










DIY Crochet Fairy Doll Pattern: A Complete Guide to Soft Amigurumi Magic
Introduction to Amigurumi and Fairy Doll Crafting
Amigurumi is the beloved Japanese art of crocheting or knitting small, stuffed yarn creatures, and it has captured the hearts of fiber artists around the world for decades. The word itself combines the Japanese terms for “knitted” and “stuffed doll,” and the craft tradition dates back to the 1950s when it first appeared in Japanese popular culture. Today, amigurumi has evolved into a global phenomenon, with crafters of all skill levels creating everything from simple animals to elaborate fantasy figures like fairies, mermaids, and woodland sprites that carry an undeniable whimsical charm.
Fairy dolls represent one of the most enchanting subcategories within the amigurumi world. Their delicate wings, flowing hair, and tiny magical accessories make them a favorite project for both beginners eager to try something special and experienced crocheters looking for a satisfying creative challenge. A well-crafted crochet fairy doll can become a treasured keepsake, a one-of-a-kind gift, or even the centerpiece of a child’s imaginative play collection. The softness of the yarn combined with the fairy’s fantastical design creates a toy that feels both magical and wonderfully tactile.
What makes fairy amigurumi particularly rewarding is the sheer range of creative decisions you get to make along the way. From choosing yarn colors that evoke moonlit forests or sun-dappled meadows to deciding on the style of wings — gossamer and translucent, or boldly crocheted — every step of the process reflects your own artistic vision. This guide will walk you through everything you need to know to bring your own crochet fairy doll to life, covering materials, techniques, assembly, and finishing touches that will make your creation truly shine.
Gathering Your Materials and Tools
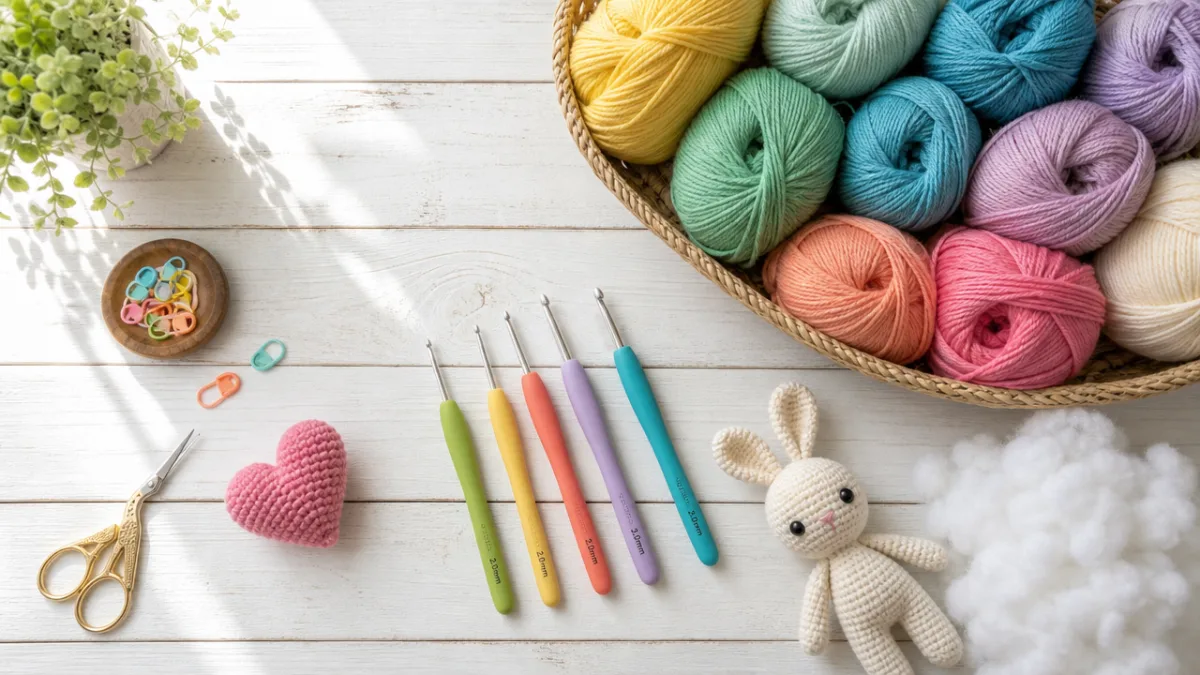
Before you pick up your crochet hook, assembling the right materials is essential to achieving a beautiful finished fairy doll. The most important choice you will make is your yarn. For the fairy’s body, a soft, lightweight yarn in a skin-toned color works best — look for yarns labeled as DK weight or fingering weight, as these create a finer, more detailed fabric that suits the small scale of amigurumi work. Popular choices include cotton yarn for a slightly structured look, or acrylic blends if you prefer a softer, squishier feel that young children will find irresistible.
Beyond the body yarn, you will need a selection of additional colors for the fairy’s outfit, hair, and wings. For the dress or tunic, consider jewel tones like emerald green, violet, or sapphire blue to give the fairy a mystical, otherworldly look. Metallic or sparkle yarns can be blended in for the wings and accessories, catching the light in a way that feels genuinely magical. Many crafters also keep a small amount of white or pale cream yarn on hand for detailing, and a contrasting color for the tiny shoes or slippers that complete the outfit.
Your toolkit should include the following essentials to ensure a smooth crafting experience:
- Crochet hooks in sizes 2.5mm and 3.0mm to match your chosen yarn weights
- Polyester fiberfill stuffing, which is safe, washable, and maintains its shape beautifully over time
- Plastic safety eyes in sizes ranging from 6mm to 8mm for a polished, professional finish
- A yarn needle or tapestry needle for sewing pieces together and weaving in ends
- Stitch markers to keep track of your rounds, especially useful when working in continuous spirals
- Small scissors, pins for positioning, and optional wire armature if you want a poseable doll
- Embroidery floss in black, pink, and red for facial details like eyelashes and a tiny rosy mouth
One additional material worth investing in is a small amount of craft wire if you plan to make poseable wings. Wrapping the wire frame in yarn or covering it with organza fabric before attaching it to your doll creates wings that can be gently shaped and reshaped, adding an interactive quality to the finished fairy. Wire armatures inside the body and limbs can also allow the doll to be posed in different positions, which children and collectors alike tend to find especially delightful.
Understanding the Basic Crochet Stitches and Techniques
If you are new to amigurumi, there are a handful of fundamental crochet stitches and techniques you will use repeatedly throughout this project. The single crochet stitch, often abbreviated as sc, is the workhorse of amigurumi construction. It produces a tight, dense fabric that holds the stuffing neatly inside and gives the doll its firm, satisfying shape. Working in continuous rounds rather than joining each round with a slip stitch is the standard amigurumi method, and it creates a seamless, smooth surface that looks polished and professional from every angle.
The magic ring, also called a magic loop or adjustable ring, is the technique used to begin almost every amigurumi piece. It allows you to start crocheting in the round with a fully closeable center hole, which means no unsightly gap at the top of the fairy’s head or the tip of her tiny shoes. If you have never tried the magic ring before, take a few minutes to practice it on scrap yarn before beginning your fairy — once it clicks, you will wonder how you ever started a project any other way. There are excellent video tutorials available online that can help you master this foundational technique in just a few attempts.
Increasing and decreasing stitches are the other essential skills for shaping amigurumi pieces correctly. An increase is simply two single crochets worked into the same stitch, which makes the piece expand outward. A decrease, often called an invisible decrease or sc2tog (single crochet two together), reduces the stitch count and shapes the piece inward. By strategically placing increases and decreases according to your pattern, you can sculpt rounded heads, tapered limbs, and even the gentle curves of a fairy’s torso. Understanding the rhythm of these shaping stitches is what transforms a flat piece of fabric into a three-dimensional figure with genuine character and expressiveness.
Step-by-Step Pattern: Crocheting the Fairy Doll
Begin with the fairy’s head, which is typically the largest and most complex piece of the doll. Using your skin-toned yarn and a 2.5mm hook, start with a magic ring and work 6 single crochets into the ring, then pull it closed. From there, you will increase every stitch for the next round (12 stitches), then increase every other stitch (18 stitches), and continue this pattern until you reach a circumference that creates a pleasingly round head — typically around 36 to 42 stitches for a doll of moderate size. Insert your safety eyes between rounds 14 and 15, spacing them about 6 to 8 stitches apart to give the fairy an open, expressive face.
Once the head is complete and firmly stuffed, you can add embroidered facial details that bring the fairy to life. Use a single strand of black embroidery floss to stitch delicate eyelashes curving upward from each eye, and a tiny V-shaped mouth in soft pink or red just below. Some crafters also add a small blush to the cheeks using a cotton swab and a touch of chalk-based blush or eyeshadow, which gives the fairy a sweet, rosy complexion. These small details make an enormous difference to the overall character and charm of the finished doll, so take your time and work slowly for the best results.
The body and limbs follow a similar structure to the head, built from the magic ring outward and then shaped with strategic increases and decreases. A typical construction sequence for the fairy proceeds as follows:
- Crochet the head and set aside after stuffing firmly
- Crochet two legs in the shoe color, then switch to skin tone for the upper leg, stuffing lightly as you go
- Join the two legs together at the hips to begin the body section, working in a connected oval
- Shape the torso upward, narrowing slightly at the waist, then expanding again for the chest
- Crochet two arms separately in skin tone, stuffing lightly or leaving unstuffed for a softer, more flexible limb
- Attach the arms to the upper body on each side at approximately the shoulder position
- Sew the completed head firmly onto the top of the body, adjusting the angle to give the fairy a natural, engaging pose
The fairy’s clothing is crocheted separately and then dressed onto the doll, which gives you the flexibility to create different outfits over time. A simple skirt can be made by picking up stitches around the fairy’s waist and working downward in increasing rounds, allowing the hem to flare out naturally. Adding a row of shell stitches, picots, or bobble stitches along the hem creates a decorative edge that looks delicate and handcrafted. For the bodice, a small rectangle of crochet sewn around the torso and fastened at the back with a tiny button or ribbon closure adds a charming finishing detail.
Crafting the Wings and Magical Accessories
The wings are arguably the most defining feature of any fairy doll, and there are several approaches you can take depending on your skill level and desired aesthetic. The simplest method involves crocheting two identical wing shapes in a sparkle or metallic yarn, using chains and single crochets to create an elongated oval or teardrop silhouette. Working a picot edging around each wing adds a lacy, delicate quality that evokes the fine structure of an actual insect’s wing. These crocheted wings can be stiffened with fabric stiffener spray or a light application of diluted craft glue to help them hold their shape once attached to the doll.
For a more dimensional, translucent effect, organza ribbon wings offer a beautiful alternative. Cut two or four pieces of sheer organza ribbon into wing shapes, then seal the raw edges with a lighter flame moved quickly around the perimeter — this causes the synthetic fibers to melt slightly and bond together, creating a clean, smooth edge that will not fray. You can further embellish these wings with a few strokes of fabric paint, glitter glue, or iridescent nail polish to add veining and shimmer. Attach the completed wings to the fairy’s back using a few secure whip stitches through the base of each wing and into the body, making sure they are symmetrically positioned.
No fairy doll is complete without a selection of tiny accessories that reinforce her magical nature and give her a distinct personality. Consider crafting some of the following additions to personalize your fairy:
- A tiny crocheted flower crown worked in miniature single crochets and slip stitches, stitched directly onto the doll’s head
- A miniature wand made from a small twig or toothpick wrapped in metallic thread and tipped with a crocheted star
- A drawstring pouch worked in contrasting yarn to hold imaginary fairy dust or tiny treasures
- Long yarn hair in a color of your choice, looped and sewn onto the head in sections to create flowing locks
- Tiny crocheted mushrooms, stars, or flowers that can be attached to the doll’s outfit as decorative motifs
The hair deserves special attention, as it dramatically changes the overall impression of the finished fairy. The most popular method for amigurumi hair is the loop method, in which lengths of yarn are cut, folded in half, and then pulled through the stitches of the head using a crochet hook before being knotted securely. By working across the top and back of the head in neat rows, you build up a full, lush mane that can be braided, left loose, or styled into an updo secured with a tiny crocheted hair accessory. Experimenting with gradient yarn or multiple strands of different colors creates an ethereal, magical effect that suits the fairy theme perfectly.
Finishing, Safety Considerations, and Gift-Giving Ideas
Once all the pieces of your fairy doll are assembled and the accessories are in place, a careful finishing process will elevate the overall quality of the finished piece significantly. Begin by weaving in every yarn tail securely using your tapestry needle, pulling each end through several nearby stitches in different directions before trimming close to the work. Loose ends that are not properly secured can work their way to the surface of the doll over time, spoiling its appearance and potentially becoming a hazard if the doll is intended for a young child. Take your time with this step, as it is one of the most important factors separating a professional-looking amigurumi from a rushed one.
If this fairy doll is intended as a toy for a child under the age of three, it is important to reconsider certain design choices to meet basic safety standards. Plastic safety eyes, while secure when properly inserted before stuffing, can still pose a choking hazard for very young children if the doll is subjected to rough play over an extended period. For babies and toddlers, replace plastic safety eyes with embroidered eyes worked entirely in yarn or embroidery floss, which have no removable parts. Similarly, any wire armature should be omitted for young children’s toys, and all attachments — including wings, hair, and accessories — should be stitched on with extra reinforcement to withstand enthusiastic handling.
Crochet fairy dolls make extraordinarily thoughtful and personal gifts for a wide range of occasions and recipients. Some wonderful gifting contexts to consider include:
- Birthday gifts for children who love fantasy, fairy tales, or imaginative play
- Baby shower gifts, using soft pastel yarns and embroidered safety features for infant-friendly versions
- Holiday ornaments, crocheted in miniature scale and hung from a ribbon loop at the top of the head
- Wedding or celebration favors, with the fairy dressed in colors matching the event’s theme
- Collector’s pieces for adults who appreciate handmade art, displayed in a shadow box or glass cloche
Beyond gifting, sharing your completed fairy doll with the online amigurumi community can be a deeply rewarding experience that connects you with a warm, enthusiastic global network of fellow crafters. Platforms like Pinterest, Instagram, and dedicated Ravelry groups are filled with makers who appreciate handcrafted work and are eager to offer encouragement, pattern advice, and inspiration. Photographing your fairy doll against a natural background — nestled among flowers, perched on a mossy stone, or set against a soft bokeh of twinkling lights — creates images that capture the magic of the piece and invite others into the world you have created with your hook and yarn.
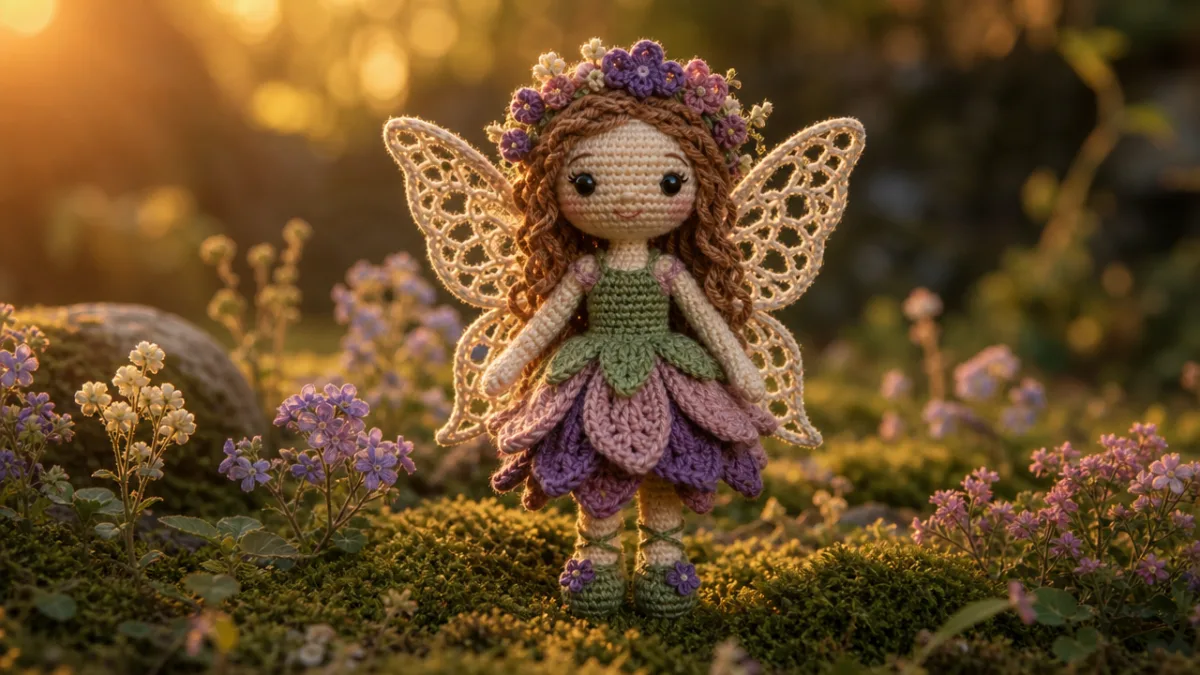
Whether you are crocheting your very first amigurumi project or adding another handcrafted treasure to a long-established collection, the DIY crochet fairy doll is a project that rewards patience, creativity, and care at every stage. The process itself — from winding the first loop of yarn around your hook to securing the last tiny accessory in place — is meditative, joyful, and deeply satisfying in the way that only handcraft can be. The finished doll carries within it every stitch you made, every color choice you deliberated over, and every small creative decision that makes it uniquely yours. That is the true magic of amigurumi, and it is a magic that never gets old.








What do you think?
It is nice to know your opinion. Leave a comment.