










Clear Glue Flower Suncatcher Craft: A Complete Guide for All Ages
What Are Clear Glue Flower Suncatchers?
Clear glue flower suncatchers are one of those crafts that look way more complicated than they actually are. The idea is pretty simple: you pour clear craft glue — the kind sold as PVA glue or Elmer’s clear school glue — into a mold or onto a flat surface, tuck some pressed or artificial flowers inside, and let everything dry into a translucent, glass-like disc. Hang it in a sunny window and the light passes right through it, lighting up the flowers like a little piece of stained glass. It’s genuinely magical.
What makes this craft so appealing is how low-barrier it is. Traditional stained glass takes specialized tools, a kiln, and a serious learning curve. This? You need a bottle of clear glue, some flowers from your garden or a craft store, and a silicone mold. That’s basically it. The process has a slow, meditative quality to it — you’re not rushing anywhere — and the payoff at the end feels genuinely impressive for how little effort it actually takes.
These suncatchers have taken off on Pinterest and Instagram in a big way, and it’s easy to see why — that jewel-like quality photographs beautifully. They make wonderful handmade gifts, seasonal decorations, or even a fun educational project for kids exploring light, color, and nature. Whether you’ve been crafting for years or you’re picking up a glue bottle for the first time, this is a project that really does meet you where you are.
Materials You Will Need
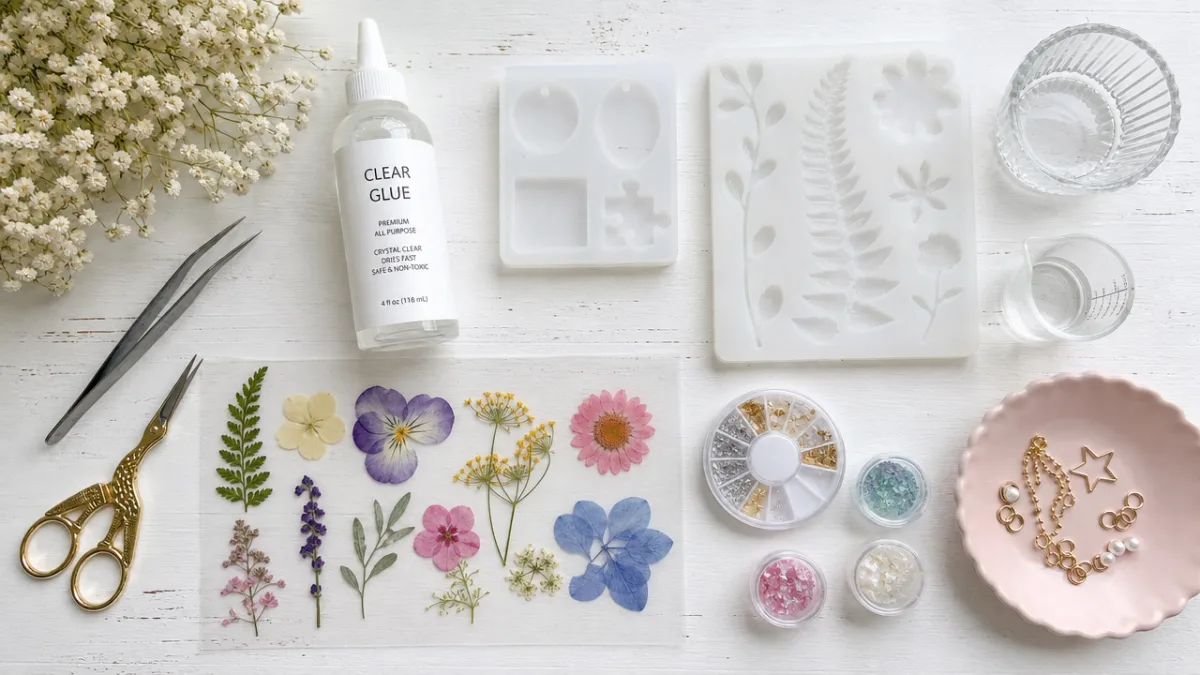
Getting everything together before you start makes the whole experience so much smoother. The good news is that most of what you need is either already at home or easy to find cheaply at any craft or dollar store. The one non-negotiable is clear glue — and it does need to be clear-drying. Something like Elmer’s Clear School Glue or a similar PVA-based glue works perfectly. Don’t grab the white school glue by mistake; it dries opaque and will leave you with a cloudy disc instead of a beautiful, light-catching one.
For flowers, you’ve got some great options. Pressed dried flowers are the most popular choice because they lie flat, dry completely, and give you that lovely authentic botanical look. You can press them yourself between heavy books over a couple of weeks, or just buy pre-pressed flowers from craft stores or Etsy if you’d rather skip that step. Small dried herb sprigs, petals, and delicate leaves all work beautifully too. If you want bold, reliable color, small artificial fabric flowers from a craft store are a perfectly valid shortcut.
Beyond glue and flowers, here’s what else you’ll want to have on hand:
- Silicone molds in circular, oval, or petal shapes — flexible silicone makes it much easier to pop the finished piece out without breaking it
- A small mixing cup or disposable bowl for pouring
- Toothpicks or a thin wooden skewer for nudging flowers into place while the glue is still wet
- Twine, ribbon, or suction cup hooks for hanging your finished suncatchers
- A hole punch or thin drill bit if you want to add a hanging hole at the top
- Optional: liquid watercolors, food coloring, or alcohol ink if you’d like to tint the glue before pouring
- Optional: fine glitter or mica powder for a little extra sparkle
Having everything laid out before your first pour matters more than you might think. There’s nothing worse than searching for a toothpick while your glue is already starting to set. Set up on a flat, level surface covered with a silicone mat or parchment paper to catch drips, and pick a spot that won’t be disturbed for at least 24 to 48 hours while things dry.
Step-by-Step Instructions for Making Your Suncatcher
The key to a great suncatcher is working in layers, and once you understand that, the whole process clicks into place. Start by pouring a thin first layer of clear glue into the bottom of your silicone mold — just enough to cover the base with about three to four millimeters of glue. If you’re adding color, stir a few drops of liquid watercolor or food coloring into the glue before you pour. Give the mold a gentle tilt to spread the glue evenly across the bottom, then set it aside. You’re waiting for this first layer to dry for roughly two to four hours, until it’s no longer liquid but still a little tacky when you touch it lightly.
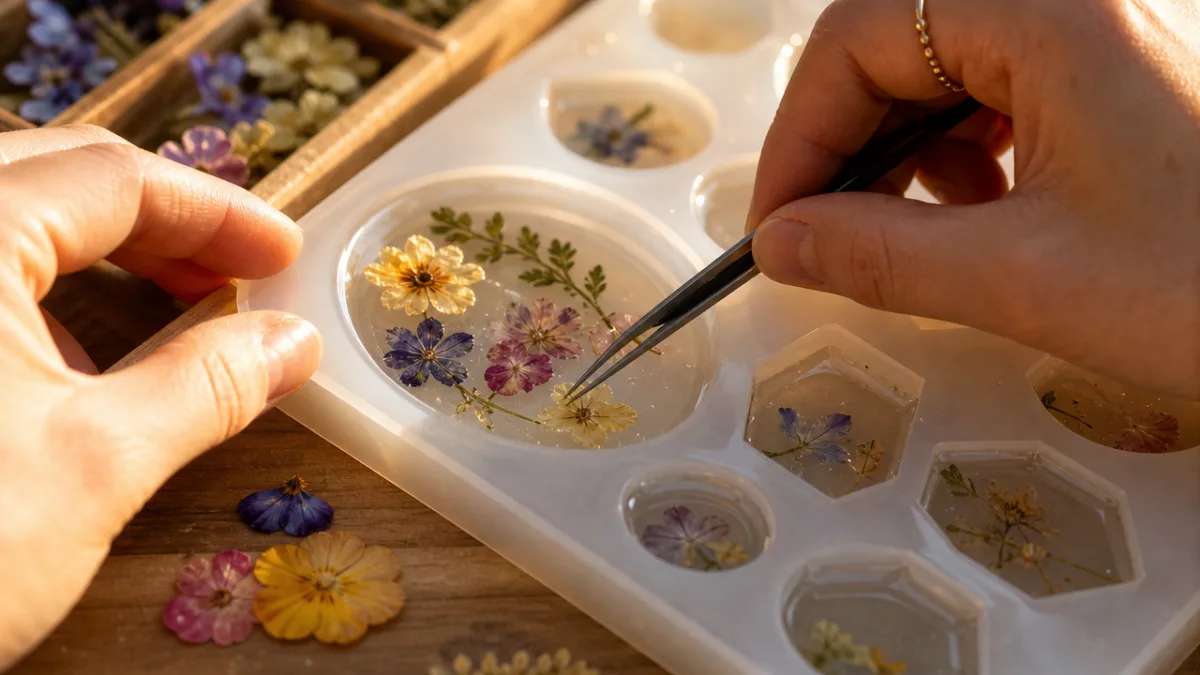
That semi-dry, tacky stage is your window to place the flowers, and honestly, this is the most fun part of the whole project. Arrange your pressed flowers face-down onto the tacky surface and press them gently to adhere. Play around with composition — a larger bloom in the center with smaller petals or leaves spreading out from it tends to look really lovely. Use your toothpick to coax petals into position without disturbing the glue underneath. Take your time here, because once they’re set, they’re set.
Once you’re happy with your arrangement, pour a second and final layer of clear glue over the top, covering all the flowers completely and filling the mold to your preferred thickness. Use a toothpick to pop any air bubbles that come up to the surface, and double-check that no flower edges are sticking out. This top layer should be a bit thicker than your base — five to seven millimeters works well. Then comes the hardest part: leaving it alone. Find a warm, dry spot away from dust and direct sunlight and let it sit undisturbed for at least 48 hours, or 72 if your piece is on the thicker side.
When it’s time to remove the suncatcher from the mold, go slowly. Peel back the edges of the silicone mold gently, then press from underneath to ease the piece free. If it comes out clear and smooth, you’ve nailed it. If anything looks cloudy, the piece probably just needs more time — tuck it back in the mold and check again in another 24 hours. Once it’s out, use a hole punch near the top edge, thread your ribbon or twine through, and it’s ready to hang.
Tips for Achieving the Best Results
Like most crafts, suncatcher-making gets noticeably better once you know a few things that most tutorials don’t bother mentioning. The most common stumble for beginners is rushing the drying time. Glue that looks dry on top can still be wet and soft underneath, and pulling a piece out of the mold too early leads to warping, tearing, or that frustrating cloudy finish. Patience really is the most important tool you have here. If you’re in a humid climate, expect drying to take longer — setting a small fan to circulate air in the room (not pointed directly at the piece) can help move things along without causing problems.
How you handle your flowers before embedding them also makes a bigger difference than people expect. Any residual moisture in a petal can cause cloudiness or even encourage mold to develop inside your finished piece over time, so flowers really do need to be completely dry. If you’re pressing them yourself, give them at least two to three weeks under weight in a warm, dry spot. A flower press speeds things up a bit, but don’t rush any flowers that still feel soft or leathery — it’s not worth it. Lavender, chamomile, pansies, violets, ferns, and small daisies all press wonderfully and are great starting points.
Here are a few more tips that can really elevate your results:
- Work in thin layers: Several thin pours dry clearer and more evenly than one thick one, which tends to bubble and warp.
- Warm your glue slightly: Set the bottle in a bowl of warm water for a few minutes before pouring. It becomes less thick and spreads much more smoothly.
- Use a level surface: Even a small tilt will cause glue to pool to one side, giving you a suncatcher that’s thicker on one edge than the other.
- Try a color gradient: Pour two or three differently tinted sections into the mold at the same time and swirl gently with a toothpick for a beautiful marbled effect.
- Seal the finished piece: A light coat of Mod Podge or clear UV resin adds durability, scratch resistance, and gives the whole thing an extra pop of clarity.
One last thing worth saying: don’t stress about imperfections. A tiny air bubble here, a slightly off-center flower there, a little variation in thickness — these are all part of the handmade charm. No two suncatchers will ever look exactly alike, and that’s genuinely the point. The small “flaws” that beginners tend to fixate on are often what make a handmade piece feel special and real rather than like something off a factory line.
Adapting This Craft for Different Ages and Skill Levels
One of the best things about this craft is how naturally it adapts to different ages and skill levels. With young kids around four and up, you can simplify things to a single-layer pour with large, bold flowers placed by an adult, while the child gets to choose the flowers, pick the colors, and decide how everything gets arranged. The sensory side of it — touching the glue, selecting petals, watching liquid slowly become solid — is genuinely fascinating for small children, and the finished piece becomes something they’re really proud of because it reflects their own choices.
Older kids and teenagers can absolutely handle the full layered process, and this age group tends to love the color-mixing and design elements especially. Teens often gravitate toward more considered aesthetic choices — monochromatic palettes, geometric mold shapes, arrangements that feel almost like botanical prints. It’s also a natural conversation starter about transparency, light refraction, and how polymers cure, which makes it a genuinely educational activity that doesn’t feel like school. Plenty of homeschooling families use this project as part of nature studies or art curriculum for exactly this reason.
For adults, this craft has a meditative, deeply satisfying quality that fans of watercolor, flower pressing, or resin art tend to particularly appreciate. If you’ve worked with epoxy resin before, you’ll find clear glue suncatchers feel familiar but much more forgiving — no special ventilation needed, no protective equipment, far less of a learning curve. For seniors, it’s an excellent choice too: it requires minimal physical dexterity, can be done entirely while seated, and produces something meaningful that can be gifted to grandchildren, hung in a window, or used to decorate for the seasons.
Creative Variations and Project Ideas
Once you’ve got the basics down, there’s a lot of room to play. A fun place to start is a seasonal suncatcher series — making a fresh set to mark each time of year. Spring blossoms and soft pastel glues for March through May, bold sunflowers and warm amber tones for summer, ruby and gold autumn leaves for fall, evergreen sprigs or snowflake-shaped molds for winter. Swapping them out in your window as the seasons change creates a rotating display that genuinely marks the passage of the year in a lovely way.
Personalized suncatchers made as gifts for specific people or occasions are another direction worth exploring. For a wedding gift, pressing flowers from the bride’s bouquet and turning them into a keepsake suncatcher is a beautiful idea that preserves those blooms for years. For a child’s birthday, lean into their favorite colors and shapes. For a housewarming, using flowers native to the area around the new home adds a thoughtful, place-specific touch. Because the materials are so affordable, you can make a coordinating set without spending much at all.
You can also branch out well beyond flowers if you want to take the concept somewhere different. Thin feathers, skeleton leaves, lace, printed tissue paper images, tiny thin seashells, or dried citrus slices all create dramatically different results while using the exact same technique. Some crafters combine small pressed flowers with short words or phrases written on tissue paper, embedding both into the glue to create something that’s decorative and meaningful at once. The fundamental process stays the same no matter what you embed — it’s really just your imagination that sets the limits.
Displaying, Gifting, and Preserving Your Suncatchers
Where you hang your suncatcher actually matters quite a bit — both for how it looks and how long it lasts. The sweet spot is a window that gets indirect or filtered sunlight for part of the day. Intense direct sun will make your suncatcher glow brilliantly, but it can also cause flower pigments to fade over time, especially reds and pinks. A window with gentle morning light, or afternoon sun filtered through a sheer curtain, will keep the colors looking vibrant much longer while still giving you that gorgeous illuminated effect.
When it comes to gifting, the packaging and the story matter just as much as the piece itself. Wrapping it between two layers of tissue paper inside a small gift box with a card explaining what it’s made from and how to hang it goes a long way. If you pressed flowers specifically for the recipient — from their garden, from a special occasion, or from a place you both love — a small note explaining that context transforms a pretty object into a real keepsake. Crafters who sell suncatchers on Etsy often find that buyers care as much about the story behind the flowers as they do about how the finished piece looks.
For long-term care, keep finished suncatchers away from high humidity, which can gradually soften the glue over the years. A bathroom window is tempting aesthetically, but it’s not the best spot if you want the piece to last. Sealing your suncatcher with a coat of UV-resistant Mod Podge or resin makes it noticeably more resilient against environmental changes and color fading. Treated with a little care, a well-made clear glue flower suncatcher can stay beautiful for years — a lasting reminder of a pleasant afternoon spent crafting, and of the flowers that inspired it.








What do you think?
It is nice to know your opinion. Leave a comment.