










DIY Crochet Rope Basket Tutorial: A Complete Guide to Making Beautiful Handmade Storage
Introduction to Crochet Rope Baskets
Crochet rope baskets have become one of the most beloved DIY home décor projects in recent years, and it is easy to understand why. These sturdy, beautiful, and incredibly functional pieces combine the timeless craft of crochet with the rustic appeal of natural or cotton rope, resulting in baskets that are both aesthetically pleasing and genuinely useful around the home. Whether you are a seasoned crocheter or a complete beginner looking for your first large-scale project, making a rope basket is an incredibly rewarding experience that produces a finished product you will be proud to display.
Unlike traditional crochet projects that use yarn, rope baskets are worked with thick cotton or jute rope, which means they come together quickly and the stitches are large enough for even beginners to follow easily. The resulting structure is firm, self-supporting, and durable — qualities that make these baskets perfect for holding blankets, storing toys, organizing laundry, or even serving as stylish planters. Because the material is so thick, you can complete a full-sized basket in just a few hours, making this one of the most satisfying quick-finish projects in the world of fiber arts.
This comprehensive tutorial will walk you through everything you need to know to create your own stunning crochet rope basket from scratch. From gathering the right materials and understanding the basic stitches, to shaping the base and building up the sides, every step has been laid out in clear detail. A free pattern is included, and a companion video tutorial is available for those who prefer visual instruction. By the time you finish reading, you will have all the knowledge and confidence you need to get started on your very first rope basket today.
Why Rope Baskets Are Perfect for Modern Homes
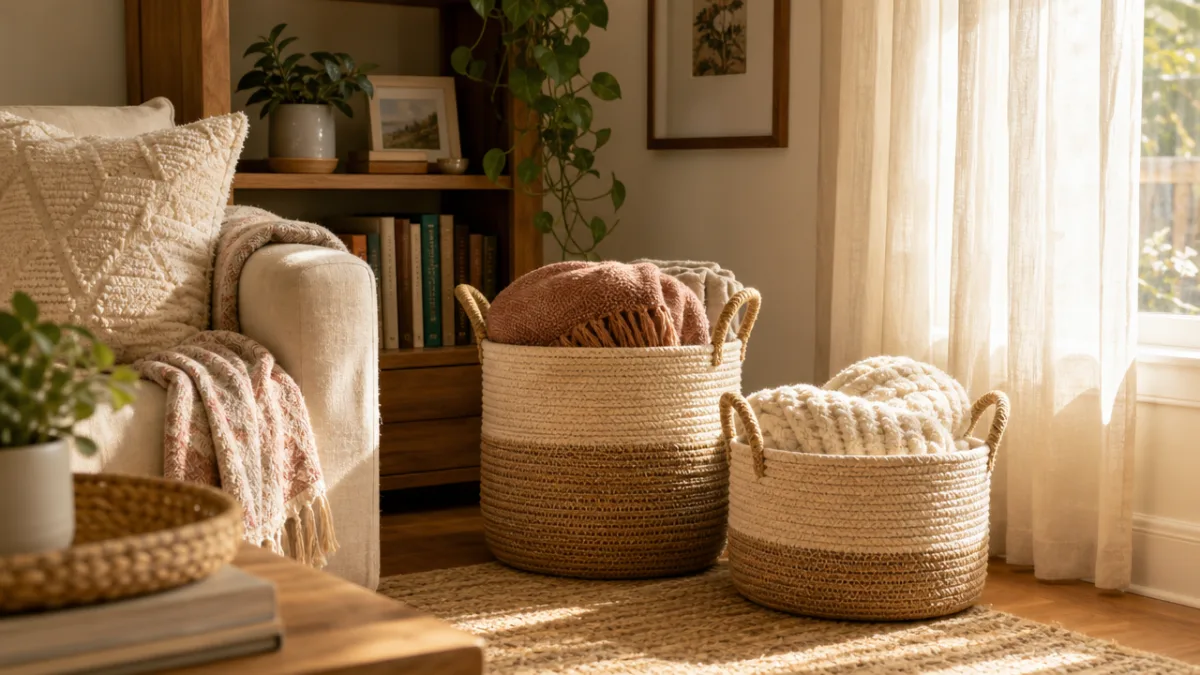
The aesthetic appeal of handmade rope baskets fits seamlessly into a wide range of interior design styles, from bohemian and coastal to Scandinavian minimalist and farmhouse chic. Their neutral tones — the creamy white of cotton rope or the warm brown of jute — complement virtually any color palette, making them incredibly versatile home accessories. A well-made crochet rope basket adds Texture, warmth, and a handcrafted touch to a room that simply cannot be replicated by mass-produced storage solutions from a big-box store.
Beyond their visual appeal, rope baskets serve a genuinely practical purpose. They are strong enough to hold heavy items like rolled-up blankets, folded towels, or children’s toys without losing their shape. They are also lightweight and easy to move from room to room, making them ideal for flexible storage solutions in busy households. Unlike wicker baskets, which can snag delicate fabrics, smooth cotton rope baskets are gentle on everything stored inside them, and unlike plastic bins, they add warmth rather than a clinical, utilitarian feel to your living space.
Making your own baskets also means you have full control over size, color, and style. You can dye cotton rope in any shade you like, add decorative elements like leather handles or woven patterns, or adjust the dimensions to fit a specific shelf or corner in your home. This level of customization is something you simply cannot get with store-bought storage, and it transforms a functional object into a true expression of your personal creativity and taste.
Materials and Tools You Will Need
Before you begin your crochet rope basket, it is essential to gather all of your materials so that you can work through the pattern without interruption. The good news is that this project requires very few supplies, and everything you need is widely available at craft stores or online retailers. The main material is rope — typically 5mm to 9mm cotton macramé rope or braided cotton cord — and the choice of thickness will directly affect the final size and stiffness of your finished basket. Thicker rope produces a larger, sturdier basket, while thinner rope gives you a more refined, delicate result.
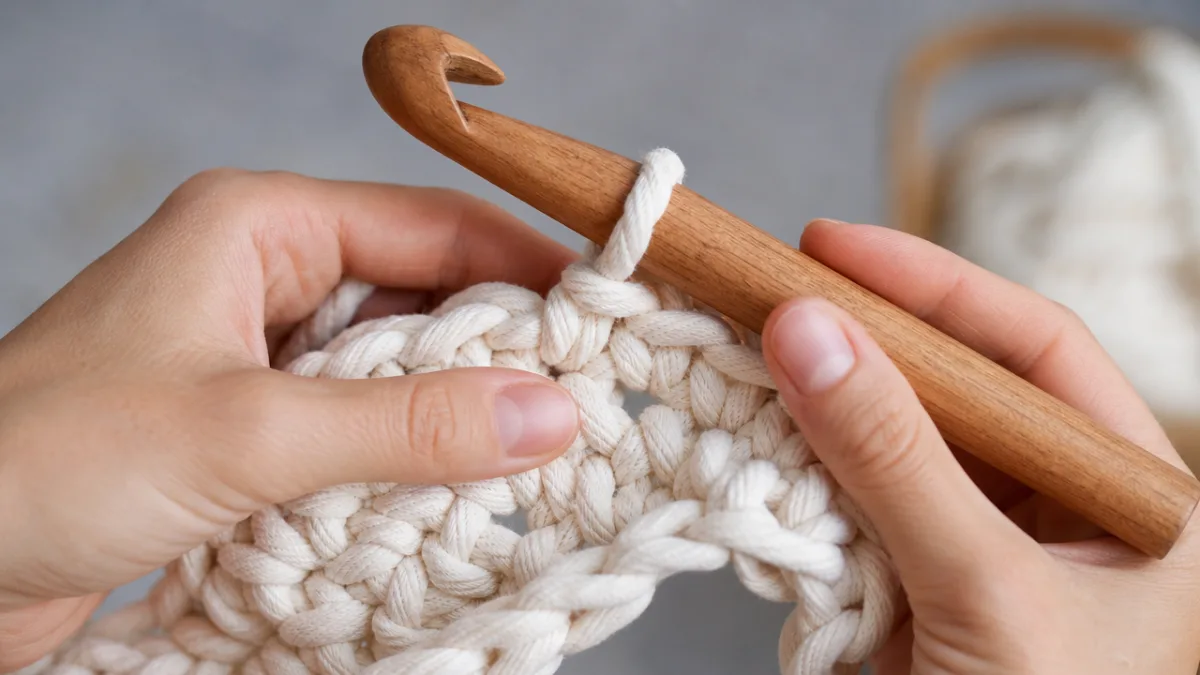
You will also need a large crochet hook sized to match your rope. For 5mm rope, a 10mm to 12mm hook works well, while thicker 9mm rope pairs best with a 15mm to 20mm hook. Using the correct hook size ensures your stitches are the right tightness — not so loose that the basket loses its shape, and not so tight that working the hook through the rope becomes a struggle. Many crafters find that a lightweight plastic or bamboo hook is more comfortable for this type of project than a heavy metal one, since rope baskets require significant grip strength over extended periods of crocheting.
Beyond the rope and hook, you will need a pair of sharp scissors to cut the rope cleanly at the end of your project, and a tapestry needle or large blunt needle for weaving in your tail ends. Some crafters also use a stitch marker — a small plastic clip or even a piece of contrasting yarn — to mark the beginning of each round, which is especially helpful when working in a continuous spiral as most basket patterns do. Optional additions include handles made from leather, rope, or fabric, which can be attached at the end to give your basket a polished, professional finish.
Choosing the Right Rope for Your Project
The rope you choose will have the single greatest impact on the look and feel of your finished basket, so it is worth taking some time to understand the differences between the most common options. Single-strand twisted cotton rope has a beautiful rustic texture and is very easy to crochet with because the hook glides smoothly between the fibers. Braided cotton rope is smoother and more uniform in appearance, producing a cleaner, more polished finished product. Jute rope is a natural, eco-friendly alternative that has a slightly rougher texture and a warm golden-brown color that looks particularly beautiful in farmhouse or bohemian interiors.
Color is another important consideration. Natural undyed cotton rope in white or off-white is the most popular choice because it is versatile, clean-looking, and easy to pair with any décor. However, colored rope — available in a wide spectrum of shades from dusty pink to deep navy — can be used to make baskets that serve as bold decorative statements. You can also purchase white rope and dye it yourself using fabric dye or even natural dyes like avocado skins or turmeric for a uniquely personal touch that adds another layer of creativity to the project.
When purchasing rope, it is always a good idea to buy slightly more than you think you will need. Running out of rope midway through a project is one of the most frustrating experiences in crafting, and rope from different batches can sometimes vary slightly in shade or thickness, making it difficult to achieve a perfectly uniform look if you need to purchase more later. A general guideline for a medium-sized basket with a diameter of about 30cm is to purchase at least 100 to 150 meters of 5mm rope, though this will vary depending on your specific pattern and tension.
- 5mm cotton rope: Best for small to medium baskets; lightweight and easy to work with for beginners
- 7mm cotton rope: Ideal for medium to large baskets; provides excellent structure without being too heavy
- 9mm cotton rope: Best for large floor baskets or laundry hampers; very sturdy and works up quickly
- Jute rope: Great for outdoor or garden baskets; natural look and eco-friendly
- Braided polyester rope: Waterproof option suitable for bathroom storage or plant holders

Understanding the Basic Stitches
Even if you have never crocheted before, making a rope basket is very achievable because the pattern relies on just a small handful of fundamental stitches. The most important of these is the single crochet stitch, which forms the tight, dense fabric ideal for a sturdy basket. Unlike lacy or open crochet patterns that require a wide repertoire of techniques, rope basket patterns are deliberately simple, using the same basic stitch repeated over and over to build up the structure in a satisfying, meditative rhythm. This repetitive quality is one of the reasons so many crafters find rope basket making deeply relaxing and enjoyable.
The magic ring — also called a magic circle or adjustable ring — is the technique used to start the base of most round baskets. It allows you to begin crocheting in the round with a completely closed center, which is essential for a neat, professional-looking bottom on your basket. If you have never worked a magic ring before, it can feel a little awkward at first, but with a few minutes of practice it quickly becomes second nature. An alternative is to chain a small number of stitches and join them into a ring, though this method tends to leave a small hole in the center that some crafters prefer to avoid.
Increasing stitches is the technique that allows the flat base of your basket to grow outward in a circle without ruffling or bunching. By adding extra stitches at evenly spaced intervals in each round, you increase the circumference of your work while keeping it flat. Once the base has reached the desired diameter, you stop increasing and simply work straight up in single crochets to build the sides of the basket. Understanding this simple principle — flat base with increases, straight sides without — is really the key insight that unlocks the entire process of making round crocheted vessels of any size or proportion.
Step-by-Step Base Instructions
To begin your basket base, start with a magic ring and chain one to count as your first stitch. Work six single crochets into the ring, then pull the tail end to close the center tightly. This forms your first round of six stitches, which is the nucleus from which your entire basket will grow. Join the round with a slip stitch if you prefer to work in joined rounds, or place a stitch marker and continue working in a continuous spiral, which is the approach most commonly used for baskets as it avoids the small jog that joined rounds can create.
In the second round, work two single crochets into each stitch around — you should end with twelve stitches total. In the third round, alternate between one single crochet in the first stitch and two single crochets in the next stitch, all the way around, giving you eighteen stitches. Continue this pattern of adding six evenly spaced increases per round, and you will find that the base grows outward in a perfectly flat circle. Most medium baskets require between five and eight rounds of base increases depending on the thickness of the rope and the target diameter of the finished piece.
Once your base has reached the diameter you want — hold it up against a plate or a measuring tape to check — it is time to transition to the sides. At this point, you simply stop increasing and work one single crochet into every stitch around for as many rounds as needed to achieve the desired height. Working into the back loop only of the first side round creates a crisp, defined edge between the base and the sides, giving your basket a clean, professional-looking corner. From that point on, work through both loops as normal to build up the walls of the basket to your desired height.
- Create a magic ring and work 6 single crochets into it, pulling the tail to close the center
- Round 2: Work 2 single crochets into each stitch (12 stitches total)
- Round 3: Alternate 1 single crochet and 2 single crochets in each pair of stitches (18 stitches)
- Continue increasing by 6 stitches each round until the base reaches your desired diameter
- Work the first side round into the back loops only to create a defined edge
- Continue working in both loops for each subsequent round until the basket reaches the desired height
- Fasten off and weave in all ends securely using a tapestry needle
Finishing Techniques and Customization Ideas
Once you have worked the sides of your basket to the desired height, it is time to fasten off and finish your piece. To fasten off, simply cut the rope leaving a tail of about 15 to 20 centimeters, then draw the tail through the final loop on your hook to secure it. Thread the tail onto a large tapestry needle and weave it securely through several stitches on the inside of the basket to hide it completely. Do the same with the starting tail from your magic ring. When all ends are woven in, give the inside of the basket a quick inspection to make sure no raw rope ends are visible from the outside.
The top edge of your basket can be finished in several ways depending on the look you want to achieve. The simplest approach is to leave the last round of single crochets as the finished edge, which gives a clean, understated look. For a more decorative finish, you can work a round of crab stitch — also known as reverse single crochet — around the top, which creates a attractive twisted cord effect. Alternatively, you can fold the top edge over and stitch it down to create a rolled hem, which adds extra stiffness and a polished, upholstered look to the rim of the basket.
Adding handles transforms a simple basket into a truly functional and stylish accessory. The most popular approach is to create rope handles by cutting two lengths of matching rope, threading them through the sides of the basket at evenly spaced points near the top, and knotting them securely on the inside. Leather handles — which can be purchased from craft suppliers or cut from old belts — add a beautiful artisanal quality and are extremely durable. You can also crochet handles directly as part of the pattern by chaining a length of stitches and bridging them between two points on the basket rim, then working back along the chain on the return row to strengthen them.
Creative Variations to Try
Once you have mastered the basic round basket, there are many exciting variations you can explore to expand your repertoire and make pieces that feel fresh and unique. An oval basket is made by starting with a foundation chain rather than a magic ring and increasing around both ends of the chain to create an elongated footprint — perfect for holding bread on a dining table or storing shoes by the front door. A square or rectangular basket is achieved by working flat panels and joining them together, producing a more structured, architectural piece that sits neatly on shelves.
Color blocking is a simple but striking way to add visual interest to your baskets. By switching to a rope in a contrasting color partway through the sides, you can create bold horizontal stripes or gradient effects. Some crafters also incorporate texture by alternating between single crochet and slip stitches, or by crocheting around a core of foam tubing inside the rope for extra rigidity. Embellishments like tassels, fringe, macramé knots, or even painted designs applied after the basket is finished can take a simple pattern and transform it into a truly one-of-a-kind statement piece.
Scaling the pattern up or down is completely straightforward — simply use thicker or thinner rope and a correspondingly larger or smaller hook, and work more or fewer base rounds to achieve the diameter you want. Tiny rope baskets made with 3mm cord and a 5mm hook are adorable as desk organizers, trinket holders, or even gift packaging. Giant floor baskets made with 12mm rope and a 20mm hook can hold an entire armful of throw blankets and become a dramatic focal point in a living room. The pattern logic remains exactly the same regardless of scale, which is one of the most beautiful and empowering aspects of this particular style of making.
Caring for Your Crochet Rope Basket and Final Tips
One of the great advantages of cotton rope baskets is that they are relatively easy to care for. Because cotton is a natural, washable fiber, most rope baskets can be spot-cleaned with a damp cloth and a small amount of mild detergent when they get dusty or lightly soiled. For a more thorough clean, smaller baskets can be hand-washed in cool water with a gentle soap, reshaped while damp, and left to air dry flat in a well-ventilated space. Avoid putting rope baskets in the tumble dryer, as the heat can cause the cotton fibers to shrink and the basket to lose its shape.
To help your basket maintain its shape over time, avoid overfilling it with items that are too heavy for its size. While cotton rope is genuinely strong, an oversized load can cause the sides to splay outward and the base to bow. If this happens, simply empty the basket, dampen it lightly with a spray bottle, reshape it by hand, and allow it to dry with a heavy book or similar object placed in the base to keep it flat. Most baskets will return to their original shape easily with this simple treatment, and the cotton actually becomes slightly stiffer and more resilient after washing and drying, which can be a genuine advantage.
To keep your basket looking its best for as long as possible, store it away from prolonged direct sunlight, which can cause the rope to yellow or fade over time, especially if you are using naturally colored cotton. Baskets used as plant holders should be lined with a waterproof insert or a plastic pot to protect the rope from moisture, which can cause mildew if cotton is kept damp for extended periods. With a little basic care, a well-made crochet rope basket will last for many years and only grow more beautiful and characterful with age and use.
Final Encouragement and Next Steps
If you are feeling inspired and ready to pick up your hook and get started, the best advice is simply to begin. Like any new skill, crochet rope basket making feels slightly unfamiliar at first, but the learning curve is genuinely gentle, and most people find that after completing just one basket they are already planning their next two or three. The free pattern outlined in this tutorial, combined with the companion video that shows each step in real time, gives you everything you need to succeed even if you have never picked up a crochet hook before in your life.
The creative community around rope basket making is also wonderfully warm and supportive. Platforms like Pinterest, Instagram, and dedicated fiber arts forums are full of makers at every level sharing their work, troubleshooting problems together, and inspiring one another with innovative variations on classic patterns. Sharing your finished baskets online — tagging the original pattern creator and using relevant hashtags — is a lovely way to participate in this community and connect with like-minded crafters around the world who share your enthusiasm for making beautiful, functional objects by hand.
Finally, remember that handmade gifts are among the most treasured things you can give someone. A crochet rope basket filled with a selection of thoughtful items — artisan soaps, a cozy candle, a bunch of dried flowers — makes a stunning and deeply personal gift for birthdays, housewarmings, new babies, or any occasion that calls for something special. Once you have made your first basket for yourself, you may well find yourself making them for everyone you know and love, turning a simple afternoon hobby into a genuinely meaningful creative practice that brings both you and the people in your life real and lasting joy.








What do you think?
It is nice to know your opinion. Leave a comment.