










Amigurumi Little Mermaid: Your Complete Guide to the Free Crochet Pattern
Introduction to Amigurumi and the Little Mermaid Pattern
Amigurumi is the beloved Japanese art of crocheting or knitting small, stuffed yarn creatures, and it has captured the hearts of crafters around the world for decades. The word itself combines the Japanese terms for “knitted” and “stuffed doll,” and the tradition produces endlessly charming figures ranging from simple animals to elaborate fantasy characters. Among the most popular projects in the amigurumi community is the Little Mermaid, a pattern that brings together oceanic whimsy, vibrant color, and satisfying construction techniques into one delightful finished piece.
The Little Mermaid amigurumi pattern is especially exciting for crocheters of all skill levels because it challenges makers to think creatively about shaping, color changes, and detail work. The iconic silhouette — a human upper body transitioning into a graceful fish tail — requires a thoughtful approach to construction that teaches transferable skills. Whether you are an experienced amigurumi artist or someone picking up a crochet hook for only the second or third time, this pattern offers a rewarding journey from first stitch to final embellishment.
What makes this particular free pattern stand out is its accessibility. Many beautifully designed amigurumi patterns come with a price tag, but this Little Mermaid design is available at no cost, making it an ideal starting point for budget-conscious crafters or those who simply want to try something new without commitment. With the right materials, a little patience, and the guidance laid out in this article, you will have a charming mermaid doll ready to display, gift, or treasure as your own handmade creation.
Materials and Tools You Will Need
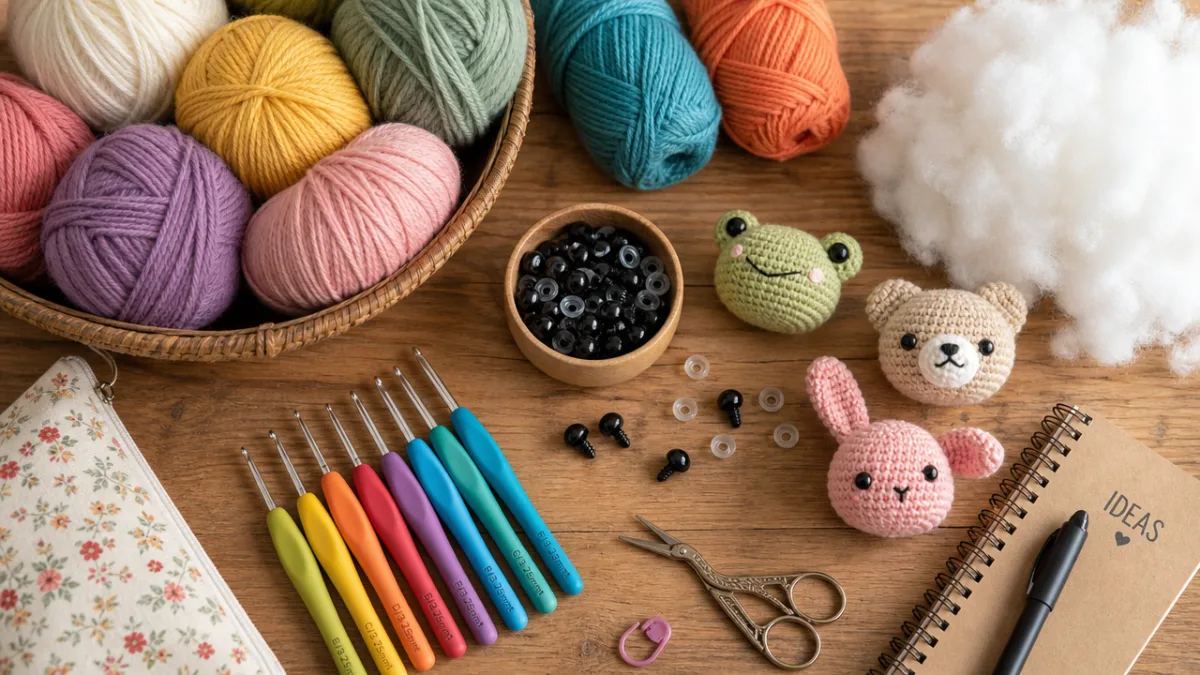
Before casting on your first magic ring, gathering the right materials is essential for a smooth and enjoyable crocheting experience. For this Little Mermaid amigurumi, you will primarily need worsted weight yarn in several colors. The classic color palette calls for a skin-tone shade for the upper body and arms, a vibrant color such as teal, aqua, or coral for the tail and shell top, and a contrasting color for any hair embellishment. Many crafters also add a tiny amount of white or cream yarn for facial details or accessories, so having a well-stocked yarn basket is a real advantage.
In terms of tools, a 3.5mm or 4mm crochet hook is the most commonly recommended size for worsted weight yarn amigurumi projects, though you should always check the gauge suggested by your specific pattern. A tighter gauge produces a denser fabric that holds stuffing better and prevents the polyfill from showing through the stitches, which is especially important for a finished doll you want to look polished and professional. Beyond the hook, you will need polyester fiberfill stuffing, a yarn needle for sewing pieces together and weaving in ends, and a pair of safety eyes in an appropriate size — typically 6mm to 9mm for a doll of this scale.
Additional helpful materials include stitch markers to track round beginnings, scissors, and optional embellishments such as small buttons, ribbon, or embroidery floss for adding facial features or decorative accents. Some crafters like to use wire or pipe cleaners inside the arms or tail fin to give the doll a poseable quality, though this is entirely optional and depends on whether the finished piece will be handled by young children. Preparing all your materials before you begin ensures that the creative flow is never interrupted by a last-minute supply run.
- Worsted weight yarn in skin tone, tail color, and hair color
- 3.5mm or 4mm crochet hook
- Polyester fiberfill stuffing
- Safety eyes (6mm–9mm)
- Yarn needle and scissors
- Stitch markers
- Optional: embroidery floss, ribbon, or small buttons for embellishments
Understanding the Pattern: Stitches and Techniques
The Little Mermaid amigurumi pattern uses a core set of crochet stitches that are standard across most amigurumi designs. The magic ring, also called the magic circle or adjustable ring, is the foundation for nearly every piece in this doll. It allows you to begin crocheting in the round while pulling the center closed tightly, which eliminates the unsightly hole that can appear when starting with a chain ring. If you have never made a magic ring before, taking a few minutes to practice this technique on scrap yarn before starting the pattern proper will save you significant frustration later.
The primary stitch throughout the pattern is the single crochet, worked continuously in a spiral rather than in joined rounds. This spiral method is characteristic of amigurumi and produces a seamless, uniform fabric ideal for three-dimensional figures. You will also encounter increases (two single crochets in one stitch) and decreases (crocheting two stitches together) to shape each body part. Understanding the rhythm of these increases and decreases is key to getting smooth, round shapes for the head and body, and a tapered, elegant shape for the mermaid tail.
Color changes are another important technique in this pattern. The transition from the skin-toned upper body to the shimmering tail color requires a clean color change mid-row or at a designated point in the round. To achieve a tidy result, always change colors on the last pull-through of the final stitch in the old color, so the new color appears crisp at the start of the following stitch. Practicing this on a swatch beforehand will give you the confidence to execute a smooth transition when it matters most in the actual piece.
Key Stitches Reference
- Magic Ring (MR): Adjustable starting loop for crocheting in the round.
- Single Crochet (SC): The foundational stitch for all body parts.
- Increase (INC): Two single crochets in the same stitch to expand circumference.
- Decrease (DEC): Invisible decrease worked through front loops of two consecutive stitches.
- Slip Stitch (SL ST): Used for joining rounds when necessary.
Step-by-Step Construction of the Little Mermaid
The construction of this amigurumi doll typically follows a logical assembly order, beginning with the head and working through the body, tail, arms, hair, and finally any decorative details. Starting with the head allows you to attach the safety eyes at the correct stage — most patterns call for inserting safety eyes before stuffing and closing the head, typically when you are about two-thirds of the way through the head rounds. Placement of the eyes is one of the most impactful decisions you will make in the entire project, as it defines the character’s personality and expression entirely.
Once the head is complete, the body is worked separately or continuously, depending on the specific pattern variation you choose. The body narrows gradually toward the waist before flaring slightly to accommodate the beginning of the tail section. This is where the dramatic color change from skin tone to tail color occurs, creating that magical visual shift that defines the mermaid silhouette. The tail continues to elongate and taper before splitting into the two fin lobes at the very end, which are worked flat and then folded and sewn to create dimension and the distinctive mermaid fin shape.
The arms are typically small tubes with rounded ends, worked in the same skin-tone color as the upper body and stuffed lightly or left unstuffed depending on the desired flexibility. Hair can be created in several ways — crocheted as a separate flat piece and sewn on, worked as individual chains looped through the head, or crafted using the yarn fringe method where lengths of yarn are attached directly to the head and then styled. Each method produces a different look, so choosing the right one depends on the aesthetic you are aiming for and how much finishing work you enjoy.
Assembly Tips for Best Results
When sewing the pieces together, using the yarn tail left from finishing each component and a blunt yarn needle produces the most seamless results. Pin pieces in place with stitch markers or straight pins before committing to the final sewing, as repositioning is much easier before the first stitch of assembly is made. The join between the head and body is the most structurally important seam in the entire doll, so take your time working through both layers evenly to ensure a secure and visually tidy attachment.
Stuffing density is another factor that significantly affects the final appearance of your Little Mermaid. The head benefits from firm stuffing to maintain its round shape and prevent flopping, while the tail can be stuffed more lightly to allow a gentle, natural curve. Overstuffing the tail can cause it to splay awkwardly or distort the color pattern of the stitches, so err on the side of caution and add stuffing incrementally as you close the final rounds. The arms, if stuffed at all, should receive only a small amount to keep them slender and proportionate to the petite body.
Customizing Your Little Mermaid Amigurumi
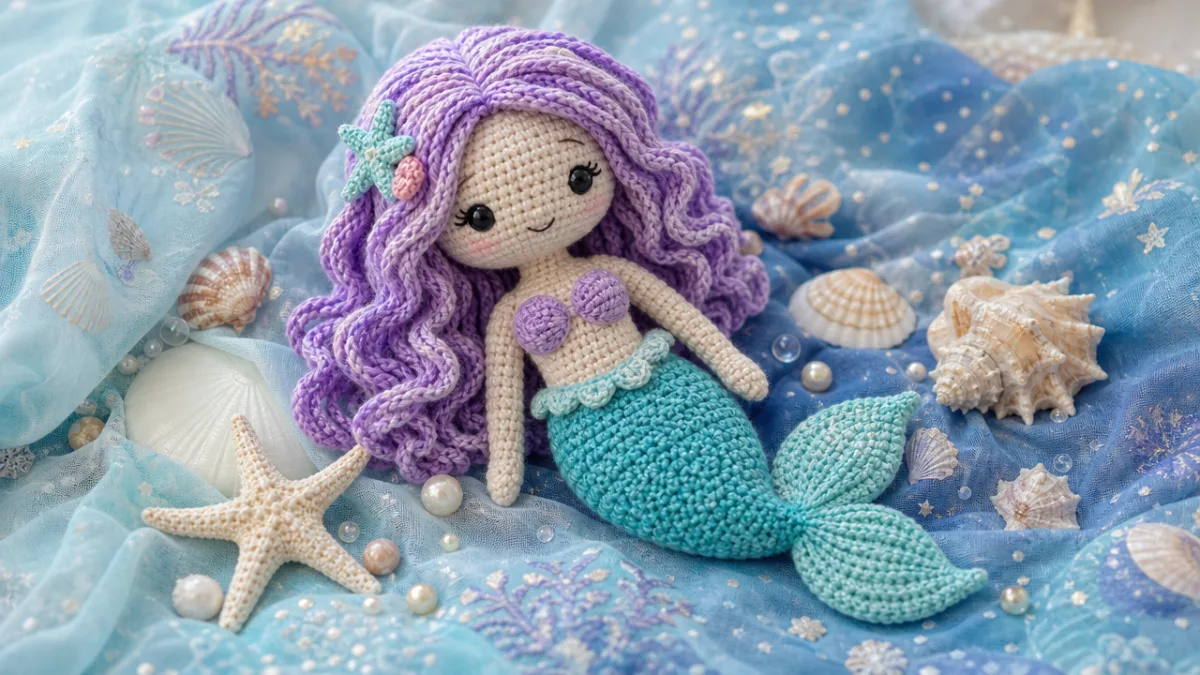
One of the greatest joys of working with a free base pattern is the enormous room for personalization and creative interpretation. The color palette alone offers infinite possibilities — while the classic Little Mermaid calls to mind red hair and a green tail inspired by the beloved Disney film, your amigurumi mermaid can be dressed in any combination of colors you love. Consider a deep navy tail with silver highlights for a nighttime ocean feel, a coral and gold palette for a sun-drenched tropical mermaid, or a rainbow gradient tail worked in multiple colors for a truly eye-catching piece.
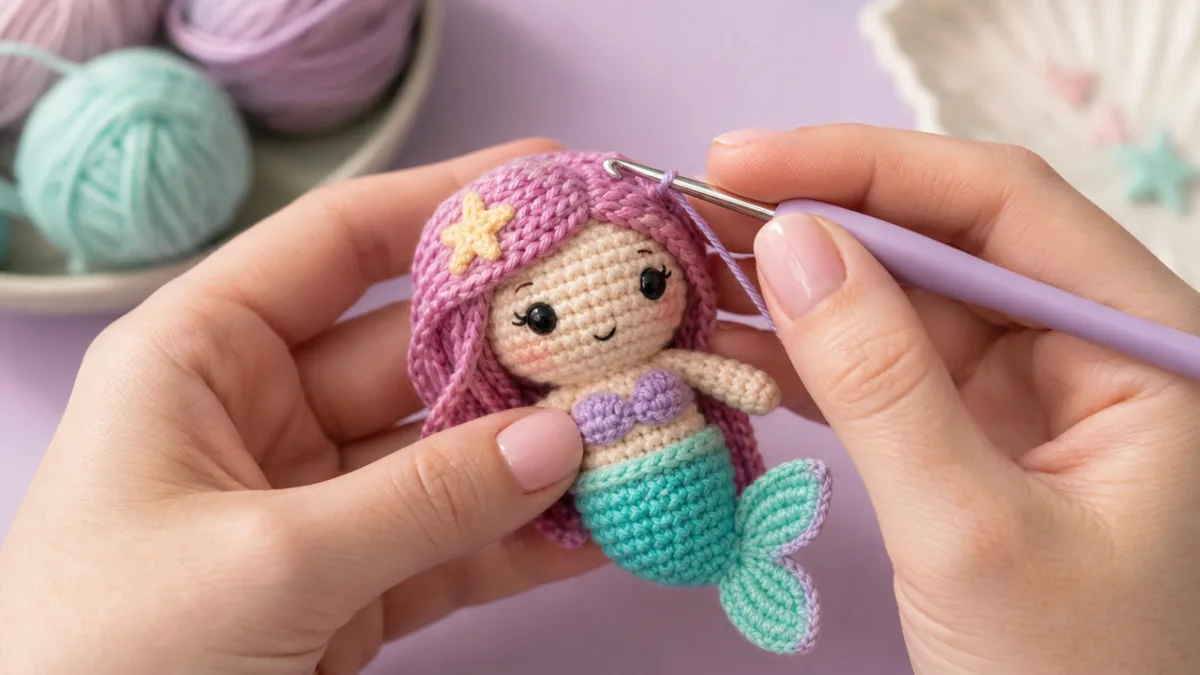
Facial embroidery is another powerful customization tool. Rather than relying solely on safety eyes, many amigurumi artists add embroidered eyelashes, blushing cheeks in pink embroidery floss, a tiny stitched smile, or even eyebrows to give the doll a more expressive, handcrafted look. These details require only basic embroidery knowledge and a contrasting floss color, and they elevate the finished piece from charming to truly professional. A small french knot highlight stitched in white over the safety eye can also create a beautiful sparkle effect that brings the mermaid’s gaze to life.
Accessories and clothing details open up even more creative possibilities. A tiny crocheted shell bra top in a contrasting color, a string of pearl-like white beads around the neck, or a miniature starfish hair clip crafted from a tiny five-petal crochet motif can transform a simple doll into a fully realized character. Some crafters even make interchangeable tails in different colors, giving the doll a miniature wardrobe that adds playful value for children or collectible appeal for adult enthusiasts. The beauty of amigurumi lies precisely in this infinite capacity for personal expression.
Color Palette Ideas
- Classic Disney: Red hair, sea-green tail, purple shell top
- Midnight Ocean: Dark blue hair, navy tail, silver embellishments
- Tropical Reef: Golden hair, coral tail, turquoise accessories
- Pastel Dream: Lavender hair, mint tail, blush pink top
- Rainbow Gradient: Multi-color hair and tail blending several shades
Finishing Touches and Care for Your Amigurumi
The finishing stage of any amigurumi project is where the work truly transforms from a collection of crocheted pieces into a cohesive, polished doll. After all components are sewn together, the most critical finishing step is weaving in every yarn end securely using a yarn needle. Threading each tail back through several stitches in different directions creates a knot-free, durable finish that will not unravel with handling or play. Take the time to trim ends close but not so close that they pull through the fabric, which would create an unsightly hole in the finished piece.
Blocking is an optional but highly recommended step for amigurumi with flat components such as the tail fin or any decorative star and shell accessories. Lightly misting the piece with water and pinning it to a foam mat in the desired shape, then allowing it to dry completely, helps set the stitches in an even, uniform pattern and can correct any slight curling or distortion that occurred during construction. The result is a noticeably more professional appearance that showcases all the hard work you put into each carefully counted round.
Caring for your finished Little Mermaid amigurumi depends largely on the fiber content of the yarn you used. Acrylic yarns are generally machine washable on a gentle cycle in a mesh laundry bag, making them the most practical choice for toys intended for children. Natural fibers such as cotton or wool require more careful hand washing and gentle drying to prevent shrinkage or felting. Regardless of fiber type, keeping amigurumi dolls out of direct prolonged sunlight helps preserve the vibrancy of the yarn colors, ensuring your Little Mermaid remains as enchanting years from now as she was on the day you finished her.
Troubleshooting Common Issues
Even experienced crocheters encounter challenges with amigurumi projects, and the Little Mermaid pattern is no exception. One of the most common issues is losing count of stitches, which can subtly alter the shape of a piece over many rounds. Using a stitch marker at the beginning of each round and counting stitches at regular intervals — especially after increases and decreases — is the most reliable prevention. If you do discover a stitch count discrepancy, it is almost always worth frogging (unraveling) back to the error and recrocheting rather than trying to compensate in subsequent rounds, as the distortion only becomes more pronounced as the work continues.
Stuffing showing through the stitches is another frequent concern, particularly if a larger hook was used or the tension in the work is too loose. Switching to a hook one size smaller than the yarn label recommends is the standard amigurumi approach to solving this problem, as the tighter gauge closes the gaps between stitches. If stuffing is still visible, layering a small square of thin white felt inside the piece before closing can hide the fill while still allowing the shape to be adequately supported. These small adjustments make the difference between a doll that looks homemade in the best possible way and one that truly looks like a treasured handcrafted heirloom.
Sharing Your Creation and Finding Community
Completing an amigurumi project is an achievement worth celebrating, and the crafting community offers countless warm and welcoming spaces to share your finished work and connect with fellow makers. Pinterest itself is an excellent starting point — saving and organizing your crochet projects, following boards dedicated to amigurumi, and discovering new free patterns is all part of the creative ecosystem that likely brought you to this Little Mermaid pattern in the first place. Pinning your own finished creation photo back to the community adds to the collective inspiration and helps other crafters find the pattern through your example.
Instagram and Ravelry are two other particularly vibrant communities for amigurumi enthusiasts. Instagram’s visual format is perfect for sharing photos of finished dolls, works in progress, and material flat lays, and searching hashtags such as #amigurumi, #crochetdoll, or #littlemermaidcrochet will connect you with thousands of creators worldwide. Ravelry functions more like a dedicated database where you can log the patterns you have made, leave notes about modifications, record the materials you used, and connect with others who have made the same pattern — creating a rich conversation around each design that benefits every crafter who makes it in the future.
Beyond social media, local crafting groups, crochet circles, and yarn store events offer face-to-face connection that online sharing cannot fully replicate. Many communities host craft fairs, charity drives for handmade toy donations, or skill-share workshops where amigurumi enthusiasts can learn from each other and grow their techniques together. Gifting a handmade Little Mermaid amigurumi to a child, a friend, or a fellow crafter creates a tangible connection between maker and recipient that mass-produced toys can never achieve — and that is perhaps the most meaningful reason to pick up a hook and create something by hand in the first place.








What do you think?
It is nice to know your opinion. Leave a comment.