










How to Make Wildflower Seed Paper at Home | Easy Botanical DIY
What Is Wildflower Seed Paper and Why You Should Make It
Wildflower seed paper is one of those rare crafts that manages to be both beautiful and genuinely useful to the natural world. At its core, it is handmade paper embedded with real wildflower seeds, so that when a recipient plants it in soil and waters it, the paper dissolves and the seeds germinate into a riot of color. It has become increasingly popular as an eco-friendly alternative to traditional paper products, showing up as wedding favors, greeting cards, gift tags, and even business cards for environmentally conscious brands.
The appeal goes beyond novelty. In a world where pollinators like bees and butterflies are under serious threat from habitat loss and pesticide use, every small patch of wildflowers matters. Planting even a postcard-sized piece of seed paper in a windowsill pot or a garden bed contributes something real to local ecosystems. Species like borage, cornflower, chamomile, and California poppy are beloved by pollinators and remarkably easy to grow, making them ideal candidates for embedding in homemade paper.
Making seed paper at home also connects you to a long tradition of hand papermaking that stretches back centuries. The basic technique, pulling a slurry of wet plant fiber through a screen to form a sheet, is essentially the same process used in medieval Europe and ancient China. What makes the wildflower version special is the addition of seeds at just the right moment, ensuring they are distributed evenly through the sheet without being damaged by heat or pressure. Once you understand the fundamentals, you can customize the paper endlessly with different fiber blends, botanical inclusions, and seed varieties.
This is also a wonderfully accessible craft. Unlike many DIY projects that require expensive tools or specialized materials, seed paper can be made with items you likely already have at home: a blender, some old paper, a window screen or piece of mesh, and a sponge. The seeds themselves are inexpensive, widely available, and can even be harvested from your own garden at the end of the season. The entire process from start to finish takes only a few hours, with most of that time devoted to drying rather than active effort.
Gathering Your Materials and Choosing the Right Seeds
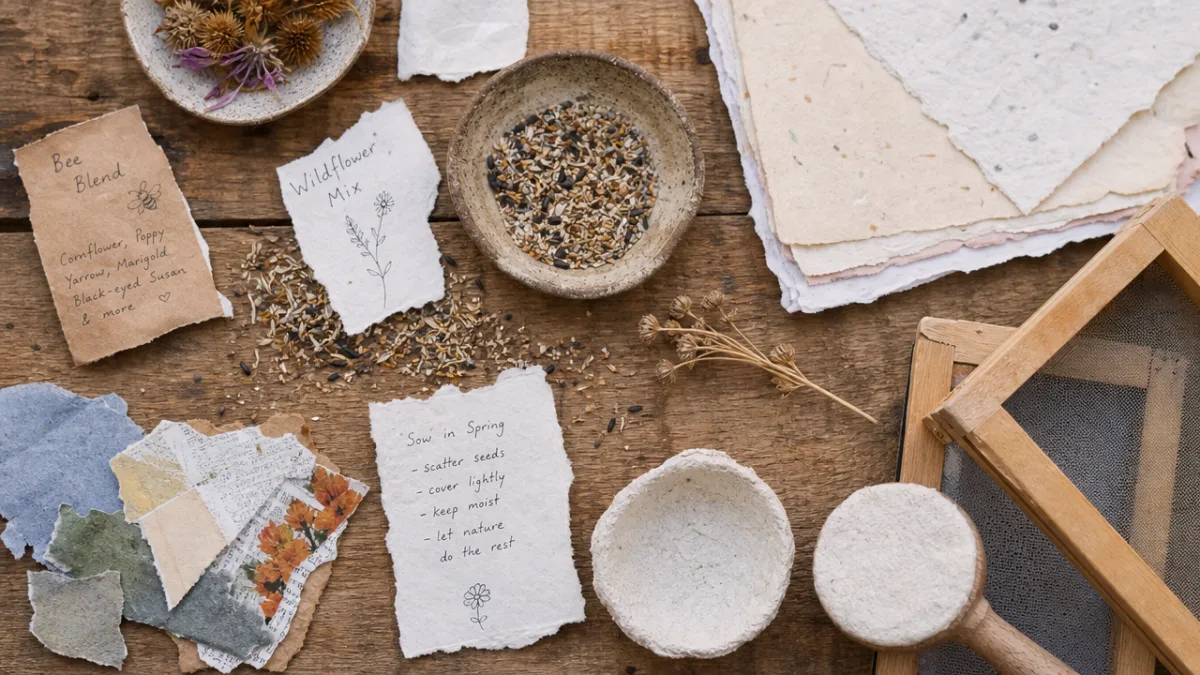
Before you begin, it helps to think carefully about your materials, because the quality of your seed paper depends largely on what goes into it. The paper pulp forms the body of the sheet, and for this you want to use recycled paper that is free of heavy dyes, glossy coatings, or synthetic additives. Plain white office paper, newspaper printed with soy-based ink, paper grocery bags, and egg cartons all work beautifully. Avoid magazines, heavily colored paper, or anything with a plastic laminate, as these materials do not break down properly and can introduce unwanted chemicals into the soil.
For seeds, the most important criterion is that they be non-hybrid, open-pollinated varieties that are appropriate for your local climate and legal to plant in your region. Avoid seeds from invasive species, even if they seem pretty, because seed paper has a way of spreading beyond its intended planting site. Excellent choices for beginners include forget-me-nots, sweet alyssum, black-eyed Susans, cosmos, and lavender. These species are hardy, cheerful, and genuinely beneficial to pollinators. You can purchase seed mixes specifically labeled for wildflower or pollinator gardens, which are already curated for compatibility and regional appropriateness.
The tools you need are minimal but worth gathering before you start so the process flows smoothly. Here is a basic list of what you will need:
- A blender or food processor dedicated to crafts (not food)
- A large basin, tub, or roasting pan filled with water
- A mould and deckle, or a simple substitute made from a picture frame and window screen stapled to the back
- A piece of felt, an old towel, or several layers of fabric cut to the same size as your paper sheets
- A sponge for pressing out excess water
- Flat boards or a clean countertop for drying
- Your wildflower seeds, stored in a small bowl
One thing worth emphasizing is the mould and deckle, which is the frame you use to pull the pulp from the water. You can purchase a purpose-made papermaking kit for a modest cost, but a simpler and more satisfying option is to make your own from an old picture frame. Remove the glass, then stretch a piece of window screen or fine mesh fabric tightly across the back and staple or tack it in place. This creates a surface that allows water to drain through while catching the paper fibers. A second frame of the same size without the screen acts as the deckle, helping to contain the pulp as you pull it from the vat.
Preparing Your Paper Pulp Step by Step
The first step in making your pulp is tearing your recycled paper into small pieces, roughly one to two inches square. This is a satisfying, meditative task, and you can involve children or friends at this stage. Once torn, place the paper pieces in a bowl and cover them completely with warm water. Allow them to soak for at least two hours, or ideally overnight. The longer they soak, the more easily they will break down in the blender. If you are working with thicker materials like cardboard or egg cartons, extend the soaking time to ensure the fibers are fully saturated and soft.
Once your paper has soaked sufficiently, fill your blender about halfway with fresh warm water and add a handful of the wet paper scraps. Do not overload the blender, as this can strain the motor and produce uneven pulp. Blend on a medium setting for thirty seconds to a minute, then check the consistency. You are aiming for a smooth, uniform slurry where no large pieces of paper remain visible. The pulp should look something like thick oatmeal suspended in water, with no distinct fibrous clumps. If pieces remain, blend for another thirty seconds and check again.
Pour the blended pulp into your large basin and repeat the blending process with additional soaked paper until you have enough pulp to fill the basin to a depth of about four to six inches when diluted with extra water. The ratio of pulp to water affects the thickness of your final sheets. More pulp relative to water will produce thicker, more textured paper, while a thinner pulp solution will yield delicate, translucent sheets. For seed paper, a medium thickness works best, as it needs to be sturdy enough to handle and write on, but thin enough to allow seeds to germinate easily once planted.
At this stage, before you begin pulling sheets, you can add optional natural colorants to your pulp. Beet juice produces soft pinks and purples. Turmeric creates a warm golden yellow. Brewed strong coffee yields a lovely warm tan. These colorants are plant-based and entirely safe for seeds and soil. Simply add a small amount to the vat and stir to distribute the color. Keep in mind that the color will appear lighter once the paper dries, so start with more than you think you need and adjust accordingly. You can also add small dried flower petals, herbs, or pieces of decorative thread to the vat at this point for additional visual texture.
Pulling Sheets and Embedding Your Wildflower Seeds
Now comes the most exciting and tactile part of the process: pulling your sheets from the vat. Place your deckle on top of your mould, screen side up, and hold them together firmly with both hands. Tilt the mould-and-deckle pair at roughly a forty-five degree angle and slide it into the vat of pulp at one end. Then, in one smooth motion, level it out and lift it straight up through the pulp, allowing the water to drain down through the screen. The goal is to end the lift with the screen horizontal, covered in a thin, even layer of pulp.
Give the mould a few gentle side-to-side shakes while it is still draining to help the fibers settle evenly across the screen. If you see thin spots or holes, you can add a small amount of extra pulp to those areas by scooping it up with your hand or a spoon and pressing it gently into place. The sheet does not need to be perfect, in fact, slight variations in thickness and edges that are softly irregular are part of the handmade charm. Allow the sheet to drain for thirty to sixty seconds until the dripping slows to an occasional drip.
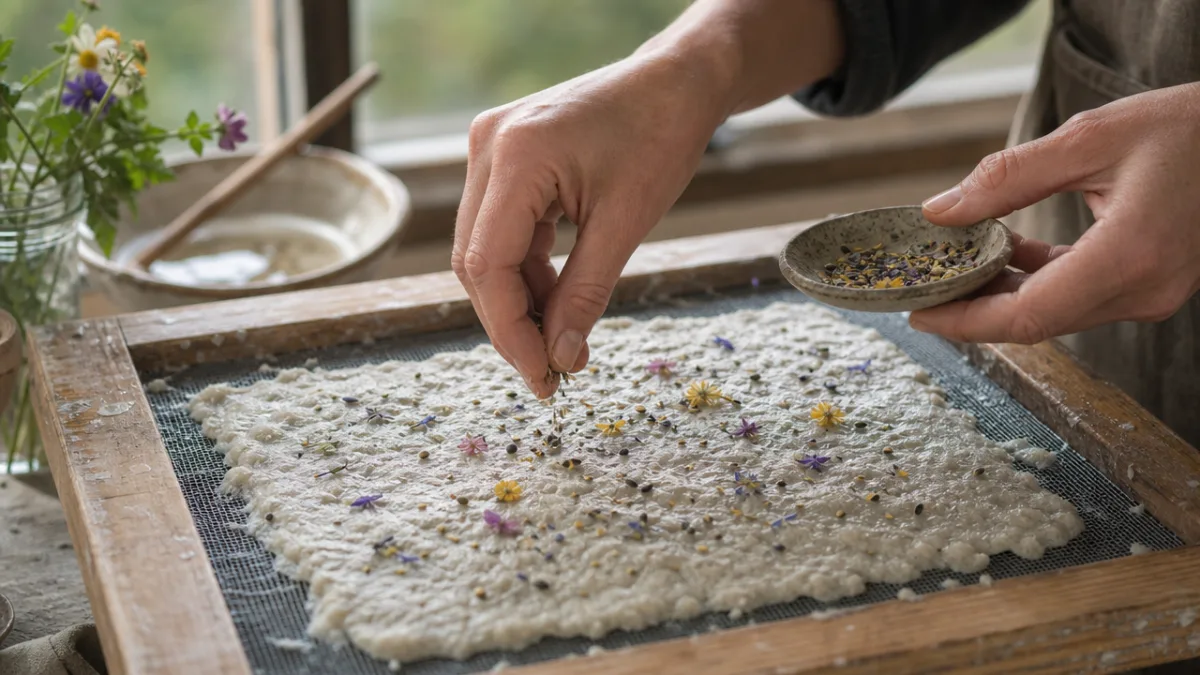
This is the moment to add your seeds. While the pulp on the screen is still very wet and receptive, sprinkle a pinch of wildflower seeds evenly across the surface of the sheet. Press them very gently with your fingertips to help them settle into the pulp rather than sitting on the surface where they might fall off during drying. The density of seeds you add is a matter of preference and the size of your paper, but aim for seeds to be roughly half an inch to an inch apart so they have room to germinate without competition once planted. You can mix seed varieties for a diverse wildflower patch, or keep sheets dedicated to a single species.
After adding the seeds, you need to transfer the wet sheet from the screen onto your drying surface, a process called couching. Lay a piece of dampened felt or fabric flat on a board. Then carefully flip the mould upside down onto the felt so the screen is facing up and the wet paper sheet is sandwiched between the screen and the fabric. Press down firmly and evenly with a sponge on the back of the screen to wick away as much water as possible. Then carefully lift one edge of the frame and peel it away. The sheet should release cleanly onto the felt. If it tears, the pulp was too thin or the transfer was too fast; practice makes this step smoother with each attempt.
Drying, Finishing, and Storing Your Seed Paper
Drying is the phase that requires the most patience, and it is also where many first-time papermakers run into trouble by rushing the process. Seed paper must dry completely, right through to the center of the sheet, before it can be handled, cut, or stored. Dampness trapped inside the paper creates ideal conditions for mold growth, which can destroy both the paper and the seeds embedded within it. Depending on the thickness of your sheets, the humidity in your environment, and the drying method you choose, this can take anywhere from twelve hours to two full days.
The simplest drying method is to leave the couched sheets on their felt backing in a warm, well-ventilated room and allow them to air dry naturally. A spot near a window with good airflow is ideal. You can also place the sheets in a low oven set to the very lowest temperature, around 170 to 200 degrees Fahrenheit, for one to two hours to speed the process, though you should watch them carefully to ensure the heat does not become intense enough to damage the seeds. Most wildflower seeds can tolerate gentle warmth, but extended exposure to temperatures above 120 degrees Fahrenheit can reduce germination rates significantly.
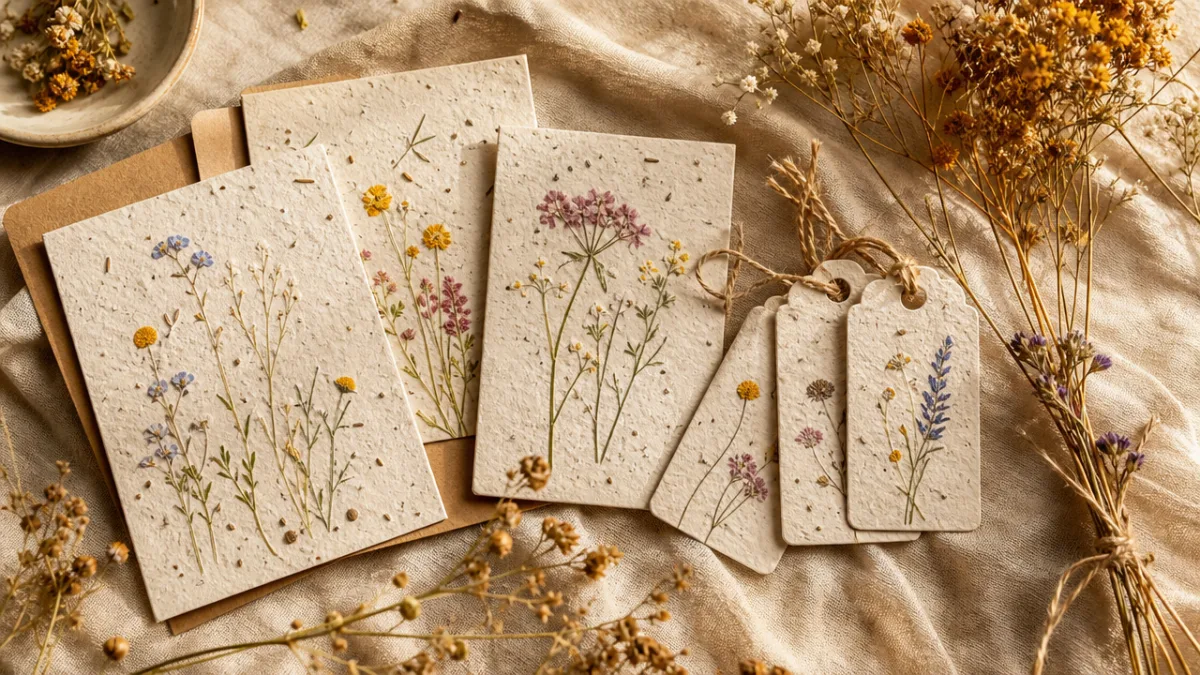
Once the sheets are completely dry, they will lift cleanly from the felt and have a firm, papery texture. At this point you can trim them into any shape you like using scissors or a craft knife and cutting mat. Popular formats include rectangular cards, circular tags with a punched hole for ribbon, bookmarks, gift tags, and small squares for packaging. Write on the finished paper with a pencil or water-based ink pen. Include planting instructions somewhere on each piece, either written directly on the paper or on a small label attached to it, so recipients know exactly what to do.
For storing seed paper before use, keep the sheets in a cool, dry location away from direct sunlight and moisture. A sealed envelope or a zip-close bag with a small packet of food-grade silica gel is ideal. Properly stored, seed paper can remain viable for one to two years, though germination rates will be highest if the paper is planted within the first growing season after it is made. Avoid refrigerating seed paper unless the packaging is completely airtight, as condensation from temperature changes can introduce enough moisture to trigger premature germination or mold growth.
Creative Uses, Gifting Ideas, and Tips for Success
Once you have mastered the basic technique, the creative possibilities for wildflower seed paper are almost limitless. It makes a profoundly thoughtful and genuinely sustainable gift for almost any occasion. For weddings, seed paper can be shaped into confetti hearts or stars, cut into invitation cards, or formed into small booklets that double as ceremony programs. For birthdays, a handmade seed paper card embedded with the recipient’s favorite flower seeds is far more meaningful than anything purchased from a shop. For the holidays, seed paper ornament shapes or gift tags continue the garden theme through the winter until planting time arrives in spring.
Seed paper is also increasingly used by small businesses and independent makers as a sustainable alternative to conventional promotional materials. Business cards made from seed paper are memorable precisely because they offer something beyond information: they offer the possibility of a garden. Brands built around values of sustainability, natural living, wellness, or the outdoors find that seed paper business cards, thank-you notes, and packaging inserts resonate deeply with their customers. The message is embodied in the material itself, which is a rare and powerful form of communication.
Here are some tips to improve your results as you continue practicing this craft:
- Always use non-coated, dye-free paper for your pulp to avoid introducing chemicals to garden soil.
- Test your seeds before embedding them by placing a few between damp paper towels and checking for germination after a week; this confirms they are viable.
- Add a few drops of liquid starch to your vat to improve the surface of the finished paper if you plan to write on it with ink.
- Use a spray bottle to mist sheets that dry too quickly on the edges before the center has set, preventing cracking.
- Keep a craft blender separate from your kitchen blender, as paper fibers can be difficult to remove fully from the blades.
- Layer different colored pulps in the vat for marbled effects by gently swirling rather than fully mixing.
The environmental impact of this craft, when you step back and consider it, is genuinely moving. You are simultaneously diverting old paper from landfill, creating something beautiful by hand, and directly supporting pollinator populations by putting more wildflowers into the world. Each sheet of seed paper you give away has the potential to bloom into dozens of flowers that feed bees, butterflies, moths, and hummingbirds across an entire season. In a culture that often feels dominated by disposable goods and digital interactions, seed paper offers a quiet counterpoint: something made slowly, with care, from natural materials, that gives back to the earth when its time as paper is done.
As you develop your practice, consider sourcing seeds from local native plant societies, seed libraries, or ethical seed companies that specialize in open-pollinated heirloom varieties. These organizations often sell seeds in small quantities at low cost, and many seed libraries will accept donations of seeds you have harvested yourself. Building a community around seed saving and sharing deepens the meaning of this craft considerably, transforming it from a pleasant hobby into participation in a broader network of people working to preserve plant diversity and support ecological health. Your handmade seed paper becomes, in this light, a small but meaningful thread in that larger web.








What do you think?
It is nice to know your opinion. Leave a comment.