










How to Make Moon Sand: The Ultimate Guide to Sensory Play Magic
What Is Moon Sand and Why Kids Love It
Moon sand might just be the coolest thing you can make at home for sensory play. The name comes from how it behaves: pack it together and it holds its shape like something solid, then tap it once and it crumbles into a soft, airy pile. Astronauts actually described the lunar surface doing something similar under pressure, which is where the name stuck. That weird push-pull quality is exactly what makes kids so obsessed with it — there’s genuinely nothing else in the playroom that feels quite like it.
Unlike regular beach sand, moon sand is moldable in a way that’s deeply satisfying to play with. Press it into a castle mold and it captures every detail perfectly. Poke it once and the whole thing collapses into a fluffy pile. That dynamic keeps kids coming back again and again in a way that most store-bought toys just don’t manage to do for very long.
There’s also some real developmental value happening underneath all that fun. For kids roughly between one and ten years old, playing with moon sand builds fine motor skills through all the squeezing, pinching, scooping, and molding. It sparks imaginative play as they build little worlds out of it. And it has a genuinely calming, almost meditative effect on kids who are feeling wound up or overwhelmed — which is why you’ll often see it used by occupational therapists and early childhood educators as a tool for emotional regulation.
The Basic Ingredients You Will Need
Here’s the best part: you almost certainly already have everything you need sitting in your kitchen. The classic moon sand recipe is eight parts flour to one part oil, and that’s basically it. Two humble pantry staples combine into something that genuinely feels like magic, which is probably why this recipe has spread so far across parenting and craft communities online.
The simplest version uses eight cups of all-purpose flour and one cup of baby oil — nothing else. The flour gives it that grainy, sandy texture and the bulk of the structure, while the oil coats each little flour particle just enough to make everything stick together when you press it, without turning it wet or sticky. Baby oil in particular gives the finished sand a light, pleasant fragrance that most kids find appealing rather than overpowering.
If you’d rather use actual sand for a more outdoor-authentic feel, you can swap play sand in at the same ratio. Just know that real sand is messier indoors, so a tray with a lip is a good idea. Some parents mix a few drops of food coloring into the oil before adding it — that way the color distributes evenly throughout instead of creating patchy blobs. You can also add a few drops of an essential oil like lavender or vanilla to the baby oil to give the whole thing a lovely scent that layers onto the sensory experience nicely.
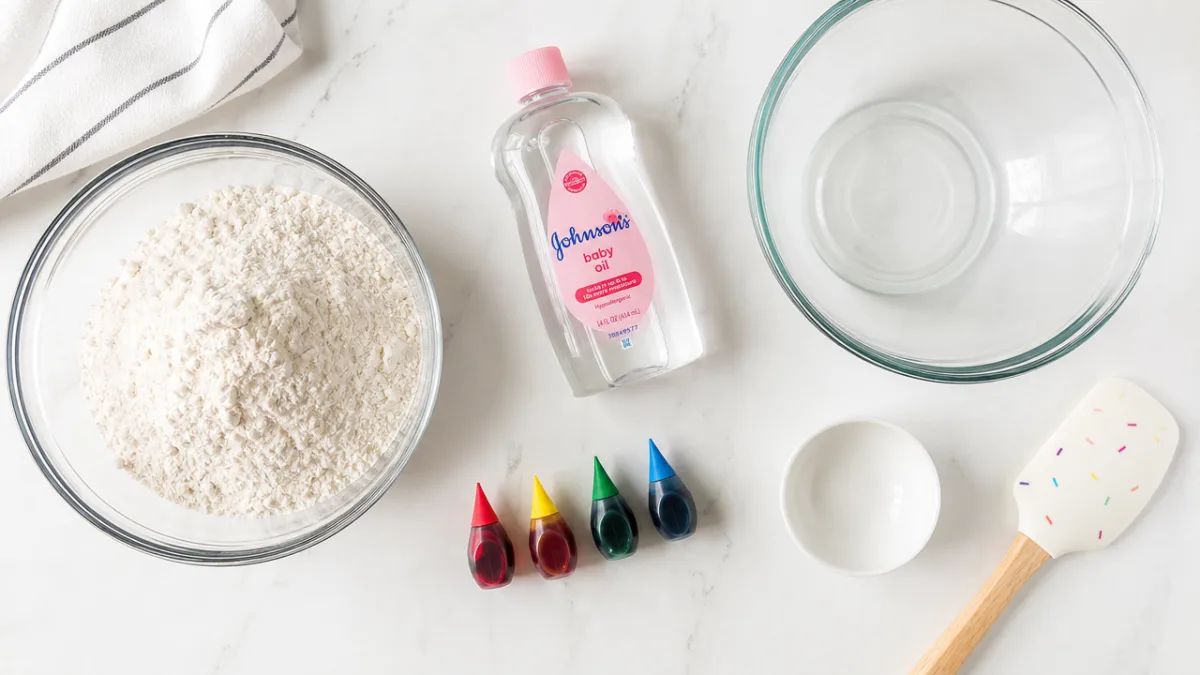
Step-by-Step Instructions for Making Moon Sand
This is genuinely one of the easiest craft projects you’ll ever do with your kids — start to finish in under ten minutes. The only real trick is how you mix it: add the oil gradually rather than all at once, so it distributes evenly through the flour instead of pooling in one spot and making part of the batch greasy. That’s really the whole secret.
Here’s how to do it, step by step:
- Measure eight cups of all-purpose flour into a large mixing bowl. Make sure the bowl is big enough that you can stir vigorously without flour flying over the sides.
- Pour one cup of baby oil into a separate small bowl or measuring cup. If you’re adding food coloring, stir it into the oil now and mix until the color is fully blended before it goes near the flour.
- Slowly pour the oil over the flour in a thin stream, stirring constantly as you go. Work it in as you pour so it doesn’t pool at the bottom.
- Once all the oil is in, use your hands to really work the mixture together — squeezing, pressing, and mixing until every bit of the flour feels slightly damp and the whole thing starts clumping when you squeeze a handful.
- Test it: squeeze a handful tightly and it should hold its shape, then tap it gently and it should crumble apart. Too dry and it won’t hold? Add a tiny drizzle more oil. Too greasy and sticky? Add a little more flour.
- Transfer your finished moon sand to a large tray, bin, or sensory table and set out whatever tools your kid loves — cups, molds, spoons, toy diggers, you name it.
One strong recommendation: let your kids help mix it, especially that hands-on squeezing stage at the end. Working the flour and oil together with their bare hands is already a great sensory activity on its own, and kids are incredibly proud when they’ve made their own play material from scratch. In my experience, kids who helped make the moon sand play with it more creatively afterward — and they’re a lot more willing to help clean up when it’s time, because it feels like theirs.
Creative Ways to Play With Moon Sand
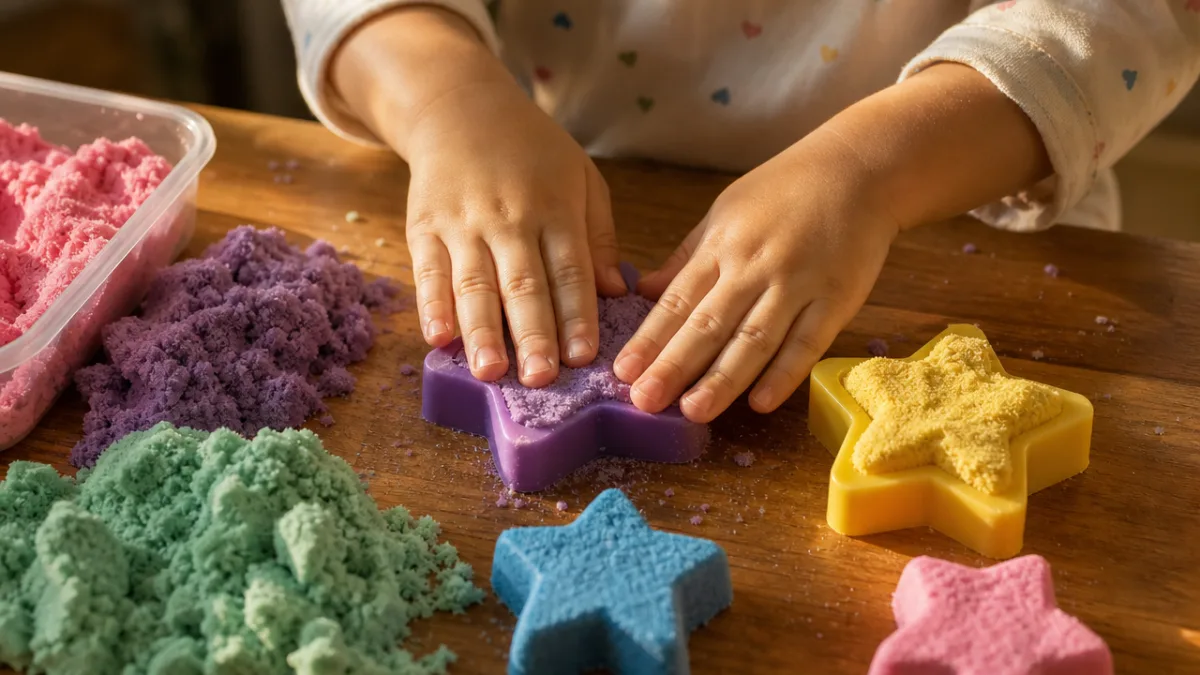
One batch of moon sand can fuel a surprising number of completely different kinds of play, depending on what you set out alongside it. The most obvious starting point is molding and sculpting — pressing the sand into cookie cutters, silicone molds, or plastic cups and popping out the shapes. Toddlers and preschoolers especially love this because it builds hand strength while they’re also learning about shapes, almost without realizing it.
For older kids, moon sand becomes the raw material for elaborate imaginary worlds. Drop in some plastic dinosaurs and you’ve got a prehistoric landscape. Add miniature trees, a few pebbles, and some small figures and suddenly there’s a whole village. Bury plastic gems or small toys and hand your child a spoon to excavate them with — instant archaeology dig activity, and a surprisingly good one for building focus and fine motor control at the same time. Honestly, the only limit is whatever small toys happen to be lurking at the bottom of the toy box.
It also works beautifully for early literacy and numeracy practice. Tracing letters or numbers into the surface of the sand with a finger, then smoothing it over and starting fresh, takes all the pressure away from the permanence of paper and pencil — something that genuinely intimidates some kids. Drawing shapes, making patterns, even just dragging abstract marks through the surface all count as pre-writing development that helps build the hand-eye coordination they’ll need later. Here are some themed setups that work especially well:
- Desert scene with plastic camels, tiny cactus figures, and golden-colored moon sand
- Beach scene with blue moon sand, real seashells, and small ocean animal toys
- Winter wonderland with white moon sand, miniature evergreen trees, and small animal figurines
- Outer space theme with gray or black moon sand, plastic astronaut figures, and small rocks
- Garden scene with green moon sand, seed packets, plastic flowers, and toy gardening tools
Storage Tips and How to Make Moon Sand Last
After making a great batch, the obvious next question is how to keep it from drying out before the next play session. The good news is that flour-and-oil moon sand holds up pretty well if you store it right. The oil keeps the flour from drying out the way it would if left exposed to air, so a well-sealed batch can stay playable for several weeks — sometimes longer.
The best container is anything airtight: a large resealable zip-lock bag, a plastic bin with a snug lid, or even a repurposed ice cream tub all work great. Press out as much air as you can before sealing, and store it somewhere cool and dry away from direct sunlight — heat can cause the oil to separate a little and change the texture. If you take it out and it feels slightly drier than usual, just knead in a few extra drops of baby oil and work it through until the texture comes back. Good as new.
One thing to keep in mind: flour-based moon sand and moisture are not friends. If it gets wet, it clumps unpleasantly and will eventually grow mold. If you want a version that can live outside or handle the occasional splash, use real play sand and oil instead, which is much more forgiving. As always, supervise younger children to make sure the moon sand stays out of mouths, and give it a quick smell and look-over before each play session. Any sign of mold or an off odor means it’s time to toss it and mix up a fresh batch.
Variations and Alternative Recipes to Try
Once you’ve got the basic two-ingredient recipe down, there’s a whole world of variations worth exploring. One popular spin uses fine-grained play sand instead of flour, with a small amount of cornstarch mixed in alongside the oil to give it a bit more structure and a heavier, more realistic sandy feel. Kids who love digging and outdoor play tend to gravitate toward this version, and it’s a nice option on days when you want the outdoor-digging experience without actually going outside.
If you have a very young toddler who’s still putting everything in their mouth, there’s a completely edible version that’s safe for that stage. Use finely ground oat flour or rice flour instead of all-purpose flour, and swap the baby oil for coconut oil. It’s genuinely non-toxic and even tastes reasonably okay, which takes a lot of the anxiety out of watching a one-year-old explore it. The texture is a little softer and slightly less moldable than the classic version, but it’s still plenty satisfying for a young sensory explorer.
Glitter moon sand is another huge hit, especially for a bit of extra magic. Stir a tablespoon or two of fine cosmetic glitter into the oil before mixing it into the flour, and it distributes evenly throughout the whole batch, catching the light beautifully as kids play. Matching the glitter to your color theme makes it even better: gold glitter in yellow sand for a treasure-hunt beach setup, silver glitter in gray sand for a space theme, or iridescent white glitter in plain sand for a winter scene that genuinely looks like sunlit snow.
Cleanup and Safety Considerations
Any parent who’s done sensory play knows cleanup is part of the deal, and moon sand is no different. The flour version is actually easier to deal with than real sand because the particles are bigger and don’t scatter as far. The trade-off is a slight oily residue on hands, surfaces, and the occasional clothing item that takes a little more effort to remove than dry particles do. The easiest solution is to contain play from the start — a large plastic storage tote, a splash mat, or a tablecloth you can shake out makes a huge difference.
For hands, regular soap and warm water cuts right through the light oil coating with no trouble. For tables and trays, a quick spray of all-purpose kitchen cleaner and a wipe is all you need. If moon sand ends up in carpet — and at some point it probably will — let it dry completely before you do anything. Then vacuum it up. Rubbing wet or oily moon sand into carpet only pushes it deeper into the fibers, so patience genuinely is the right move there.
On the safety side, flour-and-oil moon sand is about as low-risk as sensory play materials get, since both ingredients are food-grade. That said, it’s not meant to be eaten in any quantity, and kids with wheat or gluten sensitivities should use an alternative flour — oat or rice flour work well. Wash hands before and after play to keep flour away from faces and eyes, and keep a close eye on children under three who are still in the stage of exploring everything with their mouths. With those basics covered, moon sand is a safe, genuinely entertaining, and remarkably affordable activity that earns its place as a sensory play staple at pretty much every stage of early childhood.








What do you think?
It is nice to know your opinion. Leave a comment.