










Craft Room Shelving Ideas for Better Organization That Spark Serious Joy
Why Craft Room Shelving Is the Foundation of Creative Freedom
If you have ever sat down to start a project only to spend the first forty-five minutes hunting for your bone folder, a specific shade of cardstock, or that one pair of fabric scissors you swore you put back in the right place, you already understand the deep, almost spiritual value of good craft room shelving. Organization is not just about tidiness. It is about removing the friction between your creative impulse and your creative action. When your supplies are visible, accessible, and logically arranged, your brain can move straight into making rather than searching, and that shift changes everything about how you experience your craft space.
The relationship between physical order and mental clarity is well documented in both psychology and interior design. When we are surrounded by visual clutter, our brains have to work harder to filter out irrelevant information, which leaves us with less cognitive bandwidth for actual creative thinking. A thoughtfully shelved craft room, on the other hand, sends a constant signal to your nervous system that everything is under control, that your materials are cared for, and that you are someone who takes your creative practice seriously. That sense of calm readiness is genuinely energizing and can transform a hobby space into a true creative sanctuary.
Beyond the psychological benefits, smart shelving protects your investment. Craft supplies are expensive. Specialty papers warp when stored improperly, inks dry out when lids are not sealed because bottles get buried, and delicate tools get damaged when they are jammed into overstuffed drawers. A proper shelving system that respects the nature of each material — flat for paper, upright for fabric bolts, sealed and visible for adhesives — extends the life of your supplies considerably, meaning you spend less money replacing things you technically already own but simply cannot find or have inadvertently ruined through poor storage.
Understanding Your Craft Before You Shelve
Before purchasing a single shelf bracket or storage bin, the most valuable thing you can do is spend time auditing your craft practice honestly and specifically. A scrapbooker has fundamentally different storage needs than a fiber artist, who has different needs than someone who primarily does mixed media or resin work. The shape, size, weight, and frequency of use of your materials should directly inform every shelving decision you make. Buying gorgeous open shelving units before you understand your own workflow often results in a beautiful room that still does not work for how you actually create.
Consider conducting a full materials inventory where you categorize everything by type, size, and how often you reach for it. Daily-use items should live at eye level and arm’s reach. Seasonal supplies, bulk backstock, or rarely used specialty tools can live higher up or behind closed cabinet doors. This hierarchy is not just about convenience — it is about building a shelving system that has an internal logic you can feel intuitively, so that putting things away becomes as natural as taking them out. When the system makes sense, maintaining it becomes effortless rather than a constant battle.
Think too about the vertical real estate in your craft room. Most people dramatically underutilize the wall space above five feet, treating it as decorative territory when it could be doing significant organizational work. Floor-to-ceiling shelving on even one wall can house an extraordinary volume of supplies without consuming any floor space at all. This is especially important in smaller craft rooms or dedicated corners of a bedroom or office, where square footage is limited but vertical space remains largely untapped and full of potential.
Open Shelving Versus Closed Storage — Finding Your Perfect Balance
The great ongoing debate in craft room design is whether to go with open shelving, closed cabinetry, or some combination of the two, and the honest answer is that the best approach almost always involves both. Open shelving gives you visual access to your supplies at a glance, which is enormously helpful for creative work where color, texture, and material choice are part of the design process. When you can see your entire collection of washi tape at once, you are far more likely to reach for the perfect one — and far more likely to remember you have it in the first place.
Closed storage, meanwhile, serves a different but equally important function. It contains supplies that do not photograph well, are visually chaotic even when organized, or simply do not need to be on display all the time. Bulk adhesive refills, tool maintenance supplies, packaging materials, and anything still in its original retail packaging tends to look messy on open shelves and is better tucked behind doors. Closed storage also reduces dust accumulation on delicate supplies like specialty papers, ribbons, and fabric yardage, which is a practical consideration that often gets overlooked until you pull out a beautiful piece of linen only to find it has turned gray from sitting exposed for two years.
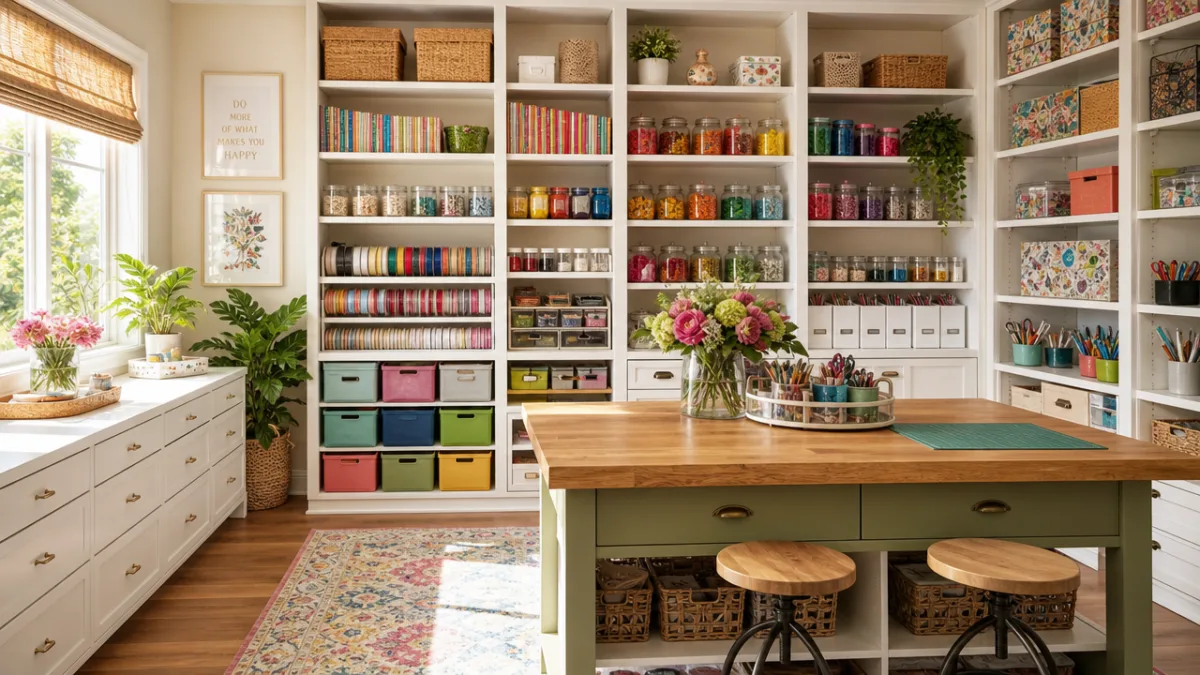
The aesthetic of combined open and closed storage is also simply more pleasing to the eye and more interesting to spend time in. A wall that is entirely open shelving can feel overwhelming — a visual cacophony of color and shape that exhausts rather than inspires. But a wall that mixes open display shelves with closed cabinet sections below creates natural visual breathing room, drawing the eye to the curated, displayable items while hiding the workaday stuff behind clean cabinet fronts. This approach lets you design your craft room to feel intentional and beautiful without requiring you to keep every single supply in a Pinterest-perfect state at all times.
Choosing the Right Shelving Materials for Longevity
Not all shelving is built equal, and the material you choose for your craft room shelving will significantly affect both the functionality and the longevity of your storage system. Solid wood shelving is beautiful and extremely durable, but it is also heavy and expensive, and it needs to be properly sealed if it will be holding wet media, inks, or anything that might leak or drip. Plywood is a popular and excellent middle-ground option — it is strong, holds screws well, resists sagging under weight better than particleboard, and can be painted or stained to match any aesthetic from modern farmhouse to sleek contemporary.
Wire shelving, while not the most glamorous choice visually, offers genuine practical advantages in a craft room. The open grid structure allows air circulation, which is beneficial for supplies that need to breathe, and the visibility from multiple angles means you can see what is stored without pulling everything forward. Wire shelving is also extremely adjustable, easy to clean, and very affordable. It works particularly well in a utility area of the craft room — a back wall or storage closet where function completely outweighs form and where a beautiful aesthetic simply is not the priority.
Cube storage systems, whether from major retailers or custom built, deserve special mention because their modular nature makes them uniquely suited to craft rooms. Each cube becomes its own category zone, and you can fill them with open bins, pull-out drawers, fabric baskets, or simply stack items directly on the shelves. Because they are modular, you can rearrange, add to, or completely reconfigure the system as your craft practice evolves — which it inevitably will. Investing in a quality cube shelving system early in your craft room organization journey often pays dividends for years.
Organizing by Category — The System That Actually Works
The most effective craft room shelving systems are built around a category-first approach, where every supply belongs to a clear category, every category has a designated zone, and every zone is physically marked in some way — whether through labeled bins, color coding, shelf labels, or simple physical grouping. When you know that all paper products live on the left wall, all fabric and fiber on the back wall, and all tools and equipment on the right, you do not have to think when you are looking for something. Your body just moves toward the right zone before your brain has even fully processed the question.
Subcategories matter just as much as broad categories. Within your paper zone, for example, you might have subsections for cardstock organized by color family, specialty papers like vellum or kraft, patterned scrapbook paper organized by collection or theme, and adhesive-backed papers separate from non-adhesive. The more granularly you can define your subcategories without making the system so complex it becomes burdensome to maintain, the faster and more pleasurably your craft sessions will begin. Time spent setting up a precise system upfront is time saved on every single project you make afterward.
A practical framework many craft room organizers swear by uses what designers call zone mapping — physically sketching out your room on paper and assigning each wall or section to a broad category before you purchase or place any storage. This prevents the common mistake of filling up beautiful shelving with whatever happens to be nearby, which results in a room that looks organized but does not function logically. Zone mapping forces deliberate decision-making and often reveals that you have far more of certain supplies than you realized, which can meaningfully change which categories get the most prime real estate in your space.
Labeling Systems That Make Maintenance Easy
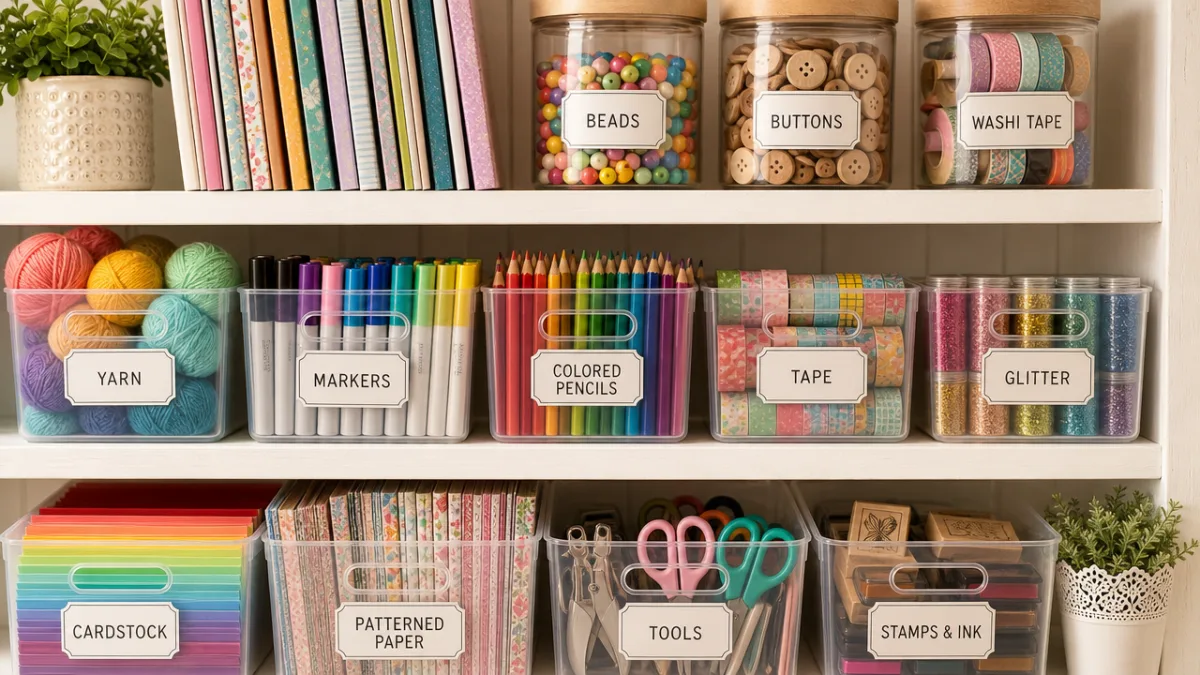
Even the most beautifully designed shelving system will descend into chaos without a consistent labeling strategy, because labels are what allow multiple people to use a space (or allow you to use it when you are tired, distracted, or working quickly) without things ending up in the wrong place. Labels do not have to be elaborate or expensive to be effective. A simple label maker producing clean white tape with black text is often more functional than hand-lettered chalkboard tags, which look gorgeous in photos but can be difficult to read quickly in practice.
Consider the following approaches to labeling your craft room shelving, choosing whichever fits your aesthetic and practical needs best:
- Printed labels on adhesive tape applied directly to bins, baskets, and shelf edges — clean, readable, and easy to update when categories shift
- Tag labels attached with twine to baskets and fabric storage containers, which are easier to swap out without leaving residue
- Color-coded bin systems where each craft category has an assigned color, with labels as a secondary identifier — particularly useful for visual thinkers
- Spine labels on binders and file folders for flat paper storage, mimicking a library system for finding specific collections quickly
- Magnetic labels on metal shelving or metal-painted surfaces, which allow total flexibility as your categories evolve
The most important thing about any labeling system is not sophistication but consistency. Decide on your format, apply it uniformly across the entire space, and commit to updating labels immediately whenever you reorganize a category rather than letting the temporary “I’ll fix this later” situation become permanent. A label that says “MISC” or that no longer reflects the contents of a bin is actively worse than no label at all, because it introduces doubt into a system that should feel automatic and trustworthy.
Vertical and Wall-Mounted Shelving Solutions for Maximum Space
Wall-mounted shelving is one of the most powerful tools in craft room organization because it takes storage completely off the floor and out of the furniture footprint, preserving valuable workspace while adding enormous storage capacity. Floating shelves installed above a desk or work table create a natural display and access zone for frequently used supplies without requiring any floor space at all. The visual lightness of floating shelves also keeps a small craft room from feeling cramped and closed in, which matters enormously when you are spending hours in the space doing detailed creative work.
Pegboards deserve their own enthusiastic endorsement as a wall-mounted storage solution that is uniquely suited to craft rooms. A large pegboard painted to match your room’s color scheme and outfitted with hooks, shelves, bins, and holders becomes an infinitely reconfigurable vertical storage surface that displays your most beautiful tools like art while keeping them immediately accessible. Scissors, rulers, punches, cutting tools, rolls of tape, spools of ribbon — all of these items live beautifully on a pegboard and can be rearranged in minutes as your workflow or tool collection changes.
Rail systems — whether kitchen-style stainless rail systems or purpose-built craft rail storage — offer another excellent wall-mounted option, particularly for tools and frequently accessed small supplies. Mounted at the back of a desk or along a wall above a work surface, a rail system with hooks and interchangeable accessories keeps tools at arm’s reach without taking up any desk or shelf real estate. Many crafters use rail systems specifically for their most-used cutting tools, adhesive dispensers, and marking implements so that these daily essentials are always exactly where they need them without any hunting or rearranging of bins.
Maximizing Corner Space and Awkward Nooks
Corner spaces and awkward architectural nooks are among the most underutilized areas in any craft room, and yet they often represent a significant percentage of the room’s total square footage. Corner shelving units — whether purchased as dedicated corner units or assembled from standard shelving with custom corner brackets — can turn a previously dead zone into several linear feet of excellent storage. Rotating corner shelving, sometimes called lazy Susan shelving, is particularly effective in craft rooms because it eliminates the “black hole” effect of deep corner cabinets where items in the back become effectively invisible and inaccessible.
Built-in shelving that wraps around windows, doors, and other architectural features requires more planning and sometimes more investment, but creates storage that feels like it belongs to the room rather than being added to it. Shelves installed above a doorway, for example, are perfect for lightweight, decorative, or rarely accessed items. Shelving built around a window can frame the view beautifully while housing an impressive volume of supplies on either side. These solutions require measuring carefully and often involve some basic carpentry or the help of a handyperson, but the result is storage that maximizes every inch of the room in a way no freestanding furniture unit can match.
Even the space beneath shelving units can be put to organizational work with the addition of under-shelf baskets, hooks, or hanging organizers that clip or hook onto the shelf above. These inexpensive additions effectively add a half-shelf between existing shelves, perfect for holding rolls of tape, bundles of ribbon, or small baskets of frequently grabbed supplies. The cumulative storage added by thoughtfully using the undersides of shelves throughout a craft room can be substantial — often equivalent to adding another full shelving unit — without requiring any additional wall space or floor footprint.
Styling Your Shelves to Inspire as Well as Organize
There is a meaningful difference between shelving that organizes your supplies and shelving that actively inspires you every time you walk into the room, and the craft rooms that people find most joyful to work in almost always achieve both simultaneously. Styling your shelves is not a superficial or vain pursuit — it is an act of intentional design that turns your storage into part of the room’s creative atmosphere. When your shelving looks beautiful, you are more motivated to maintain it, more excited to spend time in the space, and more likely to take your craft practice seriously as something worth investing in.
Color coordination is one of the fastest and most impactful ways to elevate functional craft room shelving into something visually pleasing. Organizing yarn by color gradient, arranging cardstock in rainbow order, grouping thread by hue — all of these approaches turn raw material storage into something that resembles a curated display. The organizational benefit is real as well: color-organized systems are genuinely faster to navigate than randomly arranged ones because the human eye finds color distinctions more quickly than text labels. This is one of those happy cases where beautiful and functional are the exact same thing.
Do not be afraid to include a few purely decorative elements among the functional storage on your craft room shelves. A small plant, a framed quote, a beautiful piece of pottery, or a meaningful object from a trip or memory creates visual anchors among the practical items and helps the space feel like a room rather than a supply depot. These small personal touches are what transform a well-organized craft room into a sanctuary — a place that reflects your personality and your values as a creative person, and that welcomes you in rather than merely containing your stuff. Joy in a craft space is always part functional and part deeply, unashamedly personal.
Maintaining Your Craft Room Shelving System Over Time
The most common mistake people make after investing significant time and energy into setting up a beautiful, functional craft room shelving system is treating the setup as a one-time event rather than an ongoing practice. Craft collections grow, interests shift, new tools are acquired, and old supplies get used up — all of which means that a shelving system requires regular reassessment and maintenance to stay effective. Building a simple maintenance routine into your craft practice, even something as brief as a ten-minute weekly reset and a more thorough quarterly review, makes an enormous difference in how well the system serves you over the long term.
The quarterly review is particularly valuable because it gives you permission to evolve the system as your needs change, rather than staying loyal to an arrangement that no longer fits your current practice. If you started with a heavy focus on scrapbooking but have recently fallen in love with embroidery, your shelving system should reflect that shift. Supplies you are no longer using regularly should be rotated to less prime real estate, while your new primary materials should move to the most accessible, well-lit, ergonomically ideal positions. A shelving system that reflects who you are as a crafter right now is always more functional than one that reflects who you were two years ago.
Finally, resist the temptation to let your craft room shelving become a holding zone for things that do not belong there. Every shelf that holds non-craft-related items — household overflow, gifts waiting to be wrapped, things you plan to donate — is a shelf that is no longer working for your creative practice. Set a firm boundary that the craft room and its shelving are dedicated entirely to your supplies and tools, and find another home for everything else. This boundary is not rigid or precious — it is simply a commitment to honoring your creative space and, by extension, honoring your creative self. A well-shelved craft room is an act of self-respect, and you deserve every inch of it.








What do you think?
It is nice to know your opinion. Leave a comment.