










Sewing Organizer Bag Tutorial: Create Your Perfect Craft Companion
Introduction: Why Every Sewer Needs an Organizer Bag
If you have ever sat down to begin a sewing project only to spend the first twenty minutes hunting for your seam ripper, a specific thread color, or that one needle you know you just had, then a dedicated sewing organizer bag is exactly what your crafting life has been missing. This indispensable accessory keeps everything you need within arm’s reach, whether you are working at your home sewing table or heading to a quilting class across town. The satisfaction of reaching into a well-organized bag and immediately finding what you need is genuinely transformative for your creative practice.
A sewing organizer bag is more than just a storage solution — it is a reflection of how seriously you take your craft. When your tools are organized, your mind is free to focus entirely on the creative work in front of you rather than the logistical scramble of locating supplies. Experienced sewers and quilters often say that half of good craftsmanship is good preparation, and nothing embodies that philosophy more clearly than a thoughtfully designed organizer that holds your most essential tools in dedicated pockets, loops, and compartments sized specifically for sewing accessories.
Making your own sewing organizer bag adds an extra layer of meaning to the project. You get to choose fabrics that speak to your personal aesthetic, customize the pocket sizes to fit your specific collection of tools, and practice a range of sewing techniques in the process. By the end of this tutorial, you will have a beautiful, functional bag that showcases your skills and serves you every time you sit down to sew. Whether you are a beginner looking for a confidence-building project or an experienced sewer wanting to refine your organization system, this guide is designed to walk you through every step with clarity and care.
Materials and Tools You Will Need
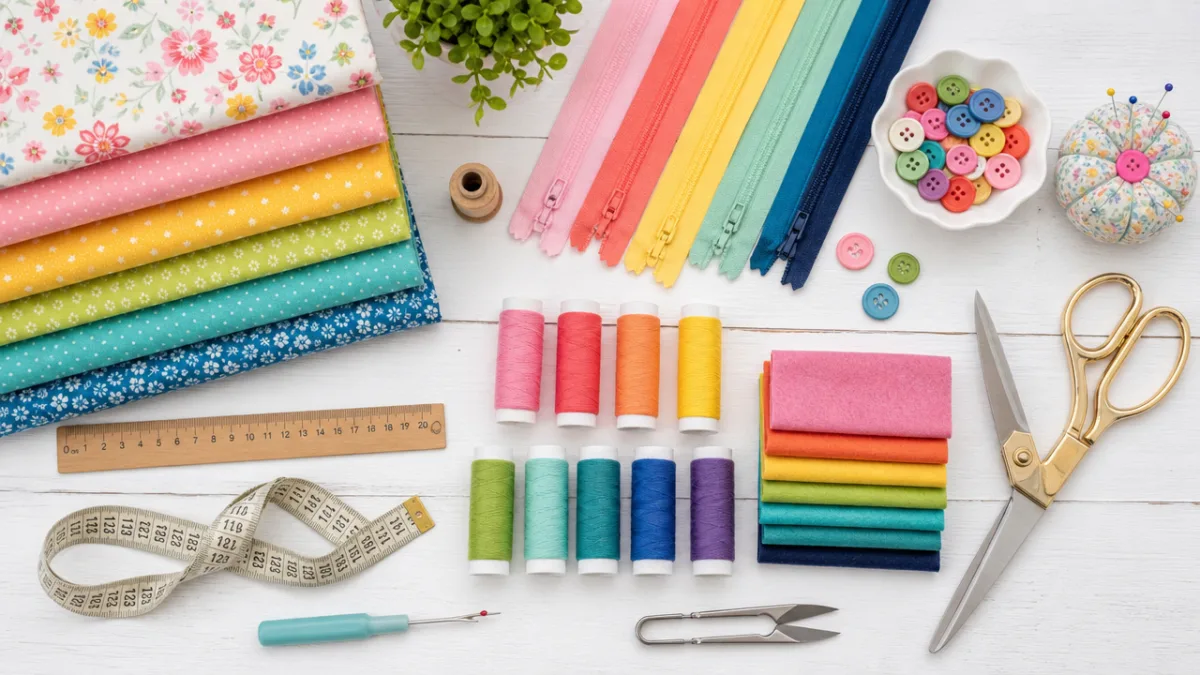
Before you cut a single piece of fabric, gathering all your materials ensures the construction process flows smoothly from start to finish. For this project, you will need approximately one yard of sturdy outer fabric — a medium-weight canvas, denim, or decorator fabric works beautifully and provides the structure the bag needs to stand up to regular use. For the lining, choose a coordinating quilting cotton that is both attractive and durable. You will also need a piece of fusible fleece or foam interfacing to give the bag body and protect the tools inside from bumps and pressure.
Hardware and notions play an equally important role in this project. You will want to have the following items on hand before you begin cutting:
- One 14-inch zipper for the main compartment closure
- Two 7-inch zippers for interior accessory pockets
- Two sets of magnetic snaps or heavy-duty snaps for flap closures
- One pair of 18-inch webbing handles in a coordinating color
- A D-ring and swivel clip for an optional detachable wrist strap
- Approximately two yards of half-inch elastic for tool loops
- Coordinating thread in both bobbin and top thread weights
When it comes to your sewing tools for construction, make sure your machine is equipped with a zipper foot, a heavy-duty needle appropriate for the weight of your outer fabric, and a walking foot if you are sewing through multiple layers of interfacing and fabric simultaneously. Have your rotary cutter, self-healing mat, and clear quilting rulers ready for precise cutting. Press every seam as you go using a good iron with steam capability, as crisp pressing is what separates a professional-looking finished bag from one that looks homemade in the less flattering sense of the word.
Fabric selection deserves particular attention because it directly affects both the aesthetic and the longevity of your bag. Look for fabrics with a tight weave that resist fraying and hold their shape over time. Pre-wash everything before cutting to prevent shrinkage after construction, especially if you are mixing fabric types such as cotton and canvas. Fat quarters from your local quilt shop can be a wonderful source of coordinating prints if you want to create a scrappy, eclectic look, while a pair of solid fabrics in complementary colors creates a clean, modern feel that never goes out of style.
Cutting and Preparing Your Fabric Pieces
Precise cutting is the foundation of a bag that goes together smoothly and looks polished when finished. Begin by pressing all your fabrics thoroughly so you are working with flat, wrinkle-free surfaces. Using your rotary cutter and quilting ruler on a self-healing mat, cut your outer fabric pieces to size: two rectangles measuring 14 inches wide by 16 inches tall for the front and back panels, two side gusset pieces measuring 4 inches wide by 16 inches tall, and one bottom piece measuring 14 inches wide by 4 inches tall. These dimensions create a bag with generous interior volume without being so large that it becomes unwieldy to carry.
Cut your lining pieces to match the outer fabric dimensions exactly, and cut your fusible fleece pieces approximately one-quarter inch smaller on all sides to reduce bulk at the seam allowances. Fuse the interfacing to the wrong side of each outer fabric piece according to the manufacturer’s instructions, using a pressing cloth to protect delicate outer fabrics from direct iron contact. Take your time with this step — bubbles or uneven adhesion in the interfacing will show through to the right side of the fabric and are very difficult to correct after the fact. Allow each fused piece to cool completely before handling to ensure a secure bond.
For the interior pocket pieces, cut the following from your lining fabric and a second coordinating cotton if you like a contrasting look:
- One large zippered pocket: two pieces at 13 inches wide by 8 inches tall
- Two smaller tool pockets: four pieces at 6 inches wide by 8 inches tall
- One long elastic tool loop strip: one piece at 13 inches wide by 4 inches tall
- One slip pocket for flat items: one piece at 13 inches wide by 10 inches tall, folded in half
Mark all your pieces clearly on the wrong side with a fabric marker or chalk pencil, noting which edge is the top, where the zipper will be placed, and which pieces are mirror images of each other. Good labeling at the cutting stage saves enormous confusion during construction, especially if you have to step away from the project and return to it later. Store cut pieces flat in a large zip-top bag or fold them neatly and pin a label to each stack — your future self will be very grateful for this small act of organizational kindness during the often-hectic construction phase.
Constructing the Interior Pockets and Tool Loops
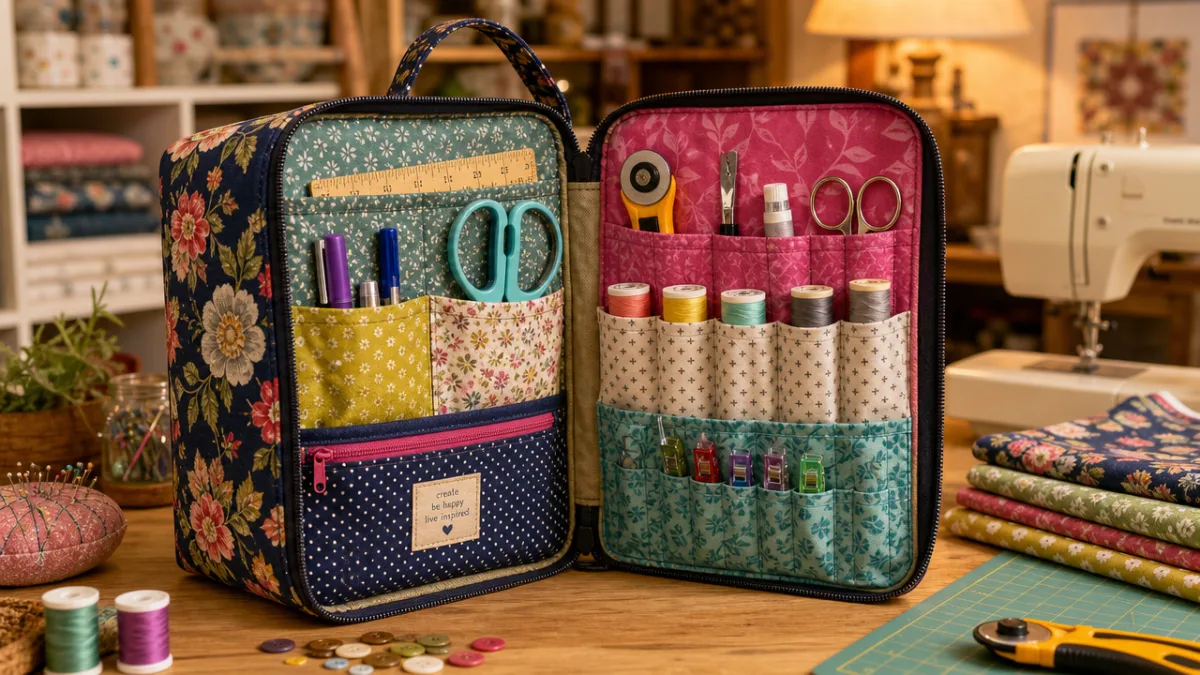
The interior of your sewing organizer bag is where all the real magic happens, and spending time getting the pocket layout right before you sew anything permanently will pay dividends in daily usability. Begin with the large zippered pocket on the back lining panel. Place the zipper face-down along the top edge of one pocket piece, aligning the zipper tape with the fabric edge, and stitch in place using your zipper foot. Press the fabric away from the zipper, understitch close to the seam to keep the fabric from rolling forward, and then attach the second pocket piece in the same manner on the opposite side of the zipper. Fold the assembled pocket in half so both fabric pieces are right-side out with the zipper running across the top, and baste the raw side and bottom edges together. This completed pocket unit is now ready to be applied to your lining panel.
The elastic tool loops are one of the most satisfying elements of the whole bag because they are so immediately practical. Cut your half-inch elastic into segments: four pieces at 3 inches each for larger tools like scissors and a seam ripper, six pieces at 2 inches each for medium tools like marking pencils and a stiletto, and eight pieces at 1.5 inches each for small tools like hand sewing needles in their cases and thimbles. Fold each elastic loop in half, aligning the raw ends together, and baste them to the right side of your tool loop fabric strip at evenly spaced intervals. When this strip is stitched to the lining panel, all those loops will be securely anchored and available to hold your tools upright and accessible.
Constructing the slip pocket for flat items like a small notebook, a pattern printout, or a phone requires simple but careful folding and stitching. Fold the long pocket rectangle in half with right sides together, and stitch across the top short edge to create a clean finished top. Turn right side out, press flat, and topstitch close to the folded top edge for a crisp, professional look. Then position this pocket on your front lining panel, aligning the raw bottom and side edges with the lining, and divide it into multiple sections using vertical lines of stitching. You might create one wider section for a small sketchbook and two narrower sections for pattern pieces — customize the divisions to suit your own most frequently used flat items.
Before assembling the lining panels into the bag, lay your planned interior out on a flat surface and physically place your sewing tools in the designated spots. This dry run often reveals adjustments that need to be made — perhaps a loop is slightly too small for your favorite embroidery scissors, or a pocket division would be more useful if shifted an inch to the left. Making changes at this stage is as simple as re-marking with chalk and adjusting your stitching plan, whereas changes after everything is assembled can require frustrating seam ripping and reworking. The few extra minutes spent on this test run are always well invested.
Assembling the Bag Body and Outer Shell
With all your interior pocket work complete, it is time to construct the outer shell of the bag, which gives the whole project its structure and exterior appeal. Begin by installing the main zipper across the top of the front outer panel. This process mirrors what you did for the interior zippered pocket — lay the zipper face-down along the top edge of the front panel, stitch in place with the zipper foot, flip the fabric over and press, understitch, and then repeat on the back panel. When you zip the two panels together, you have the foundation of your bag’s main body. Leave the zipper partially open before completing the assembly so you can turn the bag right side out later.
Attaching the gusset pieces to create the three-dimensional body of the bag is the step where many first-time bag makers feel a surge of nerves, and understandably so — joining curves and corners precisely takes practice and patience. Pin the side gusset pieces to the front and back panels with right sides together, clipping into the seam allowance at the corners to allow the fabric to pivot around the right angles. Sew slowly around the corners, stopping with your needle down to lift the presser foot and reposition the fabric as needed. A consistent half-inch seam allowance throughout this step ensures the gusset sits flat and even on all sides of the finished bag, and pressing the completed seam allowances toward the gusset side helps the bag maintain its structured silhouette.
Attach the webbing handles now, before the lining is joined to the outer shell, because accessing the top edge is much easier at this stage. Position the ends of each handle 3 inches in from the side seams on both the front and back panels, with the handle ends extending down about 1.5 inches below the top zipper seam. Secure each end with a box stitch — stitch a rectangle around the perimeter of the handle end, then stitch an X through the center — repeating this stitching pattern two to three times for maximum strength. These handles will bear the full weight of your loaded bag repeatedly over years of use, so reinforcing them thoroughly now is absolutely essential for long-term durability.
Assemble the lining shell using exactly the same process as the outer shell, leaving a 5-inch gap in one of the bottom side seams for turning. Insert the completed lining into the outer shell with right sides facing each other, align the top edges and side seams carefully, and stitch around the entire top opening. Trim and grade the seam allowances, clip the corners, and turn the whole bag right side out through the gap in the lining. Push the lining down into the bag interior, encourage all the corners out with a blunt turning tool, and press the top edge with steam until it lies crisp and flat. Topstitch around the top edge to hold the lining in place and add a final polished detail to the exterior.
Finishing Details and Personalizing Your Organizer
The finishing touches on a handmade bag are what elevate it from merely functional to truly special, and this stage of the project is where your personality can shine through most vividly. Consider adding an exterior slip pocket to the back panel before assembly — a simple rectangle of coordinating fabric, finished at the top with a clean fold and topstitching, divided into two or three sections, is perfect for holding your phone, a small pair of scissors that you want quick access to, or your sewing class schedule. Positioning this pocket between 2 and 3 inches up from the bottom of the back panel and 1 inch in from each side gives it a balanced, intentional look that reads as a designed feature rather than an afterthought.
Embellishment options for the exterior of the bag are nearly limitless, and even small details make a significant difference in the overall impression of the finished piece. Here are some ideas to consider as you put the final touches on your organizer:
- Appliqué a simple scissors, spool, or needle motif to the front panel using coordinating fabric and a tight satin stitch
- Add a fabric label inside the bag with your name and the date you made it — a lovely tradition for handmade items
- Thread a decorative zipper pull through the main zipper, such as a charm, a ribbon loop, or a leather tab, for a boutique-quality detail
- Use contrast thread on the exterior topstitching to create a visual design element that ties your fabric choices together
- Attach a small wrist strap using the D-ring and swivel clip hardware for carrying the bag when your hands are full
Pressing the finished bag one final time with steam is a step many makers skip in their eagerness to admire and use the completed project, but it genuinely makes a noticeable difference in how professional and intentional the bag looks. Pay special attention to the seams around the zipper, the corners of the gusset, and the base of the handles, using a pressing cloth to protect any decorative stitching or delicate outer fabrics. A clapper or wooden seam roller can help flatten stubborn seams through multiple layers of canvas and interfacing that your iron alone cannot fully press. This final pressing session is your last opportunity to correct any slight puckering or unevenness before the bag enters regular use.
Once your organizer bag is complete, take a few minutes to thoughtfully load it with your sewing tools before you first use it in your creative work. This initial loading process often reveals whether you need to make any last-minute adjustments — perhaps adding a small safety pin to a loop that is slightly too large, or sliding a piece of thin foam into a pocket to raise smaller items to a more accessible height. Keep a short list of any modifications you would make if you were to sew this bag again, because sewing organizer bags make wonderful gifts for fellow crafters, and you will find yourself wanting to make additional versions once you experience how dramatically this bag improves your sewing sessions.

Tips for Long-Term Care and Organization Maintenance
A well-made sewing organizer bag is an investment in your creative practice, and treating it with a little regular care will keep it looking beautiful and functioning perfectly for many years. Spot-clean the exterior with a damp cloth and a small amount of gentle dish soap as needed, being careful not to saturate the interfacing which can sometimes wrinkle or detach from the outer fabric if subjected to excessive moisture. For fabric bags made from washable cotton and canvas without foam interfacing, a gentle machine wash on a cool cycle followed by air drying flat usually works well, but always check the care requirements of your specific hardware before immersing the bag in water.
Maintaining the organizational system inside the bag requires a small but consistent habit: returning every tool to its designated spot at the end of each sewing session. It takes only a minute or two to tuck scissors back through their loop, cap your marking pens and slide them into their pocket, and zip the smaller compartments closed. If you return your bag to its home on your sewing table or shelf knowing that everything is in its place, the next time you sit down to sew you can dive immediately into your creative work rather than spending precious motivation on logistics. Many experienced sewers describe this end-of-session tidying ritual as a satisfying conclusion to their creative time — a small act of respect for both the craft and the tools that support it.
Periodically reassess whether your tool loops and pocket divisions are still serving you well as your collection of sewing tools grows and changes over time. You may acquire a new pair of embroidery scissors that needs a different-sized loop, or discover that you are reaching into a certain pocket so frequently that it deserves a more prominent position. Because you made this bag yourself, you have the knowledge and skills to modify it — add a new loop with a few hand stitches, insert a removable organizer insert, or even unpick and reposition a pocket divider seam. This adaptability is one of the most meaningful advantages of making your tools rather than buying them, and it keeps your sewing practice in a state of constant, joyful refinement.
Sharing the pattern and process for this sewing organizer bag with other crafters in your community is one of the most generous things you can do with the skills you have developed. Consider hosting a small sewing circle where participants bring their own fabric choices and work through the construction steps together, or writing up your own modifications to the design and sharing them in an online sewing community. The sewing world thrives on exactly this kind of generous knowledge sharing, and the project is perfectly calibrated as a group activity — interesting enough to hold experienced sewers’ attention while approachable enough for beginners to feel genuinely capable of completing it. Every bag that gets made becomes a unique expression of its maker, and that diversity of expression is what makes the handmade sewing community such a rich and inspiring place to belong.








What do you think?
It is nice to know your opinion. Leave a comment.