










Why Candle Samples Take 2–3 Weeks: The Real Process Explained
The Hidden Complexity Behind Every Candle Sample
If you’ve ever ordered a candle sample and found yourself wondering why it takes two to three weeks, you’re not alone. It’s easy to picture someone melting some wax, pouring it into a jar, and calling it done — but that picture couldn’t be further from the truth. Candle making sits right at the intersection of craft and chemistry, and getting a sample right takes real knowledge, careful testing, and a genuine respect for how these materials behave together. The wait isn’t filler. It’s the process doing exactly what it’s supposed to do.
At its core, every candle sample is trying to answer one question: will this candle actually do what the customer expects? That means nailing the scent throw, getting a clean and even burn, making sure the wax sticks properly to the container, achieving the right melt pool, and choosing a wick that won’t tunnel or fill the room with soot. And here’s the tricky part — all of those things affect each other in ways that aren’t always obvious. A fragrance oil that smells incredible straight from the bottle might behave completely differently once it’s blended into a specific wax. It might even throw the wick off enough that you need a totally different size or type to get things back on track.
What makes this timeline make sense is understanding that candle development is inherently a back-and-forth process. Most makers don’t nail it on the first try, and the good ones aren’t expected to. They pour, evaluate, tweak, and pour again — sometimes several times before a formula is solid enough to hand off to a client or put up for sale. The two-to-three week window accounts for all of that iteration, plus the cure time that’s required between each test, plus the reality that most makers are juggling more than one project at once. Cutting that time short doesn’t speed things up — it just produces samples that don’t tell the truth about the finished product.
The Initial Formula Development Phase
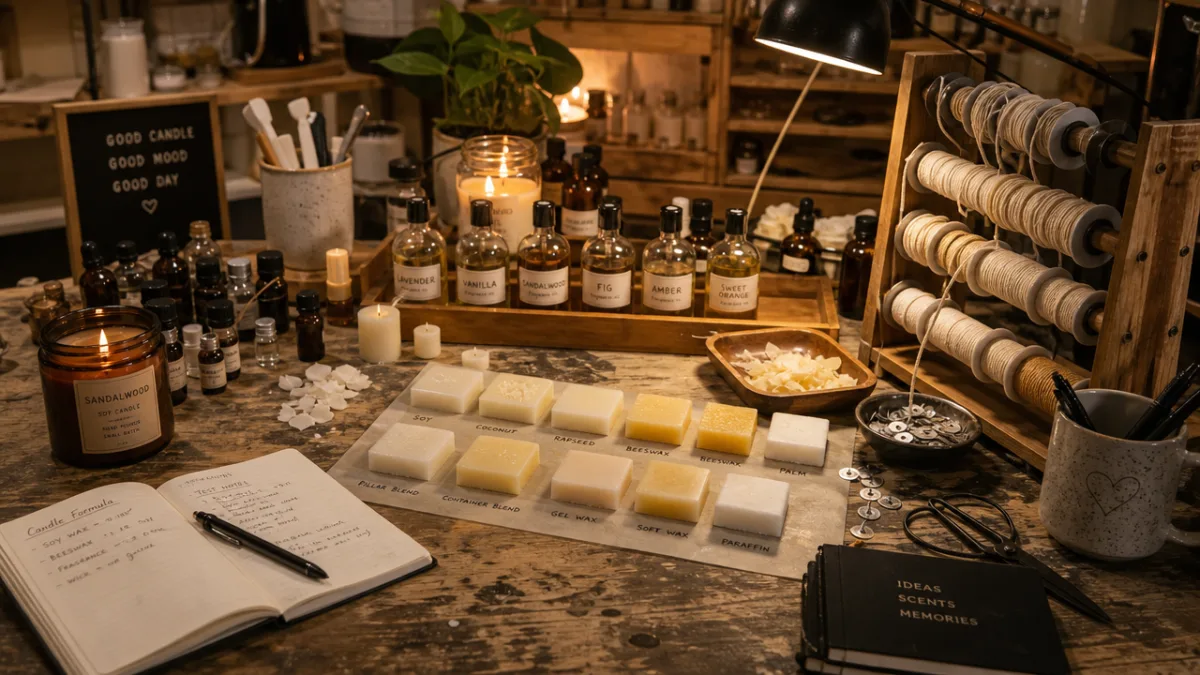
A lot of work happens before a single drop of wax ever gets melted. The first big decision is choosing the right wax base — soy, paraffin, coconut, beeswax, or one of the many proprietary blends out there — and it’s not a casual choice. Each wax has its own melting point, its own capacity for holding fragrance, its own way of behaving as it cools and sets. Pick the wrong one for the job — say, pairing a heavily scented formula with a wax that can’t handle that kind of load in a wide-mouth tumbler — and you’ve already set yourself up for problems before testing even starts. Getting this right takes experience and usually means digging into supplier data sheets.
Next comes the fragrance. Clients often arrive with a scent concept rather than a specific product — something like “a rainy morning in a cedar cabin” — and turning that concept into something real means either tracking down a pre-made fragrance oil that fits the brief or working with a fragrance house on something custom. Every fragrance oil comes with a recommended usage rate, usually expressed as a percentage of the total candle weight, and more isn’t always better. Push the fragrance load too high and you risk destabilizing the formula, causing oil to seep out, or creating a fire hazard. Finding the right amount is more of a balancing act than it might seem.
Then there’s the wick — arguably the most technically demanding variable in the whole process, and the one most likely to stretch the testing timeline. Wick sizing charts from manufacturers are a helpful starting point, but they’re really just that: a starting point. The wick that burns beautifully in one wax-fragrance combination might be totally wrong for another, even if you’re using the exact same jar. You have to factor in the fragrance load, the wax type, whether dye is being used, and even the typical temperature of the space where the candle is likely to be burned. There’s no chart that captures all of that for you.
The First Pour and Initial Evaluation
The first test pour is one of those moments that’s equal parts exciting and humbling. The maker measures everything carefully, heats the wax to the right temperature, adds the fragrance at just the right point in the process, and pours into the chosen vessel. Even here, the details matter — pour temperature affects how the surface sets, how well the wax grips the glass, and whether issues like sinkholes or wet spots show up. Too hot or too cool, and you might end up with a candle that looks wrong enough to fail on presentation alone, even if it would have burned just fine.
Once the candle is poured, it needs to cool at a controlled pace. Cool it down too fast in a cold room and you risk cracking or frosting, especially with natural waxes. Leave it somewhere too warm and the top might sink, which means a second pour — and more time added to the clock. After it’s fully set, the candle goes into what’s called the initial cure period. This is when the wax and fragrance molecules are still settling and binding together into a stable matrix, and skipping or shortening it gives you burn test results that don’t reflect how the finished candle will actually perform.
Most wax and fragrance combinations need at least 48 hours to cure before the first burn, and plenty of experienced makers prefer to wait 72 to 96 hours. While the candle is curing, the maker isn’t just sitting on their hands — they’re checking the surface and sides for cosmetic issues, looking for any signs of fragrance seeping or pooling on top, and evaluating the cold throw, which is the scent the candle gives off before it’s ever lit. Cold throw matters a lot in retail environments, so if it’s weak or missing, that’s a signal that something in the formula may need to change before testing goes any further.
Burn Testing: The Most Time-Consuming Step
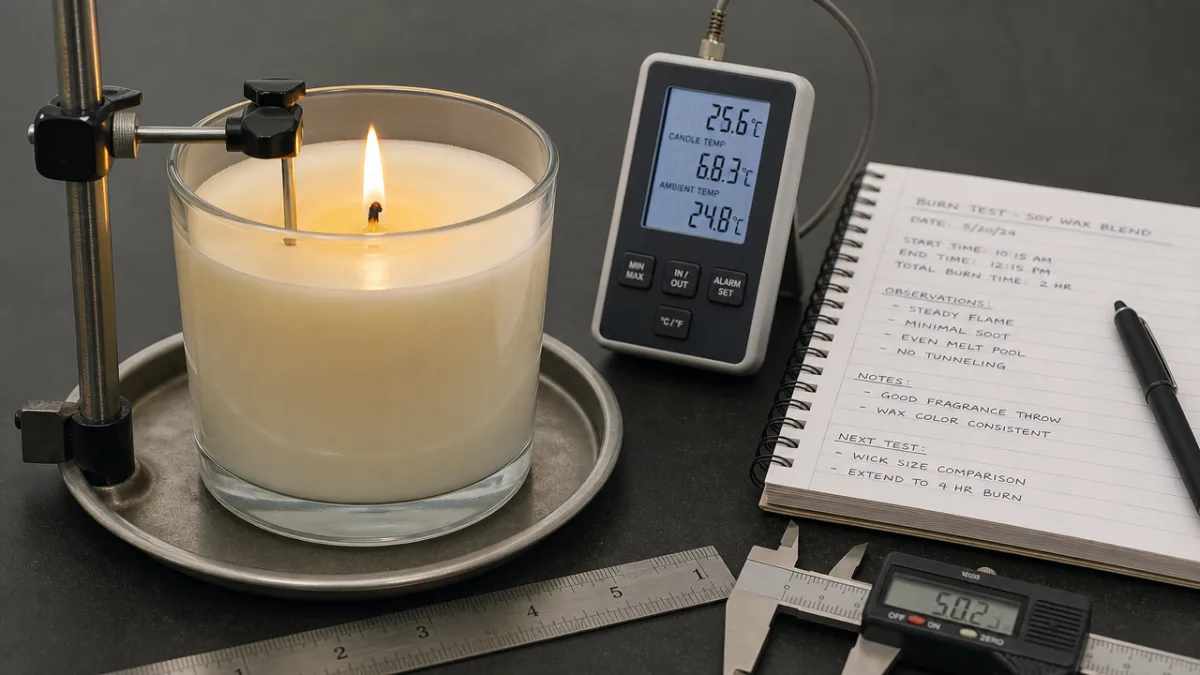
Burn testing is where the bulk of the time goes, and it’s also the phase that people outside the candle world tend to underestimate the most. This isn’t a matter of lighting a candle, checking on it an hour later, and calling it good. A proper burn test follows a structured sequence of sessions — each one typically four hours long, matching the maximum recommended burn time for most container candles — with a mandatory cooling period in between each one. The goal is to replicate how a real consumer would actually use the candle, and to see how it holds up across its entire lifespan, not just on one good day.
Throughout each burn session, the maker is watching and recording a whole set of performance details: how wide and deep the melt pool is at the one-, two-, and four-hour marks; what the flame looks like and how it’s behaving; whether the wick is mushrooming (which signals carbon buildup); how much soot is collecting on the jar; how evenly the wax is melting across the vessel; and what the hot throw is like — the strength and character of the scent while the candle is actually burning. If anything falls outside acceptable parameters, the maker has to figure out why and decide whether the fix means changing the wick, adjusting the fragrance load, tweaking the pour temperature, or some combination of all three.
A full burn test cycle covers the candle from first light all the way to the point where it’s no longer safe to use. For a typical eight-to-ten-ounce container candle with a burn life of forty to fifty hours, that’s ten to twelve individual four-hour sessions, each separated by at least four hours of cooling time. Even running sessions back to back during normal working hours, that fills up multiple weeks on its own. And if a session reveals a problem serious enough to require reformulation — a new wick, a different pour temperature, a reduced fragrance load — everything resets. A fresh pour, another full cure period, and the cycle begins again.
Adjustments, Reformulation, and Multiple Rounds of Testing
It’s genuinely uncommon for a candle formula to pass every evaluation on the first try. Even makers with years of product development experience run into surprises during testing. A fragrance oil from a new supplier might behave differently than expected. A client’s chosen vessel might have a slightly different internal diameter than what the maker’s reference charts account for. A shift in the studio’s ambient temperature during a different season can change how a pour sets. Adjustment and reformulation aren’t signs that something went wrong — they’re a normal and expected part of how candle development actually works.
Typical adjustments between rounds include things like moving up or down a wick size, switching to a different wick series entirely, nudging the fragrance addition temperature by five to ten degrees, modifying the fragrance load by half a percentage point, or changing the cooling method. Every change gets documented carefully so that results can be compared across rounds, and so that when a formula finally passes, it can actually be reproduced. That documentation isn’t busywork — it’s what turns a successful sample into a reliable production formula.
When meaningful changes are made, makers don’t try to patch the existing test candle. They do a completely fresh pour that incorporates all the adjustments at once, so the new round of testing reflects the actual intended formula rather than some hybrid of old and new. That fresh pour needs another full cure period before burn testing can resume. Run through two or three rounds of adjustment — which is completely normal — and you can see pretty clearly how the two-to-three week timeline fills in on its own, without any unnecessary delays or foot-dragging.
Quality Review, Documentation, and Sample Preparation
Once a formula clears all the burn testing benchmarks, there’s still a bit more ground to cover. The maker needs to do a thorough quality review of the approved formula — checking the finished surface for any cosmetic issues, making sure labels or packaging elements are applied correctly, confirming that the scent profile still matches the original brief or client expectation, and pulling together the documentation that will go along with the sample. Sending a candle sample without supporting documentation is a bit like handing someone a recipe without the ingredient list.
Professional sample documentation typically includes a formula sheet covering the wax type, fragrance oil name and supplier, fragrance load percentage, wick type and size, pour temperature, addition temperature, and cure time. It often includes burn test results organized session by session, with melt pool measurements, flame behavior notes, and scent throw ratings for each one. This paperwork serves everyone: it gives the client confidence that the sample was developed rigorously, it gives the maker a reliable reference for scaling the formula up to full production, and it creates a record that supports consistent quality over time. Without it, reproducing the candle at any quantity is largely guesswork.
Getting the sample ready for delivery also takes some care. The candle needs to be properly labeled in line with applicable safety regulations, which in many markets means including warning labels, net weight, burn time, and fragrance disclosures. It needs packaging that’ll keep it safe in transit — a cracked or dented sample makes a poor first impression no matter how well it performs. If multiple fragrance variants are being sampled at the same time, each one needs to be clearly distinguished and documented separately. All of this final preparation is easy to underestimate, but it genuinely adds time to the back end of the process.
- Formula documentation including wax type, fragrance supplier, load percentages, and pour temperatures
- Burn test records covering every session from first light to end of life
- Cold throw and hot throw evaluations with subjective and objective ratings
- Cosmetic inspection notes covering surface finish, adhesion, and label placement
- Compliance review for safety labeling requirements in the destination market
- Packaging selection appropriate for safe transit without cosmetic damage

What This Means for Buyers and Brands
Once you understand what actually goes into candle sample development, the timeline starts to look a lot different. If you’re building a candle line for retail, planning a product launch, or sourcing private label candles for your brand, putting three to four weeks in your project plan for sample development isn’t being overly cautious — it’s being realistic. Pushing a maker to turn samples around faster creates pressure to cut corners on cure time and burn testing, and that produces samples that don’t honestly represent the finished product. The result is usually costly reformulations after production is already underway, which is the opposite of saving time.
It’s also worth reframing thorough sample development as a money-saver rather than a delay. A formula that goes straight to production without adequate burn testing can lead to safety issues, customer complaints about poor scent throw or tunneling, returns, and real reputational damage — all of which cost far more than a few extra weeks in the development phase. The two-to-three week sample timeline is, when you look at it that way, an investment in confidence. Confidence that what you approved in the sample is what your customers are actually going to receive.
If you’re working with a maker for the first time, asking about their sample development process is one of the best ways to gauge whether they’re worth your trust. A maker who can walk you through their testing methodology, tell you how many burn sessions they run, explain how they document formulas, and talk knowledgeably about wick selection is a maker who takes this seriously. The sample timeline is one of the clearest windows into how a candlemaker actually operates. When someone tells you samples take two to three weeks and can explain exactly why, that’s not an inconvenience — it’s a good sign you’re working with someone who knows what they’re doing.








What do you think?
It is nice to know your opinion. Leave a comment.