










Cheap Home Upgrades That Look Expensive (Under $200)
Why Budget-Friendly Upgrades Can Transform Your Home
A lot of people assume that a beautifully designed home comes with a beautifully large price tag. And honestly, it’s easy to see why — interior designers charge thousands just for a consultation, which makes stylish living spaces feel like something reserved for other people. But here’s the thing: with a good eye and a little patience, you can make changes that genuinely look high-end without spending anywhere close to what you’d expect.
The dirty little secret of interior design is that what makes a space feel expensive usually isn’t how much anything cost — it’s the cohesion, the intention, and the quality of finish. A room that’s been thoughtfully put together with inexpensive materials, installed carefully and chosen with purpose, will almost always outshine a space full of costly but mismatched pieces thrown together without a plan. It really does come down to execution.
This guide walks you through a handful of tried-and-true upgrades that together come in under $200 but produce results that look like they cost far more. Whether you’re getting ready to sell, breathing new life into a tired room, or just want a home you actually enjoy coming back to, these DIY projects will genuinely impress — and the best part is that most of them only need basic tools and a free weekend to pull off.
Hardware Swaps That Instantly Elevate Every Room
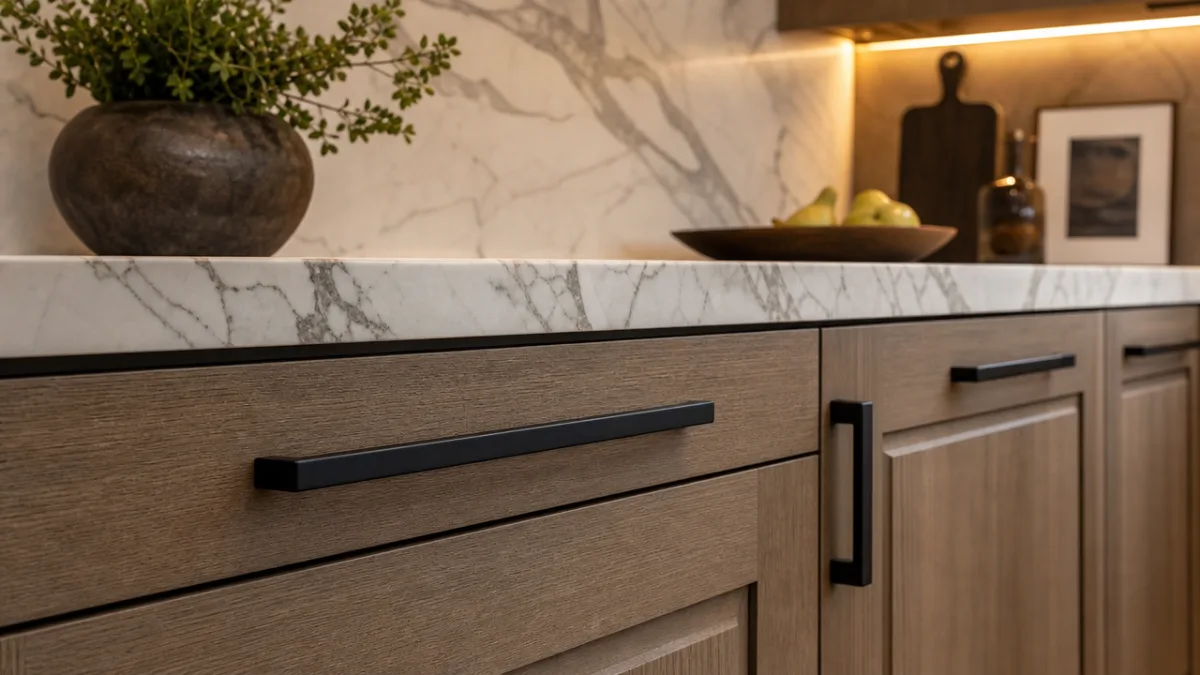
If you want one of the fastest, highest-impact upgrades you can make to any room, swap out the hardware. Cabinet handles, drawer pulls, door knobs, hinges — think of them as the jewelry of a room. When they look cheap or dated, they bring everything else down with them. The good news is that replacing hardware is about as simple as DIY gets: you need a screwdriver and a tape measure, and that’s pretty much it. A full set of brushed gold or matte black cabinet pulls typically runs $30 to $60, and the difference is immediate.
When you’re picking new hardware, consistency is everything. Settle on one finish and commit to it throughout the room — or the whole house if you want things to feel really pulled together. Finishes that look expensive without actually being expensive include brushed brass, satin nickel, matte black, and oil-rubbed bronze. They photograph well, age gracefully, and work across a surprising range of cabinet styles from shaker kitchens to traditional bathroom vanities. One finish to avoid: shiny chrome. It tends to read as budget-conscious and shows every fingerprint.
And don’t stop at the cabinets — take a look at your light switch plates and outlet covers too. These are the kinds of details that get ignored during renovations, but yellowing or mismatched plastic covers quietly undermine an otherwise nice room. Swapping them out for crisp white Decora-style covers or brushed metal options costs just a few dollars per plate and takes minutes. Combined with new cabinet hardware, these tiny swaps add up to something that feels genuinely intentional — and that sense of intention is exactly what expensive design always communicates.
Paint Techniques That Add Depth and Sophistication
A single can of good paint might be the most powerful tool a budget renovator has. For under $50, you can completely change the mood and perceived quality of a room — but the key is pushing past the “four walls, same color” approach and exploring what designers actually do to create depth and visual interest. Accent walls, two-tone color schemes, color blocking, limewash effects — these are all things a confident beginner can pull off, and the results look like you spent a lot more than you did.
One technique that’s having a real moment right now is painting your walls and trim in the same color or closely related tones — sometimes called “color drenching.” When the walls, baseboards, door frames, and ceiling all share the same color family, the room takes on this enveloping, gallery-like quality that people immediately associate with high-end design. Deep, moody shades like forest green, slate blue, and warm terracotta work especially well for this and look stunning in photos.
Another great option is faking a limewash or Venetian plaster look on an accent wall. Traditional Venetian plaster done by a craftsperson can run into the thousands. But modern limewash paints at most home improvement stores can get you surprisingly close for $40 to $60 worth of product. The technique is simple: apply the paint in overlapping, irregular strokes with a sea sponge or chip brush, then wipe back sections while it’s still wet to let the variation show through. What you end up with is a layered, textural wall finish that looks genuinely artisanal — and nobody needs to know how you got there.
Lighting Upgrades That Change Everything
Nothing shapes the atmosphere of a room quite like lighting, yet it’s one of the most consistently overlooked areas when people start thinking about home improvements. Most builder-grade fixtures do their job, but they bring absolutely nothing to the room aesthetically. Replacing even one key fixture — a pendant over the kitchen island, a statement piece in the entryway — can fundamentally change the character of a space. And attractive options are easier to find than you’d think: good-looking pendant lights, flush mounts, and even small chandeliers are widely available for well under $100.
But before you replace a single fixture, do this first: swap all your bulbs to the same warm color temperature. Most homes are lit by a hodgepodge of cool white, daylight, and warm white bulbs, which creates a visual incoherence that makes spaces feel unsettled and, frankly, a little cheap. Replacing everything with 2700K to 3000K warm white LEDs creates a unified, flattering ambiance that instantly makes rooms feel more intentional and inviting. This upgrade costs $15 to $25 for a whole house and takes under an hour — which probably makes it the single best return on investment on this entire list.
Adding dimmer switches to your main living areas is another small change that pays off in a big way. A room you can dim at the touch of a switch just feels more sophisticated — it signals that someone thought about how this space would actually be used and experienced. Dimmer switches compatible with LED bulbs run $15 to $25 each and are easy enough to install for anyone comfortable with basic electrical work. Once you can shift your lighting from bright and functional during the day to warm and low for an evening in, your home genuinely feels like a different — and better — place.

Millwork and Architectural Details That Fake High-End Finishes
Some of the most convincing tricks for making a budget home look expensive involve adding the kind of architectural details you typically see in older, more expensive construction. Crown molding, wainscoting, board and batten, picture frame molding — these features signal craftsmanship and quality, and a determined DIYer can install all of them for a fraction of what a contractor would charge. Paintable MDF molding from the home improvement store is inexpensive, easy to cut with a miter saw, and sticks readily to walls with construction adhesive and finishing nails. A standard bedroom can get the full board and batten treatment for under $50 in materials.
Picture frame molding — sometimes called wall frames or shadow boxes — is a particularly satisfying technique for a flat, featureless wall. You install rectangular frames of thin molding directly onto a painted wall, creating a geometric pattern that nods to formal, traditional architecture. Paint the frames the same color as the wall and you get a subtle, tonal effect that looks quietly expensive. Paint them a contrasting color and you’ve got a bold statement wall. Either way, the materials typically cost under $30, and the transformation from “boring room” to “looks professionally designed” is genuinely striking.
And don’t underestimate what a fresh coat of bright white semi-gloss can do for your baseboards and door casings. Over time these elements collect scuffs, yellowing, and grime that make whole rooms feel dingy without you even realizing why. Cleaning them up, giving them a light sand, and repainting creates a crisp visual boundary that makes even modest spaces look well-cared-for and polished. This is especially true in older homes where the trim has been painted in some long-outdated off-white or cream. A single quart of trim paint runs about $15 and covers most rooms comfortably.
Soft Furnishings and Styling That Pull the Room Together
Once the bigger improvements are in place, the final layer is soft furnishings and styling — and this is where a lot of DIY renovators trip up. Some go too minimal and the room feels sparse and unfinished. Others overcorrect and fill every surface until things feel cluttered and overwhelming. The sweet spot is a room that feels curated — like each item was chosen deliberately for a reason, not just placed wherever there was space.
Throw pillows and blankets are some of the most cost-effective styling tools you have access to. Two or three complementary throw pillows in varying sizes, textures, and patterns can take a plain sofa from “I bought this at a discount furniture store” to “this was clearly put together by someone with taste.” When choosing pillows, mix solids with patterns and make sure everything shares at least one color in common. Linen, velvet, and chunky knit textures all read as expensive and add real visual warmth to a seating area. A solid set of quality-looking pillows usually runs $40 to $60.
Mirrors are wildly underused in budget decorating. A large, well-placed mirror can make a small room feel dramatically bigger, bounce light into dark corners, and give a wall an actual focal point. Oversized mirrors show up at discount home goods stores and online retailers for surprisingly reasonable prices, and an interesting frame — ornate, architectural, unexpected — can make even a cheap mirror feel like a real design statement. Similarly, a gallery wall with matching frames instantly reads as polished and intentional. When you step back and take in all of these upgrades together, the cumulative effect is a home that looks significantly more expensive, beautiful, and considered than its actual price tag would ever suggest.








What do you think?
It is nice to know your opinion. Leave a comment.