










Easy Wax Melts: Your Complete Guide to Making Beautiful Scented Home Fragrance
What Are Wax Melts and Why You Should Make Your Own
Wax melts are those little scented pieces of wax you pop into a warmer to fill your home with fragrance — no open flame required. Instead of a wick, the wax sits in a dish and gets gently heated from below by a tea light or an electric warmer, which slowly releases the scent into the air. It’s a great alternative to traditional candles, and a lot of people find them safer and more budget-friendly for everyday use.
Making your own wax melts has really taken off lately, and honestly, it’s easy to see why. You get complete control over what goes into them — the scents, the ingredients, the colors, even how they look sitting on your shelf. Store-bought melts can add up fast, and a lot of them contain synthetic fragrances or additives you’d rather not have in your living space. When you make your own, you know exactly what’s in every batch, and you can choose natural fragrance oils, clean-burning waxes, and whatever botanicals or colorants feel right for your home.
Beyond the practical side of things, it’s just a genuinely fun hobby. There’s something really satisfying about walking into a room that smells amazing and knowing you made that. They also make incredibly thoughtful gifts — the kind people actually get excited about. Whether you’ve never tried any kind of craft before or you’ve already dipped your toes into candle making, wax melts are one of the most approachable projects out there. The equipment list is short, the process is simple, and the results are something you’ll genuinely be proud of.
Essential Supplies and Ingredients You’ll Need
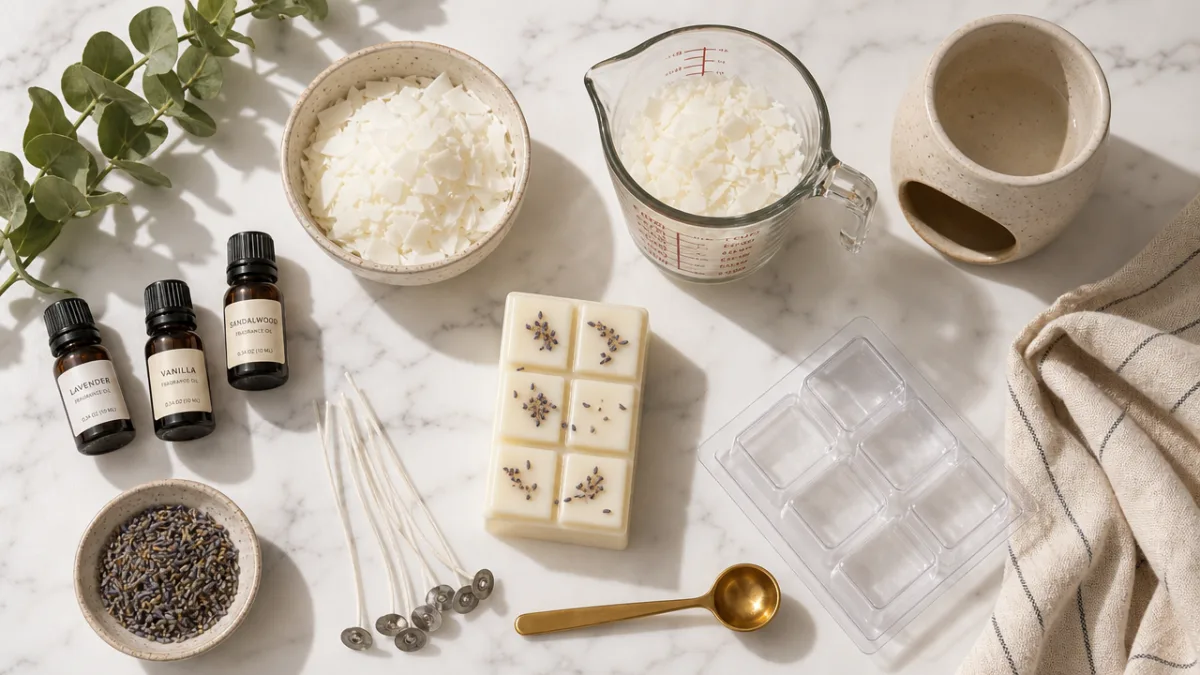
The good news is you really don’t need much to get started. A lot of the basics might already be in your kitchen, and anything else is easy to find at a craft store or order online. The most important thing to get right is your wax, and for beginners, soy wax is the way to go. It’s a natural, renewable material made from soybean oil, it burns cleaner than paraffin, and it holds fragrance really well. It also gives your finished melts that gorgeous creamy, matte look that somehow manages to look polished even on your very first try.
Next up is fragrance. You can use fragrance oils or essential oils, though fragrance oils tend to be stronger, more affordable, and available in a much wider range of scents — everything from fresh florals and clean linen to warm vanilla, cozy baked goods, and deep woodsy blends. A general starting point is about one ounce of fragrance oil per pound of wax, but you can nudge that ratio up or down depending on how strong you want the scent to be. Just make sure whatever oils you buy are specifically rated for use in wax products, since some are only formulated for other applications.
Rounding out your supply list: a double boiler or dedicated melting pot, a candy or candle thermometer, a silicone or clamshell mold, a stirring spoon, and a kitchen scale so your measurements are accurate. After that, it’s all optional fun — liquid candle dye or mica powder if you want color, dried flowers or herbs for a botanical look, and some nice packaging if you’re planning to give them as gifts. Once you’ve got everything together, you’re ready to dive in.
Step-by-Step Instructions for Making Wax Melts
The process really is as simple as it looks, and once you’ve done it a couple of times you’ll have a full batch finished in under an hour. Start by weighing out your soy wax flakes on your kitchen scale. One pound of wax will fill a standard clamshell mold right to the top, giving you around six individual melt segments. Add the wax to your double boiler or melting pot and heat it gently over medium-low, stirring here and there, until it’s fully melted and sitting somewhere between 170 and 180 degrees Fahrenheit.
Once it’s completely melted, take it off the heat and let it cool down a bit — you’re aiming for around 160 degrees before you add your fragrance oil. This part matters more than it sounds: wax that’s too hot will actually burn off the fragrance before it ever makes it into your mold, which means a weaker-smelling final product. When you’re at the right temperature, pour in your fragrance oil and stir slowly and steadily for a full two minutes so everything fully combines. If you’re adding any colorant, now’s the time for that too — just keep stirring until the color looks even throughout.
Pour the scented wax into your molds slowly and carefully to keep air bubbles from forming. Then just let them sit at room temperature for four to six hours, though leaving them overnight is even better if you can wait — they’ll be completely hardened and much easier to work with. Silicone molds release with a simple flex, and clamshells are ready to use or wrap up as gifts right out of the mold. Store everything in a cool, dry spot away from direct sunlight to keep both the fragrance and the appearance in good shape.
Best Fragrance Combinations and Seasonal Scent Ideas
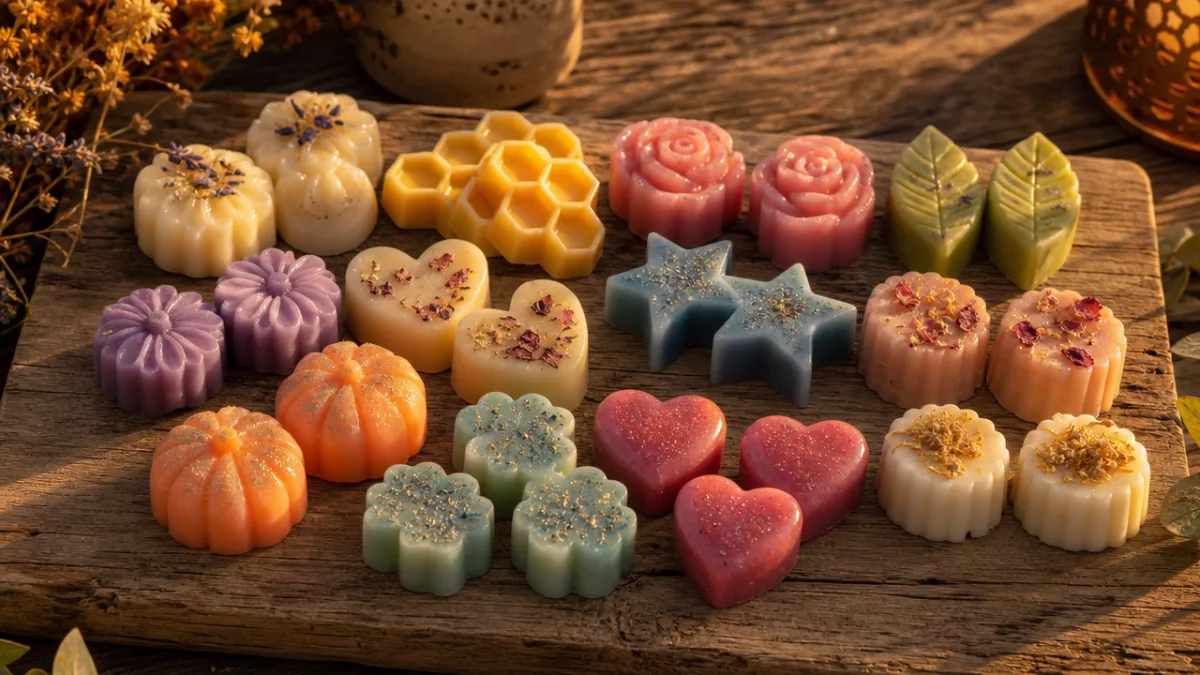
Honestly, blending your own fragrances might be the most enjoyable part of this whole hobby. Layering two or three complementary oils together can produce something genuinely complex and beautiful — the kind of scent you just won’t find pre-made in a store. Vanilla and sandalwood is a classic combination that comes together really warmly, feeling cozy and refined at the same time. Lavender and eucalyptus is another one that works almost anywhere in the house, giving off a clean, spa-like vibe that’s especially nice in bathrooms and bedrooms.
Thinking seasonally is a great way to keep your home feeling intentional and fresh throughout the year. In fall and winter, warm spicy combinations just feel right — think cinnamon and clove, pumpkin spice, apple and maple, or something like balsam fir or Christmas tree. Come spring and summer, you’ll probably find yourself reaching for lighter, brighter things: citrus blends, sea salt and driftwood, fresh flowers, or tropical notes like coconut and mango.
If you’re making melts to give as gifts, tailoring the scent to the person makes such a difference. An outdoorsy friend might love something built around cedar, pine, and a hint of black pepper. Someone who loves baking might be completely won over by brown sugar, butter, and warm cinnamon. You could even put together a little gift set with a few complementary scents they can mix and match in their warmer — it turns a simple handmade gift into something that feels really thoughtful and personal.
Here are some popular fragrance blending ideas to get you started:
- Cozy Autumn: Cinnamon, clove, and orange peel for a warm, spiced seasonal blend perfect for living rooms and entryways.
- Fresh Linen: Clean cotton, light musk, and a hint of lavender for a crisp and calming everyday fragrance.
- Tropical Escape: Coconut, pineapple, and vanilla for a bright and cheerful summer scent that feels like a vacation.
- Woodland Walk: Cedar, pine needle, and earthy patchouli for a grounding, nature-inspired aroma.
- Spa Day: Eucalyptus, peppermint, and a touch of lemon for an invigorating and refreshing experience.
Tips for Stronger Scent Throw and Professional Results
Getting a strong, consistent scent throw is something most wax melt makers obsess over a little, and it really does come down to a few key things. First and most importantly: fragrance oil quality. Not all oils perform the same way once they’re in a warmer, and it’s worth spending a little more on oils from a reputable candle or soap supplier. The cheaper options might smell great straight from the bottle, but they often fall flat when it comes to actually throwing scent into a room.
Your choice of wax also makes a real difference. Soy wax is wonderful and we love it for all the reasons already mentioned, but a soy-paraffin blend can actually throw scent more strongly — which is why a lot of professional wax melt makers use a blended wax specifically formulated for melts rather than candles. These melt-specific waxes are easy to find from candle-making suppliers, and they’re designed to hold a higher percentage of fragrance oil without causing problems like sweating or separation on the surface of your finished melts.
Temperature during the crafting process is another thing worth paying attention to. Getting your pour temperature right helps prevent rough surfaces, air pockets, and frosting. And here’s a tip a lot of beginners don’t know about: let your melts cure for at least 24 to 48 hours before you test them. The fragrance actually keeps bonding with the wax during that time, so a melt that seems a little underwhelming on day one will often smell noticeably better by day two. It’s a small thing that makes a surprisingly big difference.
Creative Packaging and Gifting Ideas for Homemade Wax Melts
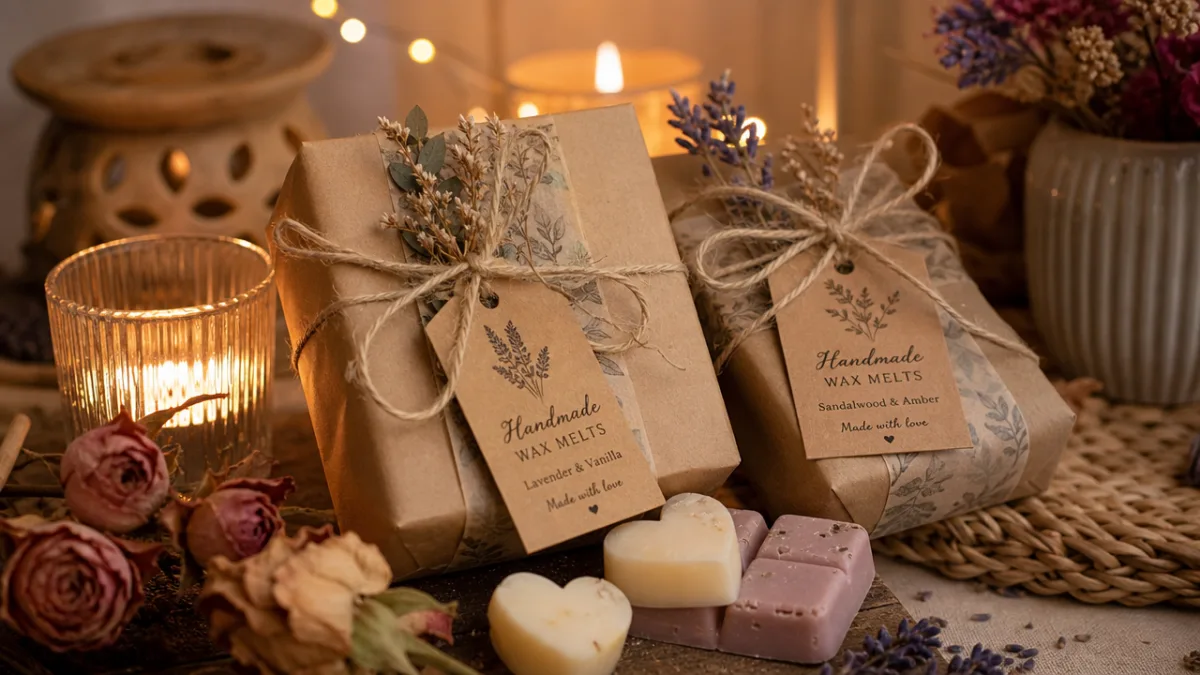
When you’re giving wax melts as gifts, packaging really does go a long way. A thoughtfully wrapped batch feels luxurious in a way that has nothing to do with how much you spent. The clamshell mold is the most practical option — it keeps everything tidy and gives you a flat surface to stick a custom label on. You can design your own labels for free using something like Canva, and adding a scent name, ingredient list, and a little bit of your own visual style makes the whole thing feel genuinely professional.
For something that feels a bit more artisan or boutique, try pouring your melts into small kraft paper boxes, decorative tins, or clear cellophane bags tied with ribbon or twine. Layering different-colored melts inside a clear bag is a lovely touch — it looks striking and lets the recipient see exactly what they’re getting before they even open it. For weddings, baby showers, or other occasions where presentation really matters, individual melt shapes tucked into small organza bags are a delicate and elegant option that people genuinely love receiving.
If you’re thinking about selling your melts at craft fairs or online, it’s worth putting some time into developing a consistent visual identity for your packaging. When your labels, colors, and materials all feel cohesive, it creates a professional impression that people remember — and that builds real trust with customers. A small card tucked inside with usage instructions, warmer settings, and ingredient notes is a nice finishing touch, and it’s especially appreciated by buyers who care about what they’re bringing into their home.
Troubleshooting Common Wax Melt Problems
Even if you follow every step carefully, you’ll probably run into a hiccup or two as you’re learning — that’s completely normal. One of the most common things people notice is frosting, which shows up as a white, powdery film on the surface of finished melts. It looks like something went wrong, but it’s actually just a natural characteristic of soy wax and doesn’t affect how your melts perform at all. If you’d prefer a smoother look, try pouring at a slightly higher temperature, letting your melts cool more slowly, or switching to a soy wax formula specifically marketed as low-frost.
Another thing that comes up fairly often is fragrance oil seeping or “sweating” on the surface of the melts. This usually means you’ve used a bit more fragrance oil than the wax can fully absorb — most soy waxes max out somewhere between six and ten percent fragrance by weight, so if you’re going over that, sweating is likely to follow. The fix is simple: pull back on the fragrance load a little, stir more thoroughly during mixing, and try adding the fragrance when the wax has cooled just a few degrees more than usual. Slightly cooler wax tends to bind more effectively.
Cracks or sinkholes appearing on the surface usually point to the wax cooling too fast, which can happen if your workspace is chilly or drafty. A simple fix is to loosely drape a piece of cardboard or a thin cloth over your molds while they set — it slows things down just enough to encourage more even hardening. If cracking keeps being an issue, you can also try adding a small amount of coconut oil to your wax blend, which adds flexibility and helps prevent surface imperfections. It might take a bit of trial and error to dial things in, but once you figure out what works in your particular space, the results will be consistently great.








What do you think?
It is nice to know your opinion. Leave a comment.