










From Waste to Wonder: Turning Spoon Ring Offcuts into Resin Flower Pendants
There is something deeply satisfying about a craft practice that generates almost no waste. When jewellery makers work with spoon rings — those beloved pieces cut and shaped from vintage silverware — the process inevitably produces small curved offcuts that are too beautiful to discard but too small for most traditional metalwork. These little crescents and slivers of vintage silver, often stamped with faint hallmarks or the ghost of an old pattern, have long ended up in scrap bins or recycling bags. But there is another path entirely, and it begins with a bottle of resin and a handful of dried petals.
Resin jewellery and metal jewellery communities have historically existed in separate orbits, each with its own tools, aesthetics, and devoted following. The idea of combining the two — using the offcuts from one craft tradition as inclusions within another — opens up a genuinely exciting creative space. The result is a pendant that carries two kinds of history simultaneously: the social history of the original spoon, perhaps engraved with initials or decorated with a pattern from a century ago, and the natural history of a flower pressed and preserved in amber-clear resin. The combination is unexpectedly poetic.
This article walks through the entire process of making resin flower pendants from spoon ring offcuts, covering everything from preparing your metal pieces and pressing flowers to pouring resin and finishing your pendant for wear. Whether you are a seasoned spoon ring maker looking for a way to honour every scrap of material, or a resin artist curious about incorporating metalwork, this guide will give you a thorough foundation to start experimenting with confidence.
Understanding Your Offcuts: What You Are Working With
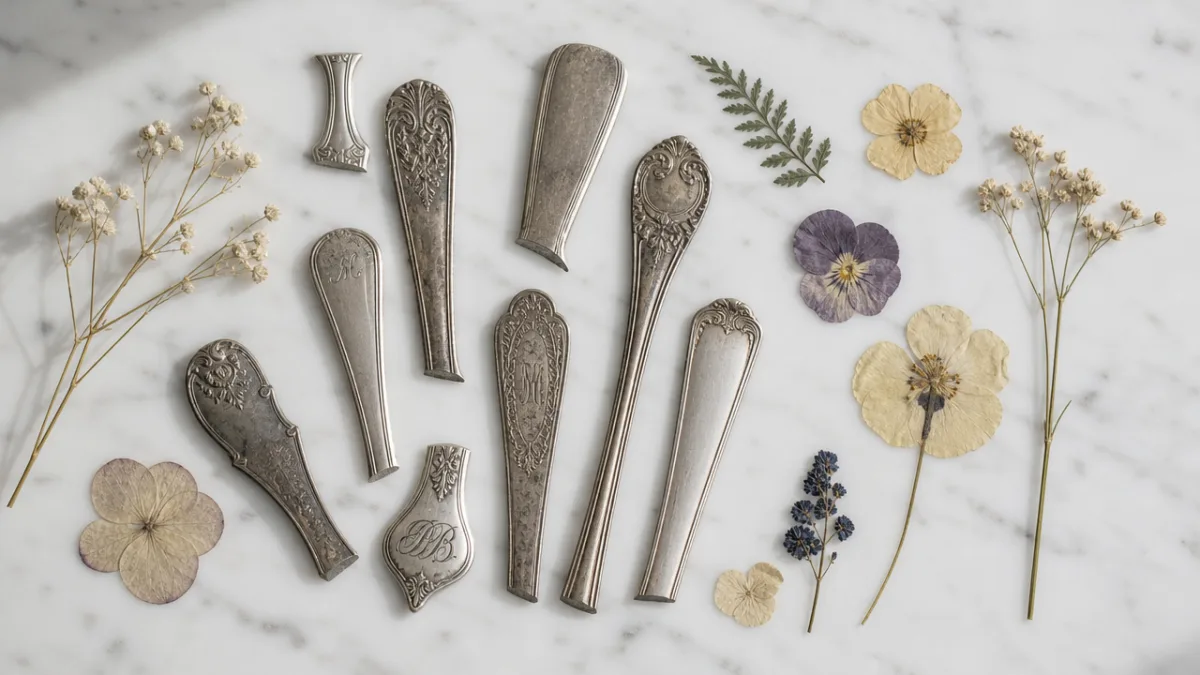
When you cut a spoon ring, the typical process involves removing the bowl of the spoon and trimming the handle to length before bending and sizing it into a ring. Depending on the spoon, this can leave you with a surprising variety of offcut shapes. The bowl itself, if not used for a bowl ring or spoon pendant, becomes a shallow cup-shaped piece of metal with a natural concavity that is extraordinarily useful in resin work. Handle trimmings produce straight or gently curved strips, often bearing decorative edging or embossed patterns along their length.
The metal in vintage spoons is almost always either sterling silver, silver plate over a base metal such as nickel or brass, or stainless steel from mid-century and later pieces. Each of these behaves slightly differently in resin. Sterling silver and silver plate can develop a lovely patina over time, even when encased in resin, giving the finished pendant an aged, romantic quality. Stainless steel remains bright and clean-looking. Neither will rust or corrode significantly, which makes them stable long-term inclusions. It is worth sorting your offcuts by metal type so you can predict how each will age inside the resin over months and years of wear.
Before using offcuts in resin, they need thorough preparation. Even a tiny trace of grease, flux residue from any soldering work, or surface contamination can cause resin to cure with a cloudy or tacky patch directly over the metal. Clean each piece with isopropyl alcohol at 90% concentration or higher, scrubbing gently with a soft toothbrush to get into any engraved details. Allow the pieces to dry completely — at least thirty minutes in a warm, dust-free environment. If the metal has sharp edges from cutting, use a fine needle file or a piece of 400-grit wet-and-dry paper to smooth them before encasing, since sharp edges can stress-crack cured resin over time.
Pressing and Preparing Your Flowers
The flower component of these pendants is just as important as the metal, and preparation here can make or break the final result. Fresh flowers contain moisture, and moisture is resin’s enemy: it causes bubbles, cloudiness, and incomplete curing. This means that every petal, leaf, and bloom destined for a resin pendant must be thoroughly dried before it goes anywhere near a mixing cup. The two most reliable methods for home studios are traditional book pressing and silica gel drying, and each produces a slightly different aesthetic result worth understanding before you commit.
Traditional book pressing — placing flowers between sheets of absorbent paper inside a heavy book, then stacking more weight on top — takes between two and four weeks depending on the thickness of the flower and the humidity of your environment. The results are beautifully flat with softened, matte colours that have a vintage herbarium quality. This look pairs extraordinarily well with the aged character of vintage silverware offcuts. Silica gel drying, by contrast, preserves more three-dimensional structure and more vivid colour, since the moisture is drawn out quickly over two to five days. Both methods work well for resin pendants; the choice is largely aesthetic.
Not all flowers press with equal success, and it is worth building a repertoire of reliable varieties before experimenting with more difficult blooms. Excellent choices for beginners include pansies, violas, Queen Anne’s lace, small daisies, forget-me-nots, and individual petals from roses or peonies. Thick, succulent, or very moisture-dense flowers — think tulips, orchids, and most tropical varieties — are considerably more difficult and are best avoided until you have a feel for the process. When selecting flowers specifically for use with spoon ring offcuts, consider how the colour and scale of the bloom will read against the silver. Delicate white or cream flowers create an almost Art Nouveau effect against engraved silver, while bold jewel-toned blooms like deep purple violas create dramatic contrast.
Choosing Resin and Tools for Pendant Making
Jewellery-grade epoxy resin is the standard choice for this type of work, and selecting the right formulation genuinely matters. Look for a resin marketed specifically for jewellery or small-scale casting rather than a general-purpose tabletop resin. Jewellery resins are formulated to cure harder, with greater clarity and UV resistance. They typically have a longer working time — around 30 to 45 minutes of open pot life — which gives you adequate time to position small inclusions carefully without rushing. Two-part systems where you mix resin and hardener in a precise ratio (commonly 1:1 or 2:1 by volume) are standard, and accurate measuring is critical to a proper cure.
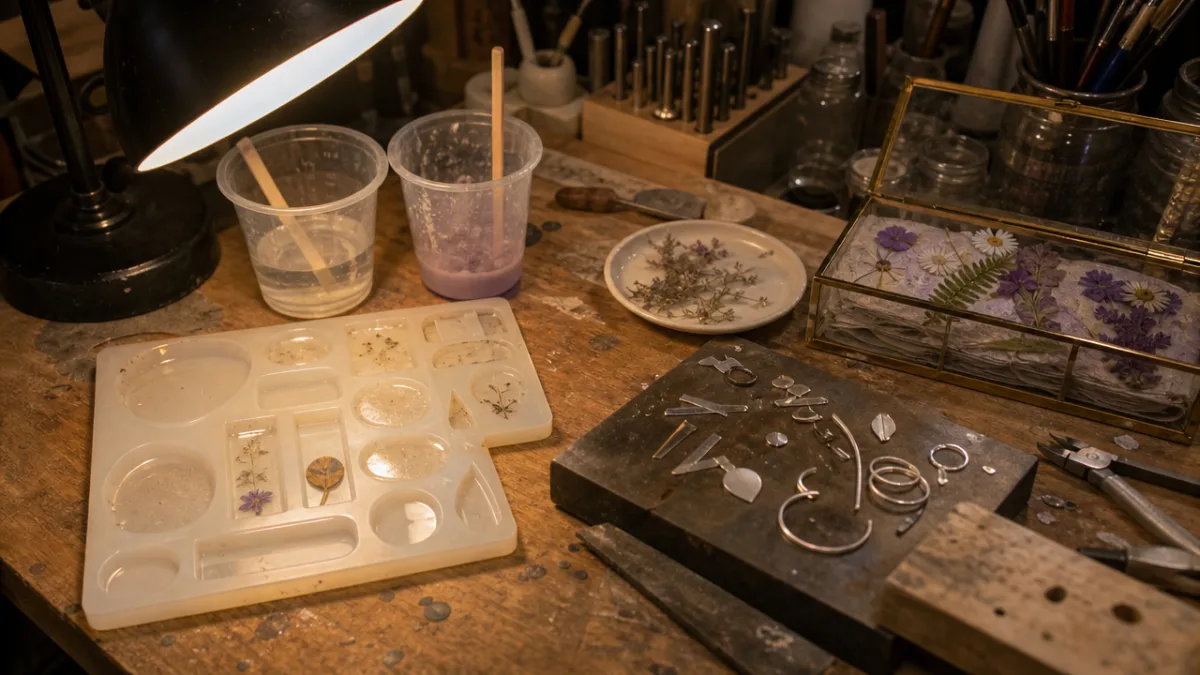
Beyond the resin itself, a functional pendant-making setup requires a few key items. Silicone pendant moulds are available in an enormous range of shapes — oval, teardrop, round, square, hexagonal — and silicone releases cured resin cleanly without any mould release agent. For pieces that incorporate spoon offcuts, look for moulds with enough depth to fully submerge the metal piece beneath a layer of resin while still leaving room for the flower layer above it. Graduated mixing cups with clearly marked measurements, wooden or silicone stirring sticks, a heat gun or butane torch for popping surface bubbles, nitrile gloves, and a dedicated work surface protected with a silicone mat or wax paper complete the essential kit.
UV-resistant resin formulations are worth the additional cost for jewellery that will be worn regularly and exposed to daylight. Standard epoxy resin yellows over time when exposed to UV light, which will muddy the colours of your pressed flowers and give the pendant an aged, amber cast that may not be what you intended. UV-stable resins resist this yellowing for significantly longer, keeping your flowers looking fresh and your silver looking bright. Some makers also add a tiny quantity of UV-stabilising additive to non-UV resins as a cost compromise, though results vary by brand.
The Pouring Process: Layering Metal and Botanicals
The key to a successful layered resin pendant is patience, and the most important patience of all is allowing each layer to reach a gel stage before adding the next. If you pour all your inclusions into a single large pour, the metal will sink to the bottom under its own weight, and the flower — which is almost weightless — will float upward toward the surface and may even break through and sit partially exposed on top. Layered pouring solves both problems elegantly and gives you far more creative control over the composition of each pendant.
Begin with what will become the back of your pendant — the first pour goes into the bottom of the mould, which will end up as the face of the piece when you demould. Mix a small quantity of resin according to the manufacturer’s instructions, stirring slowly and thoroughly for at least two minutes to avoid introducing excess bubbles, then pour a thin base layer of roughly two to three millimetres into each mould cavity. Use a toothpick to pop any surface bubbles immediately, or pass the flame of a butane torch briefly across the surface from a distance of about ten centimetres. Allow this layer to cure to a gel — firm but still slightly tacky — before proceeding, which typically takes two to four hours depending on your resin brand and ambient temperature.
Once the base layer has gelled, place your spoon ring offcut face-down into the mould, pressing it gently into the tacky surface. The tackiness will grip the metal piece and hold it in position during the next pour. Mix a second small batch of resin and pour carefully over and around the metal piece, filling the mould to about halfway. Again, pop bubbles, and allow this layer to gel before adding the flower. The flower goes in next — position it with a toothpick while the resin is still liquid, then add a final thin top layer to seal everything in. Three to four layers in total is standard for a pendant of this type, resulting in a piece typically eight to twelve millimetres deep with the metal and botanical clearly visible at different depths.
Demoulding, Sanding, and Polishing
Most jewellery-grade epoxy resins reach full hardness within 24 to 72 hours at room temperature, though the manufacturer’s instructions will specify the cure time for your particular product. Resist the temptation to demould early: partially cured resin is soft enough to dent or scratch permanently, and it will continue to shrink slightly as it finishes curing, which can cause the surface to warp. When the recommended cure time has passed, flex the silicone mould gently from all sides before pushing the pendant out from behind. Good silicone moulds release cleanly without tools, and the resin surface should be smooth and clear where it was in contact with the mould.
Freshly demoulded pendants almost always have sharp edges around the perimeter where the resin met the top of the mould, and may have a slightly matte or uneven top surface from exposure to air during curing. This is entirely normal and is addressed through wet sanding. Begin with 400-grit wet-and-dry sandpaper used with water, working in small circular motions around the edges and across the top surface. Progress through 800, 1000, 1500, and 2000 grit in sequence, rinsing between each stage. The pendant will look increasingly scratched and cloudy as you sand — this is also normal. The clarity returns in the polishing stage.
Polishing is where the transformation happens, and it is deeply satisfying. After the final sanding stage, use a resin polishing compound or a plastic polish such as Novus Plastic Polish on a soft cloth, buffing in small circular motions until the surface becomes clear and glossy. For pendants with a metal offcut component, the polishing process will also brighten any exposed silver at the edges of the piece, creating a natural visual connection between the metal in the resin and the metal bail or jump ring you will add to hang the pendant. A UV-curing top coat applied after polishing provides an extra layer of protection and brings the surface to a glass-like clarity that makes the flower and metal inclusions appear to float inside the piece.
Adding Findings and Finishing Your Pendant for Wear
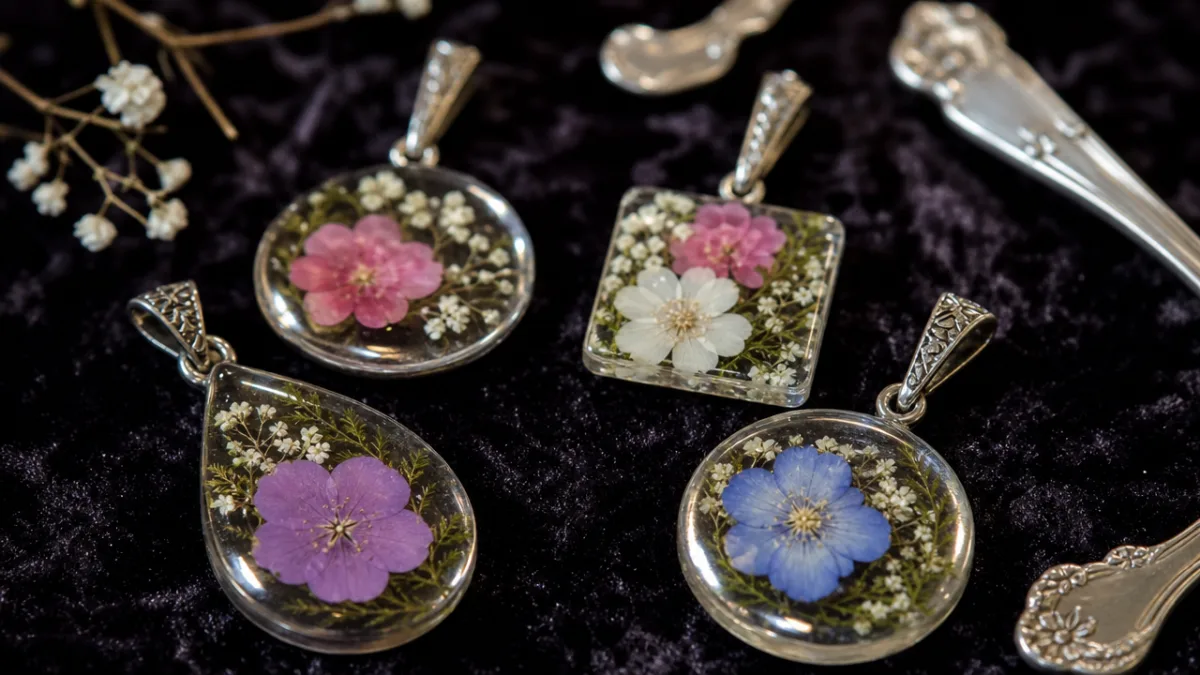
A beautiful resin pendant is only wearable once you have added the hardware that allows it to hang from a chain or cord. The most common approach is to drill a small hole through the top of the pendant using a 1mm or 1.5mm drill bit designed for use with resin or plastic, then thread a jump ring through the hole and close it with flat-nose pliers. Drilling resin requires a slow speed and a gentle touch — excessive heat from a fast drill bit can melt or crack the resin around the hole. Some makers prefer to add a pendant bail by gluing a flat-pad bail directly to the back of the piece with strong two-part adhesive, which avoids drilling entirely and is a good option for thinner or more delicate pendants.
Jump rings and bails for resin pendants should be chosen to complement the character of the spoon ring offcut inside the piece. If your offcut is sterling silver, sterling or fine silver findings are the obvious choice and will give the piece a cohesive, precious feel. If your offcut is silver-plated base metal, silver-plated brass findings are an affordable and perfectly appropriate match. Gold-filled or gold-plated findings can create a beautiful mixed-metal contrast if the pendant is intended as a deliberate two-tone piece. The finding size matters too: a large, heavy pendant made from a substantial spoon bowl offcut needs a bail rated to carry the weight securely, while a tiny pendant made from a handle sliver can be hung from a delicate 4mm jump ring.
Chain or cord selection completes the pendant and significantly affects how it presents when worn. Fine sterling cable chains in 45cm or 50cm lengths suit most pendant sizes and keep the focus on the resin piece itself. Brass or gold-fill chains warm the overall look and work particularly well when the flower inclusions are in amber, terracotta, or deep orange tones. For a more casual, bohemian feel, waxed cotton cord in natural linen or deep jewel tones can be knotted directly through the jump ring. Leather cord — either round or flat — gives a more rustic, artisan quality that suits pendants with a heavily patterned or antique-looking spoon offcut. Whatever you choose, consider offering the pendant with a few cord or chain options if you are making pieces to sell, since buyers’ preferences vary widely.
Selling, Photographing, and Describing Your Work
Resin flower pendants made from spoon ring offcuts occupy a genuinely compelling niche in the handmade jewellery market, and the story behind each piece is a significant part of its appeal to buyers. When writing listings for platforms such as Etsy, Folksy, or your own website, lean into the narrative: where did the spoon come from? What pattern does it carry? What flower is preserved inside, and where was it grown or foraged? Buyers of handmade jewellery are often specifically seeking pieces with provenance and personality, and a well-told origin story consistently outperforms generic product descriptions in both engagement and conversion.
Photography for resin jewellery presents specific challenges. The transparency and reflectivity of resin means that background colours and light sources show up clearly inside the piece itself, which can either be a feature or a problem depending on your setup. Natural daylight on an overcast day — which provides soft, even, shadow-free illumination — is ideal for showing the true colour and clarity of the resin without hotspots. A white or very pale neutral background keeps reflected colour out of the piece. For detail shots that show the spoon offcut and the flower clearly, a 50mm macro lens or a phone with a dedicated macro mode will bring the inclusions into sharp focus. Take at least one image showing the pendant worn on skin, since scale and wearability are difficult to judge from flat lay shots alone.
Pricing handmade resin jewellery that incorporates metalwork offcuts is a common challenge for makers transitioning from gifting to selling. A useful baseline is to calculate your material costs (resin, mould amortisation, findings, chain, packaging), multiply by three to cover overheads and profit margin, then add an honest hourly rate for your labour time. For a pendant that takes two to three hours of active working time across its multiple pour stages — not counting curing waits — plus additional time for sanding, polishing, and finishing, this calculation typically yields a retail price in the range that reflects the genuine skill and time involved. Underpricing handmade jewellery is extremely common and ultimately unsustainable; buyers who value handmade work will pay appropriately when the quality and story are clearly communicated.








What do you think?
It is nice to know your opinion. Leave a comment.