










Alcohol Ink Dyed Candles: A Complete Tutorial Guide
Introduction to Alcohol Ink Candle Dyeing
If you’ve been looking for a craft that feels genuinely exciting from the very first try, alcohol ink candle dyeing might be exactly what you’ve been missing. It’s one of those techniques that works just as well for total beginners as it does for experienced makers, and the results are honestly kind of jaw-dropping. The best part? You don’t have to make candles from scratch. You just pick up some plain white or ivory pillar candles from your local craft store, and you’re already halfway there. Every finished piece ends up completely unique — all swirling color and depth that looks like something you’d find in a boutique shop.
What makes alcohol inks so fun to work with is how unpredictable they are — in the best possible way. These inks were originally made for non-porous surfaces, and they’re highly pigmented, fast-drying, and translucent. When they hit the waxy surface of a candle, they spread and bleed and blend into each other in ways you can’t fully control, which is actually the whole point. The results look organic and layered, almost like watercolor, with a depth you just can’t get from other coloring methods.
Whether you’re after a relaxing weekend project, a thoughtful handmade gift, or just a fresh way to add some personality to your home, this craft delivers. The supplies are affordable, the cleanup isn’t bad, and the learning curve is gentle. Seriously — even your very first attempt is likely to turn out something you’ll actually want to display, which is a pretty rare thing in the crafting world and a big reason people get hooked on this technique.
Materials and Tools You Will Need
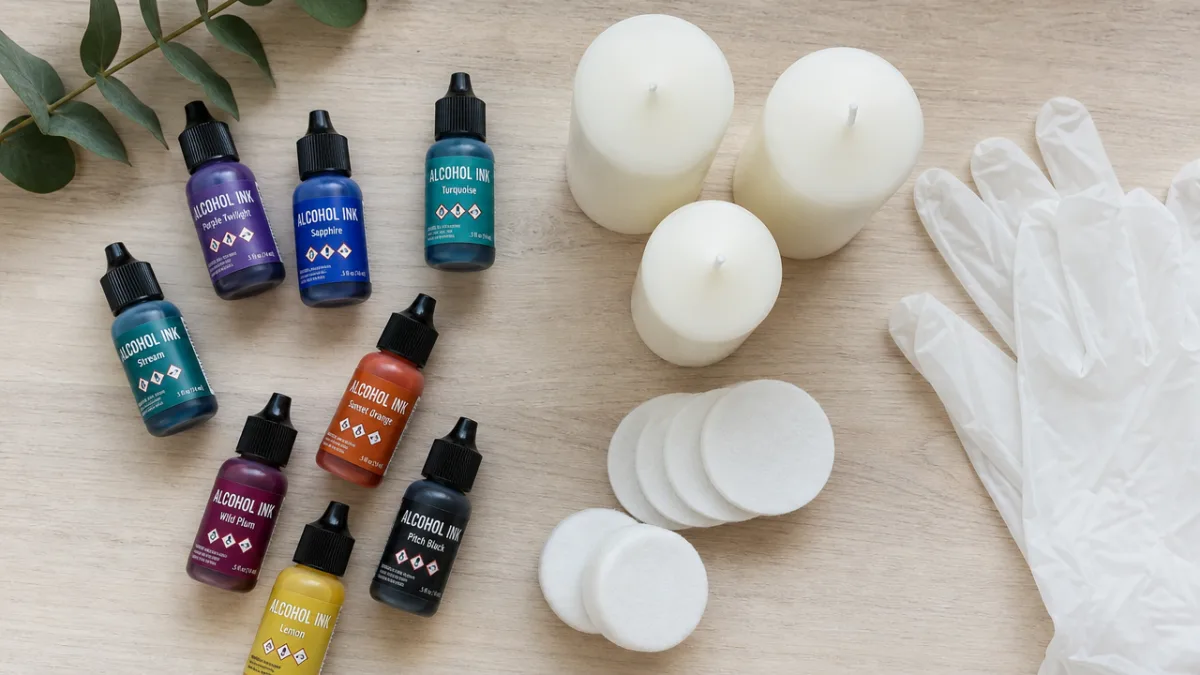
Getting your supplies together before you dive in makes a real difference here. The star of the show is, obviously, the candle itself. Plain white pillar candles are your best bet because their smooth, pale surface lets the ink colors really pop. Look for ones without embossing or texture — uneven surfaces can make the ink pool in weird places or run unevenly. Having a few different heights and diameters on hand gives you more to play with as you experiment.
For the inks, most craft stores carry brands like Ranger Adirondack, Pinata, or Tim Holtz, and the color range is huge — from rich jewel tones to soft pastels. For your first project, grabbing two or three colors that work well together is a great way to see how they interact. You’ll also want blending solution (sometimes called alcohol ink blending medium), which thins the ink, slows it down a little, and helps it flow more freely across the surface. It’s not strictly required, but it makes a noticeable difference.
Beyond the inks and candles, here’s what you’ll want to have ready before you open a single bottle:
- Plain white or ivory pillar candles in your preferred size
- Alcohol inks in two to four coordinating colors
- Alcohol ink blending solution or 91% isopropyl alcohol
- Latex or nitrile gloves to protect your hands from staining
- A protected work surface such as a silicone mat or wax paper
- Cotton balls, felt pieces, or foam applicator pads
- Paper towels for quick cleanup and dabbing
- A heat gun or hair dryer set to low heat (optional, for blending effects)
Having everything laid out before you start is really important with alcohol inks because they dry fast — you’ll want to move with confidence once things get going. Cover your work surface generously, since ink that gets on wood or fabric is basically there to stay. It’s also worth cracking a window or working somewhere with decent airflow, because the alcohol fumes can build up quickly, especially once you’ve got multiple bottles open at once.
Preparing Your Workspace and Candles
A little prep work goes a long way with this craft — it’s honestly one of those things that separates a smooth, enjoyable session from a stressful one. Start by setting up somewhere comfortable, well-lit, and well-protected. Lay down several layers of wax paper or a big silicone mat to catch drips, and keep paper towels close by. Alcohol ink can permanently stain almost any porous surface, so it’s really worth spending a few extra minutes making sure your table and clothing are covered before anything gets opened.
Once your space is set up, give your candles a quick wipe-down with a dry cloth to get rid of any dust or residue from packaging. Some people like to run a hair dryer on the lowest setting over the candle surface for a moment before applying ink — a slightly warm wax surface can help the ink spread a little more smoothly. Just be careful not to overdo it. Too much heat will soften the wax and cause the candle to lose its shape before you’ve even started.
Get your gloves on before you open anything, and think about throwing on an apron or an old shirt you don’t mind ruining. Keeping a small cup of isopropyl alcohol nearby is also a smart move — you can use it to rinse off applicators between colors and to fix small mistakes before they fully set. Once all of that is sorted, you’re genuinely ready for the fun part: putting color on the candle and watching what happens.
Step-by-Step Application Techniques
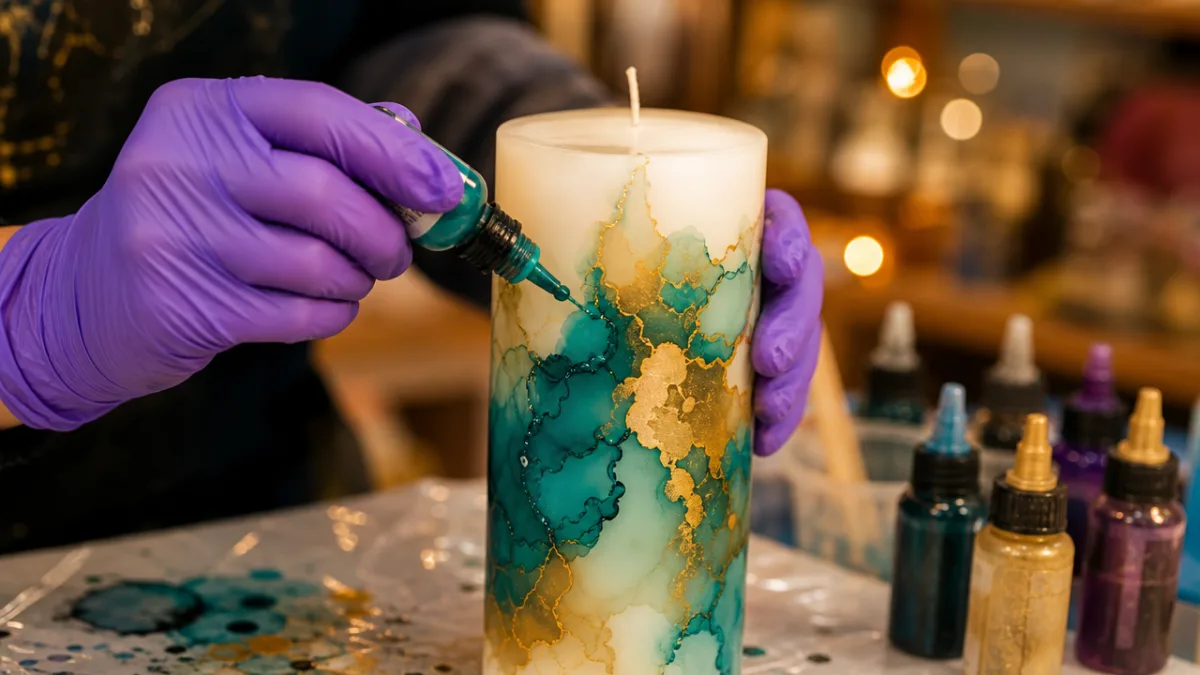
There are several ways to apply alcohol ink to candles, and each one gives you a pretty different look. The easiest starting point for beginners is the drip method — you just hold the candle upright and let drops fall from the bottle onto the top edge, then let gravity do the work as the ink runs down the sides. You get these gorgeous vertical streaks that bleed into each other wherever colors meet, almost like poured watercolor. Work quickly and rotate the candle a bit as you go so the coverage wraps all the way around.
If you want a bit more control over where the color lands, the applicator pad method is your friend. Dip a small piece of felt or a foam pad into your ink and press it against the candle, dabbing and dragging to build up color. You can overlap colors while they’re still wet to blend them, or wait for one to dry a bit before adding the next for a more layered look. This approach works really well for gradient or ombre effects where you want the colors to shift gradually from one end of the candle to the other.
The swirl or marbling technique is probably the most dramatic of the bunch and honestly one of the most satisfying to do. Apply a few colors close together on the surface, then use a cotton ball lightly dampened with blending solution to swirl them around in gentle circular or figure-eight motions. The result looks incredibly intricate and artsy, but it comes together faster than you’d expect. The main thing to watch out for is overworking it — too much blending and the colors start to muddy together rather than staying distinct.
As you get more comfortable, here are a few more techniques worth trying:
- Stippling: Dab a crumpled piece of plastic wrap or tissue over wet ink to create organic, cellular textures across the candle’s surface.
- Layering: Allow the first layer of ink to dry completely, then add a second application in a contrasting or complementary color for increased depth and richness.
- Salt technique: Sprinkle fine sea salt over wet ink to create starbursts and crystalline patterns as the salt absorbs the pigment.
- Resist method: Apply petroleum jelly to areas of the candle before inking to create white or natural-wax patterns and designs.
Color Theory and Design Inspiration
You don’t need an art degree to make beautiful candles, but knowing a few basics about color goes a long way. Colors that sit next to each other on the color wheel — called analogous colors — blend together naturally and almost never produce ugly results. Think blue and teal, or orange and red. These combinations are safe bets when you’re just getting started and still figuring out how the inks behave on wax.
Complementary colors are the ones sitting directly across from each other on the wheel, like purple and yellow or blue and orange. They create bold contrast and a lot of visual energy when placed side by side. They can get a little muddy where they overlap, but experienced crafters actually use that muddiness on purpose to add depth. If you want your candle to be a real showstopper, a well-executed complementary palette will absolutely deliver.
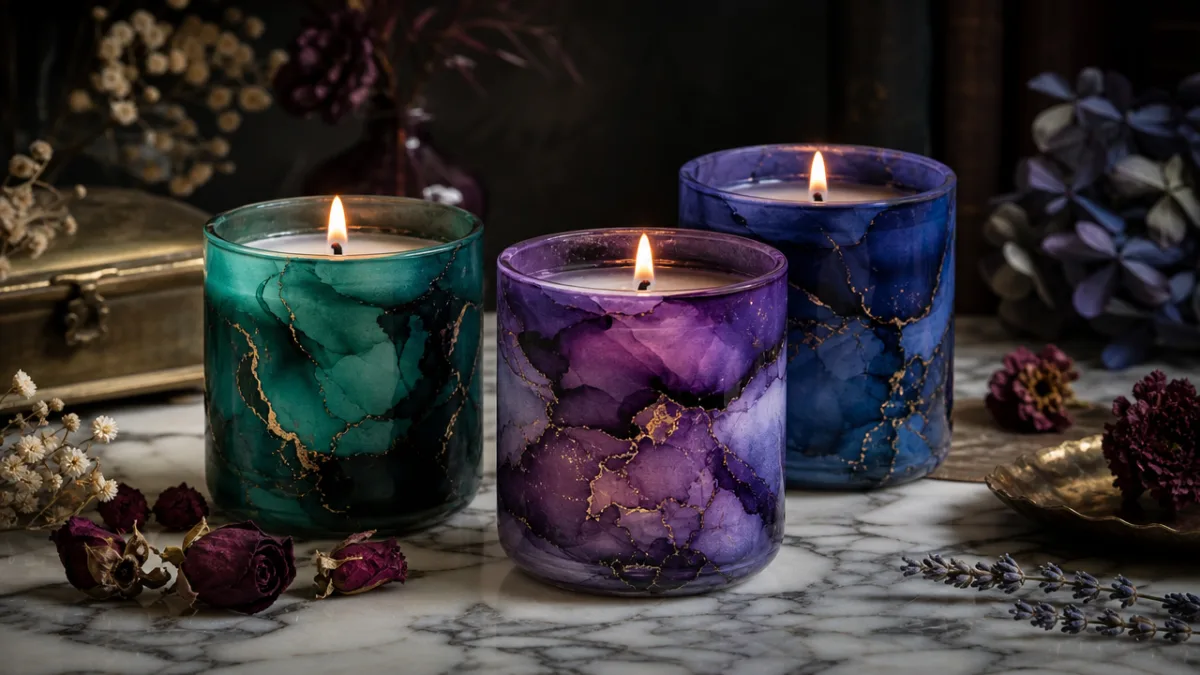
For design ideas, nature is pretty much an inexhaustible resource. A stormy ocean look works beautifully with navy, teal, and grey with a touch of white blending solution. Burnt orange, deep red, and warm gold together evoke a desert sunset in the most satisfying way. Gemstone-inspired candles have gotten really popular lately — deep emerald, sapphire, or amethyst with a hint of gold metallic ink gives them this luxurious, elegant feel that makes them genuinely impressive as gifts. Sunrises, forests, flowers, minerals — all of it translates surprisingly well to a candle surface.
Seasonal themes are another great way to guide your color choices and give your candles a sense of occasion. Here are a few palette ideas to get you thinking:
- Spring: Soft lavender, blush pink, mint green, and pale yellow for a fresh, botanical feel
- Summer: Vibrant turquoise, coral, sunshine yellow, and bright white for a coastal or tropical vibe
- Autumn: Deep burnt orange, russet red, forest green, and warm brown for a cozy, harvest aesthetic
- Winter: Icy blue, silver, deep navy, and crisp white with gold accents for an elegant, wintry look
Finishing, Sealing, and Display Tips
Once you’re happy with how your candle looks, let it dry before you do anything else with it. Alcohol inks usually feel dry to the touch within five to fifteen minutes, but giving it a full hour before moving on to sealing or displaying is genuinely worth the patience. You want the ink fully cured and bonded to the wax surface so you’re not accidentally smearing your hard work.
A lot of people like to finish their candles with a thin coat of clear acrylic sealant spray to protect the design from smudging and scratching. If you go this route, stick with a matte or satin finish rather than glossy — high gloss tends to look plasticky and kind of kills the organic, handmade quality of the ink work. Spray from about twelve inches away in a thin, even coat, let it dry fully, and add a second coat if needed. Do this outside or in a very well-ventilated space and follow whatever safety instructions come on the can.
One thing worth knowing: alcohol ink candles are really best treated as decorative pieces rather than candles you actually burn. The ink sits on the outside of the wax rather than being blended through it, which means burning them could release smoke or fumes you don’t really want indoors. If you do want to burn yours, keep it short, trim the wick to a quarter inch before each use, and never walk away from a lit candle. Many people just display them as art objects and never light them at all, which honestly makes a lot of sense given how much effort goes into making them look good.
For display, grouping candles of different heights together creates a really lovely vignette on a mantel, shelf, or table. Pairing them with natural elements like dried botanicals, stones, or driftwood plays up their handmade, artisanal feel and makes the whole arrangement look intentional. And if you’re giving them as gifts, tucking them into a simple kraft paper box or wrapping them in clear cellophane tied with ribbon turns them into something that genuinely feels special — the kind of present that shows real thought and effort went into it.
Troubleshooting Common Issues
Even people who’ve been doing this for years run into hiccups, so knowing how to work through common problems will save you a lot of headaches. One of the most frequent ones is ink that beads up or pools on the surface instead of spreading out nicely. This usually means the wax has some kind of coating that’s repelling the liquid, or that you applied too much ink in one spot. Try hitting the area gently with a hair dryer on low — the warmth usually encourages the ink to flatten out and spread across the surface like it’s supposed to.
Another thing that trips people up is colors blending into a muddy brown or grey instead of the vibrant mix they were going for. This typically happens when complementary colors get overworked together while wet, or when too many colors pile up in the same spot without letting anything dry in between. If it happens to you, stop blending — keep going and you’ll only make it worse. Let it dry completely, then go over it with a fresh, bold color to pull the eye away from the muddy area and bring some life back into the design.
Ink drying too fast before you’ve had a chance to blend it is another common frustration, especially in warm or dry rooms. To buy yourself more working time, add a few extra drops of blending solution to your ink before you apply it, or mist the candle’s surface lightly with isopropyl alcohol to reactivate the ink and thin it slightly while you’re still working. If the ink is consistently drying faster than you can keep up with no matter what you do, try moving to a cooler space or tackling the candle in smaller sections rather than trying to cover the whole thing at once.
And if you finish a candle and just don’t love it? You don’t have to scrap it. Because the ink sits on the surface rather than soaking deep into the wax, you can often remove a lot of the color by buffing the candle gently with a cloth dampened in isopropyl alcohol. It won’t get it back to perfectly pristine, but it’ll get you close enough to start over with a new color scheme or try a different technique entirely. This works best when the ink hasn’t been sealed and hasn’t been sitting for too long, so keep it in mind early in the process if you sense things aren’t going the way you hoped.








What do you think?
It is nice to know your opinion. Leave a comment.