










DIY Steps and Stairs in a Sloping Garden: A Complete Guide to Transforming Your Landscape
Understanding the Challenge of Sloping Gardens
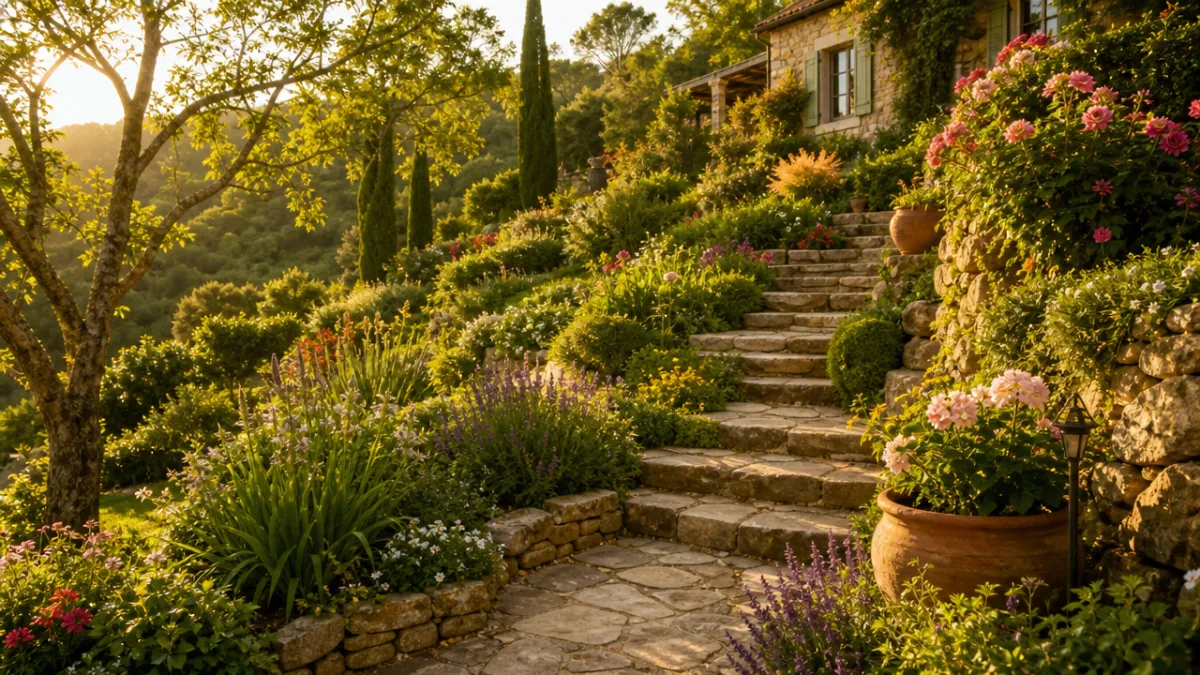
A sloping garden presents one of the most exciting and rewarding challenges any homeowner or garden enthusiast can face. Rather than viewing an uneven terrain as a problem to be solved, skilled gardeners have long understood that a slope is actually an opportunity — a chance to create dimension, drama, and functional beauty that a flat garden simply cannot achieve. The key lies in transforming that raw, difficult terrain into something both practical and visually stunning through the careful construction of steps and stairs.
When you walk through a garden that has been thoughtfully terraced and fitted with well-crafted steps, you immediately notice the difference. Movement through the space feels intentional and guided. Your eye is drawn upward or downward naturally, following pathways that invite exploration. This kind of design thinking is at the heart of every great sloping garden transformation, and it begins with understanding the fundamental relationship between gradient, safety, and aesthetics. Getting this balance right is what separates a truly impressive result from a merely functional one.
Beyond the visual appeal, there are deeply practical reasons to address a sloping garden with proper steps and stairways. Erosion control is a major concern on any incline — rainwater running unchecked down a slope will gradually strip away topsoil, damage plant roots, and create muddy, unstable patches. Well-constructed steps, particularly those paired with retaining structures, interrupt this flow and help anchor the landscape. They also make the garden far safer to navigate, especially for children, elderly visitors, and anyone carrying tools or gardening supplies across the property.
Planning Your Garden Steps: Design Principles and Layout
Before a single stone is placed or a spade breaks the earth, the planning stage is absolutely critical to the success of any garden stairway project. You need to begin by carefully assessing the total rise and run of your slope — that is, how high it climbs and over what horizontal distance. These two measurements will determine everything from the number of steps required to the ideal depth of each tread. As a general rule of thumb borrowed from architectural practice, the sum of one riser height plus one tread depth should equal between 45 and 60 centimeters for comfortable outdoor walking.
The materials you choose at this planning stage will dramatically influence both the look and the longevity of your finished steps. Natural stone such as sandstone, limestone, or slate offers a timeless, organic appearance that blends beautifully into garden settings. Reclaimed railway sleepers have become enormously popular for their rustic charm and their impressive structural strength when properly treated and anchored. Poured concrete, though less glamorous, provides unmatched durability and can be topped with pavers, gravel, or even mosaic tiles to achieve almost any aesthetic you desire. Brick remains a classic choice that suits formal garden styles particularly well.
Sketching out a detailed plan on paper — or using one of the many available garden design apps — before you begin will save you enormous time, money, and frustration. Mark out the line of your proposed stairway with garden hose or string pegs first, walking the route yourself to test whether it feels natural. Consider how the steps will connect to existing paths, lawn areas, patios, or planting beds. Think about drainage from the very beginning, since water management is one of the most common areas where DIY garden steps fail. A slight forward pitch on each tread, just a degree or two, will allow rainwater to drain away from the stairway rather than pooling on the surface.
Essential Tools and Materials for the DIY Builder
Equipping yourself with the right tools before you begin is one of the most important investments you can make in this kind of project. A quality spade and mattock are your primary earthmoving tools, and spending a little more for well-balanced, durable versions will pay dividends across what can be several days of physical work. A spirit level is absolutely non-negotiable — without it, you cannot ensure that your steps are safe and flat. A rubber mallet, a bolster chisel, and a club hammer will be needed for cutting and shaping stone or brick to fit. For larger projects involving concrete, a hired concrete mixer will save your arms and your back.
The materials list for a typical natural stone step project will include the following essentials that every builder should source before beginning work:
- Flat-topped stones or slabs for the treads, each at least 40mm thick for adequate strength
- Hardcore or compacted gravel base material for the foundation of each step
- Sharp sand and cement for the mortar mix, typically in a 4:1 ratio
- Weed-suppressing membrane to lay beneath the base layer
- Landscape pins or pegs to hold membrane and guide string lines
- Safety equipment including gloves, knee pads, and protective eyewear
- A long straight edge or timber board for checking level across treads
Safety during construction is something many enthusiastic DIYers underestimate until an injury forces them to reconsider. Moving large stones and heavy sleepers puts enormous strain on the lower back, and the risk of dropping heavy material on hands or feet is very real. Always lift with a bent knee and straight back, and never attempt to manoeuvre heavy stones alone when a second pair of hands would make the task both easier and safer. Wearing solid boots with steel toecaps is highly recommended throughout this kind of project. It is also worth checking with your local council whether any permits are required for significant landscaping work, as regulations vary widely by region.
Step-by-Step Construction Techniques
The foundation is the most important element of any garden step, and it is the part most likely to be rushed by impatient builders eager to see visible progress. Begin by excavating the slope to create a series of stepped platforms, each representing the position of one finished step. The depth of each excavation should account for your hardcore base layer, which should be a minimum of 100mm deep and ideally 150mm for heavier stone. Compact this base layer thoroughly using a hand tamper or hired plate compactor — any softness at this stage will result in sinking and shifting once the steps are in use and exposed to weather cycles.
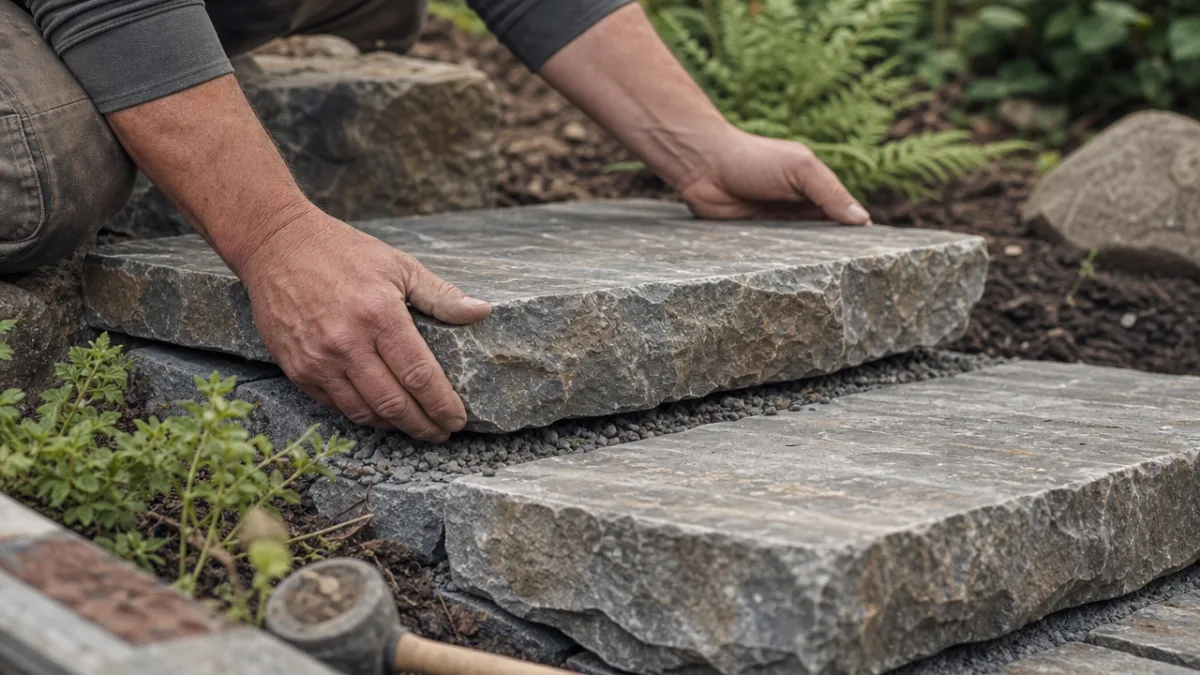
With your base prepared, the first riser stone or sleeper is set in position and bedded into a firm mortar mix. This first riser is the most critical of all, as everything above it will build upon its level and position. Use your spirit level obsessively at this stage, checking front-to-back level, side-to-side level, and alignment with your string guidelines simultaneously. Once the riser is set and allowed to firm up slightly, the tread material is laid behind it and pressed firmly into a mortar bed, again checking for that slight forward drainage pitch. Working methodically upward, one step at a time, is the only correct approach — resist any temptation to leap ahead.
For gardeners working with railway sleepers rather than stone, the construction technique shares the same foundational principles but differs in some practical details. Sleepers are typically fixed using rebar or long steel pins driven through pre-drilled holes and deep into the ground behind the riser, providing remarkable stability even on steep slopes. The horizontal surface of a sleeper tread can be left natural for a rustic look, treated with decking oil for weather resistance, or fitted with anti-slip metal strips across its width — a strongly recommended addition for any steps that might become slippery when wet. Gaps between sleepers can be planted with creeping thyme, mind-your-own-business, or other low-growing plants for a beautifully soft, naturalistic finish.
Planting and Landscaping Around Your New Steps
The construction of your steps is only half of the story — how you plant and dress the surrounding landscape will determine whether your stairway looks like a finished, intentional design feature or an isolated construction project dropped into a garden. The most impressive garden step installations are those where the boundary between hard landscaping and soft planting is deliberately blurred. Allow creeping plants to spill over the edges of treads. Tuck ferns and shade-loving perennials into the gaps between risers. Train climbing roses or jasmine along any retaining walls that accompany the stairway, and let nature do what it does best by softening every hard edge over time.
Choosing the right plants for the areas directly adjacent to your steps requires thinking about several factors simultaneously. You need plants that will not become so large that they obscure the steps and create a trip hazard. You want species that will tolerate the somewhat dry and free-draining conditions that typically exist along stone or concrete edges. And you should think about year-round interest, choosing a mix of evergreen structure plants and seasonal flowering species so that the stairway looks beautiful in every month of the year. Some particularly well-suited choices for this setting include the following plants that experienced gardeners return to again and again:
- Alchemilla mollis (Lady’s Mantle) — its frothy lime-green flowers and water-repelling leaves look spectacular tumbling over stone edges
- Thymus serpyllum (Creeping Thyme) — releases fragrance when brushed by passing feet and handles light foot traffic
- Erigeron karvinskianus (Mexican Fleabane) — self-seeds prolifically into cracks and crevices with charming small daisy flowers
- Festuca glauca (Blue Fescue) — creates striking architectural tufts of blue-grey foliage for modern or formal garden styles
- Heuchera varieties — provide bold foliage colour in shades from deep burgundy to caramel, thriving in partial shade beside steps
Lighting is another dimension of garden step design that is often left as an afterthought but can transform the entire feeling of the space after dark. Low-voltage LED step lights set flush into risers cast a warm, inviting glow that guides visitors safely up or down the stairway without the harsh intrusion of overhead spotlights. Solar-powered options have improved dramatically in recent years and require no wiring whatsoever, making them a genuinely practical choice for the DIY builder. String lights wound through adjacent planting or along retaining wall tops add a magical quality to evening garden entertaining that is almost impossible to achieve by any other means.
Maintenance, Safety Checks, and Long-Term Care
Even the most beautifully constructed garden steps will require regular maintenance to keep them safe and looking their best over the years and decades ahead. The most important seasonal task is checking for any movement, sinking, or heaving caused by frost, tree root growth, or soil settlement. Run your hand along each tread and apply gentle pressure to the risers — any wobble or flex should be addressed promptly before it develops into a more serious structural issue. Re-pointing mortar joints that have cracked or eroded is a straightforward task that makes a significant difference to both appearance and structural integrity.
Algae and moss growth on stone and concrete treads is the most common safety hazard in garden steps, particularly in shaded, damp positions. A seasonal scrub with a stiff brush and a diluted solution of patio cleaner is the most effective treatment, and applying a penetrating anti-slip sealant afterward will help resist future biological growth while also protecting the stone from staining. Avoid pressure washing stone steps too aggressively, as this can erode the surface and destroy the natural texture that provides grip. For wooden sleeper steps, check annually for any signs of rot at ground contact points and treat with appropriate timber preservative before deterioration progresses.
Seasonal planting maintenance around the steps is equally important for keeping the overall design looking intentional and well-managed rather than overgrown and neglected. Cut back any plants that are beginning to encroach onto the treads in a way that reduces visibility or creates a slip hazard. Divide and replant spreading perennials every two or three years to keep them vigorous and well-proportioned. Weed regularly around the step edges, since weeds growing beneath stones can gradually lift and shift even well-laid work. This consistent, modest investment of care and attention is what keeps a DIY garden stairway looking as impressive in its tenth year as it did on the day of completion — and that, ultimately, is the true mark of a skilled gardener’s work.

Inspiration and Skill: What Makes Garden Stair Building Truly Impressive
What separates a truly impressive garden stairway from a merely functional one is the accumulated evidence of careful thinking at every stage of the process. It is visible in the consistent spacing of risers, in the way each tread sits absolutely flat and true despite the challenges of working in natural materials on uneven ground. It shows in the choice of materials that complement the existing garden style rather than clashing with it, and in the small details — a chamfered edge on a stone tread, a perfectly pointed mortar joint, a riser faced with matching pebbles — that reveal a builder who was thinking about beauty as well as function from the very beginning.
The Pinterest and social media landscape is filled with extraordinary examples of DIY garden step projects that demonstrate just how high the amateur standard has risen in recent years. Homeowners with no formal training in landscaping or stonemasonry are producing work that rivals professional contractors, driven by the availability of online tutorials, the wealth of shared experience in gardening communities, and simply by the pride and patience they bring to working on their own outdoor spaces. These projects inspire countless others to take up the challenge themselves, creating a wonderful cycle of shared knowledge and raised ambition across the gardening community.
If you are standing at the bottom of your sloping garden feeling both excited and daunted by the prospect of this kind of project, the most important advice is simply to begin. Start with a small section. Build one or two steps, assess the result, and allow yourself to learn from the process before committing to the full stairway. Most gardeners who have completed projects like this will tell you that the skills required are genuinely accessible to any patient, physically capable adult willing to take the time to plan properly and work methodically. The satisfaction of walking up a stairway you built with your own hands, through a garden you have shaped and planted yourself, is a reward that no bought solution can ever quite replicate.








What do you think?
It is nice to know your opinion. Leave a comment.