










You’ve Got Mail: 17 DIYs for Super Stylish Stationery
The Timeless Art of Handcrafted Stationery
In an age dominated by digital communication, there is something profoundly special about receiving a handwritten letter or a beautifully crafted card. Handmade stationery carries with it a warmth and intentionality that no email or text message can replicate. When you take the time to create something with your own hands, you are sending a message within the message — one that says the recipient is worth your time, your creativity, and your care. This is precisely why the art of DIY stationery has experienced such a remarkable resurgence in recent years.
The beauty of making your own stationery is that it opens up an entire world of creative possibilities. You are no longer limited to the generic, mass-produced cards found at big-box stores. Instead, you can tailor every element — from the paper stock and ink color to the embellishments and envelope lining — to perfectly suit the occasion and the personality of the person you are writing to. This level of personalization transforms a simple piece of paper into a genuine keepsake that recipients often hold onto for years.
Getting started with DIY stationery does not require an art degree or a professional printing studio. Many of the most stunning results come from simple techniques that anyone can master with a little practice and the right materials. Whether you are a seasoned crafter or a complete beginner, the projects in this guide will walk you through seventeen inspiring ideas that range from beginner-friendly to impressively advanced, ensuring there is something wonderful for every skill level and every budget.
Gathering Your Essential Supplies and Tools
Before diving into any creative project, having the right materials on hand makes all the difference between a frustrating afternoon and a joyful, productive crafting session. For stationery making, the foundation of everything is quality paper. Look for cardstock in weights ranging from 80 lb to 110 lb for cards and notecards, as this gives your pieces a satisfying, substantial feel. For writing paper, a smooth 24 lb or 28 lb stock in a warm white or ivory tone feels luxurious beneath a pen and photographs beautifully. Specialty papers like vellum, handmade seed paper, or watercolor paper can add stunning texture and dimension to your projects.
Beyond paper, your toolkit should include a reliable bone folder for clean, crisp folds; a self-healing cutting mat paired with a sharp craft knife or paper trimmer for precise edges; and a variety of adhesives including a glue stick, double-sided tape, and a fine-tip glue pen for delicate work. Stamps and ink pads are endlessly versatile — a collection that includes at least one alphabet set, a few botanical motifs, and some geometric patterns will serve you across dozens of different stationery styles. Embossing powder and a heat tool can elevate stamped designs from flat to strikingly dimensional with just a little extra effort.
Do not overlook the importance of good writing instruments in your stationery journey. A set of fine-point black pens, a calligraphy pen with interchangeable nibs, and a set of watercolor brush pens will allow you to hand-letter addresses, write personal messages, and add painterly details to your creations. Washi tape, dried florals, metallic foil sheets, and twine are wonderful embellishment options to keep stocked in your crafting space. Once you have these basics assembled, you will find that the transition from one project to the next becomes seamless and spontaneous.
Classic Techniques Reimagined: Stamping, Embossing, and Letterpress Styles
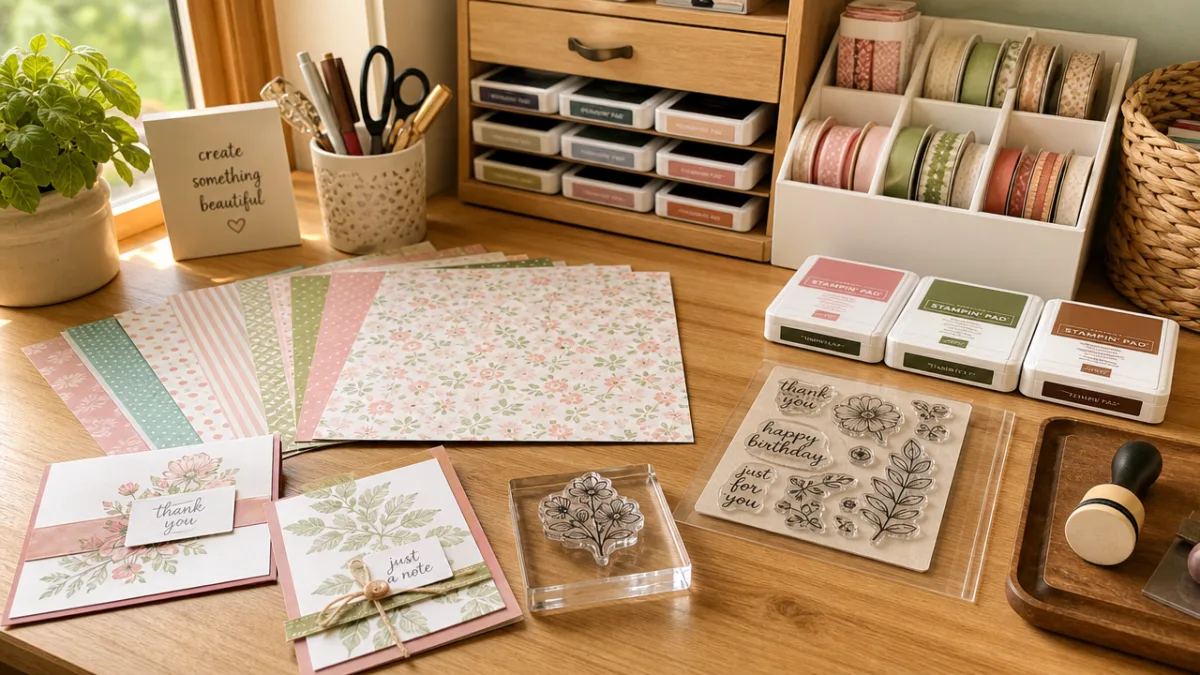
Stamping is one of the oldest and most accessible forms of paper decoration, and it has never gone out of style — because it works. The key to achieving a professional-looking stamp result at home lies in a few simple but important practices. Always ink your stamp evenly, pressing it firmly and straight down onto the paper without rocking it from side to side. Use a stamp positioner tool if you want to repeat a pattern with precision. Pair deep jewel-toned inks with ivory paper for a rich, traditional look, or use pastel inks on bright white cardstock for something modern and airy.
Embossing takes stamping to an entirely new dimension — quite literally. The technique involves stamping with a slow-drying embossing ink, coating the wet image with embossing powder, and then applying a heat gun until the powder melts and rises into a glossy, raised design. Gold and silver embossing powders on dark card stock create a stunning foil-like effect that looks far more expensive than it is. Clear embossing powder layered over a stamped watercolor wash creates a beautiful resist effect where the embossed design gleams through washes of color. This technique is particularly magical when used for botanical borders, monograms, or holiday designs.
For those craving the look of letterpress printing — that beloved deep impression that high-end wedding stationery studios charge a premium for — there are clever DIY workarounds. Using a dry embossing stylus and a light box or window, you can trace designs onto thick cardstock to create debossed impressions. Some crafters invest in an embossing machine like a Cricut or a Sizzix with compatible letterpress plates, which produces remarkably authentic results at home. Pair these impressed designs with a single color of ink hand-applied with a brayer for a result that closely mimics the real letterpress aesthetic at a fraction of the cost.
Hand Lettering and Calligraphy for Personalized Touches
Perhaps no skill elevates handmade stationery quite as dramatically as beautiful lettering. The good news is that hand lettering is genuinely learnable — even if you feel your everyday handwriting is unremarkable, consistent practice with the right tools can produce results that feel elegant and artful. Modern calligraphy, with its slightly irregular, expressive quality, has become enormously popular precisely because it is more forgiving than traditional pointed pen calligraphy. Begin with a brush pen such as the Tombow Fudenosuke or the Pentel Sign Pen Brush, and practice the basic strokes of thick downstrokes and thin upstrokes on a lined practice sheet.
Traditional pointed pen calligraphy, while requiring more patience and a slightly steeper initial learning curve, rewards the dedicated student with an incomparable refinement. You will need a straight or oblique pen holder, a flexible pointed nib such as the Nikko G or Brause Rose, and a bottle of ink. Sumi ink is reliable and flows beautifully; iron gall ink is archival and produces a rich, deep line that ages gracefully on paper. Learning to control the pressure you apply to the nib — varying it fluidly as you move through each letterform — is the central skill that transforms your strokes from stiff to graceful. Free practice worksheets are widely available online and can accelerate your progress significantly.
Even if you decide calligraphy is not for you, there are other ways to bring beautiful lettering to your stationery. Faux calligraphy, where you draw your letters first and then add a thick downstroke by hand, requires nothing more than a regular pen and looks wonderfully authentic. Digital lettering printed onto stationery is another legitimate and beautiful option — many designers create stunning letter art digitally and then print it onto quality paper for a polished, cohesive look. You might also consider rubber stamp alphabets for a consistent, retro-inspired aesthetic that works beautifully for address labels, envelope backs, and card interiors.

Seventeen DIY Stationery Projects to Try Right Now
Now that you have a solid grounding in materials and techniques, it is time to explore the full range of projects that can make up your stylish stationery collection. These seventeen ideas span a wide variety of styles, occasions, and difficulty levels, so you can build your skills progressively while always having something beautiful to send to the people you love. From quick-to-make everyday notecards to elaborate multi-piece letter sets, each project below has been chosen for its visual impact, its teachable technique, and its genuine usefulness in everyday correspondence.
The following projects are organized loosely from simpler to more involved, though every single one of them is achievable for a motivated beginner with the supplies outlined earlier in this guide. Do not be afraid to mix and match elements from different projects — for example, adding watercolor washes from Project 3 to the stamped botanicals of Project 1, or combining the wax seal technique from Project 12 with the linen-textured envelope of Project 9. The most original and striking stationery almost always comes from combining techniques in unexpected, personal ways that reflect your own aesthetic sensibility.
- Watercolor Wash Notecards: Paint loose, fluid washes of watercolor across blank white cardstock, let dry fully, and trim to notecard size. The organic blooms of color need no additional embellishment — simply add a single handwritten sentiment in the center for a result that feels like wearable art.
- Stamped Botanical Cards: Use a set of pressed flower and leaf stamps with rich forest green, terracotta, or navy ink to create layered botanical arrangements on ivory cardstock. Add a thin border with a fine-tip gold pen for a finished, editorial feel.
- Embossed Monogram Stationery Set: Create a personalized writing set by embossing a monogram letter onto the upper left corner of writing sheets and the back flap of coordinating envelopes. Gold or copper powder against deep charcoal paper looks especially sophisticated.
- Wax Seal Envelopes: Melt wax seal sticks or wax beads into a spoon, pour onto the envelope flap, and press your personalized brass seal into the wax for a closure that feels genuinely luxurious. Coordinate the wax color to the envelope for a cohesive, curated look.
- Linocut Printed Cards: Carve a simple design — a leaf, a geometric shape, a small animal — into a block of soft linoleum or a Speedball Speedy-Carve block. Roll printing ink over the surface and press carefully onto paper for a handmade print with tremendous character.
- Pressed Flower Cards: Sandwich fresh flowers and leaves between the pages of a heavy book for two to three weeks, then adhere the dried specimens to card fronts using a fine-tip glue pen. Seal with a coat of decoupage medium for durability.
- Marbled Paper Stationery: Float oil-based inks on a tray of water thickened with carrageenan, swirl into patterns, then lay your paper gently on the surface to transfer the design. Each sheet is entirely unique, making every piece of correspondence one of a kind.
- Kraft Paper and Twine Gift Tags: Cut tags from recycled kraft cardboard, punch a hole, thread with natural twine, and stamp or hand-letter your message. These are perfect for gift wrapping and bring a warm, artisanal quality to any package.
- Origami Envelope Fold: Transform a standard sheet of patterned paper into a self-sealing envelope using simple origami folds — no glue required. Use pages from vintage books, sheet music, or scrapbooking paper for envelopes with built-in visual interest.
- Watercolor Envelope Liners: Cut liner shapes from watercolor-printed paper or hand-painted sheets and adhere them inside white envelopes for a burst of color and surprise when the recipient opens their mail.
- Rubber Band Resist Cards: Wrap rubber bands around a brayer or cylindrical object, roll it across an ink pad, then over your cardstock to leave a graphic stripe-and-gap pattern that looks surprisingly designed and intentional.
- Chalkboard-Style Message Cards: Paint cardstock with black chalkboard paint, allow to dry, then write messages in white chalk marker or white gel pen. These double as reusable place cards at dinner parties or permanent keepsake cards when written with a permanent white pen.
- Foil Transfer Cards: Apply a reactive adhesive in your design to cardstock, allow to dry to a tacky consistency, then press metallic foil transfer sheets over the adhesive and burnish firmly before peeling back to reveal a gleaming foil image beneath.
- Vintage Postage Collage Stationery: Collect vintage stamps from estate sales, antique markets, or online sellers and arrange them in layered, overlapping compositions on card fronts or around envelope borders. Seal with a coat of Mod Podge for a finished, archival look.
- Vellum Overlay Cards: Layer a sheet of printed or stamped vellum over a contrasting color of cardstock and bind both layers together at the top with a mini brad, a piece of ribbon, or a wax seal. The translucency of the vellum creates a beautiful layered visual effect.
- Hand-Stitched Paper Cards: Use a pin or a thick needle to punch evenly spaced holes along a card front, then stitch through with embroidery floss in a simple running stitch, cross-stitch, or decorative pattern. The textile element on paper feels wonderfully unexpected and tactile.
- Custom Stamp Return Address Labels: Design a simple return address stamp with your name, address, and a small graphic, either through an online custom stamp retailer or by carving your own. Stamp it on the back flap of every envelope you send for an instantly cohesive, branded look.
Packaging, Gifting, and Sharing Your Stationery Creations
Once you have invested time and creativity into making beautiful stationery, the way you present and share it matters almost as much as the pieces themselves. Gifting a handmade stationery set is one of the most thoughtful and versatile presents you can give — it suits virtually everyone, from the colleague who loves to write thank-you notes to the friend who collects beautiful paper goods. Assemble a cohesive set by choosing a color palette or motif and carrying it through all the elements: the writing sheets, the notecards, the envelopes, the tags, and even the box or wrap you present them in.
A few simple packaging ideas can elevate your handmade stationery into a gift that feels genuinely professional. Stack writing sheets neatly and secure them with a band of coordinating washi tape or a length of satin ribbon. Tuck a set of cards and their matching envelopes into a glassine sleeve or a simple kraft paper pocket. Arrange the full collection in a shallow box lined with tissue paper and close it with a foil sticker seal or a handwritten tag. Adding a small luxury item — a beautiful pen, a stick of wax, a jar of calligraphy ink — completes the gift and hints at the enjoyment the recipient can have when they sit down to actually use your creations.
Do not underestimate the community aspect of DIY stationery. Platforms like Instagram and Pinterest are filled with vibrant, generous communities of paper crafters, calligraphers, and stationery enthusiasts who share tutorials, source recommendations, and creative inspiration freely. Joining a mail art exchange or a pen pal group is a wonderful way to practice your craft regularly while building genuine connections with like-minded people around the world. There is a particular joy in opening your mailbox to find a hand-addressed envelope with your name written in beautiful lettering — and an equally profound joy in knowing you are capable of creating that same experience for someone else.

Sustaining Your Stationery Practice and Finding Ongoing Inspiration
Like any creative practice, making stationery flourishes when it is nurtured consistently rather than pursued in intense but infrequent bursts. Consider setting up a small, dedicated crafting corner in your home where your supplies are organized, accessible, and visually appealing. When everything is out and ready to use, you are far more likely to sit down for even fifteen minutes of creative play on a Tuesday evening than if your materials are packed away in boxes in a closet. A pegboard with hooks for scissors and bone folders, a set of glass jars for pens and brushes, and a shallow drawer unit for paper and stamps creates a workspace that is both functional and inspiring.
Seasonal occasions provide a natural and motivating rhythm for your stationery practice. Autumn calls for rich, warm tones in burgundy, ochre, and forest green, with motifs of leaves, acorns, and harvest imagery. Winter brings the gorgeous drama of deep navy, forest, and crimson against gold and silver embossing. Spring stationery practically begs for soft florals, watercolor blooms, and the delicate pastel palette of new growth. Summer is perfect for bold, graphic designs, tropical prints, and the bright, saturated hues that photograph beautifully in natural light. Working with the seasons keeps your practice fresh and gives you a steady stream of recipients for your creations — holiday cards, birthday notes, and seasonal gifts throughout the year.
Finally, remember that the ultimate purpose of beautiful stationery is connection. In a world where communication has become faster and more frictionless than at any other point in human history, choosing to slow down and write a letter by hand is a quiet, powerful act of care. Every stamp you carve, every envelope you line, every letter you pen in careful calligraphy is a small but meaningful statement that the person receiving it is worth more than a reply-all email or a thumbs-up reaction. The art of handmade stationery is, at its heart, the art of showing up fully for the people who matter to you — and that is a practice well worth cultivating for a lifetime.








What do you think?
It is nice to know your opinion. Leave a comment.