










Free Jellycat Amigurumi Birthday Cake Crochet Pattern: Everything You Need to Know
Introduction to Jellycat-Inspired Amigurumi Crochet
If you’ve ever wandered into a gift shop or browsed a toy store and encountered those impossibly soft, charmingly quirky plush toys made by the British brand Jellycat, you already understand the magic they carry. Their whimsical designs — from bashful bunnies to smiling food items — have captured the hearts of children and adults alike for decades. Now, the world of crochet has caught up with this beloved aesthetic, giving crafters the tools to recreate that same charming energy in yarn form through the art of amigurumi.
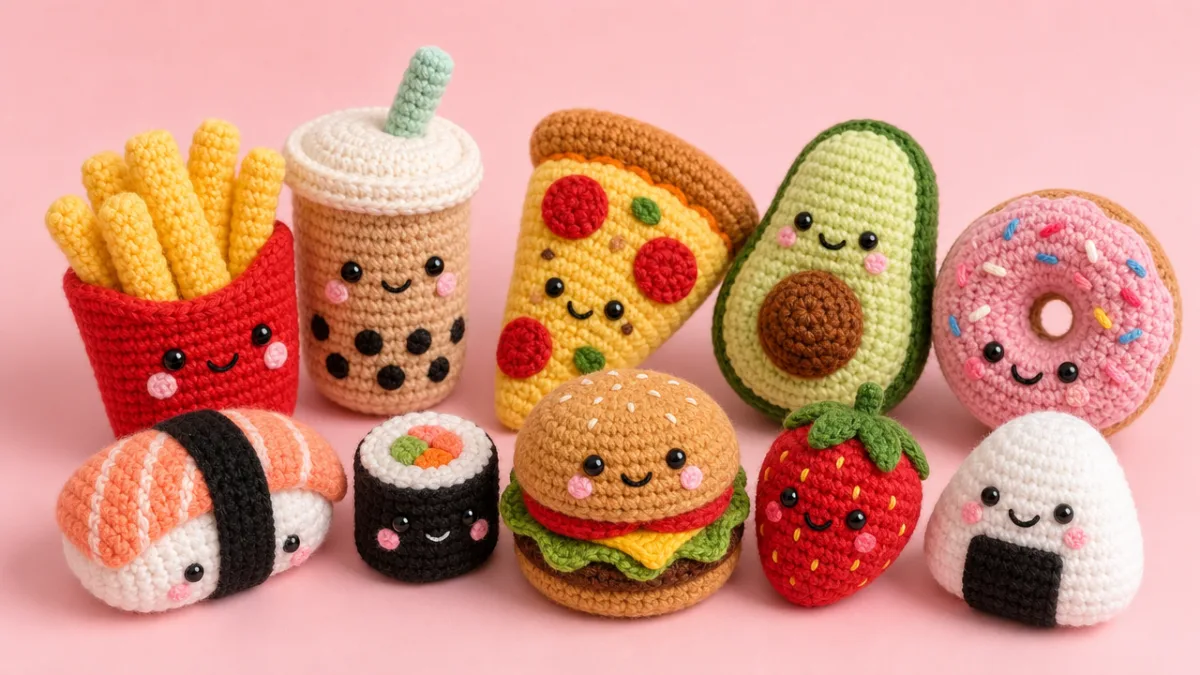
Amigurumi, the Japanese craft of knitting or crocheting small stuffed animals and characters, pairs beautifully with the Jellycat design philosophy. Both prioritize soft textures, exaggerated proportions, and an undeniable sense of whimsy that makes the finished object feel less like a toy and more like a companion. When you combine the two, you get something truly special: a handmade piece that carries all the warmth of a beloved brand but is infused with the personal love and effort of a crafter’s own two hands.
The Jellycat-inspired birthday cake amigurumi pattern is one of the most popular crossovers in this crafting niche, and for good reason. A birthday cake is already a symbol of joy, celebration, and sweetness — and when rendered in the soft, rounded, almost dreamlike Jellycat style, it becomes an absolutely irresistible object. Whether you’re making it as a gift, a nursery decoration, or simply for the joy of the craft itself, this project is one that delivers enormous satisfaction from start to finish.
Materials and Tools You Will Need
Before you dive into any crochet project, gathering the right materials is essential, and this birthday cake amigurumi is no exception. The hallmark of any Jellycat-inspired piece is its softness, so your yarn choice is arguably the most important decision you’ll make. Most crafters working in this style reach for chenille yarn or a velvet-texture yarn, which replicates that signature plush feel that Jellycat toys are so famous for. Brands like Bernat Blanket, Lion Brand Pound of Love, or any chunky chenille option tend to work beautifully for these projects.
In terms of colors, a birthday cake naturally lends itself to a cheerful, pastel-friendly palette. Many free patterns in this style suggest a soft white or cream for the cake layers, a pale blush pink or lavender for the frosting drip effect, and a bright pop of color — think canary yellow or coral — for the candles and any decorative details. Of course, the beauty of making something yourself is that you can customize the colorway entirely to suit a recipient’s favorite shades or a party’s specific theme.
Beyond yarn, you’ll need a crochet hook sized appropriately for your chosen yarn — typically a 5mm to 6mm hook works well for chunky chenille. You’ll also need polyester fiberfill stuffing to give your cake its satisfying, squishy shape, safety eyes in your preferred size (usually 15mm to 18mm for that classic wide-eyed Jellycat look), stitch markers to keep your rounds organized, a yarn needle for seaming and finishing, and scissors. Optional but helpful additions include wire armature for candles if you want them to stand upright, and a little blush powder for adding rosy cheeks to the cake’s face.
- Chenille or velvet-texture yarn in cake, frosting, and candle colors
- 5mm or 6mm crochet hook
- Polyester fiberfill stuffing
- Safety eyes, 15mm to 18mm
- Stitch markers
- Yarn needle and scissors
- Optional: blush powder for cheek details
One important note for beginners: chenille yarn, while gorgeous, can be tricky to work with because it’s harder to see your stitches clearly. Good lighting and patience are your best friends here. Taking the time to count your stitches carefully at the end of each round will save you considerable frustration later. Some crafters like to use a stitch counter app on their phone to stay on track, which can be a game changer when working with this type of yarn.
Understanding the Pattern Structure
The anatomy of a Jellycat-inspired birthday cake amigurumi typically involves several distinct crocheted components that are assembled together at the end. The main body of the cake — usually designed to look like a two or three-layer round cake — forms the largest and most central piece. This is worked in continuous rounds from the bottom up, with increases and decreases carefully calculated to give the piece its characteristic cylindrical, slightly chubby shape that feels so satisfyingly squishy in the hand.
The frosting layer is often worked separately or as an added element using a technique that creates that iconic dripping effect seen on so many Jellycat food plushies. This typically involves crocheting a scalloped or undulating edge in your frosting color and either attaching it as a band around the top of the cake body or working it directly into the piece during construction. The drips themselves might be small elongated slip-stitch chains attached at intervals around the cake’s sides, creating a wonderfully realistic illusion of frosting cascading down.
Facial features are what truly transform this object from a simple food-shaped pillow into a Jellycat-inspired character. The safety eyes are positioned with care — usually slightly lower on the face than you might initially expect, which is a key trick for achieving that Jellycat aesthetic of large, expressive eyes set in a round, friendly face. A small embroidered or appliquéd smile in a simple curved line completes the expression. Some patterns also include a tiny nose detail and those signature rosy cheeks, achieved either with embroidery or a light dusting of cosmetic blush.
The candles are typically crocheted as small separate tubes, stuffed firmly so they stand upright, and may include a tiny flame tip in yellow or orange. Sprinkles and other decorative details can be added using French knot embroidery, tiny felt pieces, or even small buttons if the toy is intended for an adult rather than a young child. These finishing touches take relatively little time but make an enormous difference to the final result, elevating the piece from charming to truly professional-looking.
Step-by-Step Overview of the Crochet Process
Beginning with a magic ring — also called a magic circle — is standard practice in amigurumi construction, as it allows you to start your rounds without leaving a visible hole at the center of the piece. For the main cake body, you’ll typically start with six single crochet stitches into the magic ring, then increase steadily across subsequent rounds to build out the diameter of the cake base. The exact number of rounds and increase intervals will depend on the specific free pattern you’re following, but most aim for a finished diameter of roughly four to six inches for a satisfying, palm-sized result.
Once you’ve reached your desired diameter for the base, you’ll work even rounds — meaning no increases or decreases — to build up the height of the cake body. This is where you can really feel the piece taking shape, and it’s one of the most meditative parts of the process. The chenille yarn slides through your fingers with a distinctive softness, and the fabric that forms has a beautiful drape and density that will hold its shape wonderfully once stuffed. Before closing up the body completely, insert your safety eyes, add your fiberfill stuffing, and use your yarn needle to close the final opening.
The frosting top is worked separately or added as a finishing layer, and attaching it neatly is one of the trickier parts of the assembly. Using your yarn needle and a length of matching frosting-colored yarn, whipstitch the frosting piece to the top of the cake body, taking care to maintain even tension throughout so the piece lies flat and doesn’t pucker. The drip effect strips are then attached one by one around the circumference of the top edge, spacing them evenly for the most realistic and visually pleasing look.
- Create the magic ring and work the base increases for the cake body
- Work even rounds to build the cylinder height of the cake
- Insert safety eyes and stuff firmly before closing
- Crochet and attach the frosting top layer and drip details
- Make and attach candles with flame tips
- Embroider the smile and add blush cheek details
- Add any additional sprinkle or decorative embellishments
Finishing the piece involves weaving in all your yarn ends securely — a step that inexperienced crafters sometimes rush, but which is genuinely important for the longevity of the piece. With chenille yarn especially, loose ends can work themselves free over time, so taking a few extra minutes to weave each tail in multiple directions through the surrounding stitches is well worth the effort. Once all ends are secure, give the finished cake a gentle squeeze and reshape it with your hands if necessary. The beauty of fiberfill is that it allows for minor reshaping even after the piece is complete.
Tips for Achieving the Authentic Jellycat Aesthetic
One of the most common questions crafters ask when attempting a Jellycat-inspired project for the first time is: what is the secret to that unmistakable look? The answer lies in a combination of factors, but yarn choice is undeniably the foundation. True chenille or velvet yarn has a pile — a raised, fibrous texture — that catches the light softly and feels impossibly plush against the skin. Substituting a standard acrylic yarn will produce a technically competent amigurumi but one that simply doesn’t have that signature Jellycat softness and sheen.
Gauge — the density of your stitches relative to the size of your hook — also plays a significant role. Amigurumi generally benefits from a tighter gauge than you might use for, say, a blanket or a garment, because tighter stitches prevent the stuffing from showing through and give the finished piece a more solid, structured feel. Most amigurumi patterns recommend going down one or even two hook sizes from what the yarn label suggests, and this is especially good advice for Jellycat-style work where a smooth, even fabric surface is part of the visual appeal.
The placement and choice of safety eyes deserves special attention. Jellycat’s signature look involves eyes that are set wide apart and relatively low on the face, creating a look of innocent, slightly bewildered joy that is completely irresistible. Before permanently setting your safety eyes — which involves pushing the post through the fabric and clicking the washer into place on the inside, a process that is essentially irreversible — use pins or small stickers to experiment with placement. Moving them even a few stitches in any direction changes the expression dramatically, so this trial period is time very well spent.
Stuffing technique matters more than most beginners realize. Overstuffed amigurumi look tight and lumpy, with stitches stretched to reveal the white stuffing beneath; understuffed pieces are floppy and shapeless. The sweet spot is a firm but yielding stuffing that allows the piece to hold its shape while still having that satisfying give when squeezed. For a birthday cake, where you want a convincing cylindrical silhouette, stuffing from the base up in gradual layers rather than pushing a large clump in all at once gives far more even and pleasing results.
Customization Ideas and Creative Variations
One of the greatest joys of working from a free base pattern rather than purchasing a specific commercial product is the endless room for personalization. The Jellycat birthday cake pattern is a wonderful template to adapt for different occasions and recipients. For a baby shower gift, consider working the entire piece in soft neutrals — ivory, pale sage, and the softest blush — and omitting the face entirely for a more abstract, decorative object. For a child’s birthday, go bold with bright primary colors and add extra candles to match the child’s age, each one a different cheerful shade.
The basic structure of the pattern can also be adapted beyond birthday cakes entirely. The same fundamental construction approach — a cylindrical body with a decorated top and an adorable face — translates readily to other food items in the Jellycat universe. Think of crocheting a wedding cake version in white and silver for a bridal shower gift, or a gingerbread house shape for a Christmas ornament, or even a stack of pancakes complete with a tiny pat of butter on top. The possibilities expand enormously once you understand the underlying logic of the construction.
Texture and mixed media additions can take a finished piece to the next level. Tiny ribbon bows, miniature crochet flowers, or small beads used as sprinkles (securely sewn down, keeping in mind safety if the piece is for a young child) all add visual interest and handcrafted charm. Some advanced crafters experiment with needle felting additional details directly onto the crocheted surface, a technique that allows for incredibly fine detail work like painted-on icing designs or tiny heart motifs. These techniques require additional tools and skills but are deeply rewarding to explore.
- Newborn gift: neutral palette, no face, soft ribbon detail
- Birthday gift: match candle count to recipient’s age
- Wedding cake variation: white, cream, and silver with pearl bead details
- Holiday version: gingerbread colors with candy cane candles
- Seasonal fruit cake: autumnal colors for fall gifting
Consider also the possibility of making a matching set — a birthday cake amigurumi paired with a small crocheted plate, a miniature fork, or even tiny crochet balloons. Presented together in a handmade gift box with tissue paper, this kind of thoughtfully assembled set becomes genuinely heirloom-quality gifting, the sort of thing that gets kept long after childhood has passed. The investment of time is significant, but the result is a completely one-of-a-kind object made with intention and care that no mass-produced toy can truly replicate.
Finding and Using Free Patterns Responsibly
The generosity of the crochet community when it comes to sharing free patterns is genuinely remarkable. Designers invest considerable time and expertise into developing, testing, and writing up amigurumi patterns, and many choose to offer their work for free on platforms like Ravelry, their personal blogs, or via Pinterest and Instagram. When you access and use a free pattern, the most important thing you can do in return is respect the designer’s terms of use, which are almost always clearly stated at the beginning or end of the pattern document.
Most free amigurumi patterns permit you to make and sell a limited number of finished items, though the exact terms vary widely from designer to designer. Some ask that you credit them by name whenever you sell or display work made from their pattern; others prohibit commercial use entirely and ask that finished pieces be made only for personal use or gifting. Reading these terms carefully and honoring them is a matter of basic respect for the creative work that went into developing the pattern, and it helps ensure that designers continue to feel motivated to share their work freely with the community.
When searching for the Jellycat birthday cake amigurumi pattern specifically, Pinterest is an excellent starting point — pins often link directly to the designer’s original blog post or PDF download. Ravelry is another invaluable resource, as it aggregates free and paid patterns in one searchable database and includes project photos from other crafters who have made the same pattern, which can be enormously helpful for visualizing how the finished piece should look and troubleshooting any confusing steps. YouTube tutorials accompanying written patterns are also increasingly common and can make tricky techniques like the frosting drip much easier to grasp.
As the amigurumi community has grown, so too has the sophistication of the patterns available. What once might have been a simple two-page written instruction set is now often a beautifully photographed, step-by-step PDF with multiple difficulty levels and clear diagrams for every stage of construction. Free does not mean low quality in this space — some of the most technically impressive and creatively inventive patterns available are offered entirely without charge, a testament to the spirit of generosity and shared enthusiasm that defines the best of the crafting world. All that’s needed is the time, the materials, and the willingness to begin.








What do you think?
It is nice to know your opinion. Leave a comment.