










DIY Birdhouse: A Complete Guide to Building Your Own Backyard Sanctuary
Building a birdhouse is one of the most rewarding DIY projects a homeowner or nature lover can undertake. Not only does it provide essential shelter for local bird populations, but it also gives you the satisfaction of creating something beautiful and functional with your own hands. Whether you are a seasoned woodworker or a complete beginner, constructing a birdhouse is an achievable goal that offers hours of enjoyment both during the build and long after, as you watch feathered visitors make their new home your own backyard centerpiece.
The appeal of a handmade birdhouse goes far beyond aesthetics. Wild birds face increasing habitat loss as urban development continues to expand into natural areas. By installing a well-crafted birdhouse, you actively contribute to local ecosystems and provide a safe nesting environment for species that might otherwise struggle to find suitable shelter. This small act of environmental stewardship can make a meaningful difference, particularly for cavity-nesting birds like chickadees, nuthatches, wrens, and bluebirds, all of which readily adopt man-made nest boxes when they meet the right specifications.
This comprehensive guide will walk you through everything you need to know to plan, build, finish, and install a DIY birdhouse that is both beautiful and genuinely functional for its intended avian residents. From selecting the right lumber to choosing the perfect mounting location, every step of the process will be covered in detail so that you can approach your build with confidence and enthusiasm. By the end, you will have all the knowledge necessary to create a structure that birds will love and that will enhance your outdoor living space for years to come.
Understanding Which Birds You Want to Attract
Before you cut a single piece of wood or drive a single nail, the most important step in your birdhouse project is deciding which species of bird you hope to attract. This decision will dictate nearly every dimension of your finished birdhouse, including the overall interior floor area, the height of the box, the precise diameter of the entrance hole, and even the type of location where you ultimately mount the structure. Different bird species have vastly different requirements, and a birdhouse that is perfect for a bluebird will be completely unsuitable for a house wren or a wood duck.
For beginners, the most commonly targeted species include the Eastern or Western Bluebird, the Carolina or Black-capped Chickadee, the House Wren, the Tree Swallow, and the Downy Woodpecker. Each of these birds is widespread across North America, comfortable nesting near human habitation, and generally willing to adopt a well-placed nest box. Bluebirds, for example, require an entrance hole of exactly 1.5 inches in diameter and an interior floor space of approximately 5 by 5 inches. House wrens, being much smaller, are happy with a hole as small as 1.25 inches, while a Wood Duck needs an oval entrance of roughly 4 by 3 inches to accommodate its larger body.
Researching your target species thoroughly before building will save you significant time and frustration. A birdhouse with the wrong hole size may attract the wrong species, or worse, allow predators to enter and raid the nest. Many birding organizations, including the North American Bluebird Society and the Cornell Lab of Ornithology, publish detailed nest box specifications for dozens of species, and consulting these resources is always a worthwhile investment of time before beginning your project. Making a species decision also helps you plan your lumber quantity and cut list more accurately, reducing material waste and keeping your project budget under control.
- Eastern Bluebird: 1.5-inch entrance hole, 5×5 inch floor, mount 4–6 feet high in open areas
- House Wren: 1.25-inch entrance hole, 4×4 inch floor, mount 5–10 feet high near shrubs
- Tree Swallow: 1.5-inch entrance hole, 5×5 inch floor, mount near water sources
- Chickadee: 1.125-inch entrance hole, 4×4 inch floor, mount 6–15 feet in wooded areas
- Wood Duck: 4×3 inch oval entrance, 10×18 inch floor, mount over or near water
Choosing the Right Materials and Tools
The materials you select for your birdhouse project will determine not only how the finished product looks but also how long it lasts and how safe it is for the birds that inhabit it. Wood is by far the best material for a birdhouse because it insulates against both heat and cold, absorbs moisture and releases it gradually, and can be worked into precise dimensions with common hand and power tools. Cedar, pine, and redwood are the three most popular choices among birdhouse builders, and each has distinct advantages worth understanding before you head to the lumber yard.
Western Red Cedar is widely considered the gold standard for outdoor birdhouse construction. It is naturally rot-resistant and contains oils that repel insects and fungal growth, meaning a cedar birdhouse can last a decade or more with minimal maintenance even when exposed to rain, sun, and temperature fluctuations year-round. Pine is a more budget-friendly alternative that works very well when given a coat of exterior paint or wood sealer on all outer surfaces. It is widely available, easy to cut and nail, and holds screws reliably. Redwood shares many of cedar’s durability properties and is an excellent choice in western regions of the United States where it is readily available at a reasonable cost.
Never use treated lumber for birdhouse construction. Pressure-treated wood contains chemical preservatives, historically arsenic-based compounds and more recently copper-based formulations, that can leach into the nesting material and harm or kill the birds and chicks inside. Similarly, avoid using plywood with interior-grade glues, as these can off-gas harmful compounds in the heat of summer when a birdhouse interior can reach temperatures well above 100 degrees Fahrenheit. Stick with solid, untreated dimensional lumber and you will build a structure that is safe for your feathered residents and durable enough to serve many generations of nesting pairs.
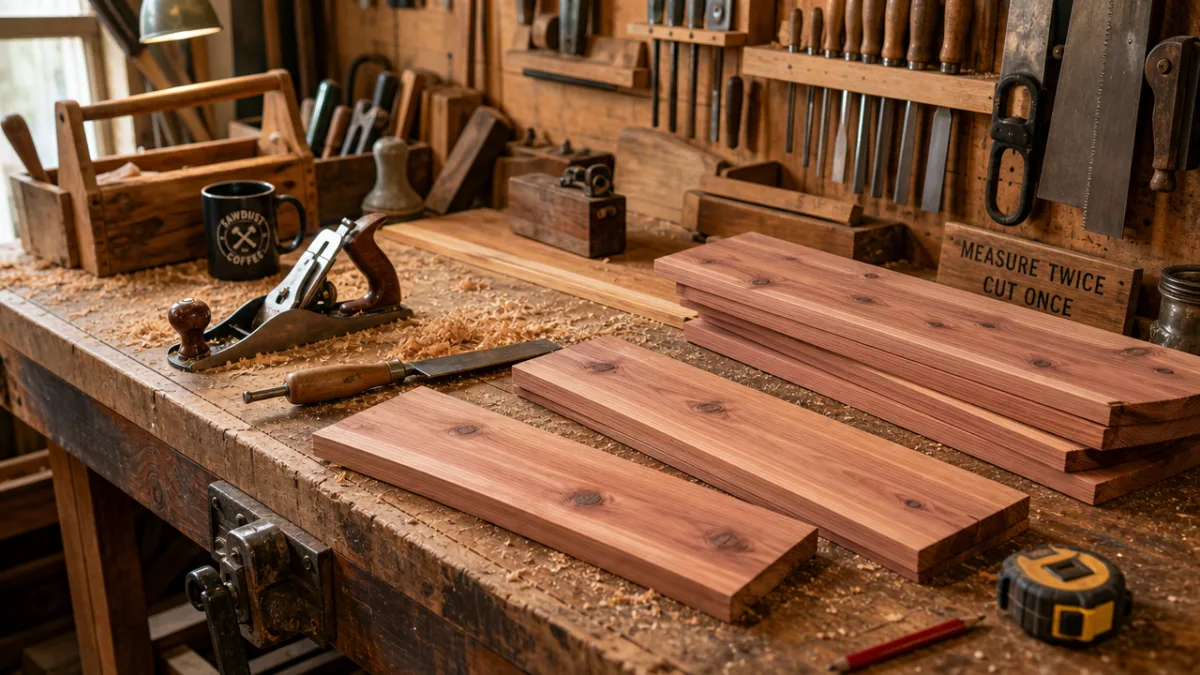
In terms of tools, you do not need an elaborate workshop to build a basic birdhouse. A jigsaw or circular saw for cutting boards to length, a drill with assorted bits including a hole saw or spade bit for the entrance hole, a hammer or finish nailer, a measuring tape, a speed square, and a clamp or two will handle the vast majority of birdhouse builds. If you have access to a table saw, you can make cleaner, more precise rip cuts, but it is absolutely not a requirement. Sandpaper in 80 and 120 grit for smoothing cut edges and the interior of the entrance hole is also important, as rough edges can injure birds as they pass in and out of the box.
Building Your Birdhouse Step by Step
With your species selected, your materials purchased, and your tools gathered, it is time to begin the actual construction of your birdhouse. Start by creating a detailed cut list based on the dimensions required for your target species. A standard single-cavity bluebird box, for example, will require a front panel, a back panel, two side panels, a floor panel, and a roof panel. Measure and mark each piece carefully on your lumber before making any cuts, using a pencil and a speed square to ensure straight, accurate lines. Taking the time to measure twice and cut once will result in a much cleaner, better-fitting final product.
Cut all your panels to the appropriate dimensions first, then move on to drilling the entrance hole in the front panel before assembly. This is much easier to do while the piece is flat and unattached rather than after the box has been assembled. Clamp the front panel securely to your work surface and use a hole saw or spade bit of the correct diameter for your target species to drill the entrance hole at the specified height above the floor. After drilling, use sandpaper wrapped around a dowel or your finger to smooth the interior edge of the hole thoroughly. A rough entrance hole can catch feathers and cause injury, so this step should not be skipped.
Assemble the box by attaching the side panels to the floor panel first, then adding the front and back panels. Using exterior-grade screws rather than nails is strongly recommended because screws provide a stronger, more vibration-resistant connection and also allow you to disassemble the box for cleaning at the end of each nesting season. Pre-drilling pilot holes before driving screws will prevent the wood from splitting, which is particularly important near the edges of narrower boards. Once the main box body is assembled, attach the roof panel last, leaving it slightly overhanging on the front and sides to shed rain away from the entrance hole and the box body below.
Two critical design elements that are often overlooked by first-time birdhouse builders are ventilation and drainage. Birds generate significant heat during brooding, and a poorly ventilated box can become dangerously hot in midsummer sun. Drill two or three small holes, approximately one-quarter inch in diameter, near the top of each side panel to allow hot air to escape. For drainage, drill three or four small holes through the floor panel so that any rain or condensation that enters the box can drain out rather than pooling and rotting the nesting material or chilling the eggs. These simple additions take only minutes but make an enormous difference to nesting success rates.
Finishing, Painting, and Decorating Your Birdhouse
Once your birdhouse is fully assembled and structurally sound, you have the opportunity to customize its appearance in any number of ways to complement your garden’s aesthetic. If you have built your box from cedar or redwood, you may choose to leave the exterior completely natural, applying only a coat of exterior-grade tung oil or Danish oil to bring out the wood’s natural grain and warm color while providing basic weather protection. This approach gives the birdhouse an organic, naturalistic look that blends beautifully into a garden setting and requires no special painting skills or equipment.
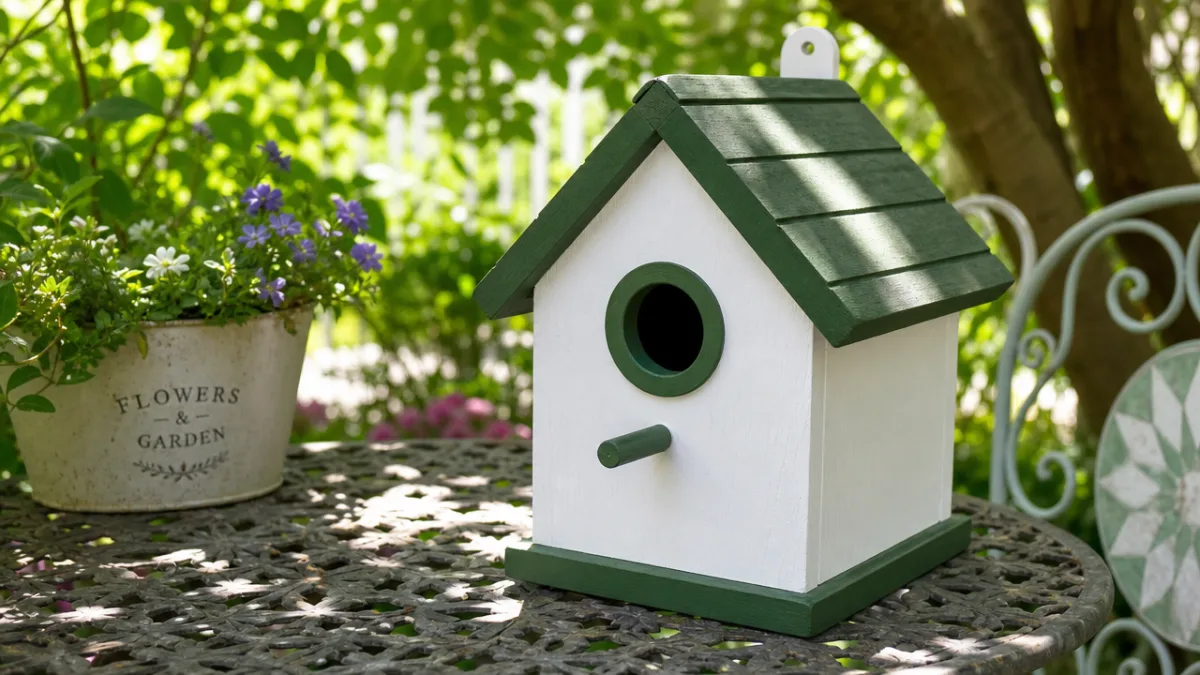
If you prefer a painted finish, choose light or neutral exterior colors for the body of the box. Dark colors absorb significantly more heat from the sun, which can raise interior temperatures to dangerous levels for eggs and chicks during hot summer months. Light greens, creams, tans, soft grays, and whites are all excellent choices that provide weather protection without causing overheating. You can add more decorative details in contrasting colors on trim elements like the roof edges, the perch area around the entrance hole, or any decorative moldings you choose to add to the exterior of the box. Always use exterior-grade latex paint and allow it to cure fully before mounting the box.
It is worth noting that many decorative elements popular in craft store birdhouses are actually harmful to birds and should be avoided in a functional nest box. Perches mounted below the entrance hole are a prime example. They are unnecessary for the birds that will actually use the box, as cavity-nesting species are perfectly capable of clinging to the entrance hole without a perch, but perches are very convenient for predators like squirrels and larger birds that might otherwise struggle to access the interior. Similarly, avoid attaching any element that creates gaps or cracks in the exterior walls, as these can create drafts, allow rain intrusion, or give access points to insects.
- Sand all exterior surfaces with 120-grit sandpaper to remove mill marks and open the wood grain for better paint adhesion.
- Apply one coat of exterior primer to all outer surfaces, paying special attention to end grain, which absorbs moisture most readily.
- Apply two coats of exterior latex paint in your chosen color, allowing full drying time between coats.
- Leave all interior surfaces completely unpainted to avoid any risk of chemical exposure to nesting birds.
- Consider applying a bead of exterior caulk along any roof seams to prevent water intrusion.
- Allow finished paint to cure for at least 48 hours before mounting the box outdoors.
Mounting, Placement, and Ongoing Maintenance
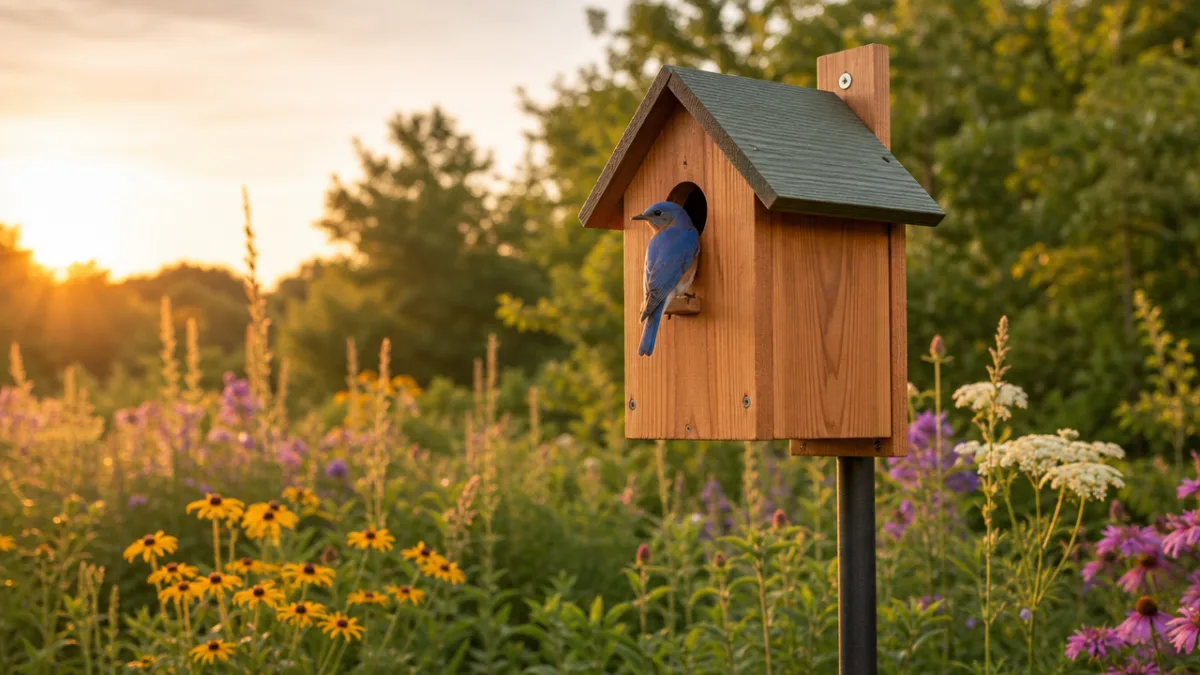
Even the most perfectly constructed and beautifully finished birdhouse will fail to attract residents if it is placed in the wrong location. Placement is arguably as important as construction quality when it comes to birdhouse success, and getting it right requires understanding the habitat preferences and behavioral tendencies of your target species. Bluebirds, for example, prefer open areas such as meadows, pastures, and large lawns with short grass, because they hunt insects on the ground and need good visibility across open terrain. Mounting a bluebird box in a densely wooded backyard surrounded by tall shrubs and understory plantings will almost certainly result in it being ignored season after season.
The height at which you mount your birdhouse also matters considerably. Most small songbird species prefer boxes mounted between four and eight feet above the ground, a height range that feels secure to the birds while still being accessible enough for you to monitor and clean the box annually. Larger cavity-nesting species like Wood Ducks and some owls prefer much greater heights, sometimes twenty feet or more. The direction the entrance hole faces is another important variable. In most of North America, facing the entrance hole east or northeast is recommended, as this orientation allows morning sunlight to warm the box while avoiding the harsh afternoon sun and the prevailing westerly winds that bring most storms.
Predator protection is a serious consideration that every responsible birdhouse builder should address. Raccoons, squirrels, snakes, and feral cats are among the most significant predators of nest box inhabitants across North America, and a box without any predator deterrent measures is essentially an easy target. Mounting your birdhouse on a smooth metal pole rather than a wooden post or tree greatly reduces climbing predator access. Adding a predator guard, such as a cone-shaped baffle below the box on a pole-mounted installation, provides an additional layer of protection. Keep the area below the box clear of vegetation that might allow predators to approach more easily.
Annual maintenance is essential to keep your birdhouse functioning as an effective nesting resource year after year. At the end of each nesting season, typically in late September or October in most regions, you should open the box and remove all old nesting material. Old nests harbor parasites including mites, blowfly larvae, and feather lice that can infest and harm chicks in subsequent nesting seasons. After removing the old nest, scrub the interior with a stiff brush and a mild bleach solution, then rinse thoroughly and allow the box to dry completely before closing it up for the winter. Some birders prefer to leave the box open or tipped forward over winter to discourage mice from taking up residence.
Troubleshooting Common Problems and Enhancing Your Setup
Even experienced birdhouse builders and birders encounter challenges from time to time, and knowing how to diagnose and solve common problems will help you achieve consistent nesting success over the long term. One of the most frequently encountered issues is a birdhouse that simply goes unused season after season despite being well-built and correctly placed. In many cases, this is simply a matter of patience, as it can take a year or two for birds to discover and evaluate a new box, particularly in areas where nest boxes are not already common. However, if a box remains unoccupied for more than two full nesting seasons, it is worth reconsidering its placement, entrance hole size, or the degree of habitat suitability in the immediate area.
House Sparrows and European Starlings represent a significant and persistent challenge for North American birdhouse enthusiasts. These two non-native, invasive species are extremely aggressive competitors for nest cavities and will readily evict or kill native cavity-nesting birds in order to take over a desirable box. Starlings can be largely excluded by ensuring your entrance hole is no larger than 1.5 inches in diameter, as adult starlings cannot fit through an opening of this size. House Sparrows are smaller and more difficult to exclude through entrance hole size alone. Many birders monitor their boxes closely during nesting season and remove House Sparrow nests and eggs repeatedly to discourage their use of boxes intended for native species.
Once you have successfully attracted nesting birds, you may find that you want to expand your birdhouse setup to support additional pairs or additional species. Creating a small bluebird trail, which is a series of nest boxes spaced approximately 300 feet apart along an open area, is a wonderful way to support multiple bluebird pairs while also providing opportunities to monitor nesting activity across multiple boxes throughout the season. Supplementing your birdhouse with other bird-friendly habitat enhancements such as native plantings, a fresh water source like a birdbath or small pond, and brush piles for ground-feeding species will make your yard an increasingly attractive destination for a wide diversity of bird life well beyond those species seeking nest cavities.
Keeping a simple nesting journal is a habit that many dedicated birdhouse enthusiasts find enormously rewarding. Recording the date when nest construction begins, when the first egg is laid, when hatching occurs, and when fledglings leave the box creates a fascinating personal record of wildlife activity in your own backyard. Over multiple seasons, these records can reveal patterns in arrival dates, clutch sizes, and fledgling success rates that are genuinely meaningful contributions to citizen science. Platforms like NestWatch, operated by the Cornell Lab of Ornithology, allow backyard birders to submit their nesting data to a national database that researchers use to track long-term trends in cavity-nesting bird populations across the continent, turning your simple DIY birdhouse project into a small but meaningful act of conservation.








What do you think?
It is nice to know your opinion. Leave a comment.