










Introduction to Gloxinia: A Jewel of Indoor Gardening
Gloxinia (Sinningia speciosa) is one of the most stunning flowering plants you can grow indoors, celebrated for its large, velvety, trumpet-shaped blooms that arrive in rich shades of purple, red, pink, white, and bi-colored combinations. Originally native to the tropical rainforests of Brazil, gloxinia has captivated indoor gardeners for centuries with its dramatic floral displays and lush, dark green foliage. Growing gloxinia from seed is an especially rewarding experience, as it allows you to witness the full arc of this plant’s life — from a near-microscopic speck to a breathtaking flowering specimen perched on your windowsill.
What makes gloxinia particularly appealing to indoor gardeners is its relatively compact growth habit. Unlike many tropical plants that demand significant floor space, gloxinia stays manageable in size, typically reaching no more than 12 inches in height and spread. This makes it ideal for apartment dwellers, office enthusiasts, or anyone who wants to inject bold color into a limited space. Its blooms can last for weeks under the right conditions, and with proper care, a single plant can rebloom multiple times throughout the year, rewarding attentive caretakers with generous flushes of color.
Growing gloxinia from seed, rather than purchasing a tuber or an established plant, is an exercise in patience that yields tremendous satisfaction. Seeds are widely available through specialty vendors and online retailers, offering access to a far broader range of colors and cultivars than you’d typically find at a local nursery. The process from seed to first bloom takes approximately five to six months, but the journey itself is deeply engaging — each stage of growth brings its own small miracle, from the appearance of the first cotyledons to the unfurling of the first enormous blossom.
Sourcing and Understanding Gloxinia Seeds
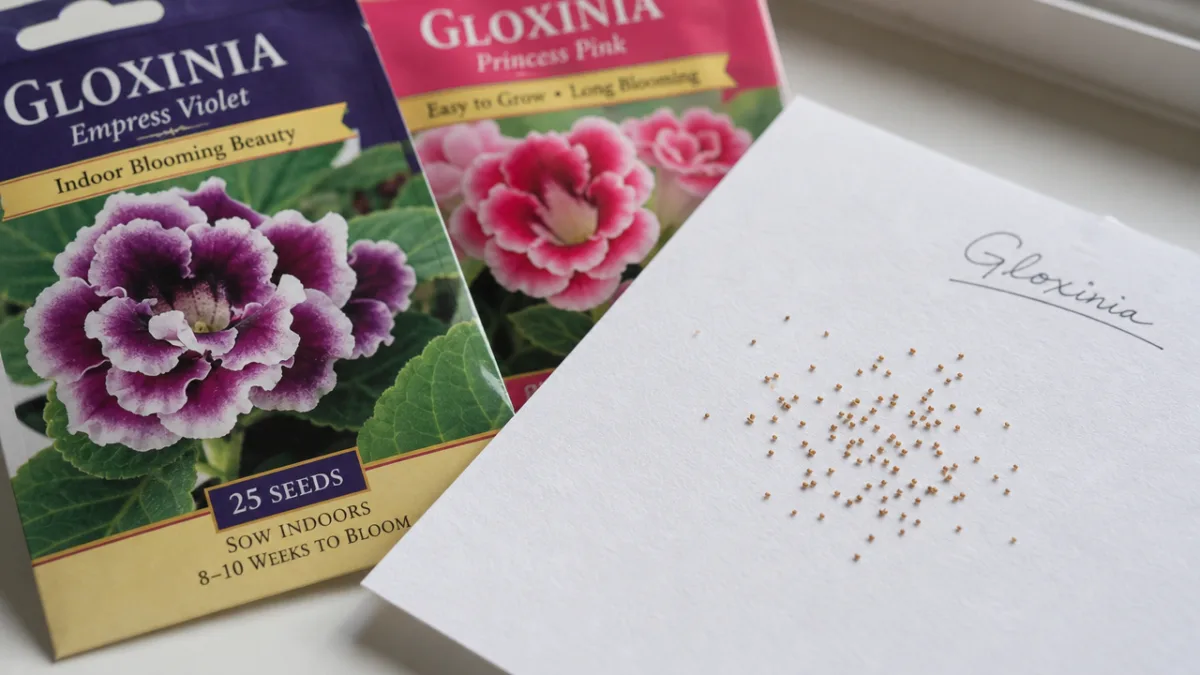
Before you begin the growing process, it’s worth taking time to understand exactly what you’re working with. Gloxinia seeds are extraordinarily tiny — among the smallest of any common houseplant — and appear almost like fine dust when poured from the packet. A single gram of gloxinia seed can contain thousands of individual seeds, which is why commercial packets often contain just a pinch. This microscopic size is not a defect; it’s simply the nature of the plant, and understanding this from the outset will help you handle and sow them successfully without losing half your investment down the drain or onto the potting bench.
When sourcing gloxinia seeds, quality matters enormously. Always purchase from reputable horticultural suppliers or specialist seed companies that specialize in gesneriads — the plant family to which gloxinia belongs. Seeds should be as fresh as possible, as germination rates decline noticeably after the first year of storage. Look for packets that include a packing date or expiration date. If purchasing online, read reviews from other growers and avoid sellers who can’t confirm seed freshness. Hybrid varieties often produce the showiest flowers and tend to be more robust in cultivation, while open-pollinated heirloom types can offer charm and unique characteristics worth exploring.
You can also harvest seeds from your own gloxinia plants if you have access to blooming specimens. After pollination — whether natural or assisted with a soft brush — seed pods will develop over the course of several weeks and eventually split open to release their contents. Collect the seeds by gently tapping the ripe pods over a clean sheet of white paper, then store them in a labeled envelope in a cool, dry location. Home-harvested seeds can be wonderfully viable and allow you to preserve and propagate treasured plants across seasons, building a personal collection of beloved varieties over time.
Preparing for Sowing: Containers, Mix, and Environment
Successful germination begins long before the seeds touch soil. Choosing the right container is your first critical decision. Because gloxinia seeds are so fine and take weeks to germinate, you want a container that retains moisture effectively and can be covered to create a humid microclimate. Shallow seed trays, small plastic propagation trays with clear humidity domes, or even repurposed plastic takeout containers with lids all work excellently. The key requirement is that your container be scrupulously clean — sterilize it with a dilute bleach solution and rinse thoroughly before use to eliminate fungal spores and pathogens that could devastate your seedlings.
The growing medium for gloxinia seeds must be extremely fine, lightweight, and sterile. Standard potting soil is too coarse and often harbors pathogens that will cause damping-off disease in tender seedlings. Instead, use a dedicated seed-starting mix and consider improving it further by mixing in a portion of fine perlite or vermiculite for drainage and aeration. Some experienced growers prefer to use pure sphagnum peat moss or a peat-based seed-starting blend, as these materials retain moisture reliably while remaining light enough not to compact around fragile developing roots. Whatever medium you choose, sift it through a fine mesh screen to remove any large particles before filling your trays.
Environmental preparation is just as critical as physical preparation. Gloxinia seeds require warmth to germinate reliably — soil temperatures between 70°F and 75°F (21°C to 24°C) are ideal. If your home is cooler than this, invest in a seedling heat mat, which sits beneath the tray and maintains consistent bottom warmth. Bright, indirect light is necessary from the moment of sowing, as gloxinia seeds require light to germinate and should never be buried. A location near a south- or east-facing window, or under a full-spectrum grow light set on a timer for 14 to 16 hours per day, will provide the consistent illumination these light-hungry seeds need to sprout successfully.
Sowing Gloxinia Seeds: Step-by-Step Technique
Sowing gloxinia seeds requires a steady hand and a methodical approach. Begin by thoroughly moistening your seed-starting medium before placing it in your container — getting it damp at this stage is far easier and less disruptive than watering after the seeds are in place. Fill your container to within half an inch of the rim, then firm the surface gently with a flat object to create an even, level seedbed. The surface should be smooth and fine, free of lumps or depressions that might cause seeds to cluster in one spot or miss adequate light exposure.
Because gloxinia seeds are so tiny, distributing them evenly can be a real challenge. One popular technique is to mix the seeds with a small amount of fine sand before sowing — the sand dilutes the seed density and makes it much easier to see where you’ve already sown. Another method involves tapping seeds gently from the packet onto a folded piece of paper, then using the paper as a chute to guide seeds carefully across the surface of your medium. Whichever method you use, aim for even distribution across the entire surface without clustering. Do not cover the seeds with any additional growing medium — they need light for germination and burying them even slightly will dramatically reduce germination rates.
After sowing, mist the surface very lightly with a fine spray bottle filled with room-temperature water. Then cover the container tightly with its lid or with a sheet of clear plastic wrap to trap humidity. Label your container clearly with the variety name and sowing date — gloxinia seedlings look remarkably similar to those of related gesneriads, and keeping accurate records prevents confusion as your collection grows. Place the covered container on your heat mat near your light source, and resist the urge to remove the cover or water again too soon. The sealed environment should stay consistently moist for the first two to three weeks without intervention.
- Use a sterile, fine seed-starting medium and sift out coarse particles before sowing
- Do not cover seeds — gloxinia requires light to germinate successfully
- Mix seeds with fine sand for more even distribution across the seedbed
- Mist gently rather than watering, to avoid disturbing or displacing tiny seeds
- Maintain soil temperature between 70°F and 75°F using a heat mat if necessary
- Seal the container to maintain high humidity during the germination period
- Expect germination to begin within 10 to 21 days under ideal conditions
Caring for Seedlings: From Germination to Transplanting
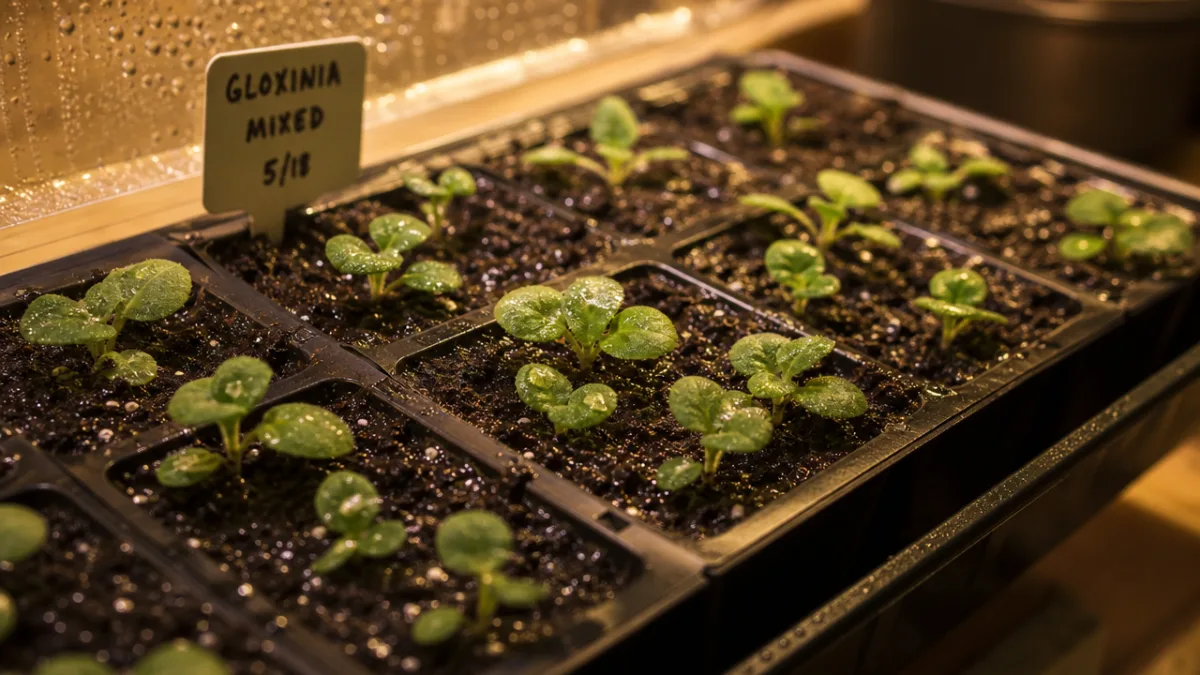
The first sign of germination is thrilling — tiny green specks appear on the surface of your medium, almost invisible at first but growing more distinct each day. At this stage, your seedlings are extraordinarily fragile and vulnerable to both desiccation and fungal attack. Maintain the humidity dome or cover for another two to three weeks after germination, lifting it just slightly each day to introduce small amounts of fresh air and begin the gradual process of acclimatization. If you remove the cover too abruptly, the sudden drop in humidity can cause the delicate seedlings to collapse before their root systems are established enough to support them.
Watering during the seedling stage requires particular care. Bottom watering is the preferred method — set your tray in a shallow dish of water and allow the medium to absorb moisture from below, then remove it once the surface appears evenly damp. This technique keeps the delicate foliage dry, dramatically reducing the risk of fungal diseases such as botrytis and damping-off that thrive in stagnant moisture around stems and leaves. Use room-temperature water at all times; cold water can shock the roots and stunt development. As the seedlings grow larger and more robust, you can transition gradually to careful top watering delivered at the base of the plants rather than overhead.
Once your seedlings have developed their first set of true leaves — the leaves that follow the initial rounded seed leaves — they are ready for their first transplanting. This is a delicate operation. Use the tip of a toothpick, a small dibber, or the pointed end of a pencil to gently ease seedlings apart and lift them individually, taking care to disturb the roots as little as possible. Transplant each seedling into its own small cell or 2-inch pot filled with a slightly richer mix — a blend of peat, perlite, and a small amount of fine compost works well. Handle seedlings by their leaves rather than their stems, as a leaf can be replaced but a damaged stem often means losing the plant entirely.
Growing On: Light, Feeding, and Tuber Development
As your gloxinia plants grow beyond the seedling stage, their care requirements evolve in important ways. Light becomes increasingly critical — gloxinia needs bright, indirect light to fuel robust growth and flower development, but direct afternoon sun can scorch its velvety leaves, leaving unsightly brown patches. An east-facing window that receives gentle morning light is often ideal. Alternatively, positioning plants under a full-spectrum LED grow light at a distance of 12 to 18 inches provides consistent, controllable illumination that produces compact, well-branched plants with deep green foliage. Rotate your pots a quarter turn every week to ensure even light exposure on all sides.
Feeding your growing gloxinia correctly will have a profound impact on the quality and abundance of its blooms. During the vegetative phase, when the plant is primarily developing leaves and building its underground tuber, feed every two weeks with a balanced liquid fertilizer diluted to half the recommended strength. Once flower buds appear, switch to a fertilizer with a higher phosphorus content — look for a bloom-booster formula with an NPK ratio such as 10-30-20 — to support the energy-intensive process of flower production. Always water the plant first before applying liquid fertilizer, as applying fertilizer to dry soil can burn the roots and cause lasting damage to the plant’s health.
One of the most fascinating aspects of growing gloxinia from seed is watching the development of the tuber — a flattened, corky underground storage organ that will sustain the plant through periods of dormancy and serve as the foundation for future seasons of growth. As your plant matures, the tuber grows steadily beneath the soil surface, accumulating reserves of starch and water. Healthy tuber development is encouraged by adequate light, consistent but not excessive watering, and proper fertilization throughout the growing season. A well-developed tuber from the first growing season will produce an even more spectacular plant in subsequent years, often blooming more freely and producing larger flowers than in its debut season.
- Provide bright, indirect light for at least 12 to 14 hours daily to encourage compact, floriferous growth
- Water consistently but allow the top inch of soil to dry slightly between waterings to prevent root rot
- Feed with balanced fertilizer during vegetative growth, switching to high-phosphorus formula as buds form
- Maintain temperatures between 65°F and 75°F — avoid cold drafts and air conditioning vents
- Keep humidity relatively high by placing pots on a pebble tray filled with water
Encouraging Bloom and Managing Dormancy
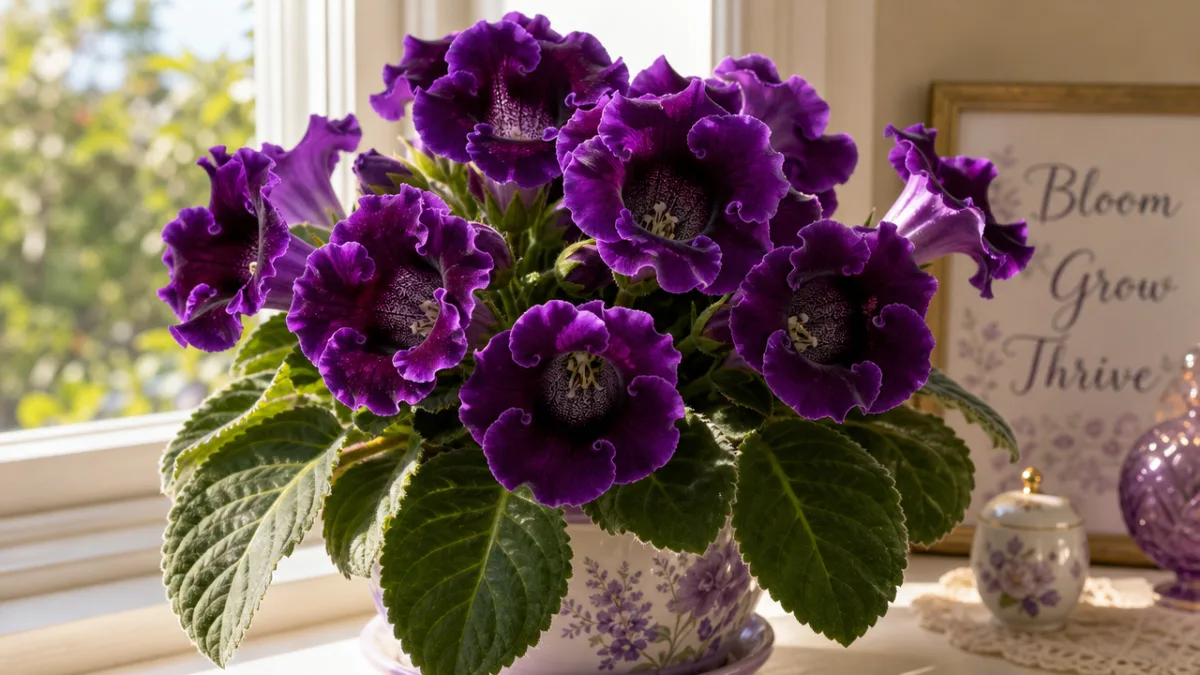
The moment your gloxinia plant sends up its first flower buds is one of genuine excitement — the reward for months of patient cultivation is finally in sight. Buds typically appear from the center of the leaf rosette, emerging as small, rounded green structures that gradually elongate and swell before the petals begin to unfurl. During this critical period, maintain stable conditions as consistently as possible. Fluctuations in temperature, sudden drafts, or changes in light intensity can cause buds to abort before they open, a deeply frustrating outcome after investing so much time and care. Keep the plant away from heating vents, air conditioners, and drafty windows during the bud and flowering stages.
Once in bloom, gloxinia flowers can persist for an impressive two to four weeks individually, with new buds continuing to open in succession so that the overall flowering display often extends for a month or more. To prolong the bloom period, deadhead spent flowers promptly — removing them at the base prevents the plant from diverting energy into seed production and encourages it to continue opening new flowers from remaining buds. Avoid getting water on the petals, as this causes spotting and premature browning of the delicate blooms. Display your gloxinia where you can enjoy it daily, as part of the joy of this plant is the intimate, up-close beauty of its extraordinary flowers.
After flowering concludes, gloxinia naturally enters a period of dormancy that should be embraced rather than fought. The leaves will begin to yellow and die back — this is entirely normal and signals that the plant is redirecting its resources into the tuber for storage. Gradually reduce watering as the foliage dies back, eventually stopping altogether once all the leaves have withered. Store the pot containing the tuber in a cool, dry, dark location — a basement shelf or the back of a closet works well — for eight to twelve weeks. After this rest period, new growth will emerge from the tuber, signaling that it’s time to move the pot back into light, resume watering, and begin a new cycle of spectacular growth and bloom.








What do you think?
It is nice to know your opinion. Leave a comment.