










Whimsical Garden Art: DIY Fairy Jars — A Complete Guide to Magical Outdoor Enchantment
The Magic Behind Fairy Jars: An Introduction to This Beloved Garden Craft
Fairy jars have captured the imagination of gardeners, crafters, and dreamers for years, transforming ordinary glass containers into luminous little worlds that shimmer at dusk and glow through the night. The concept is beautifully simple: take a mason jar or any glass vessel, fill it with light-catching materials and whimsical decorations, and place it among your garden’s greenery to create the illusion that tiny magical beings have taken up residence in your backyard. The result is an enchanting garden feature that costs very little but delivers an enormous amount of visual delight.
What makes fairy jars so appealing is their accessibility. Unlike many garden art projects that require specialized tools, training, or significant investment, fairy jars can be made by virtually anyone — from young children crafting their first project to seasoned hobbyists looking to add a personal touch to a cultivated outdoor space. The materials are inexpensive and often already found around the house, and the creative possibilities are essentially limitless. You can tailor every jar to match your garden’s color palette, the season, or simply your own whimsical imagination.
Beyond their visual appeal, fairy jars carry a certain storytelling quality that makes them especially meaningful in family gardens. They invite children to ask questions, to imagine, and to tend to the garden with a sense of wonder and responsibility. Many parents find that introducing fairy jars into the backyard gives kids a reason to go outside, to observe the natural world, and to develop a lasting love of gardening. In this way, a simple craft project becomes a gateway to a deeper relationship with the outdoors and with creativity itself.
A Brief History of Fairy Garden Traditions
The tradition of creating miniature fairy habitats has roots stretching back centuries, particularly in Celtic and British folklore where fairies were believed to inhabit woodland clearings, mossy stones, and the hidden corners of gardens. Homeowners would leave small offerings and carefully arranged natural objects to invite good fortune from these mythical beings. Over time, these folk practices evolved into the more decorative and playful craft traditions we recognize today, blending superstition with artistry in ways that feel both ancient and refreshingly modern.
Contemporary fairy garden culture gained significant momentum in the early 2000s, when miniature gardening became a major trend in the United States and Europe. Garden centers began stocking tiny furniture, minuscule watering cans, and pint-sized fencing, all designed to outfit elaborate fairy villages nestled among ground cover plants and mossy patches. Fairy jars emerged from this movement as a particularly portable and low-commitment expression of the same imaginative impulse — all the magic, none of the long-term maintenance commitment of a full fairy garden installation.
Today, platforms like Pinterest have driven fairy jar crafting into the mainstream, with thousands of pins showcasing breathtaking variations that incorporate everything from solar-powered LED fairy lights to hand-painted mushrooms and carefully arranged dried flowers. The craft community has embraced and evolved the concept with remarkable creativity, ensuring that no two fairy jars are ever quite alike. This rich creative heritage makes every jar you assemble a small contribution to a much larger tradition of human beings finding beauty in tiny, carefully tended things.
Gathering Your Materials: Everything You Need to Get Started
Before you begin assembling your fairy jars, it pays to gather all your materials in one place so the creative process flows without interruption. The foundational item is, of course, a glass jar — mason jars in quart or pint sizes are perennial favorites because their wide mouths make decorating easy and their classic silhouette complements garden settings beautifully. However, recycled pasta sauce jars, pickle jars, apothecary bottles, and even vintage glass milk bottles all make wonderful vessels. The key quality to look for is clarity: the cleaner and clearer the glass, the more brilliantly your internal decorations will catch and diffuse light.
Lighting is arguably the most critical element of a truly magical fairy jar, and the good news is that modern options are both affordable and remarkably effective. Battery-operated LED fairy light strings — the kind sold in craft stores and online in lengths of six to twenty feet — are the go-to choice for most crafters. They produce a warm, flickering glow that mimics candlelight without any of the fire hazard, and their small coin-cell batteries can power a standard jar for weeks before needing replacement. Solar-powered fairy lights are an excellent alternative for jars that will live permanently in a sunny garden spot, offering free illumination night after night.
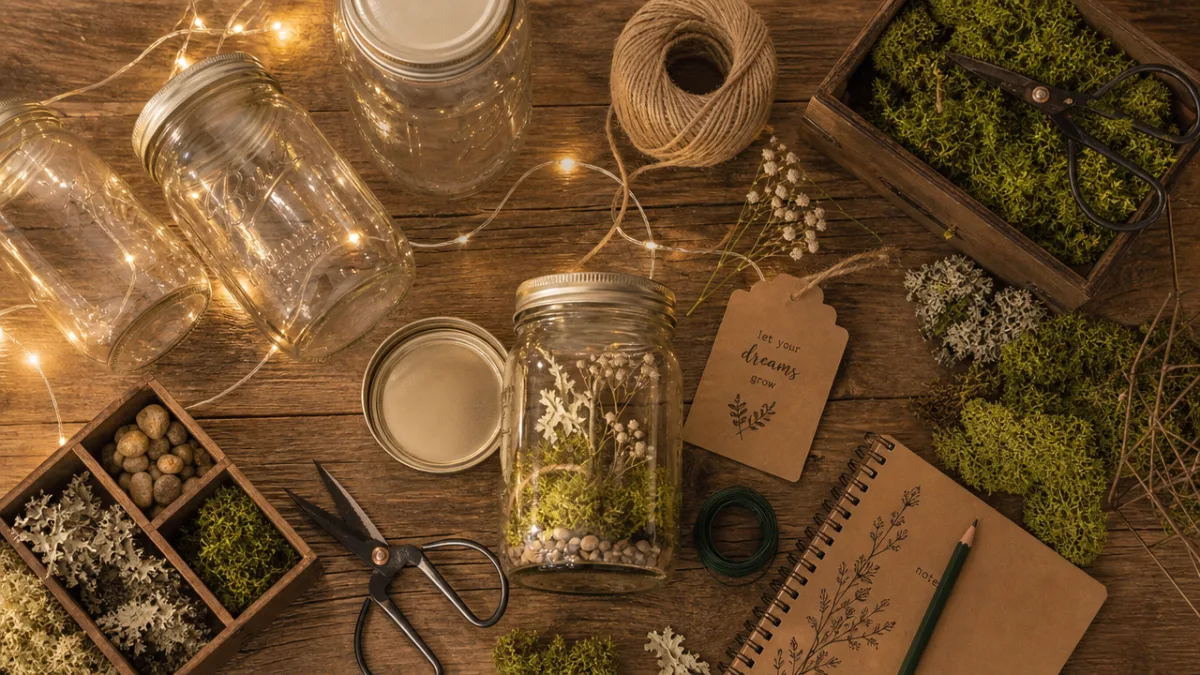
Beyond light sources, the decorative materials you choose will define the personality of each jar. Common choices include iridescent glass gems or flat-bottomed marbles, dried or artificial moss, miniature mushroom figurines, tiny fairy or gnome statuettes, ribbon, twine, lace, dried lavender or baby’s breath flowers, glitter, and small crystals or gemstones. Paint — particularly metallic and glow-in-the-dark varieties — opens up even more possibilities, allowing you to add stars, moons, and swirling patterns directly onto the glass exterior. Collecting a varied supply before you begin ensures you have plenty of creative options available as inspiration strikes.
Choosing the Right Jar for Your Vision
Not all jars behave the same way, and understanding the subtle differences between vessel types will help you choose the right container for each design you have in mind. Wide-mouth mason jars are the most forgiving option for beginners because their generous opening allows hands and tools to fit inside comfortably for arranging decorations. Narrow-necked bottles create a more dramatic, mysterious look but require the use of long tweezers or chopsticks to position items inside, which adds a pleasant puzzle-like challenge to the crafting process. Jars with embossed patterns or textured glass add visual interest without any additional decoration, catching light in organic and unpredictable ways.
Size matters more than you might initially think, particularly in relation to placement. A collection of small, four-ounce jars scattered among low ground cover plants creates a different effect than a single towering quart-sized statement jar positioned at the center of a garden bed. Many experienced fairy jar crafters recommend working in sets of three or five — odd numbers are a classic design principle — varying the heights and sizes of the jars within each grouping to create a sense of natural, organic arrangement rather than rigid symmetry. This approach mimics the way wildflowers and mushrooms actually grow in nature, lending the display an authentic, discovered quality.
Consider, too, whether you want your jars to have lids. Open jars allow moisture and insects to enter, which can create charming natural effects — moss thriving in the humidity, the occasional firefly investigating the glow — but may also cause some decorative elements to deteriorate more quickly. Lidded jars keep their interiors pristine indefinitely and can even be sealed completely to create self-contained terrariums that require no maintenance whatsoever. Clear plastic lids are available for most standard mason jar sizes and offer a nearly invisible seal that preserves the all-glass aesthetic while protecting the jar’s contents from the elements.
Step-by-Step Instructions: Building Your First Fairy Jar
Begin by thoroughly cleaning and drying your chosen jar, ensuring there are no soap residue or moisture inside that might interfere with your decorations or cause glitter to clump. If you plan to paint the exterior of the jar, now is the time to do so — apply thin coats of glass paint or a mixture of Mod Podge and craft paint, allowing each layer to dry completely before adding the next. Glow-in-the-dark paint applied as an inner coating or as constellation patterns on the outside creates spectacular results after dark, and requires only a brief exposure to sunlight or indoor light to charge effectively.
Once your jar exterior is prepared to your liking, begin building the interior landscape from the bottom up. Start with a base layer of decorative sand, fine gravel, or sheet moss — this creates visual depth and grounds the entire composition. On top of this base, arrange your larger decorative elements: a small mushroom figurine, a tiny bridge, a miniature fairy resting among the moss, or a collection of glass gems that catch and scatter light in every direction. Think of this stage as setting a miniature stage, arranging the elements so they tell a small visual story that rewards a close look.
With your decorative layer in place, it is time to add your light source. Carefully nestle the LED fairy light strand into the jar, coiling it loosely so the individual bulbs distribute evenly throughout the interior rather than clustering at the bottom. Tuck the battery pack just inside the jar’s mouth or, if you prefer a cleaner look, run the wire discreetly over the jar’s edge and hide the battery pack behind the jar or beneath a decorative stone. Switch the lights on before sealing or positioning the jar to confirm the glow is even and beautiful — minor adjustments to the strand placement can make a significant difference to the overall effect.
Decorating the Exterior for Extra Personality
The outside of a fairy jar deserves as much creative attention as the inside. Wrapping the jar’s neck with natural twine and tucking in a sprig of dried lavender or a small bunch of baby’s breath creates a cottage-garden aesthetic that feels deeply at home in an outdoor setting. Lace ribbon tied in a loose bow adds a romantic, vintage quality, while copper wire wrapped in careful spirals along the jar’s body lends a more industrial, steampunk-inspired character. The decorative choices you make for the exterior function as the jar’s “personality,” communicating its story at a glance before anyone leans in close to examine the world within.
Paint pens are an underutilized tool in the fairy jar maker’s kit and deserve special attention. These fine-tipped markers designed for use on glass allow you to write words, draw fine lines, add stippled texture, or inscribe miniature maps and illustrated borders directly onto the jar’s surface with remarkable precision. A simple crescent moon and a scatter of five-pointed stars drawn in gold paint pen on a deep blue-painted jar transforms it into something that looks intentionally artistic and professionally finished, rather than homemade. The effect is polished yet personal — exactly the combination that makes handmade garden art so appealing.
For those who prefer a more natural, organic look, consider coating the lower portion of the jar exterior with craft glue and pressing on sheet moss, tiny pebbles, or fragments of bark. This technique blurs the boundary between the glass vessel and the garden environment it inhabits, making the jar appear to have grown in place rather than been placed there by human hands. The moss will slowly dry over time outdoors but retains its color and texture beautifully, and can be refreshed with a light mist of water and a few drops of liquid fertilizer during the growing season to encourage it to remain lush and green.
Choosing the Perfect Spot: Placing Fairy Jars in Your Garden
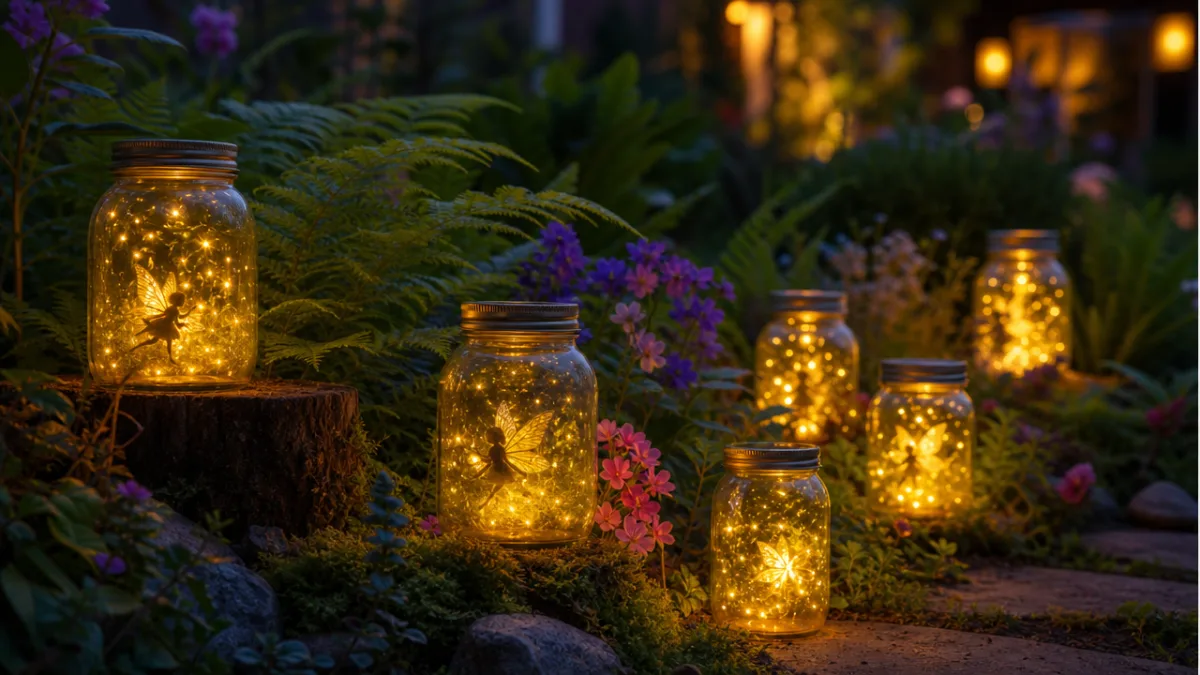
The placement of your fairy jars is every bit as important as their construction, because context transforms a pretty object into a truly magical experience. The most effective fairy jar installations are those that reward a sense of discovery — jars tucked among hostas at the base of a garden path, nestled into the crook of a tree root, or positioned just around a corner where they catch the eye unexpectedly. This element of surprise is what creates the genuine sense of wonder that the best fairy gardens are famous for producing, even in adults who consider themselves thoroughly unsentimental about such things.
Lighting conditions throughout the day should guide your placement decisions significantly. Jars positioned where they receive afternoon sun will appear beautiful in the golden hour light, their glass surfaces catching and scattering warm rays in ways that feel almost alive. As evening falls, the LED fairy lights inside take over, and the jars become luminous beacons that guide the eye through the darkening garden. Pathways are ideal locations for this reason: a row of fairy jars along a garden path provides both practical low-level illumination and an unmistakable sense of enchantment as guests move through the space after sunset.
Water features offer another spectacular opportunity for fairy jar placement. A jar positioned at the edge of a small garden pond will have its glow reflected and multiplied in the water’s surface, effectively doubling the visual impact of a single light source. Similarly, placing jars near reflective garden ornaments — mirrored gazing balls, polished metal sculptures, or even a strategically placed piece of aluminum foil buried beneath gravel — creates unexpected moments of sparkle and radiance throughout the garden. These reflected and refracted light effects are difficult to plan precisely but richly rewarding when they occur naturally.
Seasonal Variations and Year-Round Displays
One of the great pleasures of fairy jar crafting is the opportunity to refresh and reimagine your displays with each passing season, keeping your garden looking intentional and alive throughout the year. Spring calls for jars decorated with pastel ribbons, pressed flower petals, and tiny bird or butterfly figurines nestled among fresh green moss. Summer invites bolder colors — sea glass blues and greens, bright citrine yellows, the deep purple of dried lavender — and the jars can be moved to more prominent positions to take advantage of the long, warm evenings when the garden is most heavily used and enjoyed.
Autumn transforms the fairy jar palette entirely, making room for amber, rust, copper, and gold. Small acorns, miniature pine cones, dried oak leaves pressed flat against the jar’s interior walls, and orange-tinted glass gems all capture the melancholy beauty of the season with remarkable fidelity. Halloween versions featuring tiny witch figurines, miniature cauldrons, and webs of fine black wire stretched across the jar’s mouth are perennial favorites in family gardens, providing seasonal decoration that feels genuinely handcrafted rather than mass-produced. These autumnal jars can transition seamlessly into a winter display by swapping the Halloween elements for small evergreen sprigs, silver glitter snowflakes, and miniature woodland animal figurines.
Winter fairy jars, perhaps surprisingly, are among the most dramatic and beautiful of all seasonal variations. The long nights mean the LED lights inside are visible for many more hours, and the contrast between cold outdoor air and warm indoor-quality light creates a deeply appealing visual tension. Frost on the glass exterior — whether real or simulated with a dusting of iridescent craft snow adhered with spray adhesive — adds an extra layer of texture and magic. Grouped near an outdoor fire pit or along a path leading to a front door, winter fairy jars provide a welcoming warmth that makes the whole garden feel inhabited and alive even on the coldest evenings of the year.
Sharing and Expanding the Craft: Building a Fairy Jar Community
Fairy jars make extraordinarily thoughtful gifts, and one of the most satisfying ways to deepen your engagement with the craft is to share it generously with others. A handmade fairy jar tucked into a basket with a few extra fairy light strings, some moss, and a handful of glass gems makes a creative gift that encourages the recipient to begin their own crafting journey. Hosting a fairy jar making party — whether for children, for adults, or for a mixed group — is a wonderful way to spend an afternoon, combining the pleasure of conversation and shared creativity with the tangible satisfaction of producing something beautiful to take home.
Social media communities dedicated to fairy jar crafting are warm, enthusiastic spaces where makers of all skill levels share their creations, offer technique tips, and inspire one another to try new approaches. Pinterest boards devoted to the craft contain thousands of pins documenting extraordinary variations — jars shaped like lighthouses, jars containing miniature libraries with book-shaped clay tiles, jars housing complete fairy kitchens with hand-sculpted polymer clay pots and pans hanging from copper wire hooks. Engaging with these communities by sharing your own work and commenting appreciatively on others’ is both motivating and genuinely connective in a way that feels meaningful.
Teaching the craft to children is perhaps its most rewarding application of all. The act of making something magical with a child — choosing the jar together, selecting the decorations, arranging the tiny world inside, then carrying the finished jar out to the garden at dusk and watching it glow — creates a memory that tends to last far longer than the jar itself. Children who make fairy jars frequently develop a proprietary relationship with their garden corners, checking on their jars daily, adding new decorations as they find small treasures, and telling increasingly elaborate stories about the fairy occupants they are convinced visit after dark. This imaginative engagement with the natural world is one of the most generous gifts a craft can give.
Expanding Into a Full Fairy Garden
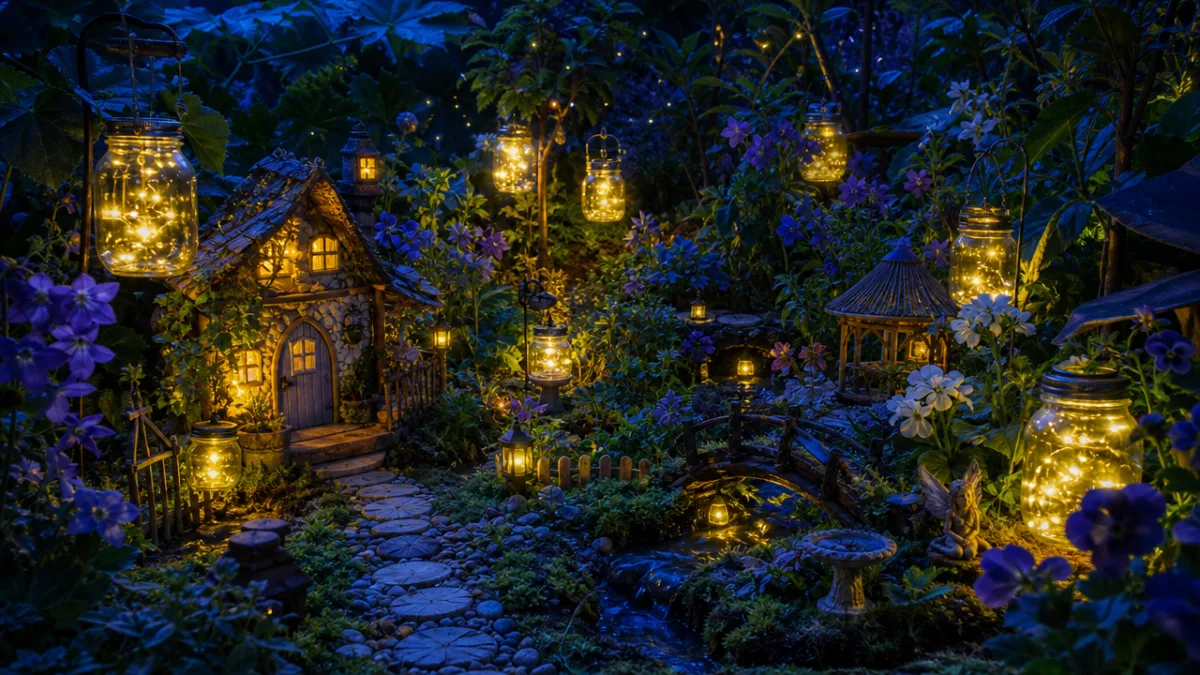
For many crafters, fairy jars serve as a first step toward a much more ambitious project: a fully realized fairy garden occupying a significant portion of an outdoor space. The same design principles that make individual fairy jars successful — attention to scale, sensitivity to light, a commitment to storytelling through carefully chosen objects — apply directly to larger installations. Fairy paths made from flat stones leading between planted areas, miniature fences constructed from popsicle sticks or twigs, and tiny signposts with hand-lettered names pointing toward “Toadstool Hollow” or “Moonflower Meadow” all extend the fairy jar’s magic across a broader canvas.
Container fairy gardens offer a manageable intermediate step between individual jars and full garden installations. A large ceramic pot, a wooden wine barrel planter, or a weathered stone trough can host an entire fairy landscape complete with ground-cover plants scaled to suggest a fairy-sized forest, stepping stones, a small mirror pool, and of course several glowing fairy jars positioned among the foliage. These contained installations are easier to maintain than open-ground fairy gardens and can be moved indoors during harsh weather, making them ideal for gardeners in climates where winter temperatures are severe.
Ultimately, the fairy jar is a remarkable object precisely because it requires so little but offers so much. It asks for a handful of inexpensive materials, an hour or two of unhurried creative time, and a willingness to believe — just briefly, just enough — that magic might actually exist in the quiet corners of a garden after the sun has set. In return, it gives back light, beauty, wonder, and the particular satisfaction of having made something with your own hands that brings genuine delight to everyone who encounters it. That is a generous exchange by any measure, and it explains why this humble craft, built around glass jars and tiny lights, continues to capture imaginations around the world.








What do you think?
It is nice to know your opinion. Leave a comment.