










Chunky Crochet Cat Cave Pattern for the Coziest Cat Bed Ever
Why Your Cat Deserves a Chunky Crochet Cave
Cats are deeply instinctual creatures, and one of their most powerful drives is the search for a safe, enclosed space where they can retreat from the world. In the wild, felines seek out dens, hollows, and tight corners that offer warmth and protection on all sides. A chunky crochet cat cave taps directly into this primal need, offering your beloved pet a handcrafted sanctuary that feels snug, secure, and completely their own. Unlike a flat cat bed, a cave structure wraps around your cat on multiple sides, mimicking that enclosed den-like feeling cats instinctively crave.
Beyond the psychological comfort a cave provides, there is also the undeniable appeal of temperature regulation. Thick, chunky yarn creates a naturally insulating structure that retains warmth beautifully during cooler months while remaining breathable enough that your cat won’t overheat in summer. The looped texture of crochet work allows for a gentle circulation of air through the walls of the cave, making it a year-round sleeping solution rather than a seasonal one. Many cat owners who have introduced a crochet cave to their home report that their cats take to it almost immediately, often within hours of first introduction.
There is also a deeply satisfying personal dimension to making this project yourself. When you crochet a cat cave by hand, every stitch is an act of love and intention. You choose the colors that complement your home decor, you select a yarn that meets your standards for softness and durability, and you invest your time and energy into creating something truly one of a kind. The finished product is not just a pet accessory — it is a handmade heirloom that reflects your care for your pet and your skill as a crafter. That personal touch makes all the difference, for you and for your cat.
Choosing the Right Materials for Your Cat Cave
The most critical decision you will make in this entire project is selecting the right yarn. For a chunky crochet cat cave, you want a super bulky or jumbo weight yarn — typically classified as a size 6 or size 7 on the standard yarn weight scale. These thick strands work up quickly and create the dense, sturdy walls your cat cave needs to hold its shape without collapsing inward. Merino wool blends are an excellent choice because they are naturally soft against your cat’s skin, resist odors to a reasonable degree, and felt beautifully if you choose to add an optional felting step to firm up the structure even further.
Cotton and cotton blend yarns are another strong contender, particularly if your cat has sensitive skin or if you live in a warmer climate. Cotton is hypoallergenic, easy to wash, and holds its shape well without any felting process. The trade-off is that cotton lacks the elastic bounce of wool, which means it may feel slightly stiffer in the finished cave. Many crafters find that a wool-cotton blend gives them the best of both worlds — the softness and structure of wool combined with the washability and breathability of cotton. Always check the care label before purchasing, since machine-washable yarn will save you considerable effort in the long run.
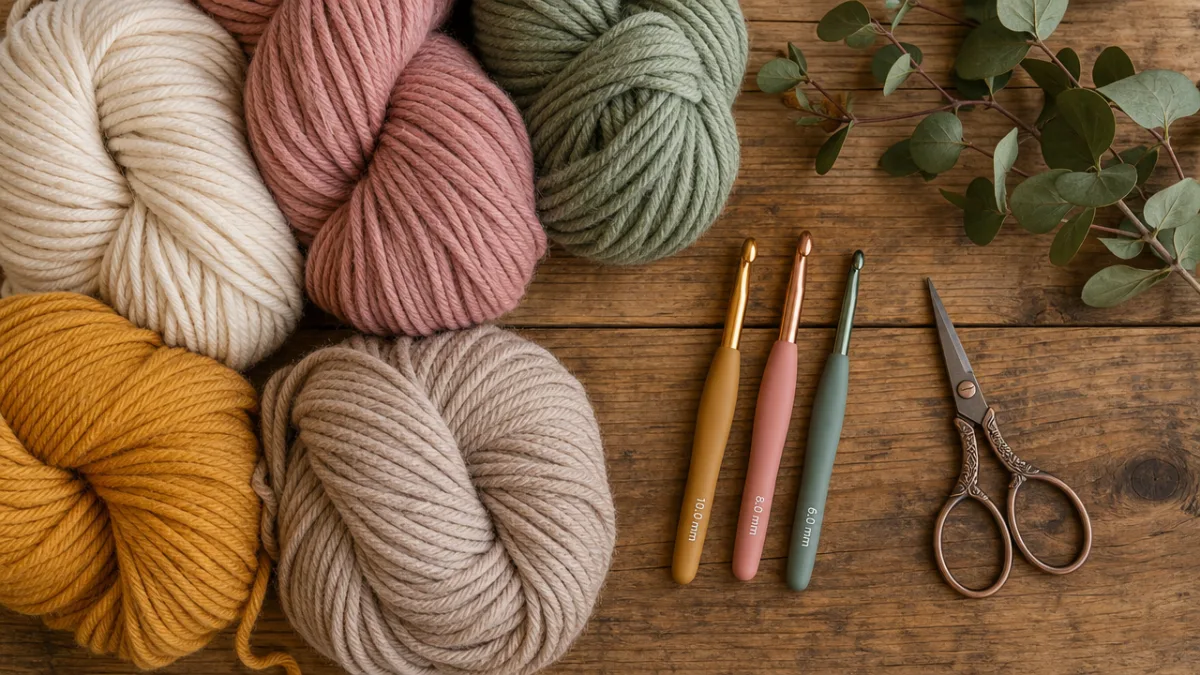
For tools, you will need a large crochet hook to match your chosen yarn weight. A 15mm to 20mm hook is standard for super bulky yarns and will give you a satisfying, fast-paced working experience. Beyond the hook and yarn, gather a yarn needle for weaving in ends, a pair of sharp scissors, and a few stitch markers to help you keep track of rounds as you work in the round. Some crafters also like to use a balloon or bowl as a shaping mold while the cave dries after blocking or felting, which helps the structure maintain its dome shape beautifully.
- Super bulky or jumbo yarn (size 6 or 7): The backbone of the project, providing warmth, structure, and visual impact. Choose approximately 200 to 400 yards depending on the size of your cat.
- Large crochet hook (15mm to 20mm): Essential for working with thick yarn comfortably and achieving the correct gauge for a sturdy cave wall.
- Yarn needle and scissors: Needed for finishing, weaving in ends cleanly, and trimming any loose fibers from the completed cave.
- Stitch markers: Helpful for marking the beginning of each round so you never lose your place in the pattern, especially useful when working with dark-colored yarn.
- Shaping mold (optional): A large balloon or mixing bowl placed inside the cave while it dries after blocking helps preserve the rounded dome shape.
Understanding the Pattern: Stitches and Structure
The foundation of most chunky crochet cat cave patterns is the magic ring, also called the magic circle or adjustable loop. This technique allows you to begin crocheting in the round from a tight, invisible center point, which is essential for building the base of your cave without a visible hole in the middle. If you have never used a magic ring before, it is worth spending a few minutes practicing the motion before beginning the actual project, since it becomes quick and effortless once your hands understand the movement. From the magic ring, you will work a series of single crochet stitches that expand outward in increasing rounds to form the flat circular base.
Once the base reaches the desired diameter — typically between 10 and 14 inches for an average-sized cat — you transition from the flat circle into the upward walls of the cave. This is done by working even rounds without any increases, which causes the fabric to naturally curve upward and inward rather than continuing to expand outward. The number of even rounds you work determines the height of the cave walls, so you can easily customize this measurement to suit a particularly large or small cat. Many patterns suggest a wall height of 8 to 10 inches, which provides good coverage for most domestic cats without making the opening so small that shy cats feel trapped.
The entrance of the cave is typically formed by working a partial round on the final few rows of the structure, leaving a gap that serves as the doorway. Some patterns create a rounded opening by working increases on either side of the gap to frame it neatly, while others use a simple bind-off method for a more casual, organic-looking entrance. Whichever method your pattern specifies, the entrance should be wide enough that your cat can enter and exit comfortably without squeezing — approximately 5 to 7 inches across is a good working guideline. After completing the cave body, many crafters add a simple border of slip stitches or reverse single crochet around the entrance for a polished, professional finish.
If you are newer to crochet and want to simplify the project further, some excellent beginner-friendly cat cave patterns use only single crochet throughout, relying on the thickness of the yarn to create a sturdy structure without any complex stitch patterns. More advanced crafters might incorporate half double crochet or double crochet for a more open, textured look, though this will result in a slightly less dense and structured cave that may require stiffening with a spray starch or blocking solution. Whatever your skill level, there is a version of this pattern that will meet you where you are and deliver a result your cat will love.
Step-by-Step Guide to Crocheting Your Cat Cave
Begin by creating your magic ring and working 6 single crochet stitches into it, then pull the ring closed tightly. This forms the center of your base and establishes the first round. In round two, work 2 single crochet into each stitch around, giving you 12 stitches total. Continue in this manner, adding one additional increase per section of stitches with each subsequent round — so round three will have increases every 2 stitches for 18 total, round four every 3 stitches for 24 total, and so on. Continue expanding until your base reaches your target diameter, typically around 6 to 8 rounds depending on your yarn weight and hook size.
Once the base is complete, place a stitch marker at the beginning of your next round and begin working even rounds with no increases. You will notice almost immediately that the fabric begins to pull upward rather than lying flat, and this is exactly what you want. Continue working even rounds until the walls of your cave reach the desired height, checking periodically by placing the base on a flat surface and measuring from the ground to the top edge of your current round. It can be helpful at this stage to occasionally insert a large bowl into the cave as you work to check that the proportions are looking right and that the opening will be large enough for your cat.
To form the entrance, work partway around your final round — about two-thirds of the way — and then turn your work, working back and forth in rows rather than continuing in the round. Work 3 to 4 rows back and forth across this section to create a roof that partially covers the opening. Fasten off and weave in all ends securely. The gap you left in the round becomes the doorway of the cave, framed naturally by the curved roof above it. If desired, add a single round of slip stitches around the entire entrance to reinforce the edges and give the cave a neater, more finished appearance.
- Create the magic ring and work round 1: Chain 2 or use the adjustable magic ring method, then work 6 single crochet stitches into the ring and pull tight to close.
- Complete the base (rounds 2 through 7 or 8): Increase evenly around each round, doubling the stitch count initially and then adding stitches proportionally until the base diameter matches your target measurement.
- Build the walls (rounds 8 through 14 approximately): Work even rounds with no increases, allowing the structure to curve upward naturally into the cave shape.
- Form the entrance: Stop partway through the final round and work back and forth in rows to create the cave’s roof and opening.
- Finish and block: Weave in all yarn ends, add an optional border around the entrance, and block or shape the cave over a mold to set its final form.
Blocking is a step that many beginner crafters skip, but it genuinely makes a significant difference in the finished appearance and structural integrity of your cat cave. To block a wool yarn cave, simply dampen the entire structure with cool water, gently squeeze out the excess without wringing or twisting, and then shape the cave over a large balloon inflated to the desired interior size. Allow the cave to dry completely — usually 24 to 48 hours — before deflating the balloon and removing it. The cave will retain the rounded dome shape as it dries, resulting in a professional-looking finished product that holds its form even under the enthusiastic weight of a lounging cat.
Customizing Your Cat Cave: Colors, Textures, and Embellishments
One of the most delightful aspects of making your own crochet cat cave is the virtually limitless opportunity for customization. Color choice alone can transform the feel of the finished piece entirely — a cave worked in warm terracotta and cream tones creates a bohemian, earthy aesthetic, while one worked in charcoal gray or navy gives a sleek, modern look that suits minimalist interiors beautifully. You can work the entire cave in a single solid color for a clean and graphic effect, or use two or three coordinating shades to create stripes, color blocks, or even a subtle gradient that shifts from the base of the cave to the top of the dome.
Texture is another wonderful customization avenue. Switching stitch types can dramatically alter the look and feel of your cat cave without adding any real complexity to the construction process. For example, working the walls of the cave in a simple waffle stitch creates a deeply satisfying grid-like texture that photographs beautifully and adds extra visual interest. A moss stitch or linen stitch alternation produces a dense, woven-looking fabric with an artisan feel. Even something as simple as using a variegated or tweed yarn instead of a solid will give your finished cave an organic, handspun quality that feels warm and special.
Embellishments offer yet another layer of personalization. Many crafters add appliqued details to the outside of the cave — crochet flowers, leaves, or geometric shapes worked separately and then sewn on, ears stitched to the top of the dome for a playful animal-themed cave, or even a personalized initial in contrasting yarn. Some cat owners add a small pom-pom hanging from a length of cord at the cave entrance, giving their cat a built-in toy to bat at while they settle in for a nap. For the interior, consider crocheting or purchasing a removable cushion insert that can be easily washed — this extends the life of the cave itself and makes maintenance far more convenient.
If you want to give your cat cave as a gift, consider adding thoughtful finishing touches that elevate it from a craft project to a premium handmade item. A simple tag made from card stock and tied through the entrance with a ribbon looks charming and gives the recipient information about the yarn used, which will be helpful when they need to clean the cave. Packaging the cave alongside a small bag of catnip or a matching crochet toy makes for an especially generous and cohesive gift set. The time you put into these details signals care and thoughtfulness in a way that a store-bought item simply cannot replicate, making your handmade cave a truly memorable present for any cat lover in your life.
Caring for Your Crochet Cat Cave and Keeping It Fresh
A cat cave is an investment of time, materials, and love, so taking good care of it will ensure it stays beautiful and functional for years to come. The care routine you need to follow depends primarily on the fiber content of your yarn, which is why checking the yarn label before you begin your project is such an important step. Wool yarns are often hand-wash-only and can be spot cleaned between deeper washes, while cotton and synthetic blends are frequently machine washable on a gentle cycle. If your cave is made from a felted wool, be especially careful to wash it in cool water only, as heat will cause the fibers to shrink and mat further.
Between washes, regular maintenance is simple and quick. Shake out the cave outdoors or over a trash can every week or two to remove loose fur, debris, and dander that accumulates naturally from your cat’s use. A lint roller run over the outer surface takes only a minute and keeps the cave looking neat between deeper cleanings. Some cat owners also find it helpful to lightly mist the interior of the cave with a diluted white vinegar and water solution, which neutralizes odors naturally without leaving any harsh chemical residue that could irritate a cat’s sensitive nose. Allow the cave to air dry completely before your cat uses it again after any cleaning treatment.
Over time, heavy use may cause the cave to lose some of its original shape, particularly if it was not blocked firmly at the beginning or if it has been washed repeatedly without reshaping during the drying process. This is easy to correct by simply re-blocking the cave using the same balloon or mold technique described in the construction section. Wet the cave thoroughly, shape it over your mold, and allow it to dry completely. Repeat this process as needed — many crafters find that re-blocking once or twice a year keeps the cave looking as good as new even after months of daily use by an enthusiastic cat. With a little regular attention, your chunky crochet cat cave will remain a beloved part of your home and your cat’s daily routine for a very long time.
- Hand wash wool yarns in cool water with a gentle wool wash, reshaping the cave over a mold as it dries to maintain the dome structure.
- Machine wash cotton or synthetic yarns on a gentle, cool cycle placed inside a mesh laundry bag to protect the structure during agitation.
- Spot clean between washes using a damp cloth and a tiny amount of pet-safe dish soap applied directly to any soiled areas, then blotted dry.
- Freshen odors naturally with a light misting of diluted white vinegar or a sprinkle of baking soda left inside the cave for an hour before shaking out.
- Re-block as needed when the cave begins to lose its shape, using the original balloon or bowl mold method to restore the rounded dome profile.








What do you think?
It is nice to know your opinion. Leave a comment.