










Paper Bag Shark Craft: A Complete Guide to Making Your Own Shark Puppet
Introduction to Paper Bag Crafts for Kids
Paper bag crafts have been a beloved staple of childhood creativity for generations, and it is easy to understand why. They require minimal materials, produce impressive results, and keep children engaged for hours at a stretch. The paper bag shark craft in particular stands out as one of the most exciting and imaginative projects a child or parent can undertake together, combining basic craft skills with a love of ocean life and adventure. Whether you are a teacher looking for a classroom activity or a parent searching for weekend entertainment, this guide will walk you through everything you need to know.
The beauty of a paper bag puppet is in its simplicity. A standard brown paper lunch bag becomes the foundation for a creature of the deep, complete with teeth, fins, and expressive eyes. Children as young as three or four can participate in age-appropriate steps like gluing pieces on, while older kids aged six and up can handle cutting and more detailed decoration. This scalability makes the shark craft one of the most versatile projects in the world of kids’ crafting, appealing to a wide range of ages and skill levels with ease.
Beyond the fun of the finished puppet, the process itself teaches children valuable skills. Fine motor development improves as little hands practice cutting, folding, and gluing. Spatial reasoning comes into play when children figure out how to position fins and teeth. Even color recognition and counting get worked in naturally when sorting materials and following instructions. The paper bag shark craft is genuinely educational at its core, wrapped up in a package that feels entirely like play to the child engaged in it.
Materials You Will Need
Gathering your materials before you begin is one of the most important steps in ensuring a smooth and enjoyable crafting experience. There is nothing more frustrating than pausing mid-project to hunt for a missing item, especially when working with young children who lose enthusiasm quickly during interruptions. Fortunately, everything needed for a paper bag shark craft is either already in most homes or easily available at any local dollar store or craft supply shop, making this an incredibly budget-friendly activity.
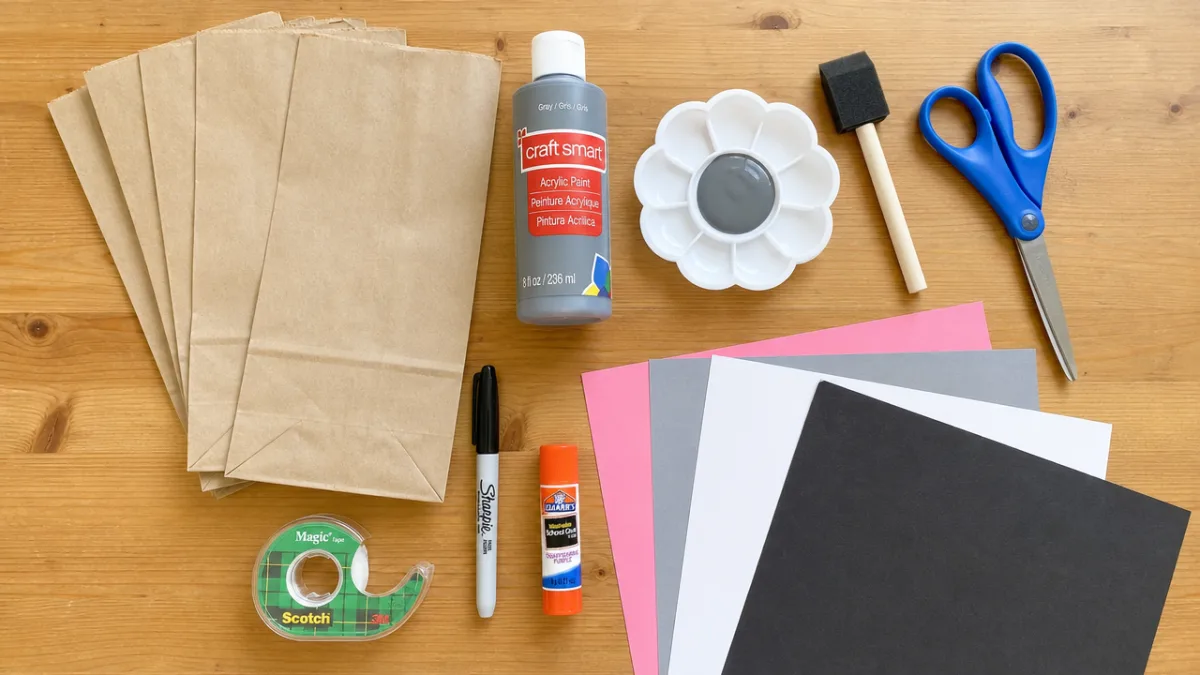
The absolute essentials include a standard brown paper lunch bag, which forms the body of your shark. You will also need gray paint or gray construction paper to give your shark its classic ocean predator coloring. White construction paper or cardstock works best for the teeth, as it holds its shape well after cutting. A pair of child-safe scissors, a glue stick or liquid craft glue, and black and white foam sheets or construction paper for the eyes round out the core supply list. Having everything laid out on a covered table before you begin makes the whole process feel organized and professional.
Optional but highly recommended materials include blue paint or tissue paper for decorative ocean-themed backgrounds, glitter glue for adding shimmer to fins and gills, and googly eyes purchased from any craft store, which add an irresistible cartoonish charm to the finished puppet. Some crafters also like to use metallic silver paper for the underbelly detail, mimicking the two-toned coloring of real sharks. A permanent black marker is also useful for adding gill slits, nostril marks, and other fine details that bring your shark to life with minimal effort and excellent visual impact.
Step-by-Step Instructions for Building Your Paper Bag Shark
Begin by preparing your paper bag. If you are painting it gray, lay the bag flat and apply two even coats, allowing full drying time between each coat. If you are using gray construction paper instead, you will wrap or cover the outside of the bag, which can be a more manageable option when working with very young children who may lack patience for drying time. Either approach produces a great result, so choose based on the age and temperament of the children you are working with, and do not worry about achieving perfection at this early stage.
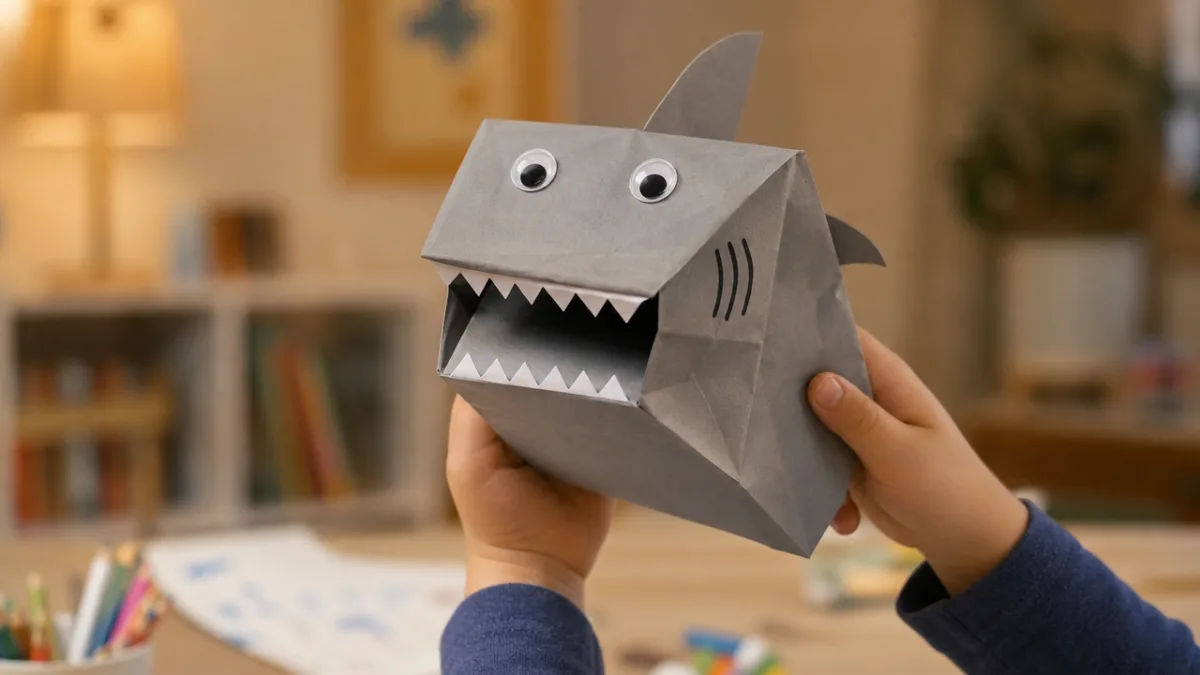
Next, cut out your shark’s teeth from white construction paper or cardstock. The most effective method is to cut a long rectangular strip and then cut triangular points along one edge to create a row of jagged teeth. You will need two strips, one for the upper jaw and one for the lower jaw. The upper teeth get glued to the flap of the paper bag, which forms the top of the mouth when the puppet is operated. The lower teeth get glued to the body of the bag just below where the flap meets the main section, creating a convincing chomping mouth when the hand moves inside the bag.
Now cut out two large triangular fins from gray paper or foam. One dorsal fin goes on top of the bag toward the rear, and two pectoral fins go on either side toward the middle. Fold a small tab at the base of each fin before gluing to give the fin a three-dimensional effect that lifts it slightly off the body. Attach the eyes near the front of the bag above the mouth area. If using construction paper eyes, cut a large white circle with a smaller black circle on top, or simply use googly eyes for instant personality. A curved black line drawn with marker just behind the mouth can suggest gills effectively.
Creative Variations and Customization Ideas
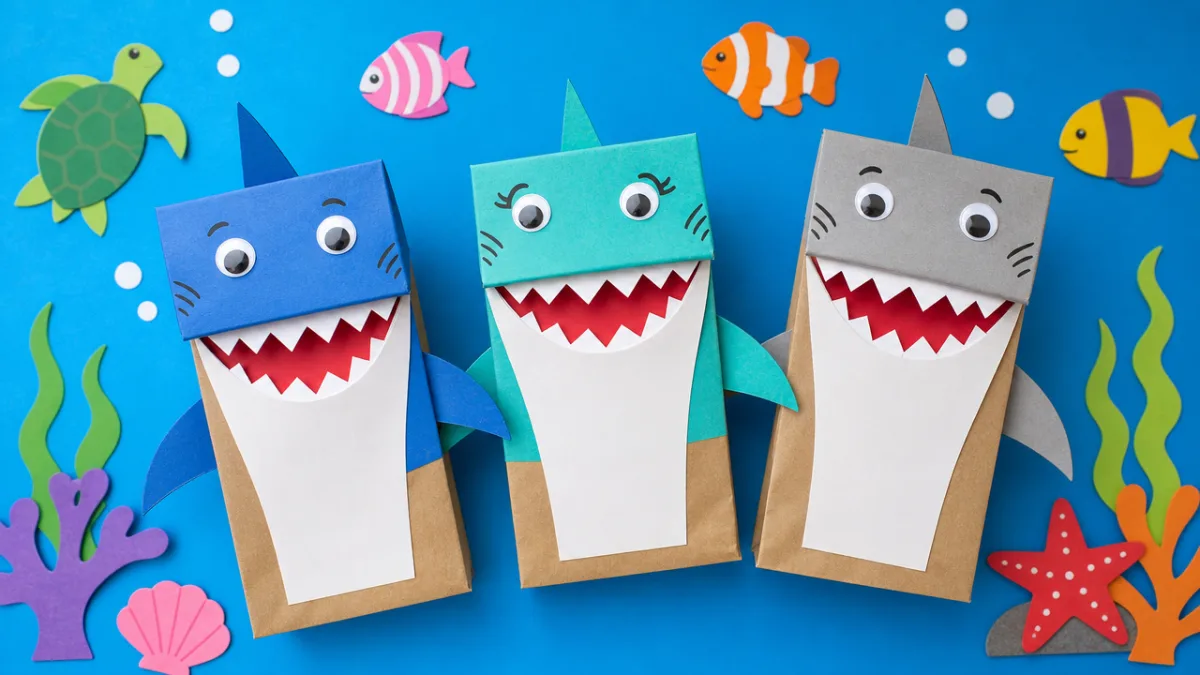
Once you have mastered the basic shark puppet design, the real fun begins with customization. Children love to put their own stamp on a craft project, and the paper bag shark offers tremendous room for personal expression. Some kids prefer a ferocious-looking great white with extra rows of teeth and narrowed angry eyes, while others lean toward a friendlier design with rosy cheeks, eyelashes, or a cheerful smile. Both approaches are equally valid and produce wonderful, personality-filled results that children will be proud to show off and play with long after the glue has dried.
Consider expanding beyond the standard gray color scheme by making different species of sharks. A hammerhead shark can be suggested by adding a wide, flat head extension made from folded cardstock. A whale shark can be crafted using blue or gray spotted paper and given a wide, gentle smile instead of pointed teeth. A tiger shark benefits from thin dark stripes painted or drawn across the body. Making a whole family of different shark species can become an extended project across multiple craft sessions, teaching children about ocean biodiversity in an engaging and memorable hands-on way.
For an extra layer of creativity, encourage children to build an entire ocean scene to accompany their shark puppet. A large piece of blue poster board decorated with painted or tissue paper waves, paper fish, coral cutouts, and sea plant streamers becomes an instant puppet theater backdrop. Children can practice storytelling skills by creating puppet shows featuring their shark alongside other sea creature characters made from additional paper bags or smaller paper rolls. This extension transforms a single craft project into an immersive imaginative play experience that develops language, narrative thinking, and social skills simultaneously.
Themed variations also work wonderfully for holidays and seasonal events. A Halloween paper bag shark might feature glowing orange eyes and a spooky color scheme in black and purple. A birthday party version could wear a tiny paper party hat glued to the top of its head and have confetti details scattered across its body. For ocean-themed classroom units, each child in the class can make a different deep-sea species and the resulting collection can be displayed together as a collaborative aquarium installation that celebrates both individual creativity and group effort in equal measure.
Educational Benefits and Learning Opportunities
The paper bag shark craft is far more than a simple time-filler. It is a richly layered educational activity that supports development across multiple domains simultaneously. Fine motor skills receive significant exercise throughout the cutting, gluing, and folding steps, building the hand strength and coordination that young children need for future writing tasks. For children who struggle with fine motor challenges, crafting activities like this one provide a motivating, low-pressure context in which to practice those skills without the frustration that can accompany formal handwriting or drawing exercises in a school setting.
The project also lends itself naturally to STEM integration, particularly in the area of science. Before or after making their puppets, children can learn fascinating facts about real sharks, exploring questions like how sharks breathe, what they eat, how many teeth they grow in a lifetime, and which species are truly dangerous to humans. This factual grounding adds depth and meaning to the craft activity, connecting imaginative creation to real-world knowledge. Children who understand that real sharks replace thousands of teeth over a lifetime bring a new appreciation to the act of cutting and placing those white paper triangles on their puppet’s jaw.
Language development also flourishes around this kind of project. Listening to and following multi-step instructions builds comprehension skills. Discussing color, shape, and positional language during the building process reinforces vocabulary in a natural context. After completion, children who use their puppets for storytelling practice narrative structure, character voice, and sequencing of events, all of which are foundational literacy skills. Teachers who incorporate puppet-making into language arts units consistently report higher levels of student engagement and retention than they see with purely text-based activities covering the same material.
The social and emotional benefits deserve recognition as well. Crafting together, whether in a classroom or at a kitchen table, creates shared experience and strengthens relationships between children and the adults guiding them. The pride a child feels when holding up a completed puppet they made themselves is a genuine confidence-building moment. For children who struggle with anxiety or difficulty in academic settings, the open-ended and success-guaranteed nature of a craft project can offer a rare, meaningful experience of competence and accomplishment that positively colors their whole relationship with learning.
Tips for Success and Common Mistakes to Avoid
The single most common mistake crafters make with paper bag puppets is using too much liquid glue, which causes the paper bag to warp, wrinkle, and lose its shape before pieces have a chance to set properly. A glue stick is almost always the better choice for attaching flat paper pieces to the bag’s surface. When liquid glue is necessary for heavier embellishments like foam pieces or googly eyes, apply it sparingly and allow adequate drying time before moving the puppet. Keeping a few binder clips or clothespins handy to hold pieces in place while glue dries is a simple trick that makes a real difference in the quality of the finished product.
Prepare your workspace thoughtfully before beginning. Cover the table with newspaper, a plastic tablecloth, or a craft mat to protect surfaces from paint and glue. Organize all cut pieces in small bowls or on separate paper plates so children can see and access everything easily without digging through a pile of supplies. Having a damp cloth or paper towels nearby makes quick cleanup of sticky fingers easy and prevents glue transfer onto finished surfaces. These simple preparatory steps take only a few minutes but dramatically reduce the stress level of the crafting session for both adults and children involved.
When working with groups of children, consider pre-cutting the more complex shapes like teeth strips and fins before the session begins. Pre-cutting removes barriers that might slow younger or less confident children down and allows everyone to focus their energy on the decorating and assembling steps where creative decision-making is most rewarding. For older children, cutting their own shapes is an important part of the challenge and the learning, so tailor your level of preparation to the specific group you are working with rather than applying a one-size-fits-all approach to every situation you encounter.
- Always test your paint on a small corner of the bag before painting the entire surface to check for bleed-through or excessive warping from moisture.
- Allow painted bags to dry completely before adding any paper pieces, ideally overnight if time permits.
- Use a pencil to lightly sketch placement of fins and eyes before committing to glue, as repositioning after gluing is difficult and often damages the bag.
- Reinforce the inside of the flap with a strip of tape if children plan to use the puppet vigorously, as repeated opening and closing can weaken the fold over time.
- Store finished puppets flat inside a folder or between two pieces of cardboard to prevent crushing if they are to be transported or kept as keepsakes.
Extending the Fun Beyond the Craft Table
A finished paper bag shark puppet opens the door to a wide range of play and learning extensions that can keep children engaged and inspired for days after the initial crafting session. One of the most natural extensions is storytelling and dramatic play. Encourage children to give their shark a name, invent a home in the ocean, and develop a personality. Ask open-ended questions to spark their imagination: What does your shark eat for breakfast? Does your shark have any friends? What adventures does your shark go on? These prompts help children build rich inner worlds around their creation and develop narrative thinking skills in a genuinely joyful context.
Puppet shows are another wonderful direction to take once the shark is complete. A simple puppet theater can be constructed from a cardboard box with a rectangular window cut out of one side. Children can perform shows for family members, classmates, or even for a camera to create a little recorded performance they can watch back and share proudly. Adding additional paper bag puppet characters, perhaps a friendly octopus, a nervous little fish, or a wise old sea turtle, builds ensemble storytelling opportunities and encourages collaborative play between siblings or friends who each craft their own ocean character.
For educators, the shark puppet can serve as a springboard into a comprehensive ocean unit. Writing activities might include composing a story about a day in the life of a shark, writing shark facts in first person from the shark’s own perspective, or creating a field guide entry for their specific shark species. Math integration can involve measuring and comparing the sizes of different shark species using drawings or paper cutouts scaled to proportion. Art integration can explore how different artists have depicted the ocean and its creatures, from scientific illustration to abstract expressionism, broadening children’s artistic vocabulary and appreciation through a subject they already find thrilling and compelling.
Finally, consider documenting the craft process from start to finish with photographs and creating a simple book or display board showing the step-by-step journey from flat paper bag to finished puppet. Children love seeing themselves in action, and this kind of documentation helps them develop metacognitive awareness, the ability to think about and reflect on their own learning process. A display of finished sharks accompanied by each child’s written shark facts or stories creates a classroom installation that invites visitors to engage with both the visual art and the written work, celebrating the full breadth of what children accomplished through one beautifully simple paper bag shark craft project.








What do you think?
It is nice to know your opinion. Leave a comment.