










Introduction to Garden Sculpture: Transforming Your Outdoor Space
Garden sculptures have been part of outdoor design for thousands of years — think the grand estates of ancient Rome or the quiet, meditative gardens of Japan. And while that history might sound intimidating, making your own garden sculpture is actually more approachable than most people expect. Whether you’re dreaming of a bold abstract piece or a charming figure tucked into your flower beds, this is one of those projects that lets you put something genuinely personal into your garden.
What’s lovely about handmade garden sculpture is that the finished piece is only part of the story. When you make something with your own hands and set it in a garden you care for, it creates a connection between the art and the space that you just can’t buy. Your sculpture will weather seasons alongside your plants, picking up the kind of subtle texture and patina that only time and the natural world can give it. That process of change is part of what makes it special.
Before you touch a single tool or choose a material, do yourself a favor and spend some time wandering your garden. Walk through it at different times of day. Notice where the morning light hits, where afternoon shadows gather, which spots naturally draw your eye. A sculpture works best when it feels like it belongs — when it amplifies what’s already beautiful rather than competing with it. Thinking about scale, proportion, and visual weight before you start will make every decision that follows a lot easier.
Choosing the Right Materials for Your Garden Sculpture
Your choice of material shapes everything — how the piece looks, how long it lasts, how much work it takes to make, and how much upkeep it’ll need down the line. The most popular options for home sculptors are concrete, hypertufa, wire mesh, clay, reclaimed wood, and metal. Each one brings something different to the table. Concrete is incredibly tough and can take almost any shape, while reclaimed wood has a warmth and character that’s hard to beat — though it does need more attention to weatherproofing over the years.
Hypertufa tends to be a favorite for garden sculptors, and it’s easy to see why. Made from Portland cement, perlite or vermiculite, and peat moss, it looks remarkably like natural stone but weighs a lot less and is much easier to work with. You can mold it by hand into almost any shape, and when it dries, it has that rough, porous surface that looks like it’s been sitting in the garden for decades. It handles frost well once it’s properly cured, and over time it develops a mossy patina as the garden’s natural organisms move in. For beginners especially, it’s hard to beat.
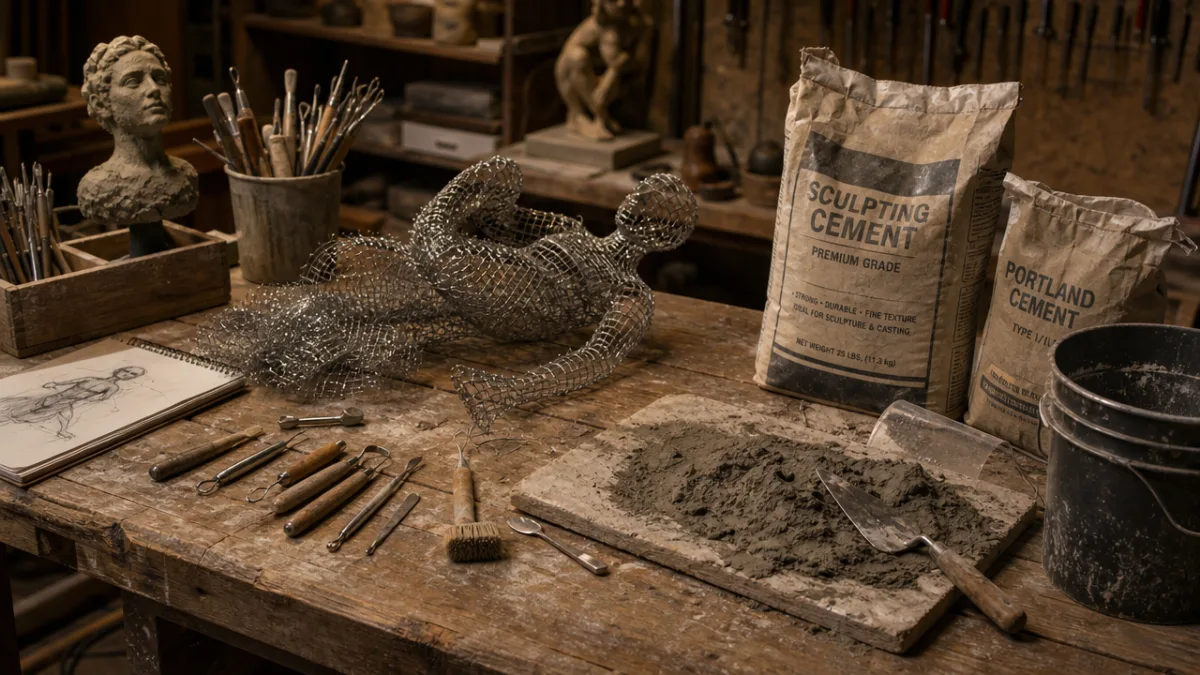
Wire mesh sculptures offer a totally different kind of experience. You shape galvanized steel wire into a three-dimensional form, then either leave the wire exposed or cover it with cement, papercrete, or mosaic tiles. The wire skeleton is particularly well-suited to figurative work because you can capture movement and gesture before you’ve committed to a final surface. Galvanized or stainless steel wire holds up well outdoors for many years without rusting, so the results are built to last.
Material Comparison at a Glance
- Hypertufa: Lightweight, stone-like appearance, develops natural patina, excellent frost resistance, ideal for beginners.
- Concrete: Extremely durable, highly versatile, can be pigmented or textured, heavier and requires more curing time.
- Wire Mesh: Great for figurative sculpture, allows expressive gesture, can be left open or covered with a surface medium.
- Reclaimed Wood: Warm organic aesthetic, sustainable, requires weatherproofing, best in sheltered garden positions.
- Clay (Fired or Air-Dry): Highly expressive and detailed, air-dry clay suits smaller pieces, fired ceramic is most durable.
- Found Objects/Mixed Media: Creative and eco-friendly, endlessly varied, suits abstract and conceptual approaches.
Planning and Designing Your Sculpture
Every good sculpture starts with a plan — and no, you don’t need any formal art training to put one together. Even rough sketches drawn from a few different angles (front, side, top) will save you a lot of headaches once you’re actually working in three dimensions. Jot down approximate dimensions and note any internal supports the design might call for. Having something to refer back to when the physical work gets tricky is genuinely useful.
Scale is one of the trickiest things to get right. A piece that looks impressive on paper can look tiny and lost next to a tall hedge, while something that seems modest in your sketch might overwhelm a small courtyard. A great trick is to stack some cardboard boxes or plant pots to roughly the intended size and leave them in your proposed spot for a day or two. Look at them from your windows, from the garden gate, from wherever you usually sit outside. It sounds simple, but it tells you a surprising amount about whether your planned scale actually works in that space.
Think about how your sculpture’s subject and style will fit the personality of your garden. A sleek geometric form suits a contemporary space with clean lines and a restrained planting scheme, while a whimsical frog or fairy feels right at home in a cottage garden full of flowers. It’s also worth considering sculptures that pull double duty — a bird bath built into a sculptural form, a sundial on a decorative pedestal, or a trellis structure that doubles as a support for climbing plants. These functional pieces earn their place in a garden twice over.
Design Checklist Before You Begin
- Determine the final size and weight of your sculpture and confirm your chosen location can support it.
- Sketch the design from at least three angles and note key measurements.
- Decide on your material and gather all tools and supplies before starting.
- Plan any internal armature or structural support that the sculpture will require.
- Consider how the sculpture will be anchored or secured in the garden to prevent tipping in wind.
- Think about the finished surface treatment, color, and any sealants needed for weatherproofing.
Step-by-Step Construction Process
With your design sorted and your materials ready, it’s time to actually build the thing. The process will look different depending on your material, but the core steps are pretty consistent across most approaches. If you’re working with hypertufa or concrete, start by building your armature if the design needs one. For organic or figurative shapes, a core of rigid foam insulation or crumpled chicken wire cuts down dramatically on the amount of material you need and keeps the finished piece lighter. Shape your armature close to the final form, leaving enough room to apply a layer of your working medium over the top.
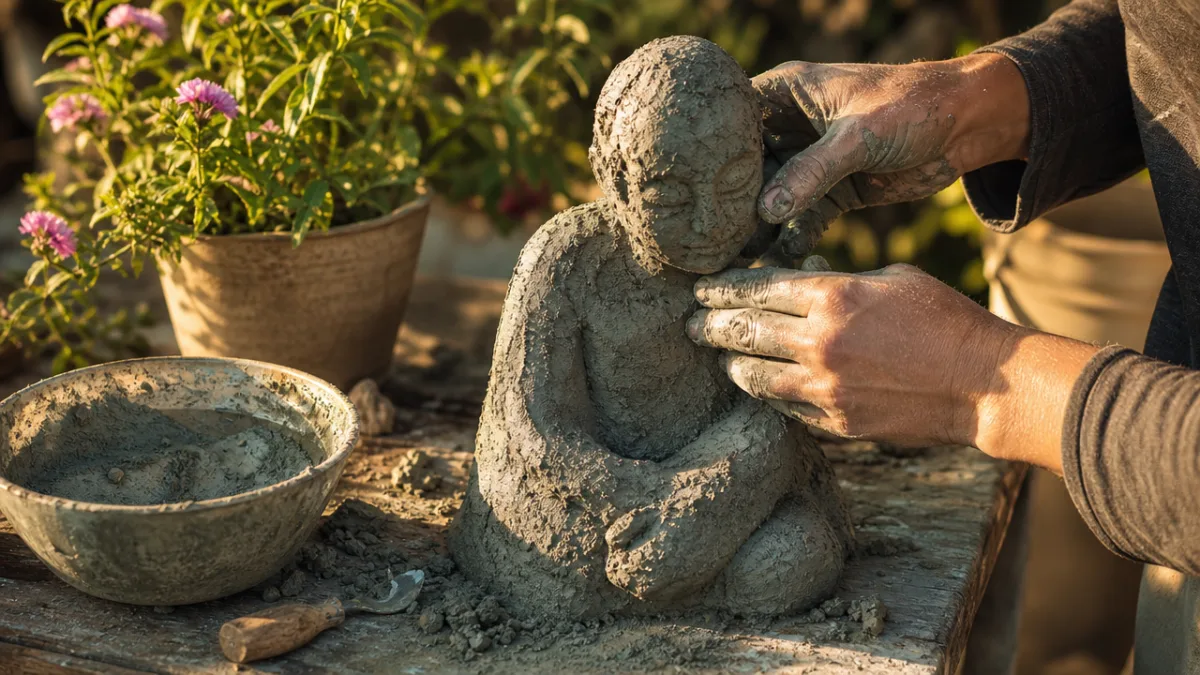
To mix hypertufa, combine one part Portland cement with one and a half parts perlite and one and a half parts peat moss in a large tub. Add water gradually, mixing as you go, until you get a consistency a bit like cottage cheese — wet enough to hold its shape when you squeeze it, but not so wet it drips. Wear gloves throughout; cement is caustic and will irritate skin if you’re in contact with it for long. Start applying the mixture to your armature in layers, pressing firmly to work out air pockets and using your hands or sculpting tools to build in texture and detail. Layer by layer is the way to go — one thick application is more likely to crack as it dries.
Curing slowly is the key to a strong finish. Drape a loose plastic sheet over the sculpture to stop it drying too fast in sun or wind, which can cause the surface to crack. Mist it lightly with water for the first 48 hours to help it cure evenly. Most cement-based pieces need at least 28 days before going outside permanently. In the meantime, you can keep refining the surface with a wire brush or carving tools — cured hypertufa and concrete can be rasped, carved, and sanded to bring out finer textures. The patience you put into the curing phase really does show in the final result.
Surface Finishing and Weatherproofing Techniques
Once your sculpture has fully cured, the surface finishing stage is where it really starts to come alive. Even if you love the raw look of freshly cured hypertufa or concrete, a few treatments can lift the piece visually and help it hold up outdoors for much longer. Working over the surface with a wire brush — using circular and linear strokes — opens up the pores of hypertufa, brings out that natural stone-like texture, and gives moss and lichen the perfect surface to take hold. That organic colonization over time is one of the most magical things about garden sculpture: a newly made piece gradually starts to look like it’s always been there.
If you want to give that aging process a nudge, you can brush a simple moss slurry over the cured surface. Blend a handful of gathered moss with a cup of buttermilk and enough water to make a paintable liquid, then brush it generously over the sculpture. Set the piece somewhere shaded and a little humid, keep it lightly misted, and within a few weeks to a couple of months (depending on your climate) you’ll start to see moss establishing and spreading. It gives the piece a beautifully aged look that genuinely can’t be faked any other way.
If you’d rather keep a cleaner, more defined appearance — or you want to introduce some color — exterior-grade masonry paint or iron oxide pigments mixed into a concrete slurry both work really well. Earthy tones like ochres, umbers, terracottas, and slate blues tend to sit most naturally in a garden setting. Once painted, seal the sculpture with a penetrating masonry sealer to protect it from water getting in and from freeze-thaw damage through winter. Reapplying that sealant every two to three years will keep the surface in good shape and prevent spalling in colder climates.
Popular Surface Finishing Options
- Natural Moss Patina: Apply moss-and-buttermilk slurry; maintain humidity; develops over weeks to months.
- Wire Brushing: Reveals natural stone-like texture; opens surface for natural weathering and colonization.
- Masonry Paint: Wide color range; apply exterior-grade formulas; seal afterward for protection.
- Iron Oxide Wash: Earthy, antique appearance; mix pigment into watered-down cement slurry and brush on.
- Mosaic Tile Inlay: Vivid, decorative finish; embed tiles before cement sets or adhere with exterior tile adhesive.
- Sealing: Apply penetrating masonry sealer for waterproofing; reapply every two to three years.
Placing and Maintaining Your Garden Sculpture
Placing your finished sculpture is one of the most satisfying moments of the whole process, but it’s worth giving it the same care you put into everything else. Bring the piece to its intended spot and really look at it before you commit. Walk around it, check how it sits against the surrounding plants, paths, and structures. Is it visible from the house? Does it create a satisfying focal point at the end of a path? Does it feel in proportion with what’s around it? Take your time here — it makes a real difference.
Anchoring the sculpture properly matters both for safety and for how long it lasts. Smaller, lightweight pieces can usually just sit on a level surface or a flat stone base, but anything larger or taller needs more secure fixing. A good approach is to embed a length of rebar or threaded steel rod into the base during construction, leaving a bit sticking out from the bottom. You can then drive that rod into the ground or set it into a concrete footing to keep the piece stable in strong winds or if someone bumps into it. On a patio or paved surface, a non-porous stone or slate base with construction adhesive works well and looks good too.
The good news is that once your sculpture is in place, it doesn’t ask for much. A little seasonal attention is really all it needs to stay looking great for decades. In autumn, clear away any leaves piling up at the base — trapped moisture is the enemy over winter. In very cold climates, put a fresh coat of masonry sealer on before the first frost. Each spring, give the piece a look over for hairline cracks and fill them promptly with exterior-grade masonry filler before water gets in and makes things worse. With that modest bit of care, a well-made hypertufa or concrete garden sculpture can genuinely outlast the person who made it — a lasting, personal mark on the landscape.

Inspiration, Creativity, and Making It Your Own
One of the best things about making garden sculpture is that there are genuinely no rules. You’re not working to a brief or following a strict tradition — you’re making something for your own garden, for your own enjoyment and the enjoyment of anyone who wanders through it. That freedom can feel a bit daunting at first, but try to hold onto this: the process is the reward. Even a first attempt that doesn’t quite come out the way you imagined teaches you an enormous amount about materials, form, and what it feels like to work with your hands in three dimensions.
If you’re not sure what to make, the garden itself is a great place to start looking. Leaves, seed pods, snail shells, pine cones — natural forms have an inherent rightness that translates beautifully into sculpture. You might also find inspiration in other traditions: the stone lanterns of Japanese garden design, the Green Man figures woven through European folklore, the scholar stones of Chinese gardens, or the abstract totems of African and indigenous American art. Each of these has a deep and genuine connection to the natural world that resonates perfectly in an outdoor setting.
As you grow more comfortable and confident, you might want to push further — into raku-fired ceramic, bronze casting through the lost-wax process, welded steel, or large-scale mosaic work. These are all things that home sculptors have taught themselves with time and practice. Local art centers and community colleges often run short courses in sculpture techniques that give you hands-on guidance and access to equipment like kilns and welding gear that you wouldn’t otherwise have. And the community of people who make art for gardens is genuinely warm and enthusiastic — workshops, garden open days, and online groups are full of people who love sharing what they know and cheering each other on. Getting connected with that world can give you both practical skills and the kind of encouragement that keeps you making things.








What do you think?
It is nice to know your opinion. Leave a comment.