










Ragged Tassels Party Decor: The Ultimate No-Sew Tutorial for Stunning Celebrations
Introduction: Why Ragged Tassels Are the Perfect Party Decoration
When it comes to creating memorable party decorations without breaking the bank or spending hours at a sewing machine, ragged tassels stand out as one of the most versatile and visually striking options available. These beautifully textured accents have surged in popularity across social media platforms precisely because they deliver a high-impact, bohemian aesthetic with surprisingly minimal effort. Whether you are decorating for a birthday celebration, a baby shower, a wedding reception, or a casual backyard gathering, ragged tassels can be customized to fit virtually any color palette or theme imaginable.
The beauty of the no-sew approach is that it truly democratizes crafting. You do not need any special equipment, advanced skills, or expensive materials to create decorations that look professionally made. All you need is fabric, scissors, and a little patience. The ragged, frayed edges that give these tassels their distinctive name are not a flaw but an intentional design choice that adds organic texture and movement, making them dance beautifully when hung from garlands, centerpieces, or overhead installations.
This tutorial will walk you through every step of the process, from gathering your materials to displaying your finished tassels in ways that will genuinely impress your guests. Along the way, you will discover tips for choosing the right fabrics, techniques for achieving consistent sizing, and creative ideas for incorporating ragged tassels into larger decorative schemes. By the end, you will have everything you need to transform any space into a festive, tassel-filled wonderland.
Materials and Tools: Everything You Need to Get Started
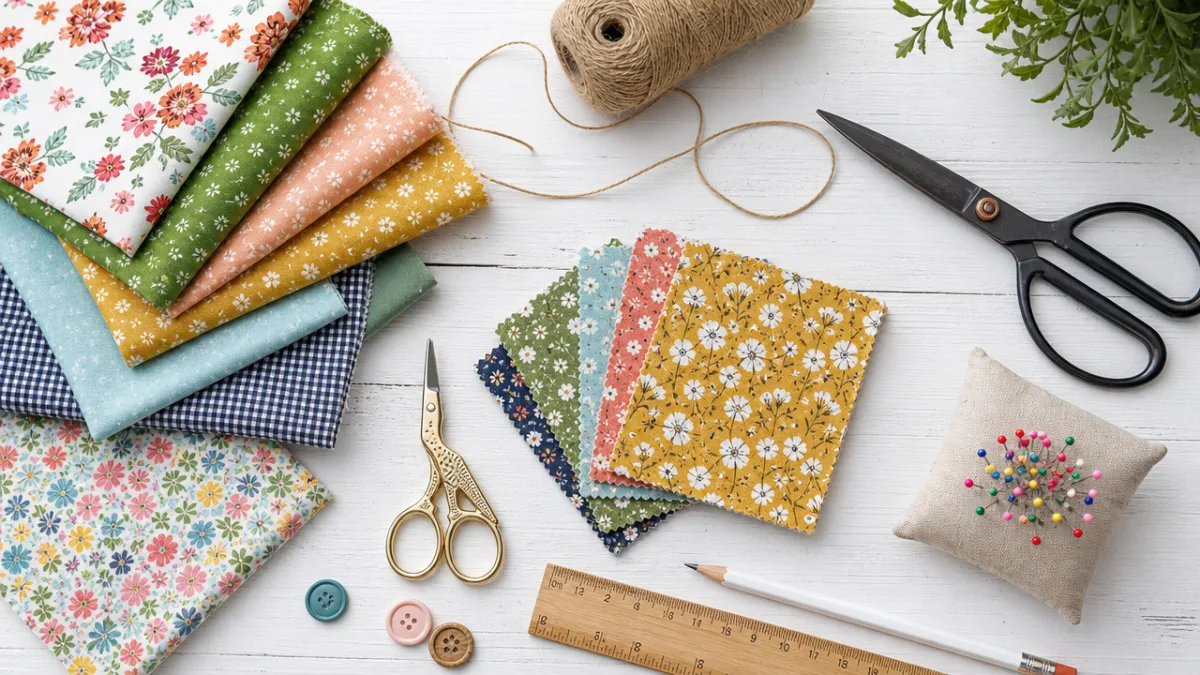
One of the most appealing aspects of making ragged tassels is the simplicity of the supply list. The primary material you will need is fabric, and the good news is that almost any woven fabric works beautifully for this project. Cotton, burlap, muslin, linen, and even lightweight denim are all excellent choices because they fray naturally when cut, creating that signature ragged texture. Avoid knit fabrics or tightly woven synthetic materials, as these tend not to fray well and will not give you the same organic, textured look that makes ragged tassels so charming.
In terms of quantities, the amount of fabric you need depends entirely on how many tassels you plan to make and how full you want each one to look. As a general guideline, a quarter yard of fabric will yield approximately four to six medium-sized tassels, depending on how thickly you layer the strips. It is always better to purchase a little extra fabric than to run short mid-project, especially if you are working with a specific color scheme. Fat quarters from a fabric store are a cost-effective and convenient option, giving you a manageable piece to work with without committing to a full yard.
Beyond fabric, you will need a sharp pair of fabric scissors, a ruler or measuring tape, and twine, ribbon, or string for hanging. Some crafters also like to use a cutting mat and rotary cutter for achieving perfectly even strips, though this is entirely optional. If you want to add extra flair, consider gathering decorative ribbon, beads, or small charms to incorporate into the tassel tops. Having a hot glue gun on hand can also be helpful for securing knots and adding embellishments, although it is not strictly necessary for the basic construction.
- Woven fabric in your chosen colors (cotton, muslin, burlap, or linen work best)
- Sharp fabric scissors or a rotary cutter with cutting mat
- Ruler or measuring tape for consistent strip sizing
- Twine, ribbon, or decorative string for the tassel tops
- Optional: hot glue gun, beads, charms, or decorative ribbon accents
- Optional: a dowel rod or hanger for making multiple tassels at once
Step-by-Step Instructions: Creating Your Ragged Tassels
Begin by washing and drying your fabric before you start cutting. This step is important for two reasons: it pre-shrinks the fabric so your tassels will not change shape later, and it initiates the fraying process, giving the edges a head start on developing that beautifully ragged texture. Once your fabric is clean and dry, lay it out on a flat surface and use your ruler and scissors to cut it into long strips. For medium tassels, strips that are approximately twelve to fourteen inches long and one to two inches wide work beautifully. For larger statement tassels, you can go up to eighteen or twenty inches in length.
Once you have cut a generous pile of strips, gather them into a bundle. The number of strips per tassel is a matter of personal preference, but somewhere between twelve and twenty strips typically creates a full, lush tassel with good visual weight. Hold the bundle together in the middle and fold it in half so that all the cut ends hang down together. At the fold point, you will tie your hanging string or twine. Wrap the string tightly around the folded point several times to create the tassel head, then secure it with a firm double knot. This is the foundation of your tassel, and a tight, secure knot at this stage ensures the whole construction holds together reliably.
After securing the head, take a moment to shake out the strips so they hang freely and evenly. You may notice that the edges are already beginning to look slightly frayed, especially if you used fabric that frays easily. To encourage more fraying and enhance the ragged texture, gently pull at the edges of individual strips or run them lightly over the blade of your scissors. Some crafters even put finished tassels through a gentle machine wash cycle after assembly to maximize the fraying effect. Experiment with different techniques to find the level of frayed texture that appeals most to your aesthetic sensibility.
For a more polished look, you can add a wrapped accent just below the tassel head. Cut a separate strip of contrasting or coordinating fabric about six inches long and wrap it tightly around the head of the tassel, just below where the hanging string is tied. Secure the ends with a small dot of hot glue or tie them in a neat knot hidden within the body of the tassel. This wrapped accent adds a neat, intentional finishing detail that elevates the overall look of your tassels and helps disguise any irregularities in the knot at the top.
Color and Fabric Selection: Customizing Your Tassels for Any Theme
The color choices you make for your ragged tassels will have the single biggest impact on how they read within your overall party decor scheme. For a romantic, soft aesthetic such as a bridal shower or garden party, consider working with blush pinks, ivory, soft sage green, and warm cream tones. These muted, dusty shades work beautifully together and create an effortlessly elegant look that feels both intentional and organically bohemian. Natural linen and unbleached muslin are particularly lovely for this palette, as their inherent texture adds visual interest even before fraying begins.
For a more vibrant, celebratory mood such as a birthday party or Cinco de Mayo gathering, do not be afraid to embrace bold, saturated colors. Bright turquoise, vivid coral, sunny yellow, and deep magenta create an energetic, festive atmosphere that is immediately joyful. When combining multiple colors in a single tassel, try grouping three to four strips of each color and alternating them as you build your bundle. This creates a striped effect when the tassel hangs that is visually dynamic and interesting. Alternatively, keeping each tassel a single solid color and then mixing colors across a garland creates a different but equally striking rainbow effect.
Texture mixing is another powerful technique for adding visual depth to your tassel arrangements. Combining a smooth cotton fabric with a rougher burlap or a slightly sheer gauze creates contrast that makes each individual tassel more interesting to look at up close while also contributing to a richer overall visual texture from a distance. Metallic fabrics, such as gold or silver lamé, can be used sparingly as accents within otherwise matte fabric bundles to catch the light beautifully, particularly for evening events where ambient lighting will make them shimmer and glow.
- Choose a primary color that matches your event’s main palette or theme color.
- Select one or two complementary or contrasting accent colors to add visual interest.
- Consider mixing fabric textures such as smooth cotton with rustic burlap for depth.
- Add metallic or sheer fabric strips sparingly for light-catching highlights.
- Test your color combination by holding strips together before committing to cutting a large batch.

Display Ideas: How to Use Ragged Tassels in Your Party Decor
The most classic and popular way to display ragged tassels is as a garland strung across a backdrop, mantel, or table edge. To create a tassel garland, simply tie your completed tassels at regular intervals along a length of twine or decorative ribbon. Spacing them approximately four to six inches apart creates a lush, full garland, while wider spacing of eight to ten inches gives a more airy, minimalist look. For a dramatic backdrop, layer two or even three garlands at slightly different heights to create a cascading curtain effect that photographs beautifully and serves as a stunning focal point for your celebration space.
Ragged tassels also work exceptionally well as individual accent pieces attached to other decorative elements. Tie a cluster of three or four small tassels to the neck of a balloon for an instant upgrade that feels custom and handmade. Attach single tassels to the corners of a banner or banner letters to add texture and movement. Use them as gift bag ties or napkin rings for table settings that carry your decorative theme all the way through to the smallest details. Even tying a few tassels around a simple glass vase filled with flowers instantly elevates it from plain to beautifully styled.
Overhead installations using ragged tassels have become one of the most popular party design trends in recent years, and for good reason. Suspend individual tassels from the ceiling at varying heights using thin monofilament or clear thread for a magical, floating effect. Group them in clusters over the dining table or dessert station to draw the eye upward and create a sense of intimate enclosure within a larger space. For outdoor events, hang them from tree branches or a pergola frame to blend the handmade elements with the natural surroundings in a way that feels effortlessly intentional.
- Classic garland: string tassels along twine at regular intervals for backdrops or mantels
- Balloon accents: tie small tassel clusters to balloon necks for textured, elevated balloon arrangements
- Table styling: use tassels as napkin rings, vase wraps, or gift tag embellishments
- Overhead installations: suspend at varying heights from ceilings or tree branches for dramatic effect
- Banner accents: attach to corner points of fabric or paper banners for added movement
- Chair back decorations: tie tassels to chair backs at the head table for a festive, personalized touch
Tips, Tricks, and Common Mistakes to Avoid
One of the most common mistakes beginners make when crafting ragged tassels is cutting strips that are too narrow. Very thin strips tend to look sparse and wispy rather than full and luxurious, which undermines the visual impact you are trying to achieve. Aim for strips that are at least one inch wide, and when in doubt, err on the side of slightly wider strips. You can always trim them down after the tassel is assembled if they feel too thick, but you cannot add width back once you have cut. Similarly, do not be stingy with the number of strips per tassel; a fuller tassel almost always looks better than a sparse one.
Another frequent issue is inconsistent strip lengths, which can make a finished tassel look uneven and untidy rather than intentionally ragged. While some variation in length adds to the organic quality of the finished piece, too much unevenness looks simply unfinished. Taking the time to cut your strips to a consistent length using a ruler or a paper template speeds up the process and ensures much more consistent results. If you have a large number of tassels to make, consider cutting all your strips assembly-line style before beginning construction, which keeps the workflow efficient and the sizing uniform.
Securing the tassel head tightly is absolutely critical to the longevity of your decorations. A loosely tied head will slip and shed strips throughout your event, leaving a trail of fabric pieces rather than beautiful decorations. When tying the head, wrap the string around at least four to five times before knotting, and consider adding a small drop of hot glue over the knot for additional security. If you are using tassels outdoors where they may be subject to wind and movement, this extra reinforcement is especially important and worth the additional thirty seconds of effort per tassel.
Finally, do not overlook the importance of proportions in your overall display. Very large tassels can overwhelm a small space while very small ones can get visually lost in a large venue. Before committing to a size, make one test tassel and hold it up in the actual space where you plan to display it. Evaluate how it reads from the typical viewing distance your guests will experience. This simple test step can save you from the frustration of making a large batch of tassels only to discover they are the wrong scale for your setting. Good proportions are the invisible foundation of any successful decorating scheme.

Storing and Reusing Your Ragged Tassels
One of the most underappreciated advantages of making your own ragged tassels is their reusability. Unlike many paper or foil decorations that get crumpled or torn during a single event, well-made fabric tassels can be carefully stored and brought out again for future celebrations. After your party is over, gently untie any garlands and lay the individual tassels flat or loosely coil them to prevent the strips from tangling. Avoid storing them in a compressed or tightly packed manner, as this can cause the strips to crease and lose their natural drape over time.
For storage, a large, shallow bin or a wide, flat drawer works better than a deep, narrow container where tassels might get crushed under their own weight. Grouping tassels by color before storing makes it easy to quickly pull together a coordinated set for a future event without having to sort through a jumbled mix. Placing a small sachet of cedar or lavender in the storage container will help protect fabric tassels from pests and keep them smelling fresh during long periods of storage. With proper care, quality fabric tassels can last for several years and multiple events.
When you are ready to reuse your stored tassels, a gentle shake and a light steaming with a garment steamer will refresh their appearance and restore the natural drape of the fabric strips. If any tassels have lost strips or come partially undone at the head, these are easy to repair by adding a few replacement strips and re-securing the head with fresh string and a dot of hot glue. The inherent repairability of the no-sew construction is another reason why ragged tassels represent such an excellent investment of your crafting time and materials compared to disposable alternatives.
Making ragged tassels as party decorations is more than just a craft project; it is a way of bringing personal creativity, handmade warmth, and sustainable thinking into your celebrations. Every tassel you make carries the particular energy of having been created by hand, and that quality communicates itself to guests in ways that store-bought decorations simply cannot replicate. Whether you make a dozen for a small intimate gathering or several hundred for a large event, the process of making ragged tassels is genuinely enjoyable, and the results are consistently beautiful, versatile, and rewarding to display.








What do you think?
It is nice to know your opinion. Leave a comment.