










The Balaclava: From Battlefield to Fashion Runway
If you want a garment with a genuinely wild backstory, the balaclava is hard to beat. It started life as military headgear — British soldiers wore these close-fitting knitted face coverings during the Crimean War in the 1850s, and the name comes straight from the Battle of Balaclava in 1854. The Ukrainian winters were brutal, and this thing solved the problem perfectly: full coverage, no fuss, and you could still see and move around fine. It was completely practical, zero pretension, and absolutely nobody at the time would have guessed it would end up on a Balenciaga runway a hundred and seventy years later.
Fast forward to now and the image makeover this thing has pulled off is honestly remarkable. Something once tied to cold-weather military ops — and, thanks to pop culture, a certain criminal aesthetic — is now showing up in Vogue, on major runways, and all over the street style feeds of every fashion capital you can name. The shift built slowly through the 2010s, then around 2021 and 2022 it just took off, as designers started working the silhouette into their collections with bold colors, unexpected fabrics, and styling combinations nobody had really tried before.
These days, the balaclava covers an enormous range of interpretations. You’ve got ultra-minimal ribbed knit versions in neutral tones that work perfectly under a tailored coat, sheer mesh styles that give you the aesthetic without full concealment, heavily embellished versions with beading and embroidery, and just about everything else you can imagine. It’s become a genuine creative canvas, and its popularity on Pinterest and YouTube has sparked a huge DIY and tutorial community around both making your own and figuring out how to actually wear one with confidence. Honestly, whether you want to knit one from scratch or just style the one sitting in your drawer, right now is a great time to get into it.
Understanding Balaclava Styles and Which One Suits You
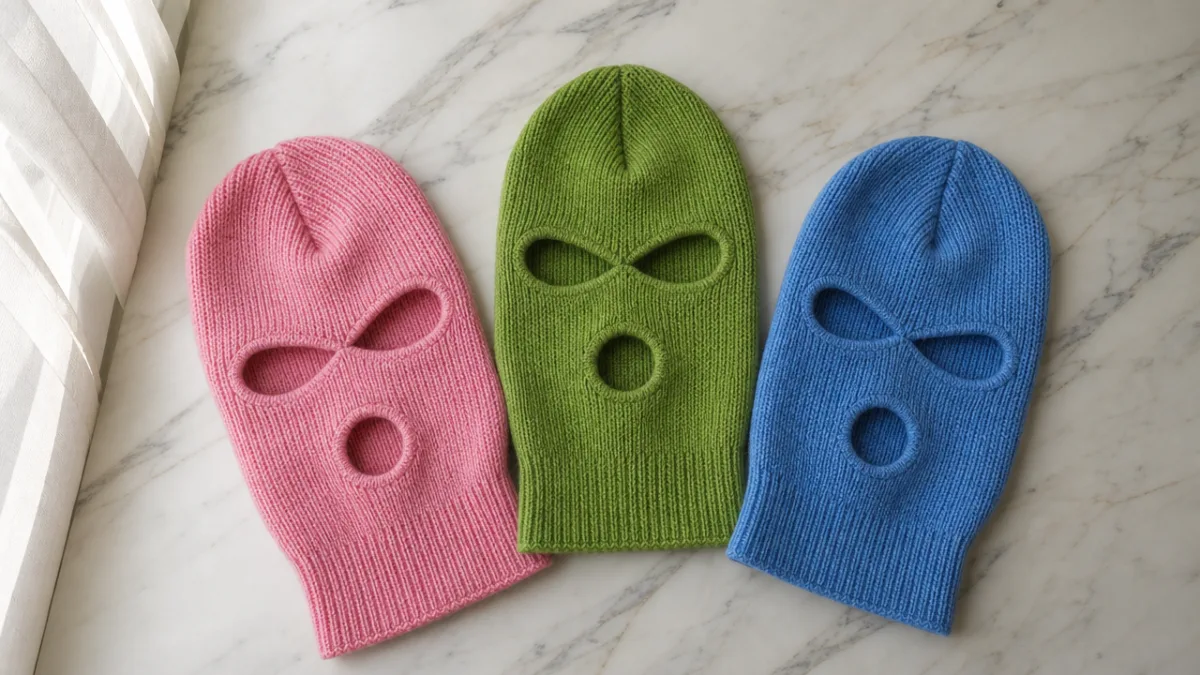
Before you jump into tutorials and styling inspiration, it’s worth getting clear on what kinds of balaclavas are actually out there right now — because they’re not all the same thing, and they definitely don’t all work for the same purposes or flatter faces in the same way. The full balaclava covers everything from the top of your head down to your collarbone, with just an opening for your eyes or your whole face depending on how you wear it. It’s a seriously dramatic silhouette, stunning in editorial or avant-garde contexts, but it does ask something of you — the right outfit and a decent amount of personal confidence to pull off in everyday life.
The half balaclava, which you might also know as a ski mask or neck warmer style, covers the lower face and neck but leaves the top of the head exposed, and it can be pulled all the way up when you need it. This is probably the most genuinely wearable version for everyday fashion because when it’s sitting down around your neck it just looks like a really interesting turtleneck, adding warmth and visual depth without making a huge statement. Pull it up over your nose and you get that mysterious, editorial quality that’s been all over social media. That kind of versatility is a big reason it’s connected so well with younger audiences who want pieces that actually do more than one thing.
Beyond those two main categories, there are plenty of more playful takes: open-face balaclavas that frame your face without covering any of it, balaclava-inspired headbands and ear warmers that borrow the look without the full commitment, and even balaclava-print garments that reference the shape more abstractly. When you’re thinking about which style suits you, be honest with yourself about your comfort zone, the situations you’ll actually wear it in, and the practical reality of your climate. If you live somewhere genuinely cold, a thick wool full-coverage version is going to earn its keep. If your winters are mild, a lightweight mesh or cotton version might be more about the aesthetic than actual warmth — and that’s completely fine too.
Materials and Tools You Need to Knit Your Own Balaclava
One of the best things about the balaclava moment we’re in is how many knitting tutorials have come along with it, and making your own means you get the exact color, texture, and fit you actually want. That said, it’s worth taking a little time before you cast on to choose your materials thoughtfully, because the yarn you pick is going to shape everything — the drape, the warmth, how long it holds up, and how it looks when it’s done. For a classic balaclava with clean stitch definition, a medium-weight wool or wool-blend in the DK or worsted range is usually the sweet spot. It shows off the stitches nicely, keeps you warm, and gets better looking with wear.
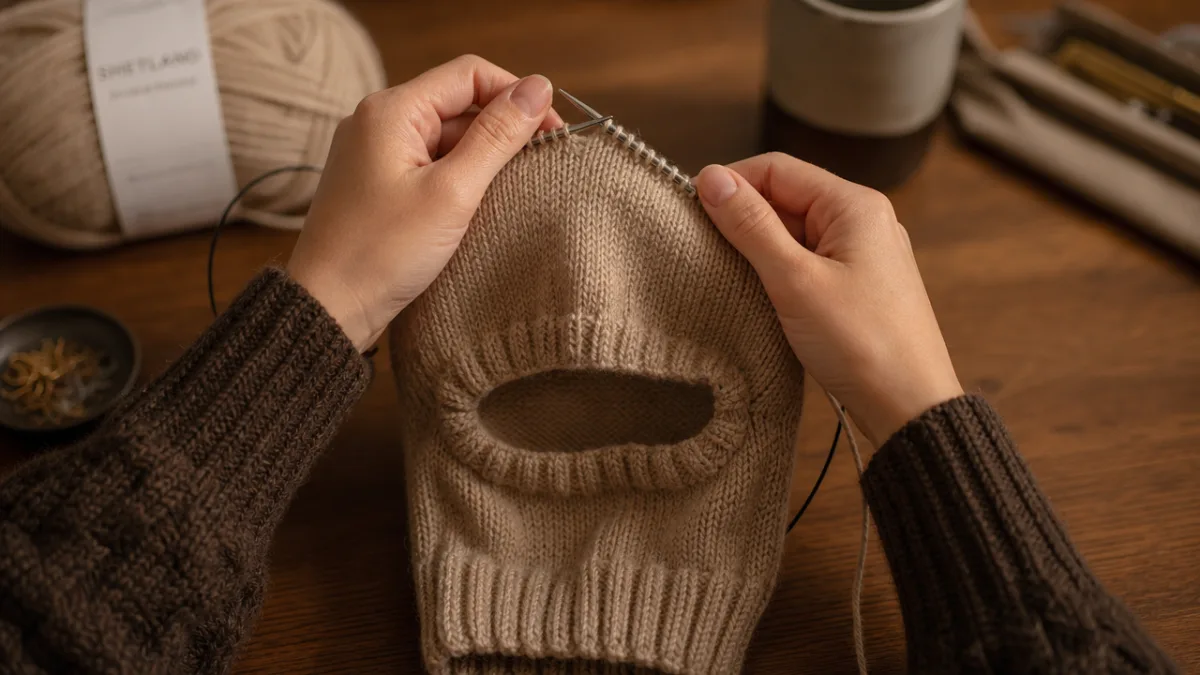
If you’re knitting in the round — which most balaclava patterns call for, since it gives you a seamless, comfortable finished piece — you’ll need circular needles or double-pointed needles sized to match your yarn’s recommended gauge. Most worsted weight patterns land somewhere around 4.5mm to 5mm needles, but please knit a gauge swatch first. Even seasoned knitters can run tighter or looser than a pattern assumes, and a balaclava that doesn’t fit your head is genuinely not fun to wear. Stitch markers are also a must for keeping track of where your rounds begin and where any shaping happens, especially around the face opening where things get a bit more involved.
A few other items will make your life noticeably easier along the way. A yarn needle for weaving in ends, a measuring tape for checking your dimensions as you go (rather than discovering a sizing problem at the very end), and some kind of row counter — a physical clicker or a phone app — are all worth having on hand. Losing your place in the face opening section is a real thing that happens, and a row counter helps you avoid it. Here’s a straightforward supply list to get you started:
- 200 to 300 yards of worsted or DK weight yarn in your chosen fiber and color
- Circular needles or double-pointed needles in the appropriate size for your yarn
- Stitch markers in at least two different colors
- Measuring tape and a yarn or tapestry needle
- Scissors and a row counter
- Optional: blocking mats and pins for finishing
Fiber content matters just as much as weight. Merino wool is a favorite for balaclavas for good reason — it’s soft enough to wear right against your face without any scratchy feeling, it handles temperature changes well, and it has a lovely natural sheen. If wool isn’t an option for you or whoever you’re knitting for, a quality acrylic or cotton-acrylic blend can give you great results and tends to be more budget-friendly and easier to wash. Alpaca produces a genuinely luxurious finished piece but can be a bit slippery to handle if you’re still getting comfortable with your needles. Whatever fiber you go with, buy enough from the same dye lot from the start — running out mid-project and adding a skein from a different lot will show up very clearly on something this close-fitting, even if the color looks identical in the store.
Step-by-Step Knitting Process for Beginners and Intermediate Knitters
The way a balaclava is constructed actually makes a lot of sense once you see the logic behind it. You’re essentially knitting a tube sized to fit around your head, shaping it to create the face opening in the middle, and then continuing the tube down over your neck. Most beginner-friendly patterns have you starting at the top of the head and working your way down, though some designers go the opposite direction and start at the neck. Either approach works well — which direction you knit is mostly personal preference unless the pattern has a specific structural reason for going one way.
You’ll cast on the number of stitches your pattern calls for based on your head circumference, then join to work in the round — and here’s where a lot of beginners trip up — without twisting your stitches. A twisted cast-on creates a spiral distortion in the fabric that you simply cannot fix without ripping everything out and starting over, so it’s worth slowing down and double-checking before you start your first round. From there, you work the crown section in your chosen stitch pattern, usually some kind of ribbing like 2×2 (knit two, purl two) or plain stockinette for a smoother surface. The tube stays consistent as you work down toward the forehead, right up until you hit the face opening — and that’s where the construction gets interesting.
There are two main ways to create the face opening. You can work flat across the front section for several rows to build the facial frame, or you can bind off the front stitches and cast them back on in the very next row to form the opening all at once. The first method gives you more control and is usually easier to manage if you’re newer to this kind of shaping. Once the opening is established, you rejoin to work in the round again for the chin and neck sections. Pay close attention to how you handle that joining point — gaps and small holes love to appear there if you’re not snug about it. When you’re all done, blocking the piece (especially around the face opening) makes a huge difference to the finished look and smooths out any tension inconsistencies from the construction process.
How to Style a Balaclava for Maximum Fashion Impact
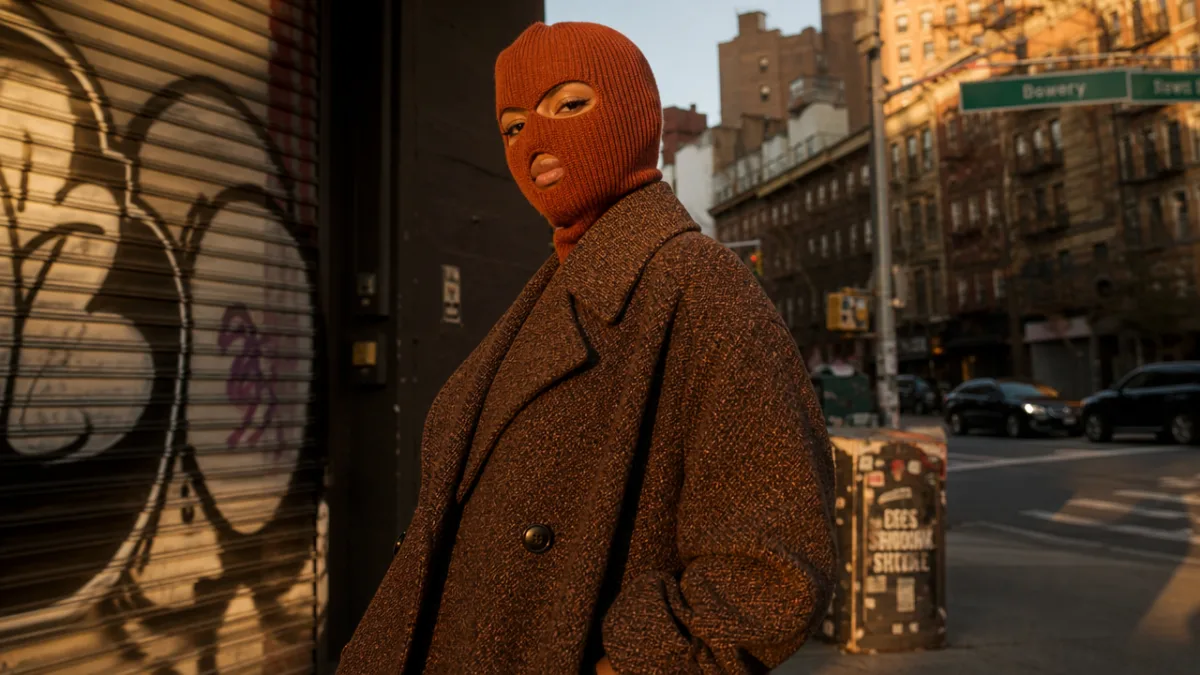
Having a balaclava is one thing — knowing how to actually wear it and make it look like you meant it is a whole other conversation, and it’s honestly the question that drives most of the engagement on YouTube tutorials and Pinterest boards dedicated to this trend. The core styling principle is balance. A balaclava is a strong, graphic statement for your head, so the rest of your outfit should either be very pared back and minimal, or very deliberately chosen to complement it rather than fight with it. Think an oversized structured coat in a quiet neutral over simple straight-leg trousers — that kind of setup lets the balaclava do its job as the focal point without everything feeling like too much at once.
Color is where you can really have fun. A monochromatic or tonal look where the balaclava matches or closely echoes the rest of your outfit creates something almost architectural — it photographs beautifully and reads as thoroughly intentional rather than thrown together. On the flip side, using the balaclava as a deliberate color pop against a neutral base, say a vivid cobalt or a fire-engine red balaclava against an all-black outfit, is bold but absolutely works and has shown up on street style feeds all over the world. Whichever direction you take it, the goal is for it to look like a choice. That sense of intention — the feeling that you knew exactly what you were doing — is what makes any strong trend piece land well.
Think about context too. At a gallery opening, a music event, or a photo shoot, even the most full-coverage dramatic balaclava is completely at home and exciting. For grabbing coffee or running errands somewhere more low-key, a half balaclava worn loose around the neck as a layering piece reads as stylish without demanding too much attention. The balaclava also earns its place in athletic and outdoor settings — winter running, skiing, cycling — where the practical function and the aesthetic appeal line up perfectly. Don’t feel like you have to keep it strictly in the fashion lane; leaning into its utilitarian roots can make it feel even more considered when the moment calls for it.
Finding the Best YouTube Tutorials and Building Your Skills Over Time
The YouTube balaclava tutorial world has gotten genuinely impressive — you can find everything from complete beginner knitting walkthroughs that assume you’ve never picked up a needle before, all the way to advanced pattern modifications, in-depth styling breakdowns, and even historical and cultural context from fashion academics. The first step to getting real value out of all of that is finding the tutorials that actually match where you are right now. If you’re just starting out with knitting, look for videos that show a clear materials list upfront, walk through the cast-on and joining process in real time rather than skipping past it, and have decent audio or captions — because when your hands are busy with needles, pausing and rewinding every thirty seconds gets old fast.
If you’ve already got some knitting under your belt, you’ll probably get more out of tutorials focused on modifications: how to turn a basic hat pattern into a balaclava, how to work cables or colorwork into the structure, or how to scale a pattern up or down for head circumferences outside the standard. The knitting community on YouTube is genuinely generous — a lot of experienced creators post follow-up videos specifically answering questions from their tutorial comments, which means the comment sections themselves are often worth reading before you even press play. Creators in the slow fashion and sustainable knitting space especially tend to frame the balaclava within a larger conversation about making your own wardrobe, which can be motivating in a way that goes beyond just learning the technical steps.
Think of each balaclava you make as a learning opportunity, not just a finished object to wear or give away. Jot down notes as you go — what you’d change about the yarn weight, the needle size, the face opening, the neck tube length. A lot of knitters keep a project journal or use something like Ravelry to track their work with photos and notes they can actually refer back to. Once you’re feeling more confident, push yourself a bit: try more complex stitch patterns, work out your own variations from scratch using basic knitting math, or start documenting your process on social media. The balaclava really is more than just a garment — it’s a surprisingly rich entry point into a community where craft, fashion, history, and self-expression all intersect in ways that keep giving the longer you stay involved.








What do you think?
It is nice to know your opinion. Leave a comment.