










DIY Garden Arbor: A Complete Guide to Building Your Own Beautiful Garden Structure
Introduction to Garden Arbors and Why You Should Build One
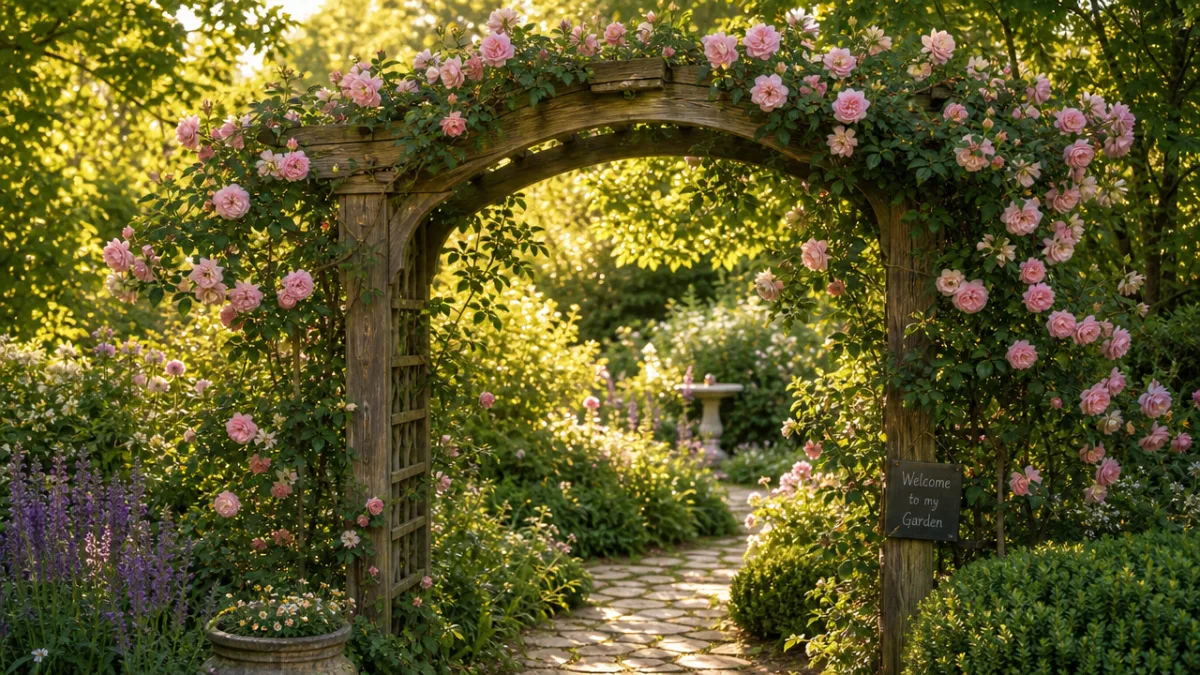
A garden arbor is one of the most rewarding structures you can add to your outdoor space. Whether you call it an arbor or an arbour — both spellings are entirely correct, with the latter being more common in British English — this elegant architectural feature has been gracing gardens for centuries. From ancient Roman peristyles draped in climbing vines to the romantic English cottage gardens of the Victorian era, the garden arbor has always served as a place where structure and nature meet in perfect harmony. Building one yourself not only saves significant money compared to purchasing a pre-made version, but it also gives you the freedom to design something that fits your garden’s unique character and dimensions perfectly.
The satisfaction of constructing a DIY garden arbor goes far beyond the finished product. Throughout the building process, you develop practical skills in woodworking, planning, and structural assembly that will serve you well in future projects. You also gain a deep understanding of how the structure fits into your garden ecosystem — how the morning sun will illuminate the climbing roses you plan to train over it, where afternoon shade will fall for a small bench placed underneath, and how the proportions will look from the kitchen window. This intimate knowledge of your creation makes the finished arbor feel truly personal in a way that no store-bought structure ever could.
Garden arbors also serve several highly practical purposes beyond their obvious aesthetic appeal. They create a natural focal point that draws the eye through the garden, making even modest-sized plots feel larger and more intentional in their design. They provide vertical growing space for climbing plants such as wisteria, clematis, honeysuckle, and roses, which is invaluable in smaller gardens where ground-level real estate is precious. They define pathways and garden rooms, giving your outdoor space a sense of organization and purpose. And of course, with a simple bench added beneath, they create a sheltered seating area where you can sit and enjoy your garden in dappled shade on warm summer afternoons.
Planning Your DIY Garden Arbor: Design, Materials, and Measurements
Before you pick up a single tool, careful planning will save you enormous amounts of time, money, and frustration. The first consideration is the size and scale of your arbor relative to its surroundings. A structure that is too small will look lost and insignificant in a large garden, while an oversized arbor can overwhelm a compact space. As a general starting point, most garden arbors are between 5 and 7 feet wide, 3 to 4 feet deep, and 7 to 8 feet tall at the peak. These dimensions comfortably accommodate two people walking side by side, allow most climbing plants to establish themselves generously across the framework, and provide a sense of enclosure without feeling claustrophobic.
The choice of wood is one of the most important decisions you will make during the planning phase, as it directly affects both the longevity and the appearance of the finished structure. Pressure-treated lumber is the most affordable option and will resist rot and insect damage effectively, though many gardeners prefer to avoid it near edible plants due to the chemical preservatives used in the treatment process. Cedar and redwood are both naturally rot-resistant and strikingly beautiful, with warm reddish tones that weather to an attractive silver-grey over time. Oak is exceptionally durable and has a classic, sturdy appearance. For a more decorative finish, you might also consider purchasing pre-cut lattice panels and decorative post caps, which can be found at most hardware stores and dramatically elevate the visual appeal of your arbor with minimal extra effort.
Sketching a detailed plan before you begin purchasing materials will help you create an accurate cut list and avoid costly over-purchasing or frustrating mid-project trips back to the hardware store. Your plan should include the dimensions of all four posts, the crossbeams that span the top, any diagonal bracing for stability, lattice side panels if you intend to include them, and the decorative elements at the peak. Consider also how the posts will be anchored — whether you will set them directly into concrete-filled holes in the ground, use post anchors set into concrete footings, or employ metal spike anchors driven into the soil. Each method has its advantages, and the right choice depends on your soil type, local climate, and how permanent you want the structure to be.
Tools and Materials You Will Need
Gathering all your tools and materials before beginning work will allow you to build your arbor efficiently and without interruption. For a standard wooden garden arbor, you will need a combination of hand tools and power tools, though the project is very achievable even for those who do not own a large workshop. The power tools that will make the job significantly easier include a circular saw or miter saw for making clean, accurate cuts, a cordless drill for driving screws and drilling pilot holes, and a jigsaw if you plan to cut any decorative curved profiles into your beams or braces. A spirit level is absolutely essential for ensuring your posts are plumb and your crossbeams are perfectly horizontal — even small errors at this stage will be visually obvious in the finished structure.
In terms of hardware and fasteners, you should invest in good quality exterior-grade screws and bolts rather than cutting corners with interior fasteners that will rust and fail within a season or two. Galvanized or stainless steel hardware is ideal for outdoor use, as it will not corrode even after years of exposure to rain and damp. For joining the main structural elements, 3-inch and 4-inch exterior screws are typically sufficient, though for the key joints between posts and crossbeams, carriage bolts with washers and nuts will provide a stronger and more attractive connection. Post anchors, if you choose to use them, should also be hot-dipped galvanized or powder-coated steel to ensure longevity.
Here is a typical materials list for a standard garden arbor approximately 6 feet wide, 3.5 feet deep, and 7.5 feet tall:
- Four 4×4 posts, each 10 feet long (allowing for 2 feet underground or in anchors)
- Two 2×6 boards cut to approximately 8 feet for the main top crossbeams
- Four 2×4 boards cut to approximately 5 feet for the secondary top rails
- Multiple 1×2 or 2×2 slats for the lattice or open top grid
- Two decorative diagonal knee braces cut from 2×4 lumber for each side
- Two lattice panels for the sides, cut to fit between the posts
- Exterior wood screws in 2-inch, 3-inch, and 4-inch lengths
- Carriage bolts, washers, and nuts for key structural joints
- Post anchors or concrete for setting the posts
- Exterior wood stain, paint, or sealant for finishing
Before you head to the hardware store, double-check your measurements and add approximately 10 to 15 percent extra to your material quantities to account for any cutting errors or pieces that need to be replaced. It is far less disruptive to have a small amount of excess wood than to stop work mid-project because you have run short. Also take time to check whether your local municipality requires a building permit for garden structures above a certain height or footprint — in most residential areas, small garden arbors do not require permits, but it is always worth confirming this before you begin digging.
Step-by-Step Construction Guide
With your materials gathered and your plan finalized, it is time to begin building. Start by marking out the exact positions of your four posts on the ground using stakes and string, checking that the layout is perfectly square by measuring diagonally from corner to corner — if both diagonal measurements are equal, your layout is square. Dig your post holes to a depth of at least 2 feet, or deeper if you live in an area with significant ground frost, as insufficient depth can cause posts to heave and shift over winter. The holes should be approximately 8 to 10 inches in diameter to accommodate both the post and the concrete surround that will anchor it firmly in place.
Setting the posts is the most critical step in the entire build, because any errors here will compound as the structure rises. Mix your concrete according to the manufacturer’s instructions and pour a small amount into the base of each hole before inserting the post, which helps prevent moisture accumulating beneath the base of the timber. Lower each post into its hole, check it for plumb in two directions using your spirit level, and brace it temporarily with lengths of scrap timber nailed diagonally to stakes in the ground. Once you are satisfied that all four posts are perfectly vertical and correctly positioned, fill the holes with concrete and allow it to cure for at least 48 hours before proceeding with the rest of the construction.
Once the posts are firmly set, you can begin building upward with confidence. The sequence of assembly typically follows these stages:
- Mark and cut the post tops to your desired height using a circular saw, ensuring all four posts are exactly level with each other by snapping a chalk line across them.
- Attach the side beam assemblies by joining the two posts on each side with a horizontal beam at the top, secured with carriage bolts for maximum strength.
- Install the main crossbeams spanning the full width of the arbor from side to side, notching them slightly into the side beams if you want a more refined joinery appearance.
- Add the secondary top slats perpendicular to the main crossbeams, spacing them evenly across the top to create the classic open grid that climbing plants will weave through.
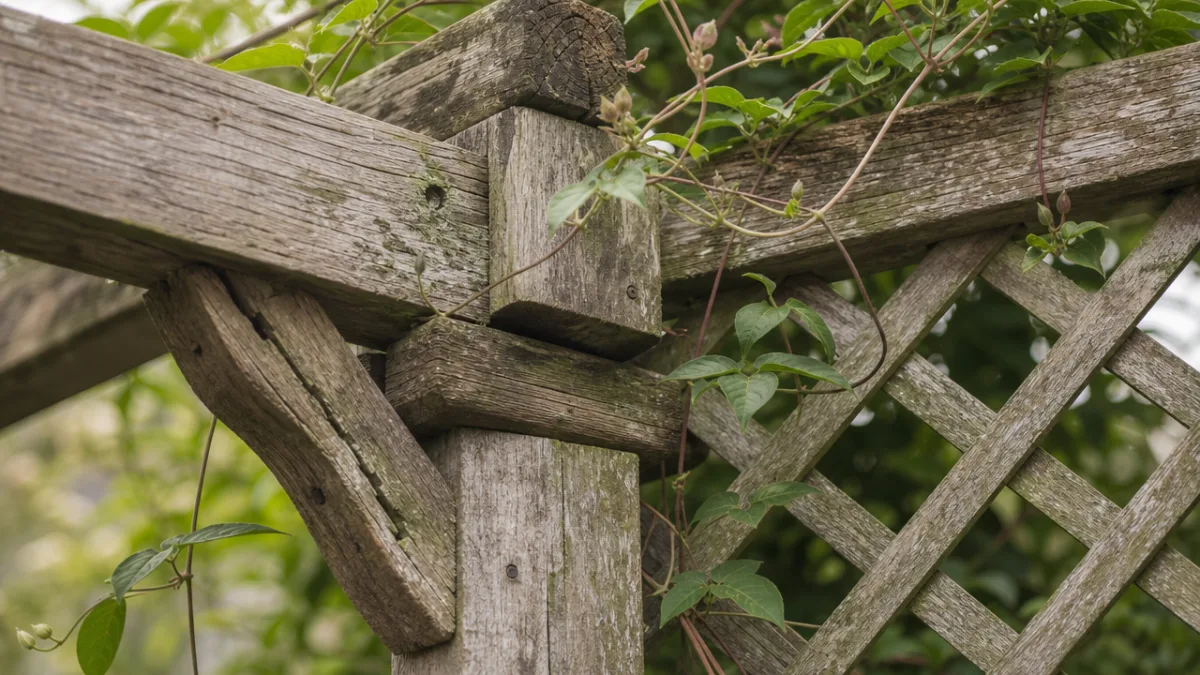
- Cut and attach diagonal knee braces beneath each top beam joint, which both strengthen the structure and add a traditional decorative element to the design.
- Install side lattice panels between the posts if desired, which provide additional support for climbing plants and create a greater sense of enclosure beneath the arbor.
Throughout the assembly process, keep stepping back to assess the structure visually from different angles and distances. What looks acceptable at close range during construction can reveal subtle misalignments when viewed from further away. Use your spirit level frequently at every stage, and do not hesitate to make adjustments before screws and bolts are fully tightened. It is far easier to correct a slightly out-of-plumb post or an uneven beam during construction than to live with a visually skewed finished structure for years to come.
Finishing, Treating, and Painting Your Garden Arbor
The finishing stage of your garden arbor project is where the structure truly transforms from a collection of raw timber components into a beautiful garden feature. Before applying any finish, spend time sanding all the surfaces thoroughly, working through progressively finer grits of sandpaper to achieve a smooth result. Pay particular attention to any sharp corners and edges, which should be rounded slightly with sandpaper to prevent splinters and to help paint or stain adhere more evenly. Remove all the sanding dust with a tack cloth or a brush before applying your chosen finish, as trapped dust particles can create a rough, uneven surface in the final coat.
The choice between painting and staining your arbor is largely a matter of personal taste and the overall aesthetic of your garden. A painted arbor, finished in classic white or soft cream, has a crisp, formal elegance that suits cottage gardens, formal rose gardens, and contemporary garden designs alike. White in particular has the beautiful effect of making climbing flowers appear more vivid and jewel-like against its backdrop. However, paint will require more maintenance over time than stain, as it can crack, peel, and flake as the wood beneath it expands and contracts with seasonal temperature changes. If you choose paint, always use an exterior-grade primer first, followed by at least two coats of a good quality exterior paint, and plan to repaint every three to five years to keep it looking fresh.
A penetrating wood stain or oil finish is a lower-maintenance alternative that enhances the natural beauty of the timber rather than concealing it. These products soak into the wood fibers rather than forming a surface film, which means they cannot crack or peel in the way that paint can. They do fade over time with UV exposure, but re-application is a quick and simple job that requires no stripping or preparation beyond a light clean. For cedar or redwood, a clear or lightly tinted sealant will preserve the warm natural color for longer, while a grey or silver toned stain can accelerate the weathered driftwood look that many gardeners find appealing. Whichever finish you choose, always read the manufacturer’s guidance regarding drying times and the number of coats recommended for exterior use.
Planting and Training Climbers on Your New Arbor
Once your arbor is built and finished, the most exciting phase begins — choosing and planting the climbing plants that will eventually clothe it in a cascade of leaves, flowers, and fragrance. The selection of climbing plants suited to garden arbors is gloriously wide, and your choices should take into account your local climate, the aspect of the arbor (how much sun it receives throughout the day), and how quickly you want the structure to be covered. Fast-growing climbers such as annual sweet peas will reward you with flowers and coverage within a single season, making them a wonderful choice while slower permanent plants are establishing themselves in their first few years.
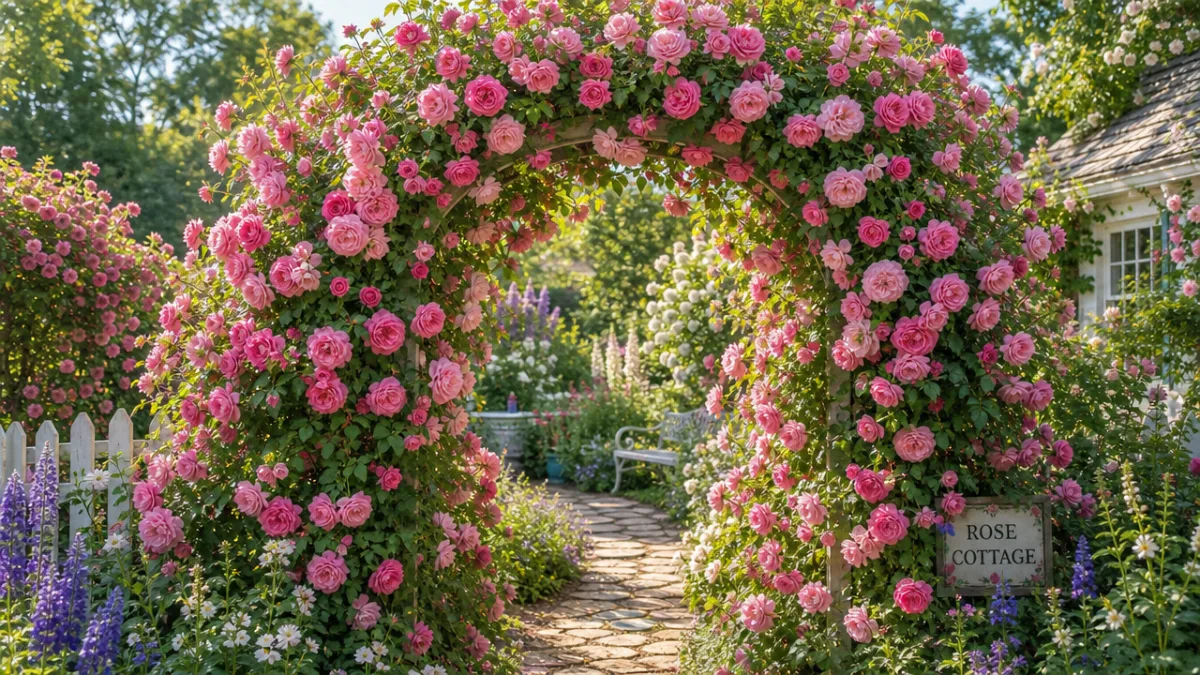
For a traditional, romantic appearance, climbing roses remain the quintessential arbor plant. Varieties such as ‘New Dawn’, ‘Compassion’, and ‘Cecile Brunner’ are all well proven for arbor growing, producing generous quantities of flowers over a long season and building up a framework of woody canes that becomes more impressive and floriferous with each passing year. Plant climbing roses in well-enriched soil at the base of each post, water them generously during their first season while they establish, and begin training the long new shoots horizontally across the structure as soon as they are long enough — horizontal training encourages a greater number of flowering side shoots and will result in a far more abundant display than simply allowing stems to grow vertically.
Beyond roses, consider creating a layered planting scheme that combines plants with different seasons of interest, ensuring your arbor looks attractive from early spring through to late autumn. Here are some excellent combinations to consider:
- Wisteria and late-flowering clematis — the wisteria provides a spectacular early-season display of hanging flower clusters, while the clematis fills the gap later in the summer with a second wave of color.
- Climbing hydrangea and honeysuckle — the climbing hydrangea contributes bold white flower heads and attractive exfoliating bark for winter interest, while honeysuckle adds extraordinary evening fragrance throughout summer.
- Annual sweet peas with a permanent rose — an ideal combination for impatient gardeners, as the sweet peas provide abundant color and scent from the very first season while the rose slowly builds into a permanent feature over subsequent years.
- Jasmine and Virginia creeper — jasmine brings intense summer fragrance and delicate star-shaped white flowers, while the Virginia creeper turns the entire structure into a blazing canvas of crimson and scarlet fire every autumn.
Training and tying in your climbers regularly throughout the growing season is essential to keeping the arbor looking well-groomed and to ensuring the plants cover the structure evenly rather than sending all their growth in one direction. Use soft garden twine or purpose-made plant ties to attach new shoots to the lattice, timber slats, or previous seasons’ canes, and check these ties periodically to ensure they are not cutting into the stems as the plants grow thicker. Annual pruning, carried out according to the specific requirements of each plant species, will keep the planting vigorous, prevent overcrowding, and encourage the maximum possible flower production year after year.
Maintenance, Longevity, and Inspiring Ideas for Customization
A well-built and properly maintained DIY garden arbor should give you many decades of pleasure and service. The key to longevity is attending to minor maintenance tasks promptly before they escalate into more significant structural issues. Each spring, make a thorough inspection of the entire structure, checking the base of each post for any signs of rot or softness, examining all the joints and connections for loose screws or bolts, and assessing the condition of the wood finish. Addressing a single soft patch on a post base early — perhaps by treating it with a wood hardener and protective paint — is infinitely easier and cheaper than replacing an entire post that has been allowed to deteriorate over several seasons.
The surface finish of your arbor will need periodic renewal regardless of which product you chose at the outset. Painted surfaces typically need refreshing every three to five years, while stained or oiled surfaces benefit from a fresh application every two to three years in most climates. Before re-applying any finish, clean the surface thoroughly with a garden hose and a scrubbing brush to remove algae, lichen, and accumulated dirt, and allow it to dry completely before proceeding. If the existing finish has deteriorated significantly, light sanding between the old and new coats will help the fresh product bond more effectively and result in a cleaner, smoother appearance.
One of the great joys of having built your own arbor is the freedom to customize and adapt it over time as your garden evolves and your tastes develop. There are countless ways to enhance the basic structure to make it even more functional and personal. A simple slatted wooden bench built between the two posts on one end transforms the arbor from a purely decorative passageway into a destination — a place to sit, read, and absorb the garden around you. Adding solar-powered fairy lights woven through the lattice panels and along the top beams creates a magical atmosphere for evening entertaining and can be done in an afternoon for very little cost. Hanging a simple hook from the central crossbeam allows you to suspend a wind chime, a hanging lantern, or even a small bird feeder, adding life and movement beneath the structure throughout the day.
If you have enjoyed building your first garden arbor and find yourself wanting to develop the structure further, consider extending the concept into a full pergola by adding additional bays in a line, creating a covered walkway through the garden. Alternatively, closing in one end with a trellis back panel and adding a simple roof of overlapping slats converts the arbor into a garden gazebo — a much more substantial project, but one that follows the same fundamental construction principles you have already mastered. You might also experiment with different aesthetic styles in future projects: a rustic arbor built from rough-hewn logs or bent willow branches has a completely different character from a formal painted timber structure, yet both are achievable with relatively modest woodworking skills and the same spirit of creative ambition that led you to attempt your first DIY garden arbor in the first place.








What do you think?
It is nice to know your opinion. Leave a comment.