










DIY Denim Apron: Upcycle Your Old Jeans Into a Stylish Workshop Essential
Why Upcycling Denim Is the Perfect Sustainable Craft Project
In a world increasingly aware of textile waste and environmental impact, upcycling old denim has emerged as one of the most satisfying and practical ways to breathe new life into clothing that might otherwise end up in a landfill. Every year, millions of pairs of jeans are discarded despite still having plenty of usable fabric left in them. A DIY denim apron project transforms that waste into something genuinely useful, durable, and even beautiful. It is a craft that sits perfectly at the intersection of sustainability, creativity, and practicality.
Denim is arguably the ideal fabric for an apron. It is thick, tightly woven, and remarkably resistant to stains, tears, and general wear. These are exactly the qualities you want in something you will wear while cooking, gardening, woodworking, or doing any number of hands-on tasks. Commercial aprons made from denim are available in stores, but they often cost far more than they should, given that you likely already have a worn-out pair of jeans sitting in your closet doing nothing at all.
There is also a deeply personal dimension to this kind of project. The jeans you upcycle carry history — faded patches, worn knees, a particular fit that speaks to years of use. When you transform them into an apron, you are not just saving money or reducing waste; you are creating something with character and story built right into the fabric. That kind of intentional making is increasingly rare, and it is one of the reasons why DIY denim projects have found such a passionate following in crafting communities online and off.
The Environmental Case for Choosing Upcycling Over Buying New
The fashion industry is one of the most polluting industries on the planet, and denim production is among the most resource-intensive processes within it. A single pair of jeans can require up to 10,000 liters of water to produce from cotton field to finished product. When you upcycle denim instead of purchasing something new, you are making a small but meaningful choice to step outside that cycle of consumption. It is the kind of decision that, multiplied across thousands of crafters, genuinely adds up.
Upcycling also keeps textiles out of landfills longer, which matters because synthetic and blended fabrics can take decades or even centuries to decompose. Even pure cotton denim, which is more biodegradable, takes years to break down under typical landfill conditions. By extending the useful life of a pair of jeans by even two or three more years in the form of an apron, you are making a tangible contribution to reducing textile waste. It is a low-effort, high-reward environmental action that anyone with basic sewing skills can take.
Beyond the environmental benefits, there is a strong community dimension to upcycling culture. Sharing your finished denim apron on Pinterest, Instagram, or crafting forums connects you with a global network of makers who are all working toward a more thoughtful relationship with materials and consumption. Tutorials are freely exchanged, techniques are improved collaboratively, and beginners are welcomed warmly. This project is not just about making an apron — it is about joining a movement that values creativity, resourcefulness, and sustainability in equal measure.
What You Will Need: Tools and Materials for Your Denim Apron
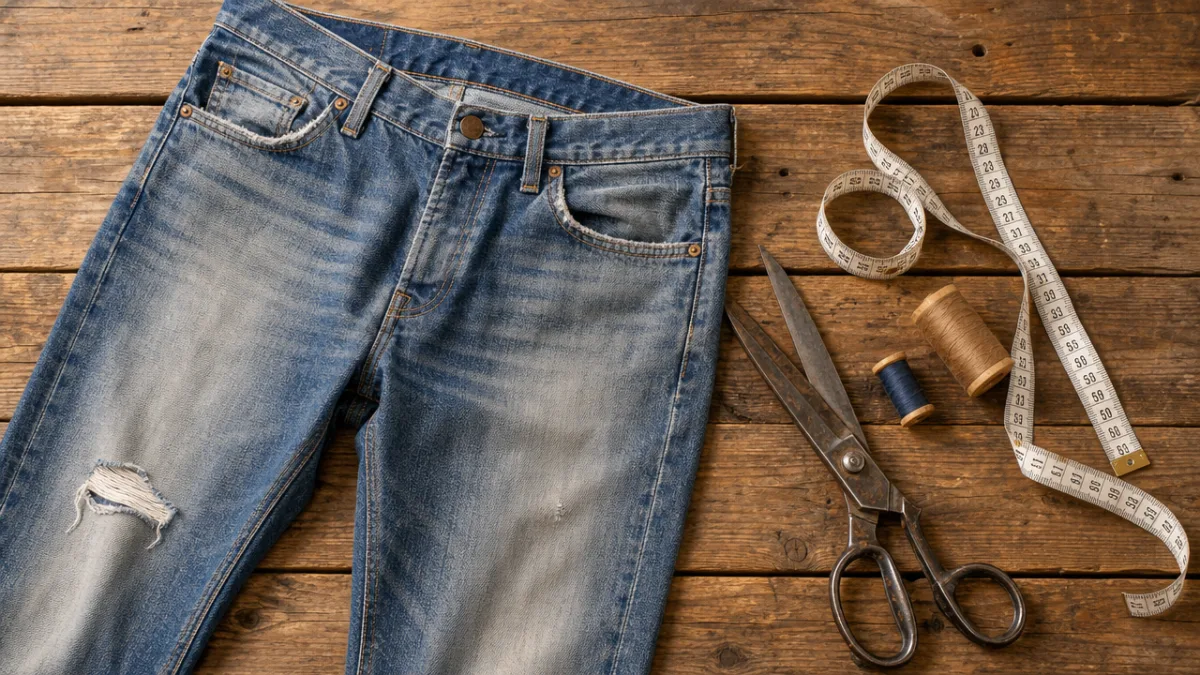
Before you start cutting, it is worth taking a few minutes to gather everything you need. One of the great pleasures of this project is that the supply list is remarkably short and affordable. Most of what you need is probably already in your home, and the few things you might need to purchase are inexpensive and widely available at any fabric or craft store. Being prepared before you begin will make the whole process smoother and far more enjoyable from start to finish.
The star of the show, of course, is a pair of old jeans. The ideal candidates are jeans that are worn or damaged in ways that make them unwearable as clothing — blown-out knees, broken zippers, irreparable stains — but that still have large sections of intact, sturdy fabric. Wide-leg or relaxed-fit jeans will give you the most material to work with, but almost any style can be adapted for this project with a little creative pattern adjustment. The larger the jeans, the more options you will have for shaping your apron.
In addition to the jeans themselves, you will need a handful of basic sewing supplies and tools. Here is a complete list of what to gather before you begin:
- One pair of old jeans in good fabric condition (any size or style)
- Sharp fabric scissors or a rotary cutter with a cutting mat
- Fabric chalk or a washable marker for tracing your pattern
- A measuring tape and a long ruler or yardstick
- Sewing machine with a denim needle (size 16 or 18 recommended)
- Heavy-duty thread in a matching or contrasting color
- Cotton twill tape, ribbon, or additional denim strips for ties and neck strap
- Pins or fabric clips to hold pieces in place while sewing
- Iron and ironing board for pressing seams
- Optional: additional pockets, D-rings, or decorative patches
Choosing the Right Jeans for Maximum Fabric Yield
Not all jeans are created equal when it comes to upcycling projects. The fabric composition matters more than most beginners realize. Pure cotton denim is the gold standard for this project because it is easier to sew, presses beautifully with an iron, and holds up well under heavy use. Stretch denim, which contains elastane or spandex, can be trickier to work with because it does not lie flat and can distort under the presser foot of your sewing machine. Check the label before you commit a pair of jeans to this project.
The weight of the denim is also worth considering. Heavier denim, typically 12 ounces or more per yard, will produce a more durable apron that holds its shape better over time. Lighter-weight denim, sometimes used in fashion-forward skinny jeans, is flimsier and may not provide the protection you want from an apron used in a workshop or kitchen setting. If you hold the fabric up to the light and can see through it fairly easily, it is probably on the lighter side and may benefit from being lined with a second layer of fabric.
If you do not have a suitable pair of jeans at home, do not despair. Thrift stores are a goldmine for this project. You can typically find men’s jeans in large sizes for just a few dollars, and the extra fabric gives you tremendous flexibility in your design. Shopping secondhand for your project materials doubles the sustainability credentials of the finished apron and keeps your costs extremely low. Some crafters make it a habit to pick up a pair whenever they spot a great option at a thrift store, building up a small stash for future projects.
Step-by-Step Instructions: Cutting and Shaping Your Apron
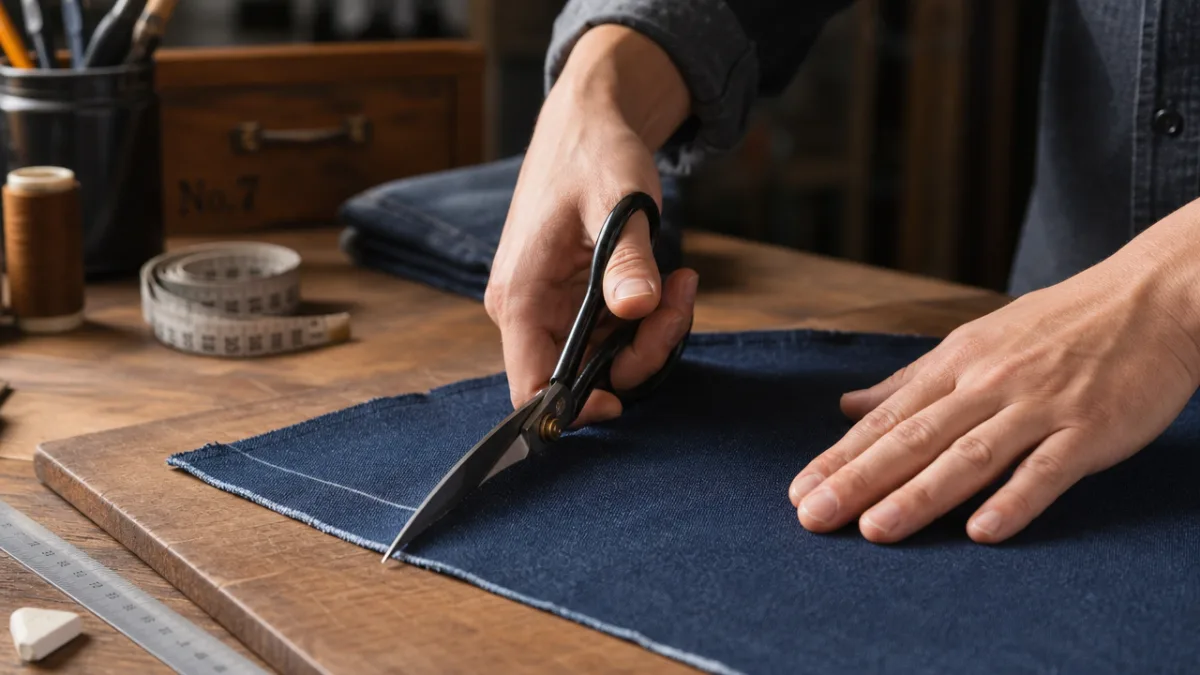
With your materials gathered and your jeans selected, it is time to begin the actual transformation. The cutting stage is the most irreversible part of the process, so it pays to measure carefully and take your time before making any cuts. A good apron typically measures between 24 and 30 inches in length and 18 to 24 inches across at its widest point, though you can adjust these dimensions to suit your own proportions and preferences. Mark everything with fabric chalk before you cut.
Start by laying your jeans flat on your work surface and cutting off both legs as close to the crotch seam as possible. This gives you your main body of fabric. Open up one of the leg pieces by cutting along the inseam, and you will have a large, flat rectangle of denim to work with. Depending on the size of your jeans, this single leg panel may be enough for the entire apron front, or you may need to piece together panels from both legs. Either approach works perfectly well, and piecing can actually add visual interest to the finished piece.
To shape the apron, fold your fabric in half lengthwise to ensure symmetry, then use a paper pattern or simply freehand a shape with your chalk. A classic bib apron has a rectangular lower section and a narrower bib section at the top. A cobbler-style apron, which wraps around both the front and the sides, offers more coverage and can be cut from wider denim panels. Whatever shape you choose, cut slowly and check your measurements at least twice before committing to any single cut. It is far easier to take more off than to put it back.
Working With Existing Seams and Features of the Original Jeans
One of the most exciting aspects of making a denim apron from old jeans is the opportunity to incorporate the existing features of the original garment. The back pockets of jeans make absolutely perfect apron pockets — they are already finished, properly reinforced at the corners, and the right size for holding tools, phones, or cooking utensils. If you position your apron pattern thoughtfully, you can often capture one or both back pockets in your main panel without any additional sewing at all.
The original hem of the jeans can also be used to create a beautifully finished bottom edge on your apron, saving you the work of hemming that section yourself. Similarly, belt loops can be repurposed as functional holders for pens, a ruler, or even a small pair of scissors. The waistband itself, if it falls in a useful position, can become a sturdy structural element. Part of the joy of this project is the puzzle of working out how to use what is already there, rather than cutting away everything and starting from scratch.
Even the rivets and bartack reinforcements that appear at stress points on jeans translate beautifully to an apron context, where durability at key points is equally important. The iconic orange stitching found on most denim provides a ready-made design element that gives your apron an authentic, crafted look without any additional decorative work. Lean into these features rather than trying to hide them — they are part of what makes a denim apron look genuinely handmade rather than factory-produced.
Sewing It All Together: Construction Techniques for a Professional Finish
With your pieces cut and your plan in place, sewing the apron together is a straightforward process, though denim does require a little more preparation and patience than lighter fabrics. The most important thing to do before you begin sewing is to equip your machine with a proper denim needle. A standard needle will struggle with the thickness of denim seams and may break or skip stitches. A size 16 or 18 denim needle, by contrast, will glide through multiple layers smoothly and consistently.
Start by finishing the raw edges of your apron pieces, either with a serger, a zigzag stitch, or by folding and pressing the edges under before sewing. Denim frays readily, and while a little controlled fraying can look intentional and stylish, uncontrolled fraying will weaken your apron over time. For a clean, durable finish, fold each raw edge over by about half an inch, press it flat with a hot iron, then sew it down with a straight stitch close to the fold. This creates a neat, professional-looking hem that will hold up through many washes.
When attaching the bib section to the main apron panel, use a flat-felled seam for maximum strength. This is the same type of seam used in the original construction of most jeans and is well suited to heavy-use items like aprons. To create a flat-felled seam, sew the pieces together with right sides facing, then open the seam out, press both allowances to one side, fold the top allowance over the bottom one, and stitch it down flat. The result is a seam that is visible on the front but extremely strong and self-enclosing, with no raw edges.
Attaching Ties, Straps, and Any Additional Hardware
The ties and neck strap are what transform a flat piece of fabric into a functional, wearable apron. For the waist ties, you have several options. You can cut long strips of denim from the leftover leg fabric, fold them in thirds lengthwise, press them, and sew them closed to create sturdy fabric ties. Alternatively, cotton twill tape or grosgrain ribbon in a coordinating color can be used for a neater, quicker finish. Either approach works well; the choice comes down to aesthetics and how much of an all-denim look you want to achieve.
The neck strap can be made in the same way as the waist ties, or you can add adjustability by using a slider buckle or D-rings salvaged from old bags or belts. An adjustable neck strap is a significant comfort upgrade, particularly if the apron will be shared between people of different heights. To attach the hardware, simply thread your strap through the slider, fold the end over, and sew a box stitch — a rectangle with an X through it — for maximum security at this high-stress point.
Reinforcing the attachment points for all ties and straps is one of the most important finishing steps in the whole project. The points where straps meet the apron body experience significant repeated stress every time the apron is put on and taken off, and if those points fail, the whole apron becomes unwearable. Sew each attachment point at least twice, ideally using that same box-stitch pattern, and backstitch thoroughly at the beginning and end of each seam. A little extra time spent on reinforcement at this stage will pay dividends in the form of an apron that lasts for years.
Customizing and Personalizing Your Finished Denim Apron
Once the basic construction is complete, the real fun begins: making the apron entirely your own through customization and decoration. A plain denim apron is already a handsome, functional object, but there is almost unlimited potential for personalization. The surface of the denim can be painted, embroidered, stamped, distressed, or decorated with patches to create something that is truly one of a kind and reflects your own aesthetic sensibility and personality.
Embroidery is one of the most popular ways to add a personal touch to a denim apron. Denim provides an excellent ground for embroidery because it is stable, does not stretch, and the weave provides a natural grid that makes counting stitches easy. Simple designs like botanicals, geometric patterns, or meaningful words and phrases can be worked directly onto the apron using basic stitches like the backstitch, satin stitch, and French knots. You do not need to be an experienced embroiderer to achieve beautiful results — even simple designs look striking against the blue-grey of washed denim.
Additional pockets are another popular customization that adds both form and function. A large center pocket divided by a vertical seam creates two convenient compartments. A long, narrow horizontal pocket near the waist is ideal for holding a phone or a small notepad. Tool loops made from denim strips or leather can hold scissors, a pen, a spatula, or whatever tools are most relevant to how you intend to use the apron. Think carefully about how you actually work, and design your pocket layout around the real tools and items you reach for most often.
Care, Maintenance, and Long-Term Use of Your Denim Apron
A well-made denim apron is built to last, but a little thoughtful care will keep it looking its best and extend its life significantly. Denim should generally be washed in cold water to prevent shrinkage and color fading, and turned inside out before washing to protect the visible surface. Avoid using bleach, which can weaken denim fibers over time and cause uneven discoloration. A gentle detergent is all that is needed for routine washing after normal use in the kitchen or garden.
For stubborn stains like paint, oil, or grease, pre-treat the area before washing by applying a small amount of dish soap or a dedicated stain remover directly to the stain and letting it sit for ten to fifteen minutes before laundering. For dried paint specifically, soaking the stained area in warm water first can help loosen the paint before you apply any cleaning product. Keep in mind that some staining on a work apron is inevitable and even desirable — it is evidence of the apron doing its job, and the patina that develops over time only adds to its character.
Perhaps the most meaningful thing about a well-made denim apron is what it becomes over time. Unlike a cheap store-bought apron that fades, frays, and eventually falls apart, an apron made with care from quality denim and good construction techniques will outlast many years of regular use. It will accumulate marks, patches, and repairs that tell the story of everything you have made while wearing it. That accumulation of history is not a flaw — it is the whole point. A denim apron made from old jeans is, in every sense, something worth making and something worth keeping for a very long time.








What do you think?
It is nice to know your opinion. Leave a comment.