










Make a Desk Out of Upcycled Furniture: A Complete Guide to Creative Repurposing
Why Upcycling Furniture Into a Desk Is Worth Your Time
Upcycling furniture into a functional desk is one of the most rewarding DIY projects you can undertake, combining creativity, sustainability, and practicality in a single endeavor. Rather than spending hundreds of dollars on a brand-new desk that looks like everyone else’s, repurposing an old piece of furniture gives your workspace a character and story that no flat-pack product can replicate. The satisfaction of sitting down each day at something you transformed with your own hands is genuinely difficult to overstate.
Beyond the personal gratification, upcycling is a meaningful environmental choice. Every year, millions of pieces of furniture end up in landfills, contributing unnecessarily to waste and resource depletion. By rescuing an old door, a vintage dresser, a set of mismatched filing cabinets, or even a salvaged barn plank, you are diverting usable materials from the waste stream and giving them a productive second life. The ecological footprint of a repurposed desk is dramatically lower than that of a newly manufactured one, from raw material extraction all the way through to delivery.
There is also a compelling financial argument for upcycling. Thrift stores, estate sales, Facebook Marketplace, and curbside pickups offer an abundance of raw material at a fraction of retail cost. A solid-core door from a salvage yard might cost you twenty dollars and, paired with a couple of filing cabinets or hairpin legs, can become a spacious, sturdy, and visually striking desk. Even accounting for supplies like sandpaper, paint, primer, and hardware, you will almost certainly spend less than a comparable store-bought option while ending up with something far more unique.
The Environmental Case for Repurposed Workspaces
The furniture industry is one of the more resource-intensive manufacturing sectors, relying heavily on timber, adhesives, synthetic finishes, and long international supply chains. When you choose to upcycle instead of buy new, you are effectively opting out of that system, at least for one purchase. Over time, as more people make this choice, the collective impact on forests, factories, and freight emissions becomes genuinely significant. Upcycling is not just a crafting hobby; it is a small but tangible form of environmental activism that fits neatly into everyday life.
Older furniture, particularly pieces made before the 1980s, was often built with far superior materials compared to modern flat-pack alternatives. Solid hardwoods, dovetail joints, and quality hardware mean that a mid-century dresser or an antique writing table can outlast several generations of modern office furniture. When you repurpose these pieces, you are not just recycling; you are preserving craftsmanship and durability that is increasingly rare and expensive to find in contemporary manufacturing.
Communities benefit as well when upcycling culture becomes widespread. Local salvage shops, vintage markets, and repair cafes all thrive when people value reuse over replacement. By embracing the upcycled desk project, you are also supporting a broader economy of skilled artisans, second-hand traders, and sustainable small businesses. Choosing to repurpose is therefore not only good for the planet but also nurturing for the local economic ecosystems that depend on people valuing things that already exist.
Finding the Right Piece of Furniture to Transform
The hunt for the right donor piece is half the fun of an upcycled desk project. Start by defining the space where the desk will live: measure the area carefully, note the height of surrounding furniture, and consider the ergonomic requirements of whoever will be working there. Armed with these dimensions, you can approach thrift stores, salvage yards, and online secondhand marketplaces with a clear brief. It helps enormously to be flexible about what form the raw material takes, since the best finds are often the ones you were not specifically looking for.
Old solid-core doors are perennially popular for desk tops because they offer an expansive, flat surface that is already the right depth and width for a generous workspace. Filing cabinets make excellent bases, providing height, stability, and built-in storage simultaneously. Trestle tables, old workbenches, kitchen islands, and even reclaimed scaffolding boards have all been successfully repurposed into desks by creative DIYers. The key is to assess structural integrity before anything else: look for pieces that are solid, free from rot or serious damage, and capable of bearing weight safely.
When sourcing from thrift stores or estate sales, bring a tape measure, a small flashlight for inspecting dark corners and undersides, and a penknife to test whether surfaces are genuinely solid wood or veneered particleboard. Particleboard can still work for some projects but is harder to sand, paint, and refinish to a durable standard. Solid wood, by contrast, is forgiving, workable, and capable of looking spectacular with the right preparation and finishing technique. Do not be put off by ugly paint colors or superficial scratches; these are easily addressed and often hide beautifully sound structure beneath.

What to Look for in Secondhand Furniture Sources
Different sources tend to yield different types of finds, and knowing where to look for specific items saves a great deal of time. Estate sales are particularly rich hunting grounds for solid wood furniture in good structural condition, since they often include pieces that were well maintained over decades. Habitat for Humanity ReStores stock salvaged building materials including doors, cabinets, and hardware at very reasonable prices, making them ideal for anyone building a desk around a door slab or reclaimed cabinetry.
Online marketplaces such as Facebook Marketplace, Craigslist, Freecycle, and eBay local listings are invaluable resources, especially if you filter for free or very low-cost items within a short driving radius. People frequently give away perfectly good furniture simply because they are moving house and cannot take it with them. Setting up saved searches with keywords like “old door,” “filing cabinet,” “vintage table,” and “solid wood desk” means you will be notified the moment new listings appear, giving you the first opportunity to claim the best pieces.
Do not overlook your own home or the homes of friends and family when hunting for raw material. An old dining table gathering dust in a relative’s garage, a redundant kitchen countertop, or a bookcase whose shelves have seen better days can all be candidates for transformation. Community groups, neighborhood apps, and local notice boards also regularly feature free furniture that people simply want removed from their property. With a little networking and a willingness to ask around, you may find your perfect desk donor piece without spending a single penny on sourcing.
Planning and Preparing Your Upcycled Desk Project
Good planning transforms an upcycling project from a chaotic scramble into a smooth and enjoyable process. Once you have your donor piece or pieces in hand, spend time sketching out your vision before picking up a single tool. Think about the overall aesthetic you want to achieve: are you going for a rustic industrial look, a clean Scandinavian style, a maximalist vintage feel, or a sleek modern finish? Your choice of colors, hardware, and surface treatment will all flow from this foundational decision and should be made consistently across the project.
Assemble all necessary materials and tools before you begin work, since nothing derails momentum like mid-project trips to the hardware store. A typical desk upcycle project will require sandpaper in multiple grits, wood filler for any cracks or holes, primer suitable for the surface type, paint or stain of your choice, a topcoat sealant for durability, and any additional hardware such as legs, brackets, drawer pulls, or cable management solutions. If you are joining multiple pieces together, you will also need appropriate fixings, potentially including bolts, L-brackets, or heavy-duty adhesive depending on the materials involved.
Safety preparation is equally important and should never be skimped on. Old furniture may contain lead-based paint, particularly if it was manufactured before 1978, so always test before sanding. Lead test kits are inexpensive and widely available at hardware stores. If lead is present, either use a chemical stripper rather than sanding, or have the piece professionally stripped. Ensure you work in a well-ventilated area at all times, wear appropriate respiratory protection when sanding or applying solvent-based finishes, and keep a clear workspace that is free from trip hazards throughout the project.
Choosing the Right Finish for Durability and Style
The finish you choose for your upcycled desk will determine both its visual character and how well it holds up to daily use. For a painted desk, chalk paint has become enormously popular in the upcycling community because it adheres to most surfaces without extensive priming, dries quickly, and creates a beautiful matte finish that can be distressed, waxed, or sealed to varying degrees. However, chalk paint alone is relatively soft and benefits significantly from a clear topcoat wax or lacquer, particularly on a work surface that will see daily contact with hands, coffee cups, and equipment.
For those who prefer to celebrate the natural beauty of the wood beneath, a stain or oil finish might be more appropriate than paint. Wood stains penetrate the grain and enhance its natural character while adding color, and are available in everything from pale Scandinavian driftwood tones to deep, rich espresso shades. Danish oil, tung oil, and linseed oil are excellent natural options that feed the wood, resist moisture, and develop a beautiful patina over time. These finishes require more coats and longer drying times but reward patience with a depth and warmth that paint simply cannot replicate.
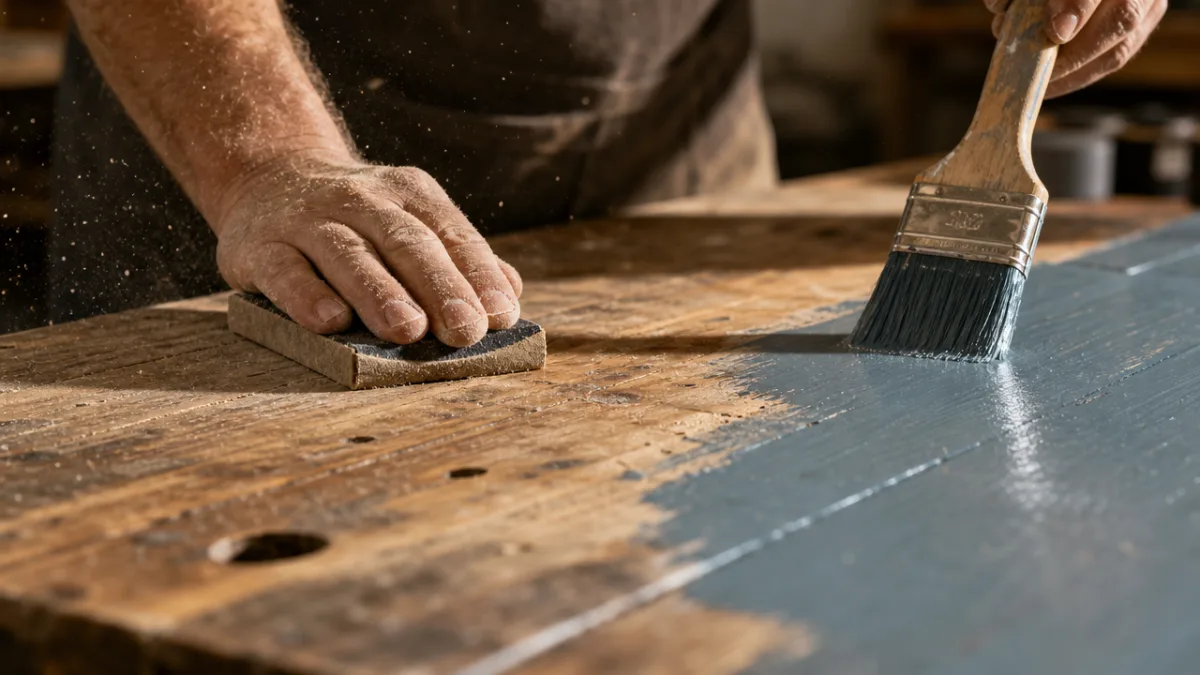
Whatever finish you choose, the quality of your surface preparation will largely determine the quality of your result. Sand thoroughly through progressive grits, starting at 80 or 100 for rough material and working up to at least 220 before applying any finish. Fill every crack, dent, and hole with appropriate wood filler and sand flush when dry. Wipe down with a tack cloth before each coat to remove all dust, and allow each layer to dry completely before adding the next. These steps may feel painstaking in the moment but are the difference between a desk that looks handmade in the best possible sense and one that simply looks rough.
Step-by-Step Construction and Assembly
With planning complete and materials assembled, the actual construction of your upcycled desk can begin in earnest. If you are working with a door slab on filing cabinet bases, start by ensuring the cabinets are the same height, placing them at your preferred distance apart, and testing the door across them for stability before securing anything permanently. The door should overhang the cabinets slightly on each side for a balanced proportion, and the two cabinets should be positioned far enough apart that there is comfortable legroom in the center without compromising the rigidity of the surface above.
Use L-brackets fixed to the inside of the cabinets and the underside of the door to create a secure connection between all components. Pre-drill all holes to prevent splitting, particularly if you are working with older or denser wood. If the desk will be against a wall, consider adding a third bracket at the back for additional stability. At this stage, also think about cable management: it is far easier to plan for routing power cables, ethernet leads, and monitor cables before everything is painted and finished than to try to add cable clips and grommets as an afterthought later.
For desk projects that involve cutting or reshaping donor pieces, invest time in accurate marking and measuring before any cuts are made. The woodworking adage of measuring twice and cutting once is never more relevant than in an upcycling project where the material cannot simply be replaced. Use a straight edge and carpenter’s square to ensure all lines are true, and if you are not confident using a circular saw or jigsaw, many hardware stores offer a cutting service, or a local joiner will often make a precise cut for a very modest fee. Accuracy at this stage pays dividends throughout the entire project.
Helpful Assembly Tips for Common Upcycled Desk Configurations
Different donor piece combinations call for slightly different assembly approaches, but some principles apply universally. Always ensure that the working surface is perfectly level before fixing it permanently, using a spirit level and shims if necessary to compensate for uneven floors. A desk that rocks or slopes slightly may not be immediately obvious during construction but will become a persistent irritation during use. Take the time to get this right before any fixings are made permanent.
- When using filing cabinets as a base, lock the castors or remove them entirely if you want the desk to stay put, and consider adding felt pads to protect flooring.
- If attaching hairpin or wooden legs, use a leg mounting plate for each leg and ensure all four legs are perfectly even in height before tightening fully.
- For floating wall-mounted desk surfaces, use proper wall studs or heavy-duty anchor fixings rated well above the expected load, and always check behind walls for pipes and cables before drilling.
- When combining two different pieces of furniture as legs, use threaded rod or dowels through both pieces and the top to create a unified structure rather than relying on surface contact alone.
- Add corner braces beneath any top that spans more than 120 centimeters unsupported, to prevent sag under the weight of monitors and equipment over time.
Ergonomics deserve careful attention during assembly. Standard desk height is approximately 73 to 76 centimeters for seated work, but this varies significantly depending on the height of the user and the chair being used. If possible, adjust the working height to suit the specific person who will use the desk, since even a few centimeters can make a significant difference to comfort during long working sessions. This is one of the underrated advantages of building your own desk: unlike commercial products, you can set the height exactly right for the individual rather than accepting a one-size-fits-all standard.
Styling and Personalizing Your Finished Upcycled Desk
Once construction and finishing are complete, the final and perhaps most personally expressive stage of the project begins: styling and personalizing the desk to make it truly your own. This stage is about more than aesthetics; a well-organized and thoughtfully arranged desk actively supports productivity and creative thinking. Begin by considering what you actually need on the desktop every day and what can be stored out of sight, and build your organizational approach around that honest inventory rather than around idealized workspace images from social media.
Hardware choices are among the most powerful tools for establishing the visual character of an upcycled desk. Swapping out old or mismatched drawer handles for a cohesive set in brass, matte black, ceramic, or brushed nickel can immediately shift the aesthetic register of the entire piece. Vintage bin pulls evoke a warm, artisanal workshop feel; sleek bar handles read as contemporary and minimal; glass knobs suggest a feminine, vintage-inspired charm. These small details cost relatively little but have an outsized effect on the finished appearance and feel of the desk.
Consider the broader context of the room when styling the desk, treating it as part of a visual conversation with the surrounding space rather than an isolated object. A desk made from a reclaimed door can be beautifully grounded by a jute rug beneath the chair and a pendant lamp overhead with an Edison bulb, leaning into its industrial heritage. A painted vintage dresser converted to a writing table might be complemented by linen curtains, a ceramic desk lamp, and a small vase of dried flowers, reinforcing its cottage or country aesthetic. Think holistically about light, texture, and color to create a workspace that feels genuinely cohesive.

Maintaining and Caring for Your Upcycled Desk Long-Term
An upcycled desk, made from solid and well-prepared materials and finished thoughtfully, should last for many years with appropriate care. The most important maintenance step is protecting the surface from moisture, heat, and abrasion during daily use. Use coasters under all drinks, a desk mat or blotter under writing and drawing areas, and felt pads under any items that sit permanently on the surface such as monitor stands or lamp bases. These simple habits prevent the vast majority of surface damage before it has a chance to occur.
Inspect the desk periodically for any signs of wear to the finish, particularly on a painted surface, and address small chips or scratches promptly before they expand or allow moisture to penetrate. Touch-up painting with the original paint color is easy to do and keeps the desk looking fresh for far longer than neglect would allow. For oiled or waxed finishes, a light application of the original oil or wax every six to twelve months will replenish the protective layer and restore the depth and luster of the surface, keeping the natural beauty of the wood looking vibrant.
Finally, embrace the evolution of your desk over time. Unlike a mass-produced piece designed to look the same on the day you sell it as on the day you bought it, an upcycled desk made from natural materials will develop a patina that reflects its use and history. Gentle wear on corners, a deepening richness of color in the wood, small marks that accumulate the stories of projects and working days all add to the character of the piece rather than diminishing it. This is the authentic quality that no new furniture can replicate, and it is precisely what makes the upcycled desk not just a surface to work on, but a piece of furniture genuinely worth caring for.








What do you think?
It is nice to know your opinion. Leave a comment.