










12 Macrame Water Bottle Holder Tutorials: The Eco-Friendly Way to Stay Hydrated On the Go
Why Macrame Water Bottle Holders Are Taking Over the Eco-Conscious World
In recent years, the intersection of sustainability and handcrafted artistry has given rise to one of the most charming accessories in the zero-waste community: the macrame water bottle holder. What began as a niche craft revival has blossomed into a full-blown movement, with makers and outdoor enthusiasts alike embracing these knotted carriers as a stylish, planet-friendly alternative to plastic holders and disposable packaging. The resurgence of macrame in modern culture is no coincidence — it speaks to a collective desire to slow down, create with intention, and reduce our reliance on synthetic, mass-produced goods.
A macrame water bottle holder is more than just a pretty accessory. It represents a conscious choice: to carry your reusable bottle in something handmade, biodegradable (when made from natural fibers), and utterly unique. Unlike neoprene sleeves or plastic clip-on carriers, a knotted cotton or jute holder tells a story. Whether you made it yourself over a quiet weekend or received it as a thoughtful gift, it carries the kind of warmth and personality that no factory floor can replicate. For hikers, commuters, festival-goers, and yoga enthusiasts, it has become the accessory of choice.
The global conversation around single-use plastics and fast fashion has pushed many people to reconsider every item they carry, from their grocery bags to their coffee cups. Water bottle holders fit perfectly into this ethos. By pairing a high-quality stainless steel or glass bottle with a beautifully crafted macrame sleeve, you create a system that is both functional and deeply intentional. And as more tutorials flood platforms like Pinterest, YouTube, and Instagram, the barrier to entry has never been lower. Even complete beginners can produce stunning results within a few hours of learning basic knots.
The Essential Materials You Need to Get Started
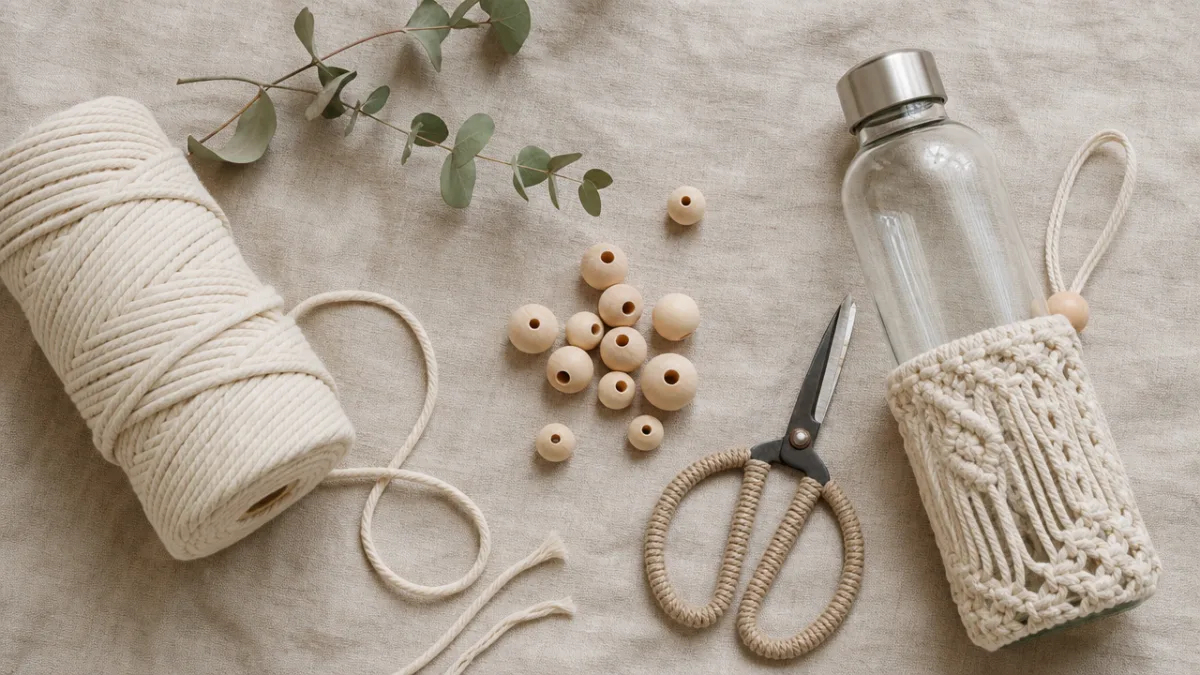
Before diving into any of the twelve tutorials available for macrame water bottle holders, it is important to understand the core materials that make these projects possible. The most fundamental element is the cord itself. Macrame cord comes in a variety of materials, thicknesses, and textures, and choosing the right one will dramatically affect both the look and durability of your finished holder. For eco-conscious makers, natural cotton rope in 3mm to 5mm diameter is the most popular choice, offering a soft, braided finish that is comfortable to grip and gentle on the environment.
Beyond cord, you will need a few basic tools and accessories to get started. A pair of sharp scissors is non-negotiable, as clean cuts prevent fraying and make knotting much easier. Many crafters also keep a measuring tape handy, since cord lengths need to be calculated before you begin — typically, you will cut cords at four to five times the desired finished length of your project. A clipboard, dowel rod, or even a doorknob can serve as your anchor point while working. Some makers prefer a macrame board with grid lines, which helps maintain symmetry and even spacing between knots.
The type of water bottle you plan to carry also influences your material choices. A wide, tall Nalgene bottle requires a different cord count and knot pattern than a slim, stainless steel thermos. Most tutorials will specify the target bottle dimensions, so it is worth measuring your bottle’s diameter and height before gathering supplies. For beginners, starting with a standard 32-ounce round bottle is often recommended because it is forgiving of small inconsistencies in knotting tension. As your confidence grows, you can experiment with tapered designs, colored cords, and decorative embellishments like beads or fringe.
- 3mm or 5mm single-strand or braided cotton macrame cord — the most versatile and beginner-friendly choice
- Sharp fabric scissors — dull blades cause fraying and make precise cuts difficult
- A wooden ring or metal D-ring — used to form the top loop for carrying
- Wooden beads or ceramic beads — optional, but adds decorative texture and visual interest
- A measuring tape and ruler — essential for consistent cord lengths and symmetry
- A clipboard or dowel rod — provides a stable anchor point while you work
Understanding the Basic Knots Used in Bottle Holder Tutorials
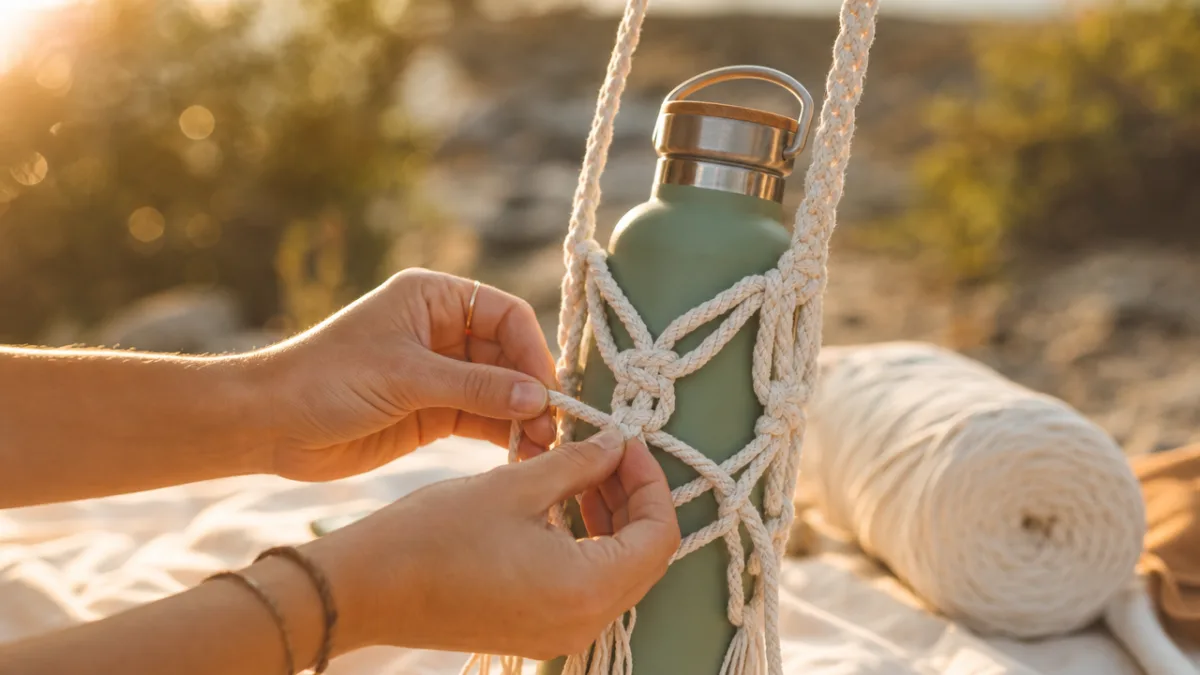
One of the most reassuring things about macrame, especially for newcomers, is that even the most elaborate-looking designs are typically built from just a handful of foundational knots. The square knot is the workhorse of nearly every macrame water bottle holder tutorial you will encounter. It is formed by crossing two working cords over a central filler cord, first from the left, then mirroring the action from the right. When repeated in alternating rows, square knots create a classic lattice pattern that is both strong and visually appealing, making it ideal for the body of a bottle holder.
The spiral knot, sometimes called the half square knot or half hitch, is another essential technique. Unlike the full square knot, the spiral knot repeats the same motion on one side continuously, causing the work to naturally twist into a beautiful helix shape. This adds visual dynamism to a holder without significantly increasing complexity. Many tutorials use spiral knots in sections near the base or neck of the holder to create contrast against the more structured lattice sections. The result is a holder that looks intricate but is surprisingly simple to produce once your hands develop the muscle memory for the motion.
Gathering knots and lark’s head knots round out the basic toolkit that most tutorials rely on. The lark’s head knot is almost always the very first knot in any project — it is used to mount your working cords onto the starting ring or dowel. A gathering knot, meanwhile, is used to bundle multiple cords together at the top or bottom of a holder, creating a clean, polished finish. Understanding these four knots — square, spiral, lark’s head, and gathering — means you are technically equipped to complete all twelve tutorials discussed in this article, regardless of their apparent complexity or decorative flair.
- Lark’s Head Knot — folds a cord in half and mounts it onto a ring; the starting point of nearly every project
- Square Knot — the most versatile and widely used knot, forming the structural body of most holders
- Half Square (Spiral) Knot — repeated one-sided square knots that spiral into a twisted column
- Alternating Square Knots — offset rows of square knots that create an open diamond mesh pattern
- Gathering Knot — wraps multiple cords together to create a neat, bundled finishing point
A Tour Through 12 Inspiring Macrame Water Bottle Holder Tutorials
The landscape of macrame tutorials available online is vast and wonderfully varied, but twelve standout designs have risen to prominence in crafting communities for their combination of accessibility, aesthetic appeal, and practical construction. The first and most beginner-friendly tutorial focuses on a simple alternating square knot design that creates a classic diamond mesh body. Working with just eight cords and a single wooden ring, makers can complete this project in under two hours. The open weave holds the bottle securely while allowing it to be seen, making it a great showcase for beautiful glass or brightly colored bottles.
Moving up slightly in complexity, tutorials three through six introduce decorative elements that elevate the basic structure into something truly eye-catching. Tutorial three, for example, incorporates wooden beads threaded onto the cords between knot sections, creating a bohemian aesthetic that pairs beautifully with earth-toned cotton rope. Tutorial four features a wrapped leather handle instead of a simple cord loop, adding durability and a tactile contrast in materials. Tutorial five teaches makers to incorporate color through the use of dip-dyed or naturally tinted rope, producing an ombre effect that graduates from deep indigo at the base to pale sky blue at the top.
Tutorials seven through twelve push further into advanced territory, introducing techniques like macrame netting, twisted fringe finishes, and multi-bottle carrier designs. Tutorial nine, a particular favorite in outdoor communities, produces a double-bottle holder with a central handle — ideal for hiking partners who want to travel light and share carrying duties. Tutorial eleven focuses on creating an adjustable drawstring closure at the top of the holder, making it compatible with bottles of varying heights and widths. Tutorial twelve, perhaps the most ambitious of the collection, features a full bohemian fringe base and alternating berry knot accents, producing a showstopper piece that looks more like wearable art than a practical accessory.
How to Choose the Right Tutorial for Your Skill Level and Lifestyle
With twelve tutorials to choose from, the question naturally arises: where do you start? The answer depends on a combination of your current craft experience, the time you have available, and how you intend to use the finished holder. For absolute beginners who have never worked with macrame before, tutorials one and two are the natural entry points. These designs use the smallest number of cords, require no special tools beyond scissors and a ring, and can be completed in a single sitting. Starting here builds the hand strength, knot familiarity, and spatial reasoning that will serve you well in more complex projects.
Intermediate crafters who have spent some time with basic square knot projects will find tutorials three through seven a satisfying and rewarding challenge. These designs introduce new elements without overwhelming the maker, and the slightly longer completion times — typically three to five hours — feel proportionate to the richness of the finished product. Makers who enjoy the meditative rhythm of repetitive knotting will particularly appreciate tutorial six, which uses a long column of spiral knots to create a minimalist, modern holder that suits both casual and professional environments. This design also makes an excellent gift, as its clean lines appeal to a wide range of tastes.
For those who have been practicing macrame for a while and are ready to invest in a genuinely complex, time-intensive project, tutorials eight through twelve offer the depth and technical challenge that experienced makers crave. These designs may take anywhere from six to twelve hours to complete, depending on pace and familiarity with the techniques involved. However, the results are correspondingly spectacular. A finished tutorial twelve holder, for example, could easily be displayed as a piece of home décor, hung on a wall as an art object even when the bottle is not inside it. The investment in time pays off in a piece that is genuinely one-of-a-kind.
- Beginners (0–6 months of macrame experience): Start with tutorials 1 and 2, focusing on lark’s head and square knots using 3mm cord
- Intermediate makers (6 months to 2 years): Tutorials 3 through 7 introduce beads, color, and decorative handle variations
- Advanced crafters (2+ years or equivalent experience): Tutorials 8 through 12 include complex patterns, fringe, and multi-bottle designs
- Outdoor enthusiasts and hikers: Prioritize tutorials 9 and 10, which emphasize durability and hands-free carrying options
- Gift makers and artisans: Tutorials 11 and 12 produce the most visually striking, gift-worthy results
Caring for Your Macrame Holder and Making It Last for Years
One of the great promises of a handmade macrame water bottle holder is longevity. Unlike mass-produced accessories that wear out, fade, or break within a season, a well-made and well-maintained macrame holder can last for years — even decades — with the right care. The key to longevity begins with material choice. Natural cotton cord, particularly single-strand or three-ply braided varieties, holds up remarkably well to regular use. It is soft enough not to fray excessively under normal handling, and it develops a pleasant, worn character over time that many makers actually prefer to the pristine look of a brand-new piece.
Cleaning a macrame water bottle holder is simpler than many people expect. Most cotton holders can be hand-washed in cool water with a small amount of mild, biodegradable soap. Gently work the suds through the knots, paying special attention to areas that contact the bottle directly, where moisture and bacteria can accumulate. Rinse thoroughly under cool running water, then gently squeeze — never wring — the holder to remove excess water. Reshape it while damp to ensure the knots dry in their correct positions, and hang it in a well-ventilated area away from direct sunlight, which can cause natural fibers to bleach unevenly or become brittle over time.
Beyond cleaning, a few simple habits will significantly extend the life of your holder. Avoid leaving it submerged in water for extended periods, as prolonged saturation can weaken the fibers and cause the knots to loosen. If you use your holder for hiking or outdoor activities, shake it out after each outing to remove dirt, dust, and debris before it has a chance to work its way deeper into the knots. Store it loosely coiled or hanging rather than compressed in a bag, which can distort the knotted structure over time. Treated with this level of care, a macrame holder made from quality materials will remain beautiful and functional through hundreds of adventures.
The Broader Impact: Macrame as a Gateway to Sustainable Living
The appeal of macrame water bottle holders extends far beyond the aesthetic. For many people, making their first holder is the beginning of a broader shift toward a more intentional, sustainable lifestyle. The act of creating something functional with your own hands challenges the assumption that everything must be purchased, packaged, and shipped. It reconnects makers to the value of time, skill, and material, encouraging a deeper appreciation for the objects they choose to surround themselves with. This shift in perspective tends to ripple outward: people who make their own accessories often begin questioning other consumption habits, leading to broader changes in how they shop, cook, travel, and live.
The community dimension of macrame craft is also worth celebrating. Online groups, local workshops, and craft exchanges have formed around the shared love of fiber arts, creating spaces where makers of all ages, backgrounds, and experience levels come together to share knowledge and encouragement. Many of the twelve tutorials highlighted here originated from makers who chose to share their patterns freely, contributing to a culture of generosity that stands in refreshing contrast to the competitive, profit-driven logic of mainstream consumerism. By participating in this community — whether as a student, teacher, or both — crafters become part of a living tradition of skill-sharing that stretches back centuries.
Finally, it is worth considering the environmental mathematics of a handmade macrame holder. A single piece made from 30 to 50 meters of natural cotton cord produces negligible waste — especially if cord scraps are saved for smaller projects or composted. Compare this to the supply chain behind a single mass-produced neoprene sleeve: synthetic petrochemical materials, factory emissions, international shipping, and packaging that likely ends up in a landfill. The macrame holder will not save the world on its own, but as part of a broader commitment to making, mending, and choosing quality over quantity, it is a quietly radical act. And it is one that begins with nothing more than a length of cord and the willingness to learn a knot.








What do you think?
It is nice to know your opinion. Leave a comment.