










Vintage Suitcase Dog Bed: A Complete Upcycled Pet Furniture DIY Tutorial
The Beauty of Upcycling: Why a Vintage Suitcase Makes the Perfect Dog Bed
There’s something genuinely satisfying about rescuing a forgotten object and giving it a whole new life — and few DIY projects do that quite as beautifully as turning a vintage suitcase into a cozy dog bed. These old pieces of travel history, the kind you stumble across at thrift stores, estate sales, and flea markets, have a charm and craftsmanship that you just can’t find in anything mass-produced. When you repurpose one into a sleeping spot for your dog, the result is something functional, beautiful, and uniquely yours.
It’s also one of the more environmentally responsible choices you can make as a pet owner. Every suitcase that gets a second life is one less thing heading to a landfill. Vintage luggage — especially stuff made in the mid-twentieth century — was built to last. Hard shells, leather handles, sturdy hinges: these things were made when longevity actually mattered, which is exactly why they hold up so well when repurposed into pet furniture.
There’s also a growing desire among pet owners to have their animals’ belongings actually fit in with the rest of the house. Nobody wants a garish plastic dog bed clashing with their living room. A vintage suitcase bed sidesteps that problem completely. Whether your space leans industrial, farmhouse, or a little eclectic, you can customize one of these to feel right at home — which makes it a surprisingly versatile project for almost any interior.
Sourcing the Perfect Vintage Suitcase
Finding the right suitcase is honestly the most important part of this whole project, so it’s worth slowing down and being a little picky before you dive in. You want something with personality — original stickers, interesting hardware, a great color — but it also needs to be structurally solid enough to hold cushioning and handle a dog using it every day. Budget some time for the hunt. It’s part of the fun.
Thrift stores, estate sales, and flea markets are your best bets for keeping costs reasonable. eBay, Etsy, and Facebook Marketplace can also turn up great finds, though keep in mind that shipping something bulky can get expensive fast. When you’re looking at a suitcase in person, test the hinges and latches, check the inside for mold or stubborn smells, and give the whole frame a once-over for structural issues. A few cosmetic imperfections are fine — charming, even — but anything with real structural damage or a smell that won’t quit is worth passing on.
Size is a big deal here. You want your dog to be able to curl up comfortably with a little room to spare, but not so much room that it stops feeling like a cozy den (which is exactly what dogs love). A good rule of thumb: measure your dog nose to tail while they’re curled up in their usual sleeping position, then add four to six inches on each side. For small to medium dogs, a suitcase around twenty-four to twenty-eight inches long tends to work really well. If you’ve got a bigger breed, look for an oversized vintage trunk — they make an equally stunning finished product.

Materials and Tools You Will Need
Getting everything together before you start makes the whole process a lot more enjoyable. Most of what you need is easy to find at craft or hardware stores, and some of it you might already have lying around. Aside from the suitcase itself, expect to spend somewhere between twenty and sixty dollars total depending on what materials you go with — which is a pretty great deal compared to boutique pet furniture prices.
The cushion is the heart of the whole thing, and you’ve got some good options. High-density foam cut to the interior dimensions of the suitcase is ideal — it’s supportive, holds its shape, and dogs tend to love it. But a folded moving blanket, stacked quilt batting, or even an old sofa cushion cut down to size can all work well too. Whatever you use, make sure there’s enough of it to be genuinely comfortable. Aim for at least three inches of cushioning, with four to five inches being even better for most dogs.
Here’s everything you’ll need to pull this project together:
- One vintage suitcase in good structural condition, sized appropriately for your dog
- High-density foam or alternative cushion filling, cut to the interior floor dimensions of the suitcase
- Fabric for the cushion cover, approximately one to two yards depending on suitcase size
- Fabric glue or a sewing machine and thread for assembling the cushion cover
- Sandpaper in medium and fine grits for smoothing any rough interior edges
- Spray paint or chalk paint if you want to refinish the exterior of the suitcase
- Optional furniture legs, available at most hardware stores, if you want to give the bed some height
- Screwdriver and drill for attaching legs and reinforcing hinges
- Mild cleaning solution and rags for thoroughly cleaning the suitcase inside and out
- Optional decorative trim such as ribbon, nail head trim, or fabric piping for a more polished finish
When it comes to fabric, think practically alongside aesthetically. You want something durable, washable, and not going to trap pet hair or fall apart when it gets damp. Canvas, denim, outdoor fabric, and upholstery-weight cotton are all solid choices. Skip anything delicate or loosely woven. And if you pick a bold pattern, that’s actually a smart move — it’ll hide minor stains and wear far better than a solid light color will.
Step-by-Step Construction Guide
Start by giving your suitcase a really thorough clean, inside and out. A mild all-purpose cleaner or a simple warm water and white vinegar solution works great. Pay extra attention to the interior since that’s where your dog will be sleeping. If the suitcase smells musty, drop an open box of baking soda inside, close it up, and leave it for a day or two before you move on. If the interior lining is beyond saving — too worn or stained — you can carefully pull it out and replace it with fresh fabric using spray adhesive or fabric glue.
Once everything is clean and dry, run your hand carefully along all the interior edges, seams, and corners. You’re looking for anything sharp: rough edges, protruding staples, pointy metal bits. Sand down any problem areas with medium-grit sandpaper, then follow up with fine-grit for a smooth finish. If you come across sharp metal pieces that can’t be sanded smooth, cover them with foam weatherstripping and secure it with strong adhesive. Don’t rush this step — your dog’s safety inside this bed matters more than anything else.
If you’re refinishing the exterior, do that now. Lightly sand the outside to help the paint grip, then apply your paint in thin, even coats. Chalk paint is really popular for this kind of project because it sticks to almost anything without priming and gives you that lovely matte, vintage-y finish. Two or three thin coats will get you good coverage — just let each one dry fully before adding the next. Once the final coat is done, seal it with a clear wax or varnish to protect against the everyday scratches and scuffs that come with life around a pet.

Next up, cut your foam (or whatever filling you’ve chosen) to match the exact interior floor dimensions of the suitcase. A serrated bread knife or an electric carving knife does a surprisingly clean job on foam. If you’re sewing a cushion cover, build in a zippered or envelope-style closure so you can pull it off and wash it easily. If you’d rather skip the sewing, fabric glue can get you a clean, finished result — though a sewn cover will hold up better over time and be much easier to launder repeatedly. Either way, fit the cushion inside the suitcase to check that it sits snugly before you move on.
If you want to add legs — and honestly, it looks fantastic and improves airflow under the bed — attach four furniture legs to the bottom of the suitcase. Most legs come with mounting plates you can screw in directly. Mark the position of each leg about two to three inches in from each corner, drill your pilot holes, and attach the plates firmly. Legs in the four-to-six-inch range tend to look the most proportional. Once they’re on, give the whole thing a good shake to make sure everything feels stable before you set the finished bed in place.
Customization Ideas and Creative Variations
This is honestly the most fun part of the whole project. Your suitcase dog bed doesn’t have to look like anyone else’s — the customization choices you make are a chance to show off your style and your love for your dog at the same time. Think about the room it’ll live in, your dog’s personality, and any design vibes you’re drawn to. Even small decorative touches can take a functional pet bed and turn it into something people genuinely stop and admire when they visit.
Decorative trim is one of the easiest ways to make the bed look finished and intentional. Nail head trim along the edge of the suitcase opening gives it a tailored, almost upholstered look. Ribbon or fabric piping hot-glued along the same spot creates something softer and more romantic. For a personal touch that really makes the bed feel like it belongs to your dog, consider a small embroidered patch with their name sewn onto the cushion cover, or iron-on letters with their initials. It’s a small thing that makes a big impression.
There are practical customizations worth thinking about too. A small pillow or bolster tucked along one interior edge is perfect for dogs who like to rest their chin on something elevated (most of them, honestly). Some people add a little hook to the inside of the suitcase lid for hanging a spare leash or a bag of poop bags, which makes the bed pull double duty as a storage spot. And if your dog is older or has trouble getting around, a simple ramp made from a piece of wood covered in carpet remnant leaned against the side of the bed can make getting in and out a whole lot easier on their joints.
Caring for Your Upcycled Dog Bed
Keeping this bed in good shape is pretty simple, but a little consistency goes a long way. The cushion cover should be washed regularly — every week or two is a good rhythm, though it depends on how much your dog uses the bed and whether they come in from outside. Wash it in warm water with a pet-safe detergent and tumble dry on low. Regular washing doesn’t just keep things hygienic; it actually extends the life of the fabric by stopping dirt and oils from slowly breaking down the fibers.
The suitcase exterior doesn’t need much attention day to day. A slightly damp cloth is all you need to wipe off dust or surface dirt when it builds up. If you used chalk paint with a wax seal, refreshing that wax once or twice a year will keep the finish looking good and protected. Check the furniture legs now and then to make sure they’re still tight, and give the hinges a seasonal look-over too. A tiny drop of machine oil will sort out any squeaking or stiffness before it becomes a real issue.
As for the foam cushion itself, plan to replace it every year or two, or sooner if it’s clearly flattened out. Good-quality foam holds up for a surprisingly long time, but it does eventually compress with regular use. The signs are pretty obvious when it’s time: you can see the flattening, your dog starts preferring to sleep somewhere else, or there’s a lingering smell that washing the cover just doesn’t fix. A new foam insert is cheap and immediately brings the whole bed back to life without any other work involved.
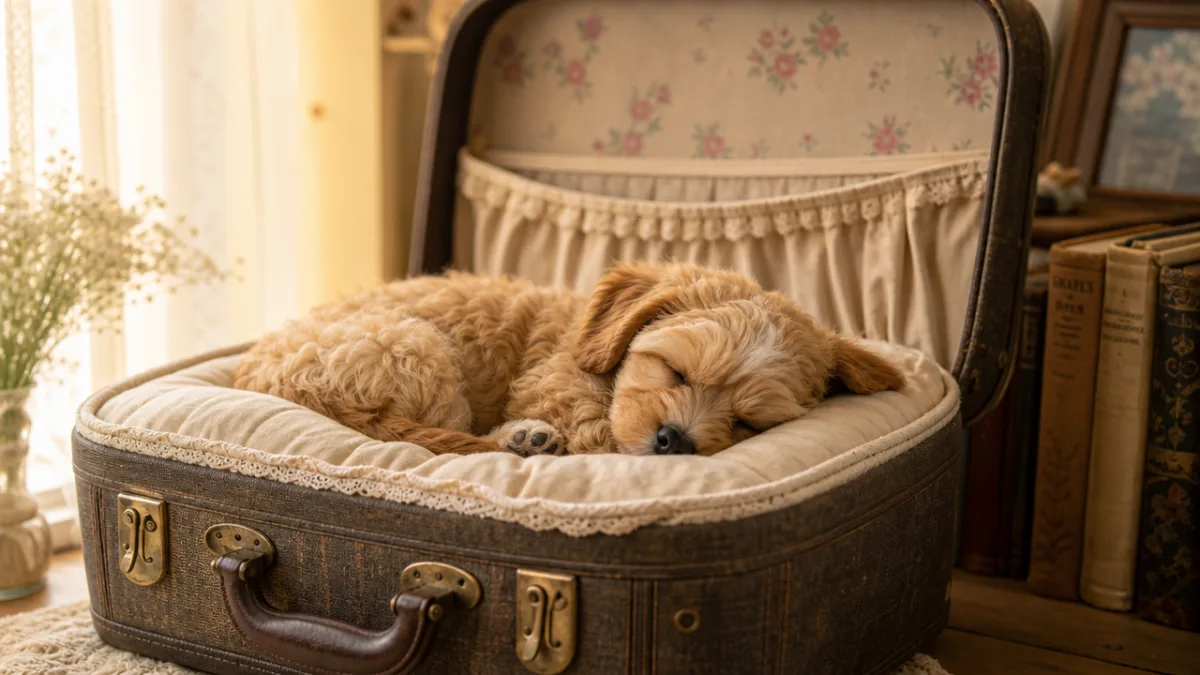
The Bigger Picture: Embracing Sustainable Pet Ownership
This project is about more than just making something cute for your dog. It’s a small but real commitment to consuming more thoughtfully. The pet industry churns out an enormous amount of cheaply made stuff that isn’t designed to last — and every time someone chooses to make something durable and handmade instead, that’s a meaningful pushback against that cycle. It’s a vote for quality, creativity, and actually respecting the materials and resources that go into making things.
The skills you pick up along the way — sourcing thoughtfully, prepping surfaces, working with fabric and foam, finishing and decorating with care — carry over to all kinds of other projects. A lot of people find that building their first upcycled piece of pet furniture opens a door they didn’t know was there. And there’s a particular kind of satisfaction that comes from looking at a finished suitcase dog bed knowing you made it yourself, that you saved something from being thrown away and turned it into something genuinely lovely. No purchase really replicates that feeling.
There’s also something nice about sharing it. Whether you post the process on social media, point it out to a friend, or just enjoy the conversation it starts when people come over, a handmade vintage suitcase dog bed has a way of making people look at old objects differently. It nudges people to see potential where they’d normally just see wear and age. Which means that even a simple pet furniture project can quietly contribute to something bigger — a shift toward making over buying, and toward lasting quality over stuff that ends up in the trash six months later.








What do you think?
It is nice to know your opinion. Leave a comment.