










Upcycled Towel Shorts: A Complete Guide to Sustainable DIY Fashion
Introduction: The Art of Upcycling Old Towels into Stylish Shorts
There’s something genuinely satisfying about taking something headed for the trash and turning it into a piece of clothing you actually want to wear. Upcycled towel shorts are exactly that kind of project — clever, sustainable, and surprisingly stylish. The idea is simple: grab some old, worn-out, or mismatched towels and turn that soft, absorbent fabric into a pair of comfortable casual shorts. Perfect for lazy summer days, beach trips, or just hanging out in the backyard.
The upcycling movement has really picked up steam in recent years, and it’s not hard to see why. Fast fashion sends millions of tons of textile waste to landfills every year, and choosing to upcycle instead of toss is one small but real way to push back against that. Towels are especially great candidates for this kind of project because terry cloth is naturally soft, durable, and pretty forgiving to work with — even if you’re newer to sewing.
And honestly? The end result is always one of a kind. Every towel comes with its own colors, patterns, textures, and little quirks that make the finished shorts completely unique. A vintage striped beach towel hits differently than a faded floral bath towel or a bold geometric hotel find. This guide will walk you through the whole process — from picking your materials to the final finishing touches — with plenty of room to make it your own along the way.
Gathering Your Materials and Choosing the Right Towel
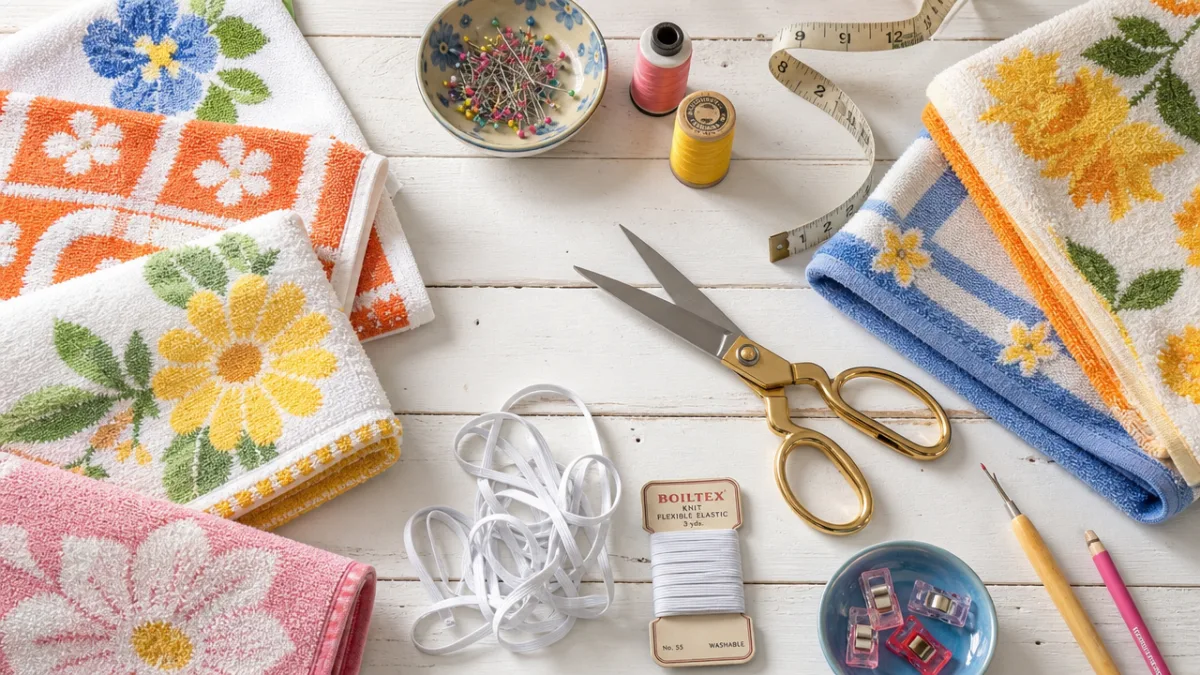
Before you grab your scissors, it’s worth taking a few minutes to get your materials sorted. The most important decision is the towel itself. Not all towels are created equal for this kind of project — thicker, better-quality towels tend to hold their shape better and feel nicer to wear. That said, thinner towels can still work if you want a lighter-weight summer garment or plan to line them.
Size matters too. A standard bath towel (around 27 by 54 inches) will usually give you enough fabric for a pair of shorts with a waistband if you’re a small to medium. For larger sizes, a bath sheet or two towels seamed together will get you where you need to be. If you’re thrift shopping or digging through your linen closet, keep your waist and hip measurements in mind so you can make smart choices on the fly.
Beyond the towel, here’s what you’ll want to have on hand:
- Sharp fabric scissors or a rotary cutter and cutting mat
- Sewing machine with a stretch or jersey needle (size 90/14 is a solid choice for terry cloth)
- Thread in a matching or contrasting color — whatever speaks to you
- One-inch elastic for the waistband
- Pins or sewing clips to hold everything in place
- A seam ripper, because mistakes happen
- An iron and pressing cloth for clean, flat seams
- A shorts pattern in your size, either commercial or self-drafted
- Fabric chalk or a washable marker for tracing
Choosing a pattern is something beginners tend to overlook, but it really does matter here. A simple pull-on style with an elastic waist is your best bet — it’s beginner-friendly, comfortable in terry cloth, and genuinely easy to wear. Look for patterns designed for knit or stretchy fabrics, since they’ll account for the slight give in terry cloth and help you end up with a better fit. Patterns with minimal seam lines are also ideal, because terry cloth has a tendency to bulk up wherever seams intersect.
Preparing Your Fabric and Cutting the Pattern Pieces
Good prep work is honestly what separates a project that goes smoothly from one that falls apart halfway through. Before you cut anything, pre-wash and dry your towel the same way you’ll wash the finished shorts. Terry cloth is notorious for shrinking, especially on its first hot wash, so running it through a full hot cycle before you cut prevents the heartbreak of perfectly fitted shorts that come out tiny after laundry day.
Once your towel is clean and dry, lay it flat on a big work surface and take a good look at it. Check for worn patches, staining, or thin spots you’d rather not feature front and center. The hem edges are often more tired-looking than the middle of the towel. A little strategic placement — putting the most vibrant, intact sections on the seat, thighs, and front panels — goes a long way toward a polished result.
Trace your pattern pieces onto the towel with fabric chalk or a washable marker. The looped texture of terry cloth can make precise marking a little tricky, so use a ruler for straight lines and go slow on the curves. When cutting, use long, smooth strokes rather than short choppy ones, which can fray the edges and pull the fabric out of shape. A rotary cutter is great for straighter sections if you have one. Cut each piece carefully and keep them organized by section as you go.
Pay attention to the grainline markings on your pattern. Terry cloth is forgiving enough to hide small inconsistencies, but cutting along the correct grain still ensures the shorts hang and move the way they’re supposed to. Many towels also have a directional pile — the loops lean one way — which can affect how the fabric catches light. For the most consistent look, cut all your pieces so the pile runs in the same direction, generally downward from waistband to hem.
Sewing Your Towel Shorts Step by Step
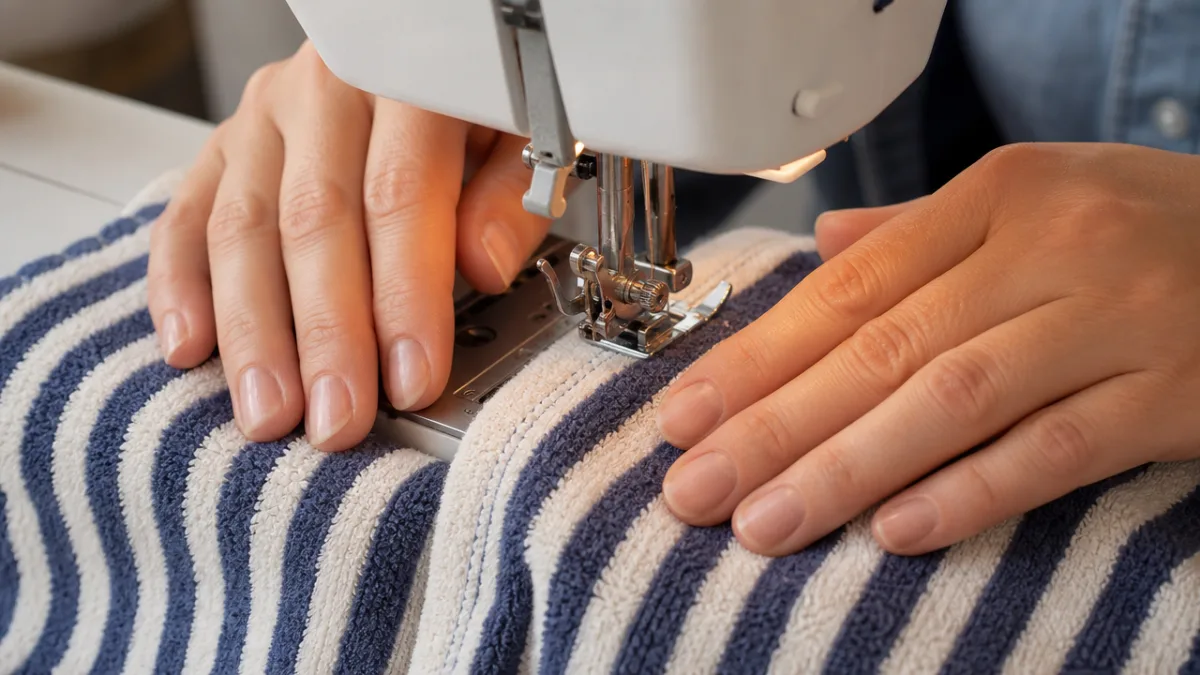
With your pieces cut and your workspace organized, it’s finally time to sew. Start by stitching the inner leg seams of each shorts leg separately before you join them. Place the front and back pieces of one leg right sides together, line up the inner leg seam, and stitch it with a straight stitch at a slightly longer length than you’d use for lighter fabrics — somewhere between 3.0 and 3.5 millimeters works well for terry cloth. It gives you strong seams without punching too many holes through the fabric.
After both inner leg seams are done, turn one leg right side out and tuck it inside the other leg so the right sides are facing each other. Line up the crotch seam carefully, matching the inner leg seams at the center point. This is the trickiest seam of the whole project, so pin it generously before you stitch. Sew the crotch seam from the center front waistline all the way around to the center back. Because this area takes a lot of stress in wear, it’s worth sewing it twice — or running it through a serger if you have one.
Next up are the side seams. Fold the shorts at the sides, align the front and back pieces, and stitch from the waistline down to the leg hem on each side. Press all your seams open with an iron on a cotton-appropriate heat setting, using a pressing cloth to protect the looped surface. Flat seams make a huge difference in how the finished shorts look and feel, especially where multiple seams come together at points like the crotch and the side seam-to-waistband junction.
Hemming is actually one of the easiest parts of this whole project. Because terry cloth doesn’t ravel or fray the way most woven fabrics do, you can finish the leg hems with a simple single fold and a straight stitch — or even leave the edges raw for a casual, relaxed vibe that honestly suits this kind of garment perfectly. If you’d rather have something cleaner, a double-fold hem or a serged edge with a topstitched fold both look great and hold up through lots of washing.
Adding the Waistband and Finishing Touches
The waistband is what takes your sewn fabric from “interesting tube” to actual wearable shorts, and an elastic waistband is genuinely the way to go here — comfortable, easy to make, and flattering in terry cloth. Start by cutting a length of one-inch elastic equal to your comfortable waist measurement. Most sewers take off an inch or two from their actual measurement so the elastic has enough tension to stay put during movement without feeling tight.
To make the casing, fold the top edge of the shorts down by about one and a quarter inches — enough to fit your elastic plus a small seam allowance — press it flat, and stitch close to the lower folded edge. Leave a two-inch opening at the center back or a side seam to thread the elastic through. Attach a safety pin to one end of the elastic and work it through the casing, keeping an eye on it so it doesn’t twist as it goes. Once it’s all the way through, overlap the ends by about three-quarters of an inch and sew them together securely with a box stitch or a zigzag.
Close up the opening with a few hand stitches or just machine-stitch it shut. Then spread the fabric evenly around the elastic — just pull and smooth the waistband gently until the gathers are distributed all the way around. To keep the elastic from rolling or twisting inside the casing while you’re wearing the shorts, stitch in the ditch at each side seam and at the center front and back, sewing straight through all the waistband layers to anchor everything in place.
Once the structural sewing is done, this is where you can really have some fun with finishing details. A few ideas worth considering:
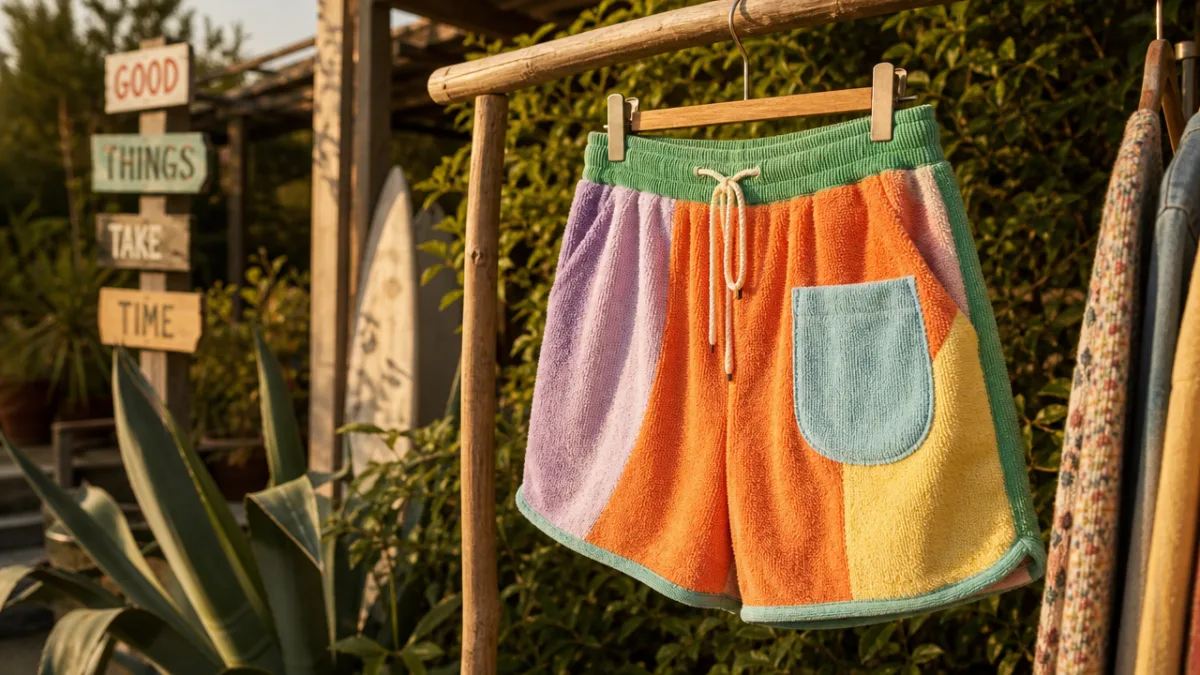
- A small patch pocket on one or both front panels, cut from a coordinating or contrasting towel fabric
- A simple embroidered motif — a sun, a wave, a little flower — on the front leg or hip in a complementary color
- Decorative trim along the hemline, like rickrack, fringe, or pom-pom edging, for a playful bohemian touch
- Decorative buttons or snaps along the side seams for a faux-fly or nautical-inspired look
- A dye bath if the original towel color isn’t quite working for you anymore
Styling Your Upcycled Towel Shorts and Care Tips
One of the best surprises of making your own clothes is finding out how wearable they actually are. Towel shorts are made for warm weather and easy living. A simple fitted tank top in a color pulled from the towel’s pattern is an effortlessly put-together look. Or try a loose linen button-down worn open over a plain white tee — breezy enough for a long beach day, but pulled together enough for a casual lunch or farmers market run.
For shoes, leather or cork sandals feel right at home with terry cloth’s natural, relaxed vibe. Canvas sneakers or espadrilles work just as well. You really don’t need much in the way of accessories — a wide-brimmed straw hat, a beaded anklet, a simple woven tote bag, and you’re done. The handmade element of the shorts does a lot of the work on its own, and fair warning: people will ask where you got them.
Taking good care of your shorts will keep them going season after season. Since they’re made from terry cloth, most of the same rules that apply to towels apply here too. Wash in cool or warm water rather than hot to avoid extra shrinkage, and turn them inside out to protect the outer surface and any embellishments. Skip the fabric softener — it builds up a waxy residue on the fibers over time and actually makes terry cloth less soft and absorbent, not more.
Tumble dry on low to medium heat, or hang them outside in the sun — sunlight is a natural deodorizer and a gentle brightener that keeps lighter terry cloth looking fresh. If pilling shows up along seam areas from regular wear, a fabric shaver takes care of it quickly. Treat them well and a pair of upcycled towel shorts can last many summers, developing that soft, well-loved quality that only gets better with time.
Why Upcycling Matters and How to Make It a Habit
This project is really about more than just a pair of shorts. It’s a way into a bigger way of thinking — one where you reach for what already exists before buying something new. Every time you upcycle a piece of fabric instead of tossing it, you’re acknowledging the resources and labor that went into making it. Cotton is a water-intensive crop, and turning an old towel into something wearable honors that rather than wasting it.
Getting into the habit doesn’t have to be a big production. Start with a small basket or bin where worn or mismatched textiles can collect instead of going straight in the trash. Old bed sheets are great lining fabric and work beautifully for lightweight summer garments. Flannel shirts become cozy lined tote bags or quilted pot holders. Old denim is practically made for bags, patches, and structured accessories. Once you start seeing worn textiles as raw material, you’ll notice creative possibilities everywhere.
Sharing what you make is one of the best ways to spread the idea and get people around you excited about it too. Post your finished shorts somewhere with a quick note about where the towel came from and how long it took. Give a handmade upcycled piece as a gift and tell the story behind it. Have a few friends over with their worn-out textiles and spend an afternoon making something new together. These small moments build community around sustainable making and show — in a real, tangible way — that living more thoughtfully doesn’t have to mean giving things up.
Upcycled towel shorts are ultimately a small proof of concept for something bigger: that beautiful, useful things can come from what’s worn out and overlooked, and that making something with your own hands carries a kind of value that a shopping cart can’t replicate. Whether you’ve been sewing for years or this is your very first project, these shorts are a genuinely satisfying place to start — made on your own terms, from your own materials, and completely, irreplaceably yours.








What do you think?
It is nice to know your opinion. Leave a comment.