










Upcycle a CD Tower into a Farmhouse Display Cabinet: A Complete Transformation Guide
Introduction: Giving New Life to Forgotten Furniture
Thanks to streaming, CD towers have become one of those things nobody really knows what to do with anymore. They’re too big to ignore and too specific to repurpose easily, so they end up shoved in the back of a garage or dropped off at Goodwill, where they sit waiting for someone to see their potential. That someone could be you — because with a bit of creativity and some farmhouse-inspired flair, that awkward tower can become one of the most charming pieces in your home.
The farmhouse aesthetic is so appealing precisely because it feels warm and lived-in without being fussy. Shiplap textures, soft whites and grays, wrought iron hardware, weathered wood — it’s a look that says “people actually live here and they love it.” A CD tower, with its tall narrow profile and built-in open shelving, is honestly a pretty natural fit for this kind of makeover. Close your eyes and imagine it painted a creamy white with some aged hardware — it really could pass for something out of a French country kitchen or a cozy porch cabinet.
This guide walks you through the whole process, from sizing up your tower and grabbing supplies to adding those final touches that make the finished piece look intentional rather than improvised. Whether you’ve done a dozen furniture flips or you’re holding a paintbrush for the first time, this project is doable, affordable, and genuinely fun. Most people spend somewhere between twenty and sixty dollars on materials, depending on what they already have lying around.
Evaluating and Preparing Your CD Tower
Before you spend any time or money on this project, take a good honest look at what you’re working with. CD towers generally fall into two camps: solid wood or MDF with a veneer, and plastic or particle board. Solid wood and MDF are the best candidates — they take paint and stain really well and hold up over time. Plastic towers need a special adhesion primer, but they’re not a lost cause if you do the prep right. Particle board is workable too, though it doesn’t love moisture, so sealing it thoroughly matters a lot.
Start by checking how solid the piece actually is. Give the shelves a wiggle, look at the back panel for warping or water stains, and check that the base sits level and sturdy. If anything is cracked or loose, now is the time to fix it with wood glue and clamps — before you put a drop of paint on it. A wobbly tower doesn’t become less wobbly once it’s painted; it just becomes a wobbly painted tower.
Once you’re happy with the structure, it’s time to prep the surface. Take off any hardware — metal dividers, sliding panels, hinges, whatever your particular model has. Then sand the whole thing with 120-grit sandpaper to rough up the surface so your primer has something to grip. Wipe everything down with a tack cloth or a damp rag to get rid of all that dust. If the original finish is really glossy, a liquid deglosser can save you a ton of sanding time and honestly does a better job of helping the primer stick. This prep work isn’t exciting, but skipping it is the number one reason DIY paint jobs go wrong.
Choosing Your Farmhouse Color Palette and Materials
Your color choice is probably the single biggest factor in whether this ends up looking like a farmhouse cabinet or just a painted CD tower. Classic farmhouse colors lean toward off-whites, creams, dusty blues, sage greens, warm grays, and the occasional matte black accent. Benjamin Moore’s Chantilly Lace, Sherwin-Williams’ Alabaster, and Rust-Oleum’s Chalked Paint in Linen White are all popular go-tos for furniture projects because they dry to that slightly matte, velvety finish that makes painted furniture look genuinely old rather than freshly coated.
Chalk paint is especially well-suited to this kind of project — it sticks to almost anything with minimal prep, dries fast, and distresses beautifully. If you’d rather have something tougher that can handle daily wear and the occasional wipe-down, a water-based cabinet enamel in matte or eggshell is a great option. Whatever you choose, plan on at least two coats, with a light sanding in between using 220-grit paper to smooth out any brush marks or dust bumps.
Before you start, get all your materials together:
- A quality synthetic brush or small foam roller for applying paint smoothly
- Shellac-based or water-based primer, especially important if painting over dark finishes or stained wood
- Fine grit sandpaper in 120, 180, and 220 grits
- Clear wax or a water-based polycrylic topcoat for sealing and protecting the finish
- New hardware in an oil-rubbed bronze, matte black, or antique brass finish
- Optional: shiplap-patterned wallpaper or thin craft wood strips for adding texture to the back panel
- Optional: chicken wire or glass panels if you plan to add doors to your cabinet
Hardware is worth spending a little extra time on, because it can make or break the whole look. Even a beautifully painted cabinet can fall flat with the wrong pulls, while the right hardware in a warm antique finish pulls everything together and makes the piece feel considered. Spend some time browsing farmhouse-style hardware online or at your local home improvement store, and don’t be afraid to mix bin pulls with round knobs — that slightly mismatched, collected-over-time look is very much on-brand for the farmhouse style.
The Transformation Process: Step-by-Step Painting and Distressing
Now for the fun part. Start with a coat of primer over the whole surface, making sure to get any raw wood edges that got exposed during disassembly or repairs. Let it dry completely — at least an hour for water-based primer, closer to two for oil-based. Once it’s dry, do a light pass with 180-grit sandpaper and wipe off all the dust before you crack open your paint.
Apply your first coat using long, smooth strokes in the direction of the wood grain if you’re brushing, or overlapping passes if you’re rolling. A good trick: start from the inside and work your way out — back panel and shelves first, then the sides, front frame, and top. That way you’re not accidentally grazing wet paint on the outside while you’re reaching into the interior. Don’t stress if the first coat looks a little thin or patchy; that’s completely normal. Let it dry, sand lightly with 220-grit, then put on your second coat.
Distressing is honestly the most enjoyable step of the whole project, and it’s what makes the difference between “freshly painted furniture” and “furniture with a story.” After your final coat has dried for at least twenty-four hours, take a piece of 120 or 150-grit sandpaper and lightly scuff the edges, corners, and raised details. Think about where a real piece of furniture would show wear after years of use — the top edges of shelves, the corners of the frame, spots around hardware. You’re trying to reveal just a glimpse of what’s underneath, whether that’s primer, the original finish, or bare wood, to give the impression of decades of gentle use.
For even more depth, try applying a glaze or antiquing medium after distressing. Mix a little raw umber or burnt sienna craft paint with water, brush it into the crevices and recessed areas, then wipe away the excess with a clean cloth — leaving just a whisper of color in the shadows. It sounds subtle, but the difference is real. Finish everything with a coat of clear furniture wax buffed to a soft sheen, or two coats of water-based polycrylic if you want something more durable and easy to clean.

Adding Farmhouse Character: Decorative Details and Hardware
This is where your cabinet really starts to develop its own personality. One of the easiest and most effective upgrades is giving the back panel some texture. The shiplap look is a farmhouse classic — you can create it by cutting thin craft wood strips to width and gluing them horizontally across the panel with small gaps between each one, then painting over everything together. If that sounds like too much work, shiplap-patterned wallpaper or peel-and-stick panels get you the same look in a fraction of the time with zero woodworking required.
Adding doors is another option worth thinking through, because it really changes what the cabinet can do. Old window frames with their glass still in are incredible repurposed cabinet doors, and you can often find them for just a few dollars at architectural salvage yards. Chicken wire stretched over a simple wooden frame gives you that classic farmhouse pantry look — you can see what’s inside without everything being fully on display. If your tower has two distinct sections, consider adding doors only to the lower half and leaving the top open for display, which is actually a really common setup in farmhouse kitchen cabinetry and works great practically.
Installing new hardware is the final finishing touch that ties everything together. Measure carefully when marking your drill holes, especially if you want hardware on adjacent shelves to line up. If you’re drilling into spots that were previously hardware-free, fill any old holes with wood filler, sand smooth, and touch up the paint before drilling new ones. Scale matters here — oversized pulls on a narrow tower look clunky, and tiny ones look a bit lost. As a general guide, three-inch bin pulls and round knobs between one and one-and-a-half inches work well for most CD tower conversions.
Styling Your New Farmhouse Display Cabinet
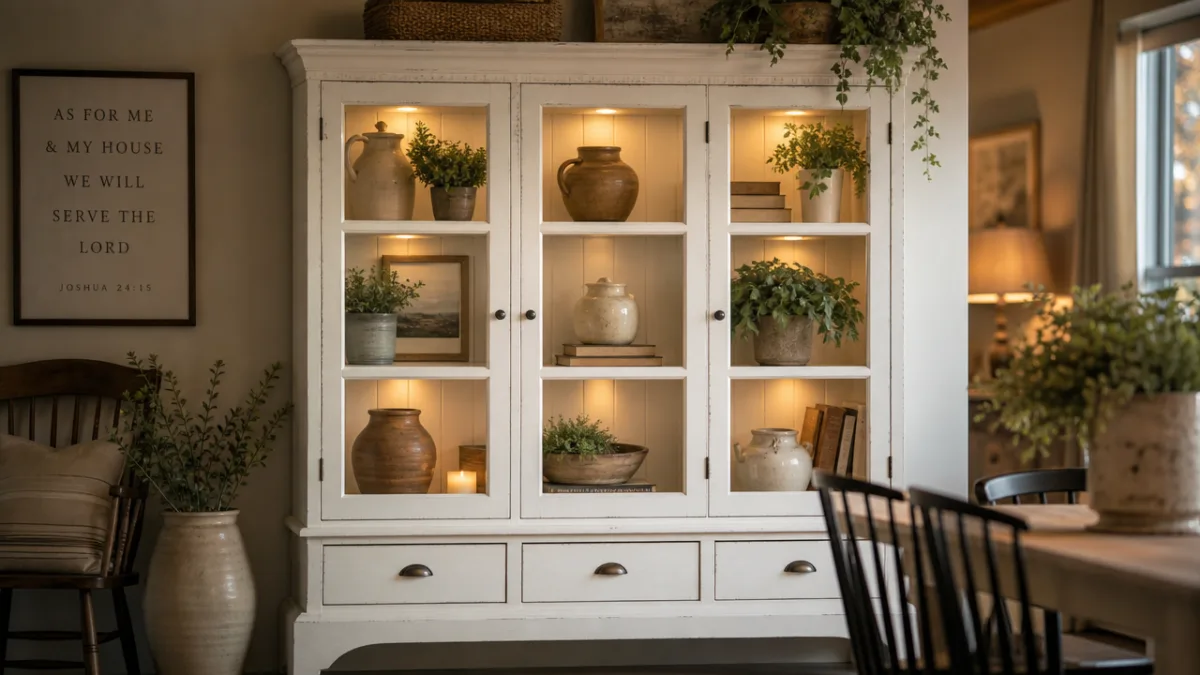
All that work deserves a great final presentation, and styling is your chance to make the cabinet feel like it’s always belonged in your space. The most visually pleasing shelf arrangements tend to follow the rule of threes — grouping objects in odd numbers and varying the height, texture, and material within each grouping. A tall candlestick next to a small ceramic bowl and a stack of worn books. A galvanized bucket alongside a framed botanical print and a trailing pothos. That kind of thing.
Farmhouse style blends the practical with the decorative, so your cabinet doesn’t need to be purely for show. Woven baskets tucked on lower shelves can hold extra linens, dog toys, or whatever you need to corral, while still adding warmth and texture to the overall look. Ironstone pitchers, mason jars filled with dried lavender or cotton stems, vintage enamelware, framed black-and-white photos — these are all farmhouse staples that feel personal and lived-in rather than like a staged photo shoot.
If you really want to make the cabinet a showstopper, add some lighting. A strand of battery-operated warm white fairy lights woven along the back panel or draped across the shelves creates this lovely glow that makes the whole thing feel magical in the evening. For something more polished, battery-powered puck lights or plug-in LED strip lighting at the top of the cabinet aimed downward will wash the shelves in warm light and make everything on display look intentional and beautiful. It’s such a simple addition, but it genuinely elevates the whole piece.
Think carefully about where you put the finished cabinet too. CD towers tend to be tall and narrow, which actually makes them ideal for rooms where floor space is tight but wall space isn’t. An entryway works beautifully — small decorative items alongside practical things like keys and mail. A dining room where it can serve as a bar or side cabinet. A bathroom holding towels and toiletries in a stylized way. A home office displaying books and meaningful objects alongside everyday supplies. The footprint is small, but the visual impact can be big.
Tips for Long-Term Care and Future Customization
A little upkeep goes a long way with a piece like this. If you finished with wax, plan to reapply a fresh coat every six to twelve months, especially in high-traffic spots or anywhere the cabinet gets direct sunlight. Waxed chalk paint is more vulnerable to heat and moisture than polycrylic-sealed finishes, so keep hot or wet things off those surfaces. For regular cleaning, a soft dry cloth is really all you need — harsh chemical cleaners can strip or dull both wax and polycrylic over time, so it’s best to skip them.
One of the best things about an upcycled painted piece is that it’s not precious — you can change it again whenever your taste shifts. Since it’s already been prepped, primed, and painted once, a future repaint is even easier. A light sanding, fresh primer if you’re making a big color change, and new paint, and it’s a whole new piece. Maybe you’ll switch out the hardware for a different finish, add some decorative molding to the frame, or trade the shiplap back panel for a bold wallpaper. Upcycled furniture is meant to grow with you, not stay frozen in one moment.
And honestly, one of the most satisfying parts of this whole project is the story behind it. When a guest compliments your cabinet and you tell them it used to be a CD tower, you’ve said something about what you value — creativity, sustainability, making something from nothing. You kept a piece of furniture out of a landfill, saved a significant chunk of money compared to buying something new, and ended up with something completely one-of-a-kind. That’s a story worth telling.








What do you think?
It is nice to know your opinion. Leave a comment.