










Ultimate Cardboard DIY Ideas & Board Crafts Guide
Introduction to Cardboard Crafting: Why This Material Is a Creative Goldmine
Cardboard might just be the most overlooked material in the DIY world — and yet it’s sitting in almost every home right now, waiting for something to do. Maybe it’s a shipping box from your last online order, the back of a cereal box, or a thick sheet of poster board from the craft store. Whatever form it shows up in, cardboard has a surprising amount of creative potential. It’s cheap, it’s everywhere, and it’s approachable whether you’re picking up a glue gun for the first time or you’ve been crafting for years.
One thing worth knowing early on is that not all cardboard behaves the same way. Corrugated cardboard — the kind with the wavy inner layer — is genuinely strong stuff. It can handle furniture-scale builds and architectural models without buckling. Flat chipboard or cereal-box cardboard is a different animal: it bends and scores easily, which makes it perfect for detailed decorative work, layered art, and templates. Knowing which type to reach for before you start a project will save you a lot of time and frustration down the road.
There’s also something just feel-good about working with cardboard. Every box you repurpose into a shelf, a picture frame, or a little sculpture is one less thing heading to the recycling bin or landfill. A lot of crafters talk about how working with cardboard changes the way they see everyday objects — suddenly that delivery box isn’t just packaging, it’s the raw material for a toy castle. That shift in perspective, that instinct to look at ordinary things and imagine what they could become, is one of the best things this kind of crafting gives you.
Essential Tools and Materials for Cardboard DIY Projects
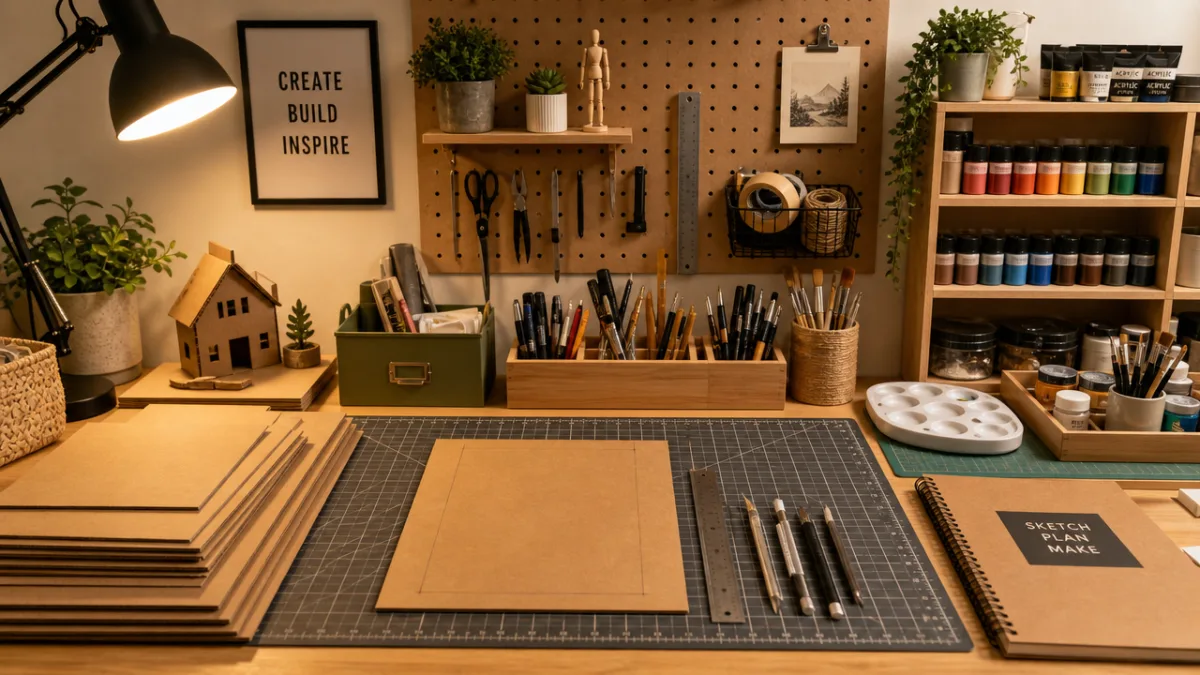
Before you jump into a project, it’s really worth taking a few minutes to set yourself up with the right tools. The single most important one is a sharp craft knife or box cutter. Clean cuts are what separate a polished-looking result from something that looks rough around the edges — literally. Use a self-healing cutting mat underneath your work so you don’t ruin your table and so your blades last longer. Speaking of blades: swap them out often. A dull blade drags and tears instead of slicing cleanly, and those ragged edges are hard to fix. A good metal ruler rounds out the basics and keeps your straight lines actually straight.
Adhesives are where a lot of beginners make mistakes. White school glue works fine for light paper projects, but if you need anything to hold with real strength, you want a hot glue gun, strong PVA glue, or construction adhesive. Mod Podge is a community favorite because it does double duty — it glues and seals at the same time, leaving a smooth, hardened surface that’s ready to paint or decorate. Keeping a variety of adhesives on hand means you’re not stuck when a project throws you a curveball.
Beyond that, here are some other supplies worth stocking up on so you’re ready when inspiration hits:
- Acrylic paints and foam brushes for laying down smooth, even base coats on finished pieces
- Gesso or white primer to seal cardboard before painting — it prevents the surface from soaking up paint unevenly and warping
- Washi tape, decorative paper, and fabric scraps for covering surfaces with color and texture
- A scoring tool or the back of a butter knife for making clean, crisp folds without cracking the cardboard
- Binder clips and rubber bands to hold pieces in place while the glue dries
- Fine-grit sandpaper for smoothing dried glue blobs or rough edges on finished work
One more thing that often gets ignored until it becomes a problem: how you store your cardboard. Keep large sheets flat and somewhere dry — moisture is the enemy, and it will warp and weaken cardboard surprisingly fast. Toss tubes, small scraps, and specialty boards into labeled bins so you can actually find them when you need them. A tidy workspace makes the gap between “I have an idea” and “I’m actually building it” a whole lot smaller, and that means more finished projects and less abandoned half-starts.
Stunning Home Décor Projects You Can Build from Cardboard
If you’ve never thought of cardboard as a home décor material, prepare to be surprised. Wall art is a great place to start — layered geometric panels cut from thick chipboard, painted in a single tonal palette, can look genuinely sophisticated when framed and hung. Hexagonal shelf units built from double-layered corrugated cardboard are another favorite, strong enough to hold small plants, lightweight books, and decorative objects when properly reinforced and sealed. Guests are usually shocked when you tell them the elegant little shelf they’re admiring came from a recycled Amazon box.
Picture frames are a classic cardboard project with almost unlimited variation. Layer a few pieces of cardboard together, cut a beveled inner edge, and you’ve got the look of a matted frame for basically nothing. Paint them with metallic acrylics — gold, silver, copper — and they photograph beautifully and hold up really well over time with a coat of clear varnish. You can take it further with raised dot details made from rolled paper, geometric cutouts, or fabric-wrapped panels to match whatever style your space has going on, whether that’s modern minimalist or cozy farmhouse.
Decorative bowls made from coiled cardboard are another category worth exploring. The basic idea is to roll strips of corrugated cardboard into tight spirals and glue the layers up to form the walls of a bowl. Once you sand it, prime it, and paint it, the result is surprisingly solid — rigid enough to hold keys, jewelry, or other small items on a nightstand or entryway table. These take patience and a decent stash of scrap cardboard, but the finished pieces have this organic, sculptural quality that genuinely looks like something you’d find in a design shop.
Cardboard Crafts for Kids: Educational, Safe, and Endlessly Fun
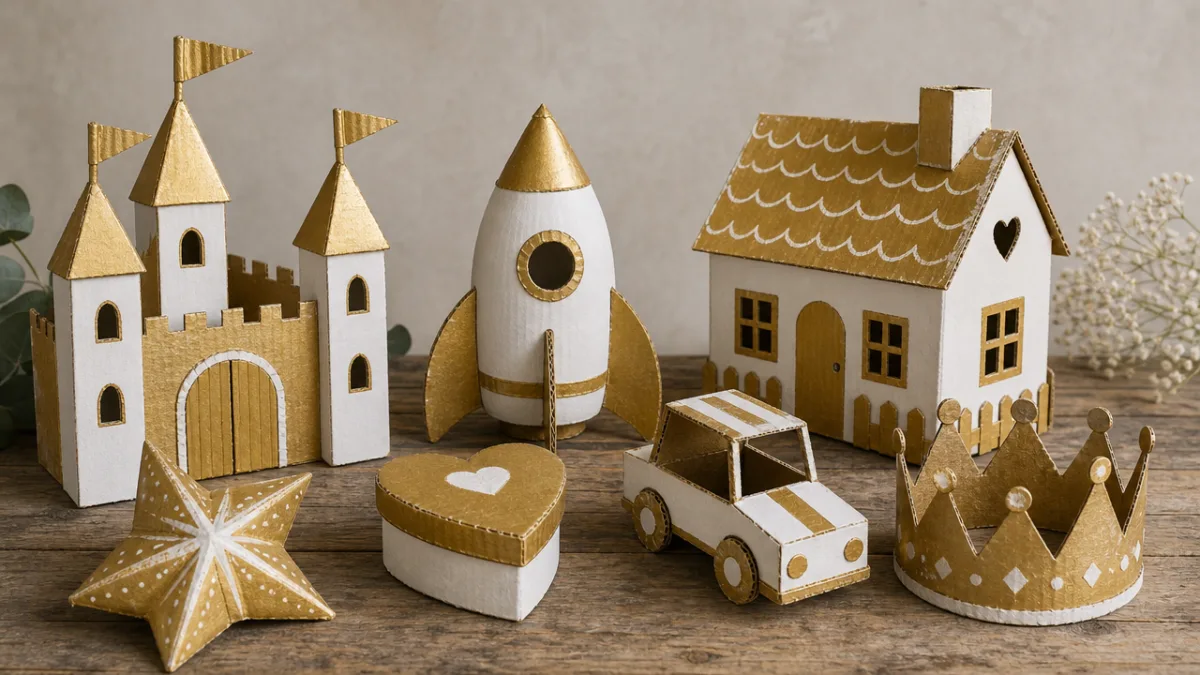
Kids and cardboard are a natural match — this is not a new discovery. Cardboard is forgiving, non-toxic, and easy enough for small hands to work with using child-safe scissors and washable glue. But beyond just being accessible, cardboard projects push kids to think spatially, plan ahead, and work through problems when things don’t go the way they expected. Building a cardboard castle or a miniature city from shoeboxes quietly exercises all kinds of cognitive skills at once, making it one of the most well-rounded craft activities you can sit down and do with a child.
Some of the biggest hits in this category are the large-scale builds kids can actually use: playhouses, puppet theaters, toy kitchens. A refrigerator box can become a full puppet theater with felt curtains and painted details that make it look like a tiny real stage. A toy kitchen built from smaller boxes can have a painted stovetop, a hinged oven door, and little shelf compartments for pretend food. What’s great about these projects is that the making and the playing are both part of the experience — kids invest in the thing they built, and that makes the imaginative play that follows even richer.
For smaller-scale projects on a rainy afternoon, there’s no shortage of fun options:
- Cardboard tube animals made from paper towel rolls, paint, and pipe cleaners
- Miniature dioramas depicting animal habitats, historical scenes, or scenes from a favorite book
- Cardboard looms for simple weaving with yarn and fabric strips
- Stencils cut from cereal boxes and used with sponge painting
- Marble runs and simple machines built from ramps, tubes, and folded cardboard channels
The benefits extend well past the afternoon of the project, too. Kids who regularly make things with open-ended materials tend to develop a higher comfort level with uncertainty and a stronger sense of their own creative capabilities — traits that researchers connect to long-term success in all kinds of areas. Teaching a child to look at a flattened delivery box and see possibility instead of trash is genuinely one of the most valuable creative lessons you can offer. Yes, there will be glue on the table. It’s worth it.

Advanced Cardboard Architecture and Structural Projects
Once you’ve got the basics down, cardboard opens up into territory that’s honestly kind of mind-bending. Architects have used corrugated cardboard as a model-making material forever, but a growing community of makers and engineers has pushed it much further — into full-scale furniture, room dividers, and even temporary structures. The secrets to making architectural-scale cardboard work are understanding how to distribute load, reinforce the joints, and protect the material from moisture. Water is the kryptonite of every cardboard project, and it matters even more at this scale.
Cardboard stools and side tables are a good entry point into structural furniture. The trick is laminating many layers of corrugated cardboard together with the grain alternating direction between layers — the same principle behind how plywood gets its strength. A stool made from thirty or more layers of double-wall corrugated cardboard, cut to shape and sealed with epoxy resin or polyurethane varnish, can hold the weight of a full-grown adult without so much as a creak. It’s one of those things you have to see to believe until you’ve actually built one yourself.
Room dividers and shelving units take things even further, relying on interlocking slot-and-tab joinery systems that hold panels together without any glue or fasteners at all. This approach, inspired by traditional Japanese woodworking, lets you assemble and disassemble large structures repeatedly — which makes them ideal for renters, students, or anyone who moves around a lot. Designing these systems does require understanding cardboard thickness and some basic structural principles, but there’s a particular kind of satisfaction that comes from building a freestanding, functional piece of furniture out of nothing but recycled boxes.
Scale architectural modeling is another whole world within cardboard crafting, sitting at the intersection of art and technical skill. Architects use chipboard and museum board to build detailed models of buildings and city blocks — physical objects that communicate space and design in ways that drawings simply can’t. Hobbyists recreating famous landmarks, dreaming up floor plans, or building elaborate miniature environments for tabletop games use the same techniques at home with impressive results. The discipline involved — measuring carefully, cutting precisely, getting your mitered corners to actually meet — builds skills that translate directly into woodworking and other more advanced making disciplines.
Finishing Techniques That Transform Cardboard Into Something Extraordinary
Here’s the honest truth about cardboard crafts: the difference between something that looks homemade and something that looks like you bought it almost always comes down to how you finished it. Raw cardboard, no matter how carefully cut and assembled, reads as temporary. But apply the right finishing techniques and that same piece can pass for wood, ceramic, or even metal. The main ingredient isn’t advanced skill — it’s patience. Thin coats, proper drying time between layers, and careful sanding are really all it takes to get from rough prototype to something you’d actually want to display.
Papier mâché is one of the oldest tricks in the book, and it’s still one of the best. Layering newspaper strips soaked in flour paste or diluted PVA glue over a cardboard form builds up a hardened shell that encases the whole structure. Let each layer dry fully — we’re talking 24 to 48 hours — and once it’s done, you can sand it smooth, prime it, and paint it to almost any finish you want. This works especially well for sculptural pieces like masks, decorative animals, bowls, and theatrical props, where surface texture and detail really matter.
For a cleaner, more modern look, try coating your cardboard project with joint compound or spackling paste. Applied in thin layers with a palette knife or putty knife, these products fill in the surface texture of the cardboard completely. Once it’s dry and sanded, you’d be hard-pressed to tell it apart from plaster or smooth-finished wood. Metallic spray paint or chalk paint over this kind of surface produces objects with real visual weight and presence — in fact, this is the exact technique behind a lot of those faux-concrete vases and decorative bowls you see selling for serious money from interior design brands.
The last step — protective sealing — is what determines how long your finished piece will actually last. For purely decorative objects that won’t see much handling or moisture, a few coats of Mod Podge or clear acrylic spray does the job. For anything that needs to be tougher — a tray, a tabletop surface, something that might encounter spills — a two-part epoxy resin gives you a glass-hard, waterproof finish that can last for years. Knowing where your piece lands on that spectrum helps you decide how much finishing effort is actually worth putting in, and ensures the result holds up to how it’s actually going to be used.








What do you think?
It is nice to know your opinion. Leave a comment.