










Shirt Tale Tote: A Complete Guide to This Free Sewing Pattern
Introduction to the Shirt Tale Tote
If you’ve ever stared at a pile of old button-up shirts and thought “there has to be something better I can do with these,” the Shirt Tale Tote might just be the answer you didn’t know you were looking for. It’s a clever little upcycling project that turns worn or unloved shirts into a genuinely useful bag — and the whole process is surprisingly satisfying. Whether you’ve been sewing for years or you’re just getting started, this one hits a sweet spot between approachable and rewarding.
What I really love about this pattern is how it leans into the character of the shirt rather than hiding it. Those button plackets, chest pockets, worn collars — they’re not problems to work around. They become design features. The finished bag feels intentional, like something that was always meant to be a tote, which is a pretty neat trick when you think about where it started.
And did I mention it’s completely free? The pattern lives over on the Beautiful Skills website, which is known for putting out thoughtfully designed projects that don’t cut corners on clarity or craftsmanship. The Shirt Tale Tote fits right in with that ethos — good instructions, a design that actually delivers, and a result you’ll be genuinely proud to carry around.
Materials and Tools You Will Need
Before you start cutting into anything, let’s talk supplies. The star of the show is a men’s button-up shirt — medium to large works best so you’ve got enough fabric to play with. Thrift stores are honestly the perfect hunting ground for these, and part of the fun is browsing for something with great character. Flannel, denim, cotton oxford — they all work beautifully and each one gives the finished tote a completely different personality.
Beyond the shirt, you won’t need anything you don’t already have in a reasonably stocked sewing space. A sewing machine that can handle medium-weight fabric is ideal, though if you’re patient enough, hand sewing is technically possible. Pick a thread that either blends in or makes a statement — both are valid choices. You’ll also want your usual suspects: sharp scissors, a seam ripper, and something to mark your fabric with.
Here’s what to have on hand before you begin:
- One men’s button-up shirt (medium to large, laundered and pressed)
- Coordinating or contrasting thread
- Sewing machine with standard presser foot
- Sharp fabric scissors or rotary cutter and cutting mat
- Ruler or measuring tape
- Fabric marking pen or tailor’s chalk
- Seam ripper
- Iron and ironing board
- Optional: interfacing for added structure and stability
- Optional: coordinating fabric for lining
Interfacing is worth a special mention because it has a bigger impact than people sometimes expect. Fusing it to your main body panels gives the bag enough stiffness to hold its shape without making it feel stiff or heavy. The weight you choose — light, medium, or heavy — will directly affect how structured the finished bag feels, so it’s worth thinking about how you actually plan to use it before you commit.
Understanding the Pattern and Cutting Your Pieces
One of the smartest things about this pattern is how it thinks about the shirt as a whole rather than just a pile of fabric to cut up. You’re encouraged to look at which parts of the shirt have the most interesting details and figure out how to show them off in the finished bag. The button placket, for instance, can become a centerline feature or a built-in pocket element. That chest pocket? You can keep it exactly where it is and let it function as an exterior pocket on the tote. It’s genuinely clever design thinking.
Before you make a single cut, take the time to lay your pattern pieces out and just look at things for a minute. Pin or weight them in place and imagine what the finished panels will look like once they’re sewn together. If your shirt has stripes or plaid, pay attention to how those lines will meet across seams — matching them up takes a bit more care but makes the finished bag look like it came from a boutique rather than a craft table. Totally worth the extra few minutes.
The main body of the tote comes from two large rectangular panels cut from the front and back of the shirt. Handles are typically made from long fabric strips, sometimes reinforced with interfacing, though you can also use the button placket strips for an especially satisfying bit of material reuse. Some versions of the pattern work in the shirt’s yoke as a structural or decorative element at the top of the bag. My strong advice: read the whole pattern before you cut anything. It’ll save you from those “oh, I needed that piece” moments.
Step-by-Step Sewing Instructions
With your pieces cut and your interfacing fused, it’s time to actually build this thing. Most people find it easiest to start with the handles, since they involve the most steps — folding, pressing, and topstitching to get neat, sturdy straps. Pressing each fold with a hot iron before you sew it might feel fussy, but it genuinely makes the difference between handles that look clean and handles that look a little sad. Don’t skip it, even when you’re eager to see the bag come together.
Next up are the main body panels. Place them right sides together and sew along the sides and bottom with your seam allowance — usually half an inch to five-eighths of an inch. Backstitch at the start and end of every seam, especially here, since these are the spots that’ll take the most stress during use. Running a second line of stitching just inside the first, or hitting the raw edges with a zigzag, will add real longevity to the finished bag. Press those seams as you go — it contributes more to the final look than most beginners expect.
Box corners are optional but honestly, if you want a bag you can actually put stuff in without it flopping around, do the box corners. The idea is simple: pinch each bottom corner so the side seam lines up with the bottom seam, creating a little triangle. Sew across that triangle at the right distance from the point, and you’ve got a gusset that gives the bag depth and lets it stand on its own. The pattern will tell you exactly where to sew, and that measurement determines how wide the base ends up, so follow it closely.
The last structural step before attaching handles is finishing the top edge. Depending on which version of the pattern you’re following, you might fold the raw edge down twice and topstitch, use the shirt’s collar band as a facing, or attach a separate binding strip. Each approach gives you a slightly different look, and honestly, all of them work well. If you’ve kept the shirt’s collar intact, this is a great moment to incorporate it as a little nod to where the bag came from.
Design Variations and Creative Customizations
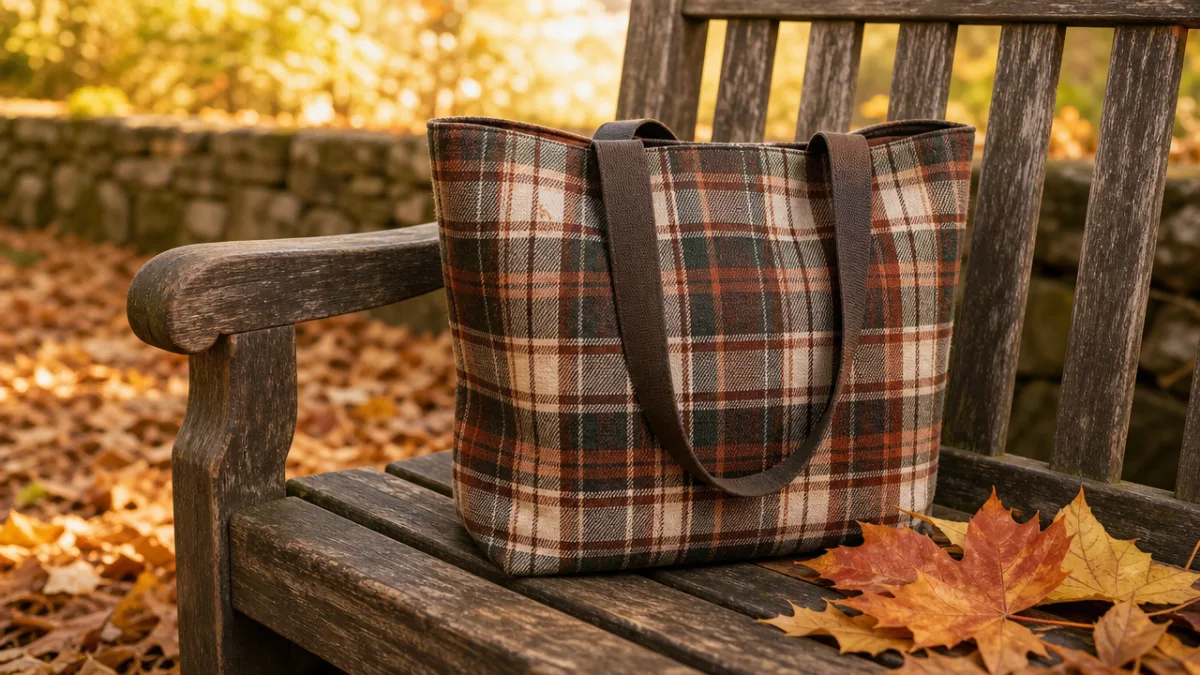
The Shirt Tale Tote is really more of a starting point than a strict recipe, and once you’ve got the basic construction down, you’ll start seeing all sorts of ways to make it your own. The shirt you choose does a lot of the work here — a thick red flannel gives you something rugged and cozy-looking, while a crisp striped Oxford comes out looking polished enough to carry to work. No two will ever look the same, which is half the appeal.
Adding a lining is one of the best upgrades you can make. It gives the bag a more finished feel, makes it easier to clean, and — here’s the fun part — it’s a chance to sneak in a contrasting print. Pairing a serious navy chambray exterior with a cheerful floral lining creates a little moment of delight every time you open the bag. While you’re at it, this is the perfect stage to add interior pockets: a slip pocket for your phone, a zippered pocket for cards and keys, or a cluster of smaller pockets if you’re the type who likes everything in its place.
Hardware is another area where small changes make a big difference. Swapping fabric handles for leather straps with D-rings instantly gives the tote a more structured, put-together look. A magnetic snap at the top keeps everything secure without much effort, and if you’re comfortable installing a zipper, that takes things up another notch entirely. Even just swapping out the original buttons on the placket for something vintage or quirky can give the finished bag a personality all its own.
Tips for Success and Common Mistakes to Avoid
Even if you’ve been sewing for a while, working with repurposed clothing has its own quirks. The most common issue is running into areas of the shirt that are worn thin or stretched unevenly in ways you don’t notice until you’re already committed to a cut. Hold your panels up to the light before you commit — it only takes a second and can save you from building a bag with a weak spot right where it’ll get the most stress. If you find a problem area, just adjust your layout to work around it.
Pressing really is the thing that separates a bag that looks handmade (in a charming way) from one that just looks homemade. A pressed seam lies flat, makes your next line of stitching more accurate, and gives everything a cleaner, more intentional appearance. A lot of new sewers treat the iron like a finishing step, something to pull out at the very end, and then wonder why their work looks a little rough despite careful sewing. Press as you go. Treat the iron like a sewing tool, because it is one.
Here are the tips worth keeping in mind as you work through this project:
- Always pre-wash and press your shirt thoroughly before cutting to prevent later shrinkage or distortion.
- Read the complete pattern from start to finish before making a single cut so you understand how all pieces interact.
- Use pins or fabric clips generously to keep layers aligned during sewing, especially across patterns and stripes.
- Backstitch at the beginning and end of every seam to prevent unraveling under the stress of daily use.
- Test your seam allowance on a scrap piece first to ensure your machine settings are correct for the fabric weight.
- Press every seam as you go rather than waiting until the end — it makes an enormous difference.
- Take your time with the handle attachment, as this is the most structurally critical part of the bag.
And finally — be patient with yourself. This project has more steps and more structural thinking involved than something like a pillowcase, but it’s absolutely within reach if you’re willing to go at a steady pace. The pattern was designed to be achievable, and that shows in how it’s put together. Trust the process, give yourself permission to go slowly, and you’ll end up with something you’re genuinely proud of.
Sustainability and the Joy of Upcycling
There’s something that feels genuinely good about making a Shirt Tale Tote, and it goes beyond the satisfaction of finishing a sewing project. The fashion industry is one of the most wasteful on the planet, and every shirt that gets transformed into a functional bag instead of heading to a landfill is a small but real pushback against that. It’s the kind of act that doesn’t feel like a sacrifice — you’re not giving anything up. You’re making something better.
Spending time really working with a garment — taking it apart, understanding how it was constructed, feeling the difference between a quality fabric and a cheap one — changes how you think about clothing more broadly. You start noticing things: why natural fibers behave the way they do, why a well-made seam holds up over years while a cheap one doesn’t, what it actually means for something to be built to last. Those are useful lessons that stick with you long after the project is done.
And if the shirt you’re working with belonged to someone — a father’s worn flannel, a grandfather’s favorite chambray, a friend’s distinctive thrift-store find — the finished tote takes on a whole other dimension. It’s not just a bag anymore. It carries the memory of that person, that fabric, those years of wear. A lot of crafters say the Shirt Tale Tote is one of the most meaningful things they’ve made, and that’s usually why. The fabric has a story, and the bag keeps telling it.








What do you think?
It is nice to know your opinion. Leave a comment.