










Outdated Bathroom? 27 Ideas to Update Your Space Without a Full Renovation
The bathroom is one of the most frequently used rooms in any home, yet it’s often the last space to receive a thoughtful design update. Whether you’re dealing with dated tile from the 1980s, a vanity that has seen better days, or simply a color palette that no longer speaks to your personal style, the good news is that a full gut renovation isn’t always necessary. With the right combination of targeted upgrades, smart styling choices, and a little creativity, you can completely transform the look and feel of your bathroom without breaking the bank or enduring weeks of construction chaos.
This guide draws together 27 of the most impactful, design-forward ideas for refreshing an outdated bathroom. From simple weekend projects that cost less than a hundred dollars to slightly more involved upgrades that deliver showstopping results, there’s something here for every budget, skill level, and aesthetic preference. The key is knowing which changes deliver the most visual impact for the least investment of time and money, and that’s exactly what we’re going to explore.
1. Start with the Vanity: The Anchor of Your Bathroom’s Style
The vanity is arguably the single most dominant visual element in any bathroom. It sets the tone for everything else in the space, and an outdated vanity can drag down even a room with otherwise charming bones. Before you consider replacing yours entirely, think about what a fresh coat of paint could do. Chalk paint and cabinet-specific primers have made it easier than ever to refinish wooden vanities in colors ranging from deep navy to soft sage, and the results can look completely custom and professional with minimal investment.
If painting feels too involved, consider swapping out just the hardware. Drawer pulls and cabinet knobs are the jewelry of your vanity, and updating them from dated brass to matte black, brushed nickel, or unlacquered brass can shift the entire personality of the piece. This is one of the quickest and most affordable upgrades you can make, typically costing between thirty and eighty dollars for a full set, and it requires nothing more than a screwdriver and twenty minutes of your time. The visual difference is consistently surprising to people who try it for the first time.
For those ready to take the next step, replacing the vanity top is a highly effective mid-range upgrade. Swapping a builder-grade laminate top for a marble-look porcelain slab, a butcher block surface, or a simple undermount sink with a clean quartz countertop can elevate the entire room dramatically. Many home improvement retailers now offer pre-cut vanity tops in standard sizes that drop right into place, making this a manageable DIY project for a confident weekend warrior. Pair this change with a new vessel or undermount sink and you’ll have a focal point that looks straight out of a design magazine.
Vanity Upgrade Ideas at a Glance
- Repaint the vanity body with cabinet-grade chalk paint or primer and topcoat in a trending color like forest green, dusty blue, or warm white
- Replace all hardware with a cohesive finish — matte black is particularly popular for its modern edge and forgiving maintenance
- Install a new vanity top in marble, quartz, or porcelain to replace laminate or outdated tile surfaces
- Add legs to a floating vanity base to give it a furniture-like, high-end appearance
- Install open shelving below a floating vanity for a contemporary, airy look that also adds storage
2. Lighting Transforms Everything: Upgrade Your Fixtures for Instant Impact
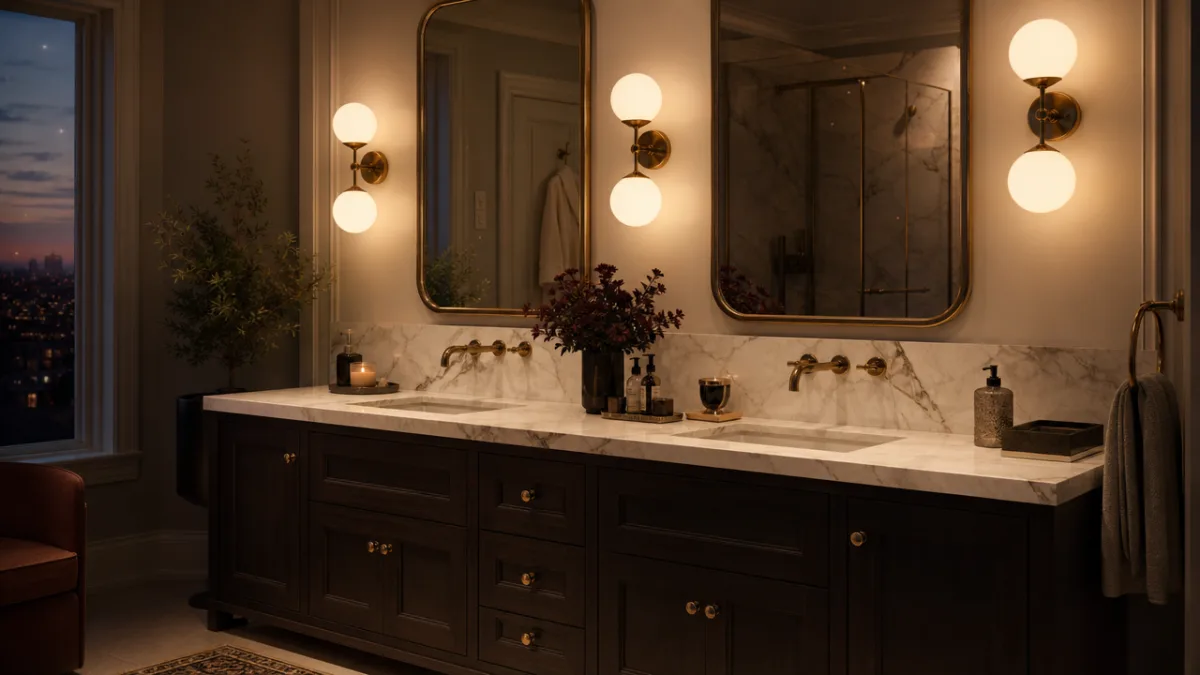
Lighting is one of the most underestimated elements of bathroom design, and it is responsible for more of the room’s atmosphere than most people realize. Many older bathrooms still rely on a single overhead fixture that casts unflattering shadows and leaves the space feeling dim and clinical. Replacing that fixture with a statement chandelier, a row of globe sconces above the mirror, or a sleek LED strip integrated into a floating mirror frame can completely change how the room feels at every hour of the day. Good bathroom lighting should be layered, functional, and beautiful all at once.
Vanity lighting specifically deserves careful attention. The classic Hollywood-style bar with exposed globe bulbs has made a major comeback in recent years, and for good reason: it provides even, shadow-free illumination that works beautifully for tasks like applying makeup or shaving. Alternatively, flanking your mirror with two wall sconces placed at eye level creates a flattering, symmetrical effect that reads as polished and intentional. When shopping for new fixtures, pay attention to the color temperature of the recommended bulbs — warm white tones around 2700 to 3000 Kelvin tend to be the most flattering for skin tones and create a spa-like ambiance.
Beyond the fixtures themselves, consider adding a dimmer switch to any existing overhead lighting. This single addition, which typically costs under twenty dollars and takes less than an hour to install, gives you the ability to dial down the intensity for a relaxing evening bath while still having full brightness available for morning routines. Combining a dimmer with an upgraded fixture and appropriately warm bulbs creates a layered lighting experience that genuinely changes how you feel in the space. It’s one of those changes that people often say they should have made years earlier.
3. Tile Refresh: Update Your Surfaces Without a Full Demo
Old tile is one of the most common complaints about dated bathrooms, and the thought of ripping it all out can feel overwhelming and expensive. But there are several smart approaches that allow you to address the problem without the mess, cost, and disruption of a full tile removal. Tile paint is one option that has improved dramatically in recent years, with epoxy-based formulas specifically designed for wet environments that can give ceramic or porcelain tile a completely fresh look. While this isn’t a permanent solution, it can buy you years of style while you save toward a more comprehensive renovation.
Peel-and-stick tile panels have also evolved well beyond the flimsy products of the past. Today’s options include realistic stone looks, subway tile imitations, and even Zellige-style textured finishes that are completely waterproof and surprisingly durable. These can be applied directly over existing smooth tile surfaces to create an entirely new look in an afternoon. Used strategically as an accent wall behind the toilet, as a tub surround, or as a backsplash behind the vanity, they deliver substantial visual impact without any of the traditional labor costs associated with tiling work.
If your grout is in decent shape but the tile color is the main offender, grout paint is an often-overlooked solution. A tube of grout colorant in a fresh shade — crisp bright white, sophisticated charcoal, or even a bold contrast color — can be applied with a small brush in just a few hours and completely changes the look of tiled surfaces. Additionally, replacing just the accent tiles or creating a small feature section of new tile, such as a decorative border or a niche insert, draws the eye and gives the impression of a more comprehensive renovation than actually took place. Strategic tile choices can modernize a space while leaving the majority of your existing installation intact.
Tile Update Strategies by Budget
- Under $50: Regrout in a fresh color or apply grout colorant to brighten existing grout lines throughout the space
- $50–$200: Apply peel-and-stick tile panels to a single accent wall or tub surround for a dramatic focal point
- $200–$500: Use tile paint to refinish floor or wall tile, combined with new grout coloring for a cohesive result
- $500+: Hire a tiler to install fresh tile in a targeted area, such as a shower niche, backsplash, or small accent wall
4. Mirrors, Accessories, and Décor: Style Is in the Details
Once your larger elements are addressed, the finishing touches are what pull a bathroom from “updated” to genuinely beautiful. The bathroom mirror is an ideal place to start, as it’s often one of the largest surfaces in the room and one that most people overlook as a styling opportunity. Swapping a basic frameless builder mirror for one with a warm wood frame, a sculptural metal border, an arched silhouette, or a backlit LED edge immediately signals that the space has been thoughtfully designed. Mirrors with built-in lighting are especially popular right now and serve dual duty as both a functional and decorative element.
Accessories like towel bars, toilet paper holders, robe hooks, and faucets make up what designers sometimes call the “jewelry” of the bathroom. When these pieces are mismatched, dated, or simply cheap-looking, they undermine the rest of the space. Replacing all of your accessories in a single coordinating finish — brushed gold, polished chrome, matte black, or oil-rubbed bronze — creates an instant sense of cohesion and intentionality. This type of wholesale accessory replacement can typically be accomplished for between one hundred and three hundred dollars and delivers a disproportionately large visual upgrade relative to the investment.
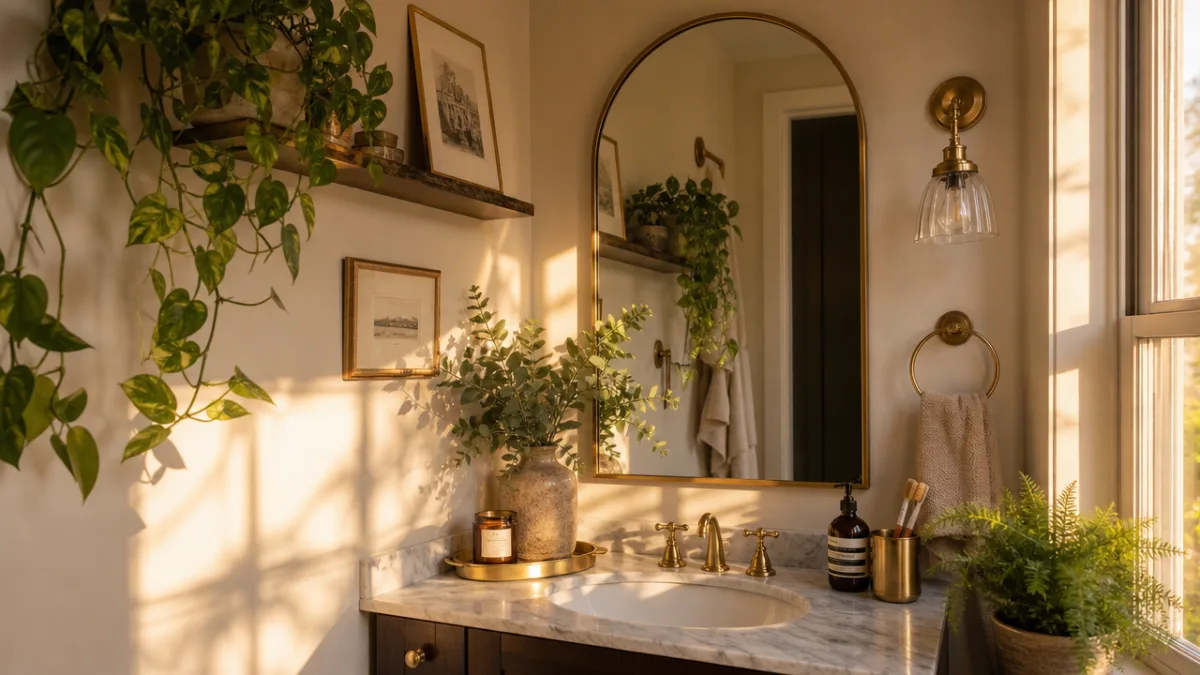
Don’t underestimate the power of plants, art, and textiles in the bathroom either. A strategically placed trailing pothos or a sculptural snake plant adds life and color that no fixture can replicate. Swapping your towels, bath mat, and shower curtain for a coordinated set in a fresh color palette can redefine the room’s entire color story in an afternoon. Even a single piece of framed art above the toilet or beside the mirror signals that the bathroom has been styled with the same care as the rest of your home — and that shift in perception is more powerful than many purely functional upgrades.
Accessory and Décor Refresh Checklist
- Replace all metal hardware with a single cohesive finish throughout the entire bathroom
- Upgrade to a statement mirror with a frame, arch shape, or integrated lighting
- Introduce at least one live plant that tolerates humidity, such as pothos, ferns, or orchids
- Invest in high-quality, coordinated towels and a plush bath mat in a fresh color
- Replace a dated shower curtain with a linen, waffle-weave, or patterned option that anchors the room’s color palette
- Add a small piece of framed art or a decorative object to personalize the space
5. Storage and Organization: Function Drives Feeling
A bathroom that feels cluttered and disorganized will always feel outdated, regardless of how beautiful its finishes might be. Thoughtful storage solutions are therefore as important to a successful bathroom refresh as any cosmetic upgrade. Over-toilet shelving units, which have become increasingly sophisticated in design, can add significant storage in a space that is typically wasted while also creating an opportunity for curated display. Floating wooden shelves finished in a natural oil are particularly popular right now and work in everything from farmhouse to modern minimalist aesthetics.
Inside your vanity, drawer organizers and pull-out bins can make even a small cabinet feel like it has twice the storage capacity. Decanting toiletries into matching glass or ceramic dispensers not only looks more polished than a collection of mismatched product bottles but also reduces visual clutter immediately. A countertop tray that corrals your daily-use items — a soap dish, a hand cream, a diffuser — creates a sense of intention and organization that reads as thoughtfully styled rather than carelessly assembled. These small organizational moves cost very little but contribute enormously to the overall impression of the space.
For bathrooms that are genuinely short on storage, adding a small piece of freestanding furniture can be transformative. A slim rolling cart in a complementary finish, a vintage stool repurposed as a side table, or a narrow linen cabinet tucked beside the toilet can each add meaningful storage while also functioning as a design element. The goal is to find pieces that serve both a functional and aesthetic purpose, because in a small bathroom every object earns its place. When everything has a home and the surface clutter is minimized, even the most modest bathroom begins to feel like a retreat.
6. Paint, Wallpaper, and Wall Treatments: The Fastest Transformation Available
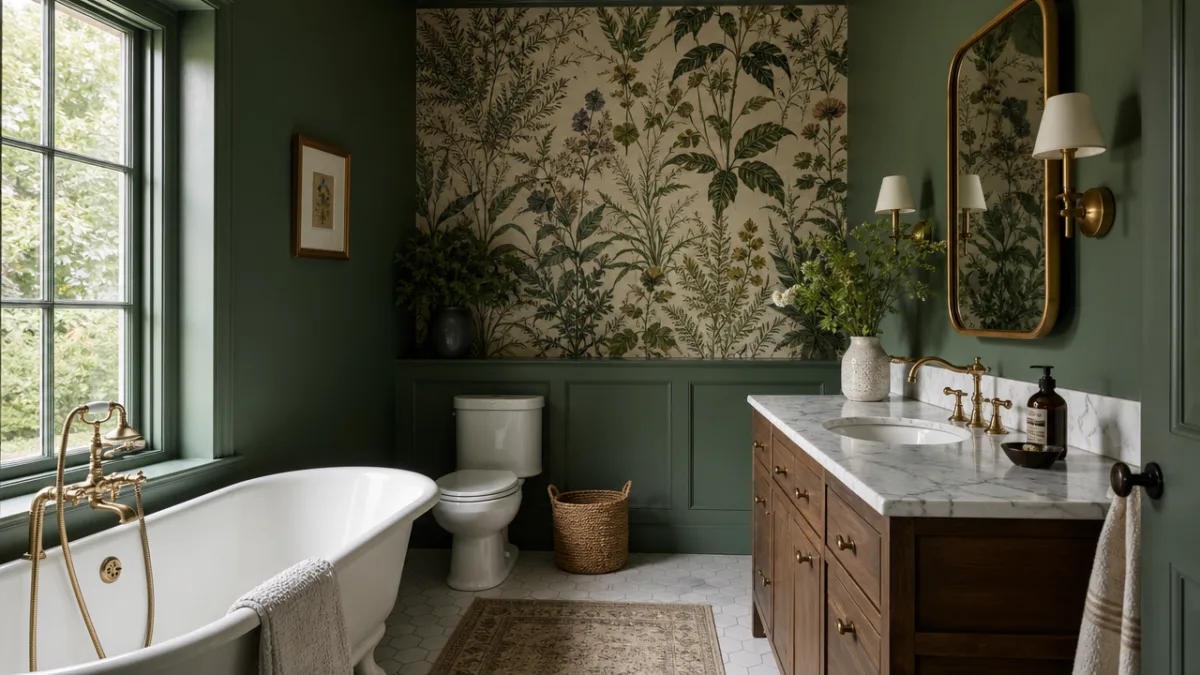
If you could make only one change to an outdated bathroom and wanted the maximum possible return on that investment, a fresh coat of paint in a deliberate, current color would be a strong contender. Bathroom paint technology has improved significantly, and today’s moisture-resistant, mold-inhibiting formulas are designed specifically for high-humidity environments. Moving from a dingy beige or a clinical white to a warm terracotta, a moody slate blue, a sophisticated deep green, or even a daring black can completely redefine the personality of the space in a single weekend, using only a roller, a brush, and a couple of gallons of paint.
Wallpaper has returned as one of the most exciting tools in the interior designer’s toolkit, and the bathroom is actually an ideal room for it. Because the square footage is typically small, you can splurge on a more expensive pattern and still cover the whole room for a reasonable total cost. Modern peel-and-stick wallpaper options that are specifically rated for humid environments have made application accessible even to first-time DIYers. A bold botanical print, an architectural geometric pattern, or a sophisticated textured grasscloth look can elevate a bathroom from forgettable to genuinely memorable in a single afternoon of work.
Beyond paint and wallpaper, consider other wall treatments that add texture and dimension. Shiplap applied to a single accent wall behind the toilet creates a farmhouse-inspired backdrop that is enormously popular and relatively easy to execute. Beadboard paneling on the lower half of the wall, capped with a simple chair rail molding, gives a bathroom an elegant, timeless quality that reads as both classic and intentional. Even a simple technique like color blocking — painting the lower third of the wall in a contrasting color — can create visual interest and a custom feel that far exceeds the complexity of the technique itself. These wall treatments work in concert with your other upgrades to create a space that feels wholly designed rather than merely functional.
Wall Treatment Ideas by Style
- Modern Minimalist: Deep matte paint in a single moody color, kept entirely free of pattern or texture for maximum sophistication
- Farmhouse: White or cream shiplap on a feature wall paired with warm wood accents and matte black hardware throughout
- Maximalist Eclectic: Bold botanical or patterned wallpaper on all four walls, embracing color and pattern as the primary design statement
- Traditional: Beadboard paneling on the lower half of the wall with a classic chair rail, painted in a soft neutral to complement marble or ceramic tile
- Transitional: Soft color blocking with a curated neutral palette that bridges traditional and contemporary influences
7. The Shower and Tub Area: Focused Upgrades with Major Payoff
The shower and tub area is the other major focal point in most bathrooms, and even small targeted upgrades here can deliver outsized visual results. One of the most impactful and underappreciated changes you can make is replacing your showerhead. A dated, inefficient showerhead that produces a weak spray is replaced for as little as fifty dollars, but upgrading to a rainfall-style head, a filtered model, or a multi-function handheld unit can make the shower experience feel genuinely luxurious. This is the kind of upgrade that you notice every single day, making it one of the best value investments in the entire bathroom refresh process.
The shower curtain, if you have one, is another high-impact, low-cost opportunity. A billowing linen curtain hung from oversized rings on a sturdy rod creates a soft, organic look that reads as high-end and editorial. A crisp waffle-weave cotton curtain in a warm white conveys spa-like cleanliness and simplicity. For something more dramatic, a printed curtain with a bold botanical or abstract pattern can serve as the room’s primary art piece. If your shower has glass doors instead of a curtain, a professional squeegee treatment or a hydrophobic coating product can keep them looking crystal clear, which makes an enormous difference in how the entire area presents.
Finally, consider the caulking around your tub and shower. Old, yellowed, or moldy caulk is one of the clearest visual signals that a bathroom is in need of attention, and it’s one of the easiest problems to fix. Removing old caulk with a simple tool and replacing it with fresh bright white or sanded caulk in a complementary color takes a few hours at most and costs almost nothing. The result is a shower or tub surround that looks dramatically cleaner and better maintained, even if nothing else about the tile or fixtures has changed. Combined with the other updates throughout this guide, this kind of meticulous attention to detail is what separates a bathroom that merely looks updated from one that truly feels transformed.
Refreshing an outdated bathroom doesn’t have to mean a complete demolition or a five-figure renovation bill. By approaching the project strategically and focusing your energy and resources on the changes that deliver the highest visual impact, you can create a space that feels genuinely new, deeply personal, and beautifully designed — all while staying well within a realistic budget. Start with one section, build momentum, and let each improvement inspire the next. The bathroom you’ve always wanted is closer than you think.








What do you think?
It is nice to know your opinion. Leave a comment.