










15 Easy DIY Bathroom Mirror Frame Ideas That Totally Upgrade Your Space
Why Framing Your Bathroom Mirror Is the Smartest Upgrade You Can Make
If you’ve been staring at that plain, builder-grade mirror in your bathroom and wondering why the space never quite feels finished, you’re not alone. Millions of homeowners live with those frameless, glued-to-the-wall mirrors that came standard with their homes, never realizing that one simple weekend project could completely transform the look and feel of the entire room. A framed mirror anchors a bathroom the way a piece of art anchors a living room — it gives the eye somewhere intentional to land and signals that the space was designed rather than simply assembled.
The beauty of a DIY mirror frame is that it works with virtually any design style. Whether your bathroom leans toward rustic farmhouse, sleek modern, coastal bohemian, or classic traditional, there is a framing approach that will feel completely at home. You’re not locked into whatever the big-box home improvement store happens to carry this season. Instead, you get to choose your materials, your finish, your proportions, and your level of detail — which means the result will feel uniquely yours in a way that a store-bought replacement mirror simply never could.
Perhaps the most compelling argument for taking on this project is the return on investment. Replacing a bathroom mirror entirely can cost anywhere from a few hundred to several thousand dollars depending on size and style. A DIY frame, by contrast, can be completed for as little as twenty to fifty dollars using materials from a craft store, a lumber yard, or even your own garage. The labor is mostly your own time, and the skills required are genuinely accessible — most of the techniques covered in this article require nothing more complex than measuring, cutting, and gluing or nailing pieces together.
Tools and Materials You’ll Need Before You Start
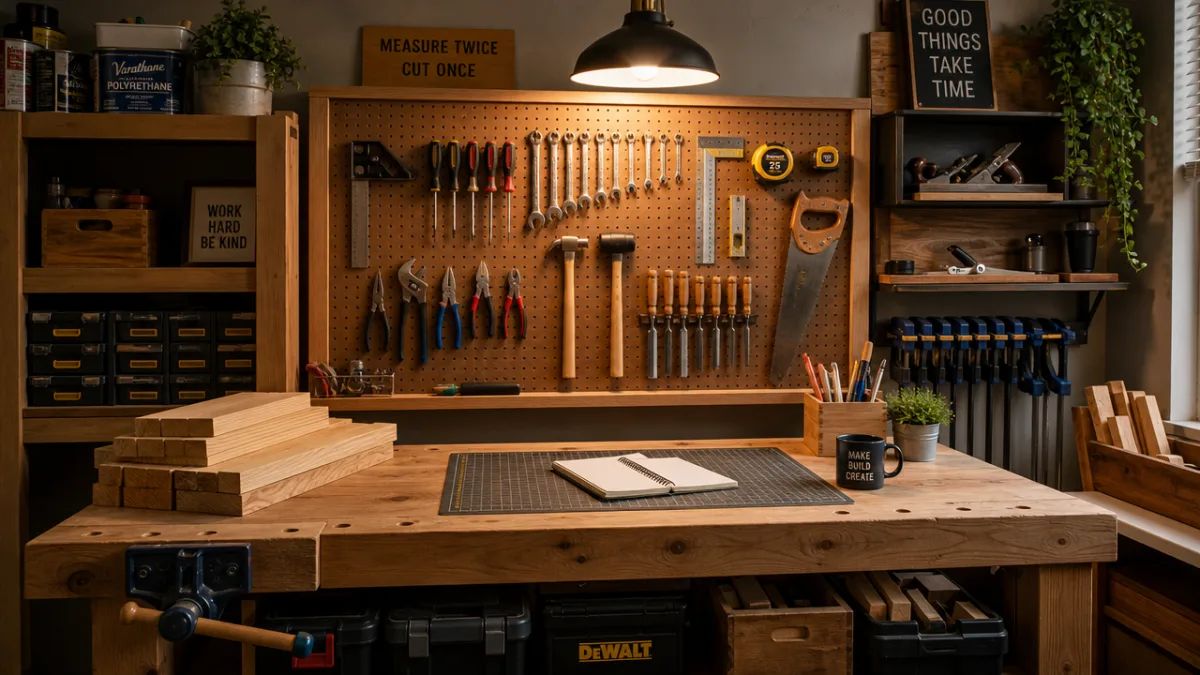
Before you dive into any of these fifteen ideas, it pays to have a clear understanding of what’s in your tool kit and what you might need to pick up. The good news is that most DIY mirror framing projects require surprisingly few tools, and many of them are things you probably already own. A tape measure, a level, a miter saw or hand miter box, wood glue, construction adhesive, and a nail gun or finish nails are the core components of almost every approach described here. If you don’t own a miter saw, a hand miter box from a craft store costs less than fifteen dollars and works perfectly well for smaller frames.
Materials vary more widely depending on which style you’re pursuing. Common choices include MDF molding, solid wood boards, peel-and-stick tiles, rope or jute, reclaimed barnwood, PVC trim boards for humid environments, decorative metal strips, and even repurposed picture frame pieces. It’s worth spending time at a craft store or lumber yard simply browsing what’s available before you commit to a direction — sometimes the perfect material presents itself unexpectedly. Always buy ten to fifteen percent more material than your measurements strictly require, because mistakes happen and having extra on hand saves a second trip to the store.
Finishing supplies deserve their own consideration. Paint, stain, wood conditioner, clear sealer, and painter’s tape are all likely to come into play. Because bathrooms are humid environments, it’s important to use products rated for moisture resistance wherever possible. A water-based polyurethane topcoat over paint or stain will help your frame hold up against steam and splashing over the years. If you’re working with raw wood, always sand progressively through grits — starting around 80 and finishing at 220 — before applying any finish for the smoothest possible result.
- Tape measure and pencil for accurate marking
- Miter saw or hand miter box for angled cuts
- Wood glue and construction adhesive
- Nail gun with finish nails, or hammer and brad nails
- Sandpaper in multiple grits (80, 120, 220)
- Painter’s tape to protect the mirror surface
- Primer and paint or wood stain
- Water-resistant sealant or polyurethane topcoat
- Level to ensure everything hangs straight
Five Classic Wood Frame Ideas for a Timeless Look
Wood framing is the most popular approach for good reason — it is warm, versatile, and available in dozens of profiles and species. The simplest wood frame you can make involves four pieces of flat board cut with 45-degree mitered corners and glued or nailed directly to the mirror’s surface using construction adhesive rated for glass. Pine is an excellent choice for beginners because it is inexpensive, easy to cut, and takes paint beautifully. Choose a width between two and four inches depending on the size of your mirror and the scale of your bathroom — a wider frame makes a bolder statement, while a slimmer frame reads as more refined.
For a farmhouse aesthetic, consider using rough-sawn or distressed wood. You can purchase barnwood-look boards from most lumber yards, or you can artificially age new pine using a technique called wire brushing, which raises the wood grain and creates a weathered texture. Follow up with a dark walnut stain, wipe it back while still wet for a more subtle effect, and seal with matte polyurethane. The result looks like a frame that has been sitting in an old farmhouse bathroom for decades, complete with the kind of character that new materials simply can’t replicate without some intentional effort.
Chair rail molding is another underutilized option that creates beautiful, layered frames with almost no additional complexity. You simply apply one layer of flat board to define the outer boundary of the frame, then add a length of chair rail or panel molding on top, positioned slightly inward to create depth and shadow lines. This double-layer approach makes a frame look far more expensive and custom than its actual cost suggests. Paint the whole assembly in a semi-gloss white for a classic Carrara-meets-colonial look, or in a deep navy or forest green for something more dramatic and contemporary.
If you want warmth without committing to a traditional profile, consider using thin strips of wood stained in complementary tones to create a herringbone or chevron pattern across the face of a wider frame base. This technique requires careful measuring and patience at the miter saw, but the visual payoff is extraordinary — it transforms a simple frame into a genuine piece of craftsmanship. Seal generously to protect the intricate surface, and pair it with brushed gold or bronze hardware elsewhere in the bathroom to complete the elevated look.
Finally, for the craftsman or arts-and-crafts enthusiast, a frame built with visible joinery details — think small wooden pegs, inset corner blocks, or a simple mortise-and-tenon look achieved with careful painting — gives a bathroom a handmade quality that is increasingly rare in a world of mass production. You don’t need to be an actual joiner to achieve this look; much of it can be simulated with paint and strategically placed trim pieces. The key is consistency in your line weights and corner details, which rewards careful planning before you ever make a single cut.
Tile, Mosaic, and Stone-Look Frame Ideas
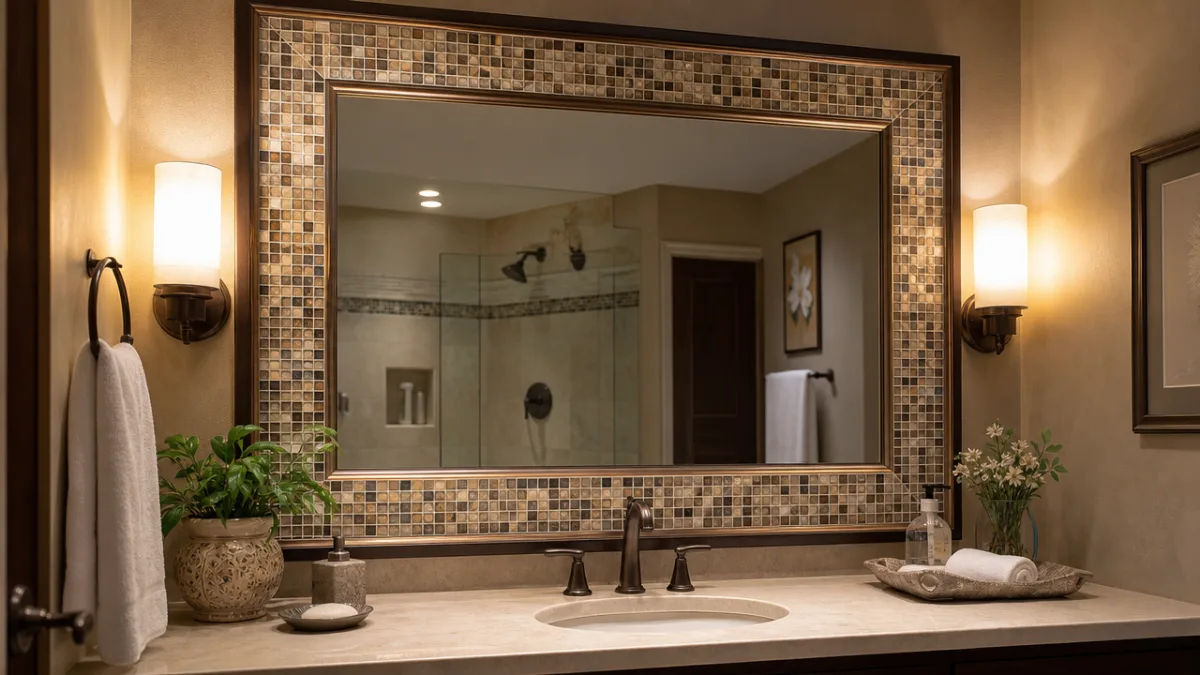
Tile framing is a fantastic option for bathrooms that already feature tile prominently, because it allows you to extend an existing pattern right up to the mirror’s edge in a way that feels intentional and professionally designed. The most accessible approach uses peel-and-stick tiles, which have improved dramatically in quality over the past several years and now come in genuinely convincing stone, marble, wood, and encaustic cement looks. Simply cut your tiles to size using a utility knife or tile cutter, apply them to a thin backing board cut to frame proportions, and adhere the whole assembly to the wall around your mirror using construction adhesive.
Penny round tile frames are particularly charming and work beautifully in vintage, Art Deco, or eclectic bathrooms. Sheets of penny round tile are sold at most tile suppliers and can be cut with scissors or a grout saw to fit the specific proportions of your mirror. Apply the sheets to a backing of cement board or moisture-resistant MDF, grout them as you normally would tile, seal the grout carefully, and then mount the assembly around your existing mirror. The result looks like a custom tiled surround at a fraction of the cost, and it integrates the mirror into the wall in a way that makes the entire bathroom feel more purposefully designed.
For those who love a natural stone aesthetic without the weight or expense of actual stone, large-format peel-and-stick marble-look panels can be cut to create a sleek, spa-inspired frame with minimal effort. The trick to making this look convincing is to pay close attention to the direction of the veining — run it consistently either horizontally or vertically across all four sides of the frame rather than rotating panels arbitrarily, which would immediately read as artificial. Seal the edges with a clear caulk that matches your grout color to eliminate any telltale gaps and give the installation a finished, professional look.
- Peel-and-stick subway tile frame for a clean, classic look
- Penny round mosaic sheets for vintage or Art Deco bathrooms
- Marble-look panels for a spa-inspired, luxurious aesthetic
- Encaustic cement tile for a bold, pattern-forward statement
- Glass tile mosaic for light-reflective shimmer and color depth
Rope, Rattan, and Organic Material Frames for a Boho Vibe
The popularity of natural, organic materials in interior design has opened up an entirely new category of DIY mirror framing that requires almost no woodworking skill and produces genuinely stunning results. Jute rope framing is perhaps the simplest of all: you build or purchase a basic square or rectangular backing frame from flat boards, then wrap that frame tightly and methodically with natural jute rope, securing the ends with hot glue. The wrapping process is meditative and forgiving — small gaps or imperfections in the tension actually add to the handmade character rather than detracting from it.
Rattan and wicker-look materials have exploded in popularity, and for good reason — they bring incredible texture and a sun-drenched, resort-like warmth to any space. You can purchase rattan webbing sheets online or from craft suppliers and stretch them across a frame backing in the same way a caned chair seat is constructed. Alternatively, pre-woven rattan ribbon can be wrapped around a backing frame in a diagonal weave pattern to create something that looks more like a decorative border. Both approaches pair beautifully with warm wood tones, white walls, linen textiles, and the kind of vintage brass hardware that defines the contemporary coastal or boho bathroom.
Driftwood and gathered natural sticks create perhaps the most organic and artistic frame option available. Collect pieces of similar diameter from a beach or woodland area, cut them to length, and arrange them in a log-cabin or radial starburst pattern around your mirror. Hot glue works surprisingly well for this application when used generously, supplemented by a few strategically placed screws for structural integrity. The result is something you simply cannot buy in a store — a one-of-a-kind piece that tells a story about where the materials came from and the hands that assembled them.
Sea glass and shell mosaics represent another beautiful option in this organic materials category, particularly for bathrooms with a coastal or cottage theme. Gather shells from beach trips or purchase them inexpensively in bulk, then arrange them in a pattern on a backing board using waterproof marine adhesive. Fill the gaps between shells with grout in a sand or cream tone, seal thoroughly, and mount the finished piece around your existing mirror. The interplay of light across the varied shell surfaces throughout the day creates a living quality in the frame that flat painted or stained frames simply cannot match.
Paint, Stencil, and No-Tool Frame Techniques
Not every DIY bathroom mirror upgrade requires a saw, nails, or specialized materials. Some of the most effective transformations are achieved entirely with paint, tape, and a willingness to experiment directly on your bathroom wall. Painted frame illusions — where you use painter’s tape to mask off a rectangular border around your existing mirror and then paint the resulting band in a contrasting color — have been popular for years precisely because they are so simple and so effective. The result, especially when done in a bold color or glossy finish against a neutral wall, reads clearly as a deliberate design choice rather than a shortcut.
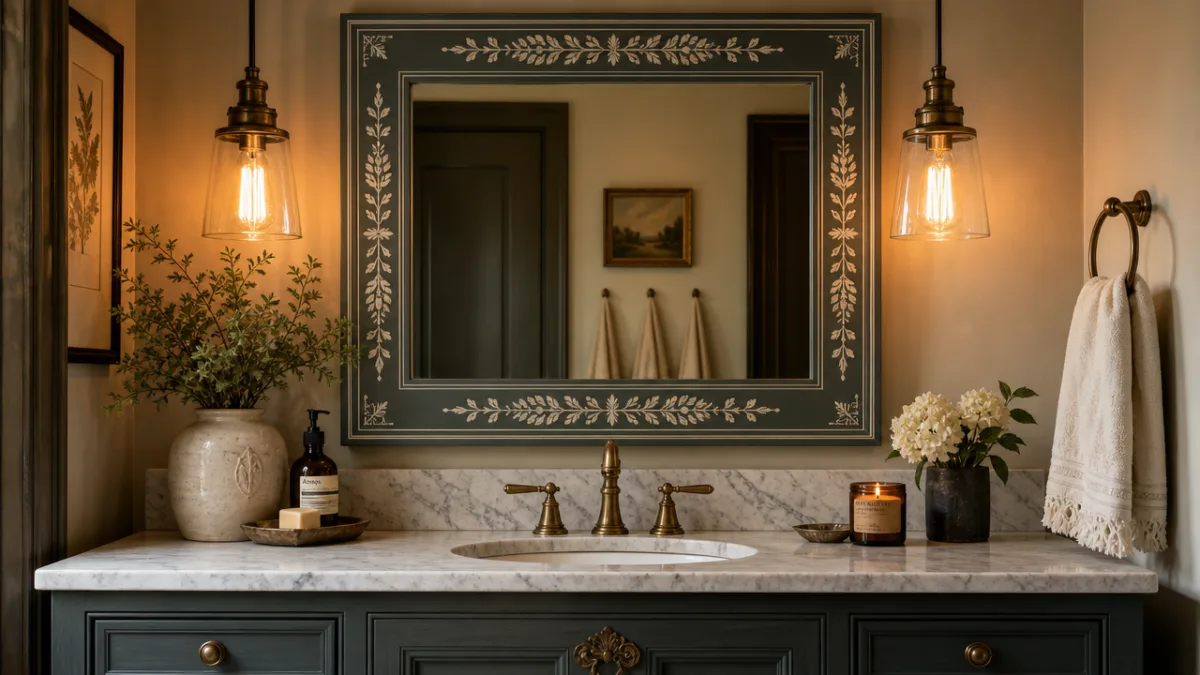
Stenciled borders elevate the painted frame concept significantly by introducing pattern, texture, and artisan detail. Moroccan tile stencils, Greek key patterns, simple geometric repeats, and floral motifs are all available inexpensively from craft suppliers and can be applied with a small foam roller or stencil brush in an afternoon. The key to a professional-looking stenciled border is to offload most of the paint from your brush or roller before applying — a technique called dry brushing — which prevents bleeding under the stencil edges. Use a paint formulated for bathrooms to ensure the finished design holds up in a humid environment over time.
Metallic paint effects deserve special mention because they can single-handedly make a basic builder-grade mirror look like a custom framed piece of furniture. Use painter’s tape to define your frame border, apply a base coat in matte black or dark charcoal, then dry-brush a metallic gold, bronze, or silver over the top in the direction of the grain. When the tape comes off, you’re left with something that genuinely resembles an aged metal frame — the kind of thing you’d find in a high-end antique shop for a hundred dollars or more, achieved for a few dollars’ worth of paint and an hour of your time.
Washi tape frames are an even more commitment-free option that deserves more attention than it typically receives in design circles. Modern washi tape comes in sophisticated patterns — thin stripes, delicate florals, faux wood grain, marble looks — that look intentional and refined at bathroom scale. Apply strips carefully around the perimeter of your mirror using a level to keep everything straight, miter the corners precisely with a craft knife and cutting mat, and the result is a frame that is both beautiful and completely reversible if you change your mind next season. It’s particularly well suited to rental apartments where wall modifications aren’t permitted.
For a truly no-commitment approach, adhesive mirror frame overlays are now commercially available in a wide range of styles, and while they represent more of a purchase than a true DIY, they are worth mentioning because they can be applied in under thirty minutes with no tools at all. Many of them are made from lightweight polyurethane foam or PVC that mimics the look of wood or metal convincingly from any normal viewing distance. Think of them less as a craft project and more as a finishing accessory — the design equivalent of a picture frame, applied directly to a mirror you already own. The result still represents a genuine upgrade over the bare, unframed glass.
Finishing Touches That Make Your Frame Look Professional
No matter which framing technique you choose, the difference between a DIY project that looks homemade and one that looks professionally done almost always comes down to the finishing details. Caulk is one of the most important and most overlooked of these details. A thin bead of paintable caulk applied along every seam where your frame meets the wall, and where your frame meets the mirror, then smoothed with a damp finger and painted over once dry, eliminates the small gaps and transitions that subconsciously signal amateur work. It’s a five-minute step that adds enormously to the perceived quality of the finished project.
Consistent paint coverage is another area where extra care pays dividends. Always apply at least two coats of paint over a coat of primer, sanding lightly between coats with 220-grit sandpaper. This builds a finish with depth and uniformity that single-coat coverage simply cannot achieve. Pay particular attention to the corners and recessed areas of your molding profile, where a brush tends to deposit excess paint that obscures the crisp shadow lines that make molding look sharp and intentional. A small artist’s brush for detail work in these areas will make your finished frame look like it was done by someone who has done it a hundred times.
Hardware and accessory coordination is the final layer that ties everything together. Once your frame is installed and finished, take a look at the other metal elements in your bathroom — faucet, towel bar, toilet paper holder, light fixture — and consider whether a simple swap of any of these to match your frame’s finish would amplify the overall effect. Brushed nickel, matte black, warm brass, and oil-rubbed bronze are the most popular current finishes, and coordinating just two or three elements in the same finish creates a level of designed cohesion that makes the whole bathroom feel intentional and elevated. Your framed mirror becomes not just a single upgrade, but the catalyst for a broader transformation of the space.








What do you think?
It is nice to know your opinion. Leave a comment.