










How To Upcycle Thrift Shop Finds Into Trendy Home Decor
Why Thrift Store Upcycling Is Having a Major Moment
There has never been a better time to raid your local thrift store with a vision and a can of spray paint. The upcycling movement has exploded in popularity over the past several years, driven by a growing cultural appetite for sustainability, individuality, and the deeply satisfying thrill of transforming something overlooked into something beautiful. What once felt like a budget necessity has become a full-blown aesthetic philosophy embraced by interior designers, influencers, and everyday homemakers alike.
The appeal goes far beyond saving money, though the financial benefits are undeniable. When you upcycle a thrift shop find, you are participating in a circular economy that keeps usable materials out of landfills and reduces the demand for newly manufactured goods. Every vintage lamp you rewire, every wooden dresser you refinish, and every ceramic bowl you repurpose as a planter is a small but meaningful act of environmental stewardship. Sustainability and style are no longer at odds — they are deeply intertwined.
Perhaps most importantly, upcycled decor gives your home a sense of personality that simply cannot be purchased from a big-box retailer. Mass-produced furniture and accessories are, by definition, designed for everyone, which means they belong to no one in particular. A hand-painted thrift store mirror or a reupholstered vintage armchair tells a story that is entirely your own. It reflects your tastes, your creativity, and your willingness to see potential where others see junk.
Training Your Eye: What to Look For at the Thrift Store
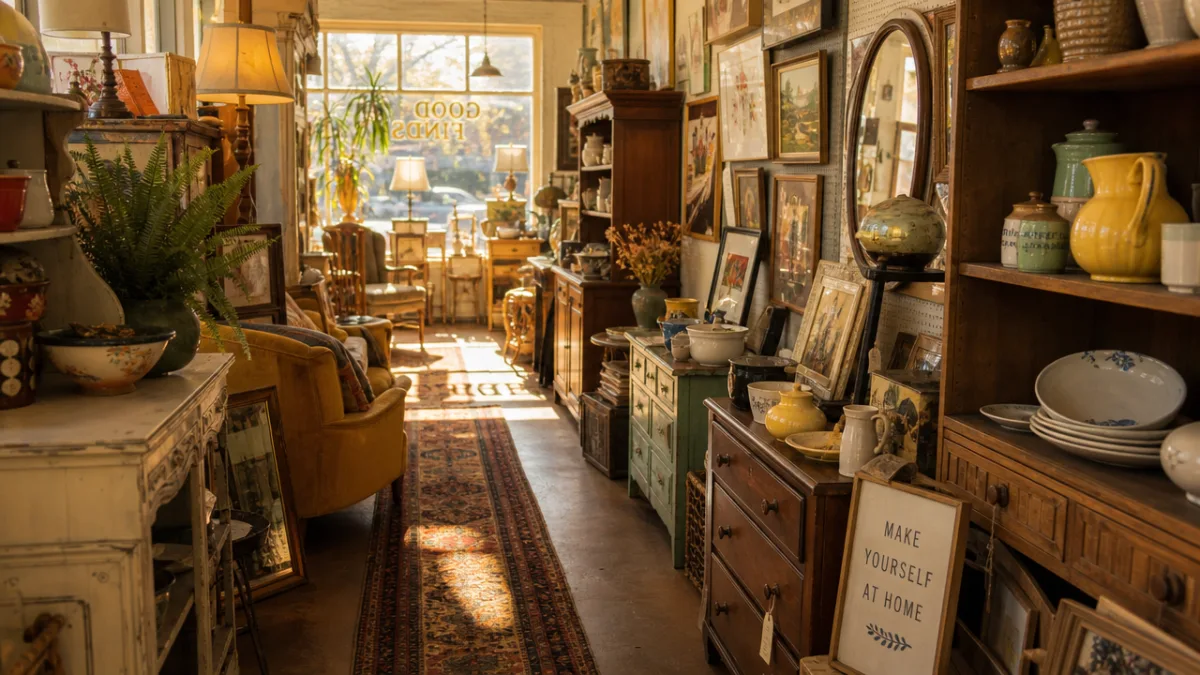
Walking into a thrift store without a trained eye can feel overwhelming. Shelves overflow with mismatched ceramics, tangled frames, outdated furniture, and curious knick-knacks of dubious origin. The key to becoming a successful upcycler is learning to see past the surface — past the ugly paint color, the worn upholstery, or the outdated hardware — and focusing instead on the underlying structure, material, and proportions of each piece. A well-built piece of solid wood furniture from 1975 is infinitely more valuable than a trendy flat-pack item from 2020.
Solid wood is your best friend in the thrift store. Run your hand along surfaces and knock gently on tabletops. Solid wood produces a satisfying thud; hollow particleboard sounds tinny and cheap. Wood can be sanded, stained, painted, distressed, or bleached into an entirely new identity, which makes it the most versatile raw material available. Avoid pieces with structural damage like broken joints or warped panels, but surface scratches, dents, and old finishes are all completely workable problems with straightforward solutions.
Beyond furniture, keep your eyes open for items with interesting shapes, textures, or materials. Brass candlesticks can be polished to a warm glow. Heavy ceramic vessels make stunning planters. Ornate picture frames can be painted and grouped into gallery walls. Vintage glass bottles become elegant bud vases with zero modification. The mental shift required is simple but profound: stop asking “what is this?” and start asking “what could this become?” That single reframe will transform the way you shop forever.
Here are some of the best thrift store categories to target on your next visit:
- Furniture: Chairs, dressers, side tables, and bookshelves with solid wood construction and good bones.
- Frames and mirrors: Any shape or size works — you can always repaint, regild, or strip the finish entirely.
- Ceramics and glassware: Look for interesting shapes, weights, and textures rather than colors or patterns you can’t change.
- Lighting: Lamps with interesting bases are easily rewired and given new shades for a fraction of retail cost.
- Textiles: Curtains, pillowcases, and even clothing fabric can be repurposed into cushion covers, table runners, or wall hangings.
Essential Tools and Supplies Every Upcycler Needs
One of the greatest misconceptions about upcycling is that it requires a fully equipped workshop and years of crafting experience. In reality, a modest collection of basic tools and supplies is enough to tackle the vast majority of thrift store transformations. Building your toolkit gradually — starting with the most versatile items and adding specialty tools as your projects demand — is both affordable and practical. You do not need to invest hundreds of dollars before you begin your first project.
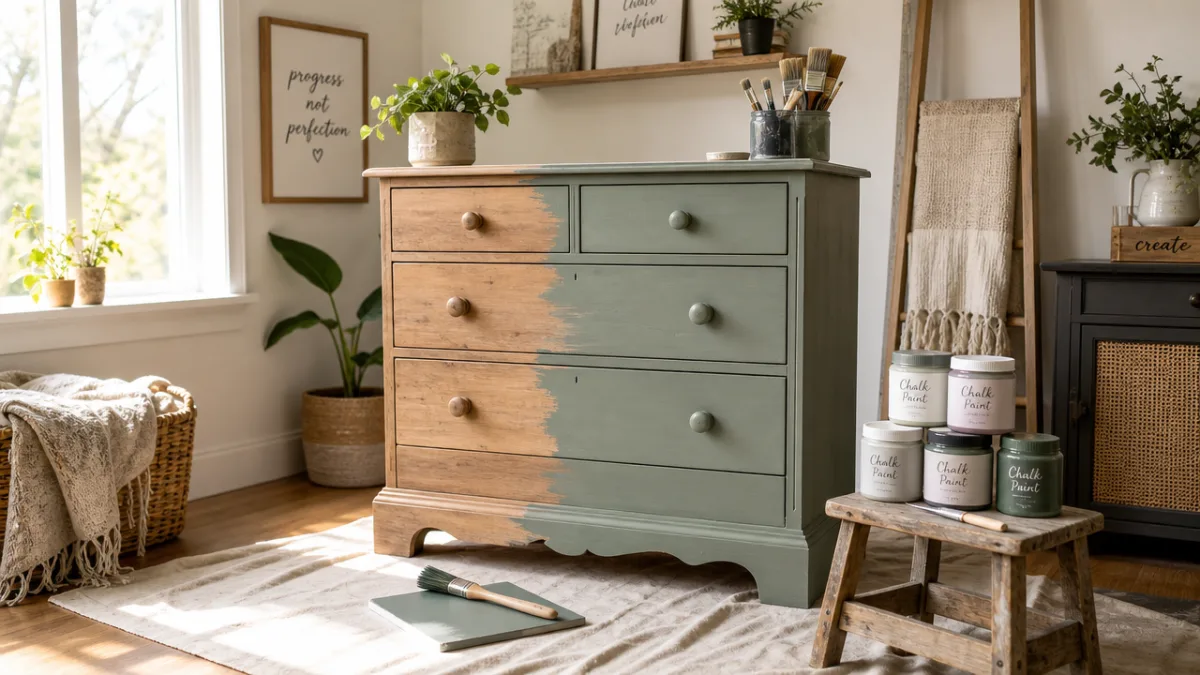
Paint is the single most transformative material in your upcycling arsenal. A quality chalk paint or mineral paint adheres to almost any surface with minimal preparation, dries quickly, and comes in a stunning range of colors from chalky whites and warm neutrals to deep jewel tones. These paints are particularly beloved by upcyclers because they rarely require a primer coat and can be easily distressed or waxed to achieve an antique finish. For metal surfaces, a good spray paint specifically formulated for metal provides a smooth, durable finish that brush painting cannot replicate.
Beyond paint, a few key supplies will carry you through most projects with ease. Sandpaper in a range of grits — from coarse 80-grit for stripping old finishes to fine 220-grit for smooth final surfaces — is indispensable. A quality brush set, a foam roller for flat surfaces, painter’s tape, tack cloth for dust removal, and a basic screwdriver set round out the core kit. For upholstery projects, a heavy-duty staple gun is a worthwhile investment that opens up an entirely new category of transformations.
Here is a quick-reference list of essential upcycling supplies to stock before you begin:
- Chalk paint or mineral paint in your chosen color palette
- Metal spray paint for hardware and metal-framed pieces
- Sandpaper assortment (80, 120, and 220 grit)
- Natural bristle brushes and foam rollers
- Painter’s tape and tack cloth
- Clear finishing wax or matte varnish for protection
- Heavy-duty staple gun and staples for upholstery work
- Wood filler for repairing dents and scratches
- New hardware (knobs, pulls, hinges) for instant updates
Step-by-Step Transformations: Five Beginner-Friendly Projects
The best way to build confidence as an upcycler is to start with projects that deliver dramatic results with a manageable learning curve. Nothing motivates you to tackle a more ambitious project like the pride of finishing a smaller one beautifully. The five projects outlined below are all achievable for complete beginners and can each be completed in a single weekend, often in just a few hours. They also represent a range of item types, so you can find something to try regardless of what your local thrift store currently has on offer.
The painted dresser is perhaps the most classic and rewarding upcycling project available. Start by removing all hardware and cleaning the surface thoroughly with a degreasing cleaner. Sand lightly to give the paint something to grip, then apply two to three thin coats of chalk paint in a color that complements your room’s palette. Once dry, replace the old hardware with new pulls or knobs — this step alone can take a piece from dated to designer. Finish with a coat of clear wax or matte varnish to protect the surface and extend its life for years to come.
A second fantastic beginner project is the gallery wall mirror grouping. Collect four to six mirrors or picture frames of varying sizes from the thrift store, ensuring they share at least one characteristic — similar tones, similar ornate or simple styles — to create visual cohesion. Paint them all the same color: a matte black, warm gold, or crisp white are all perennially stylish choices. Arrange them in an asymmetric cluster on a wall, and the result looks intentionally designed and completely unique. This project typically costs less than fifteen dollars from start to finish.
Here are the five beginner-friendly projects at a glance:
- The Painted Dresser: Sand, paint, and rehardware a solid wood dresser for an instant statement piece.
- The Gallery Mirror Wall: Collect and paint mismatched frames in a unified color for a curated cluster effect.
- The Ceramic Planter: Drill a drainage hole in a thrifted bowl or vessel and use it as a planter for indoor greenery.
- The Reupholstered Chair: Staple new fabric over a dining chair seat pad for a fresh, custom look.
- The Painted Lamp Base: Use spray paint to transform a dated lamp base into a modern metallic or matte piece.
Color, Texture, and Style: Designing with Upcycled Pieces
Successfully integrating upcycled pieces into a cohesive home aesthetic requires a basic understanding of color theory and interior design principles. The good news is that these principles are intuitive once you understand a few foundational ideas, and upcycled decor is actually one of the easiest categories to work with because you control the finish. Unlike buying a pre-colored item that may or may not work with your existing decor, you can paint, stain, or finish a thrift store find in any color you choose, making it a perfectly tailored addition to any room.
A neutral base is your safest and most versatile starting point. Whites, creams, warm grays, and natural wood tones serve as the backbone of almost any interior style, from Scandinavian minimalism to warm maximalism. Building your upcycled collection around a neutral palette allows you to introduce color and pattern through textiles — cushion covers, throw blankets, curtains, and rugs — which are easy and inexpensive to swap out as your tastes evolve. A chalk-painted white dresser, for example, works equally well in a coastal bedroom, a farmhouse hallway, or a modern minimalist living room depending entirely on what surrounds it.
Texture is the secret weapon of every successful upcycled interior. When multiple pieces in a room share the same texture — all smooth, all matte, all shiny — the space can feel flat and lifeless regardless of how beautiful the individual items are. Mixing textures creates depth and visual interest: a smooth chalk-painted side table looks stunning beside a rough linen upholstered chair and a glossy ceramic lamp base. Do not be afraid to combine matte and glossy finishes, rough and smooth surfaces, or warm and cool tones within the same room as long as there is a unifying element tying everything together.
Style coherence does not mean uniformity. The most magazine-worthy upcycled interiors succeed because they are curated rather than matched. Choose a throughline — a recurring color, a consistent hardware finish, a shared aesthetic sensibility like industrial, bohemian, or mid-century modern — and let that guide your thrift store choices and finishing decisions. When every piece in your home shares at least one common thread with the others, the result feels intentional and elegant rather than chaotic, even when the individual pieces are wildly diverse in origin and age.
Selling Your Upcycled Creations: Turning a Hobby Into a Side Income
What begins as a weekend hobby for many upcyclers quickly reveals its commercial potential. The market for unique, handcrafted, sustainably made home decor is genuinely enormous, and platforms like Etsy, Facebook Marketplace, and local vintage markets provide readily accessible channels for selling your finished pieces. Many successful upcyclers report that their side income quickly scales to cover the cost of new materials, thrift store finds, and tools — and for some, it grows into a full-time creative business. The barrier to entry is refreshingly low compared to most entrepreneurial endeavors.
Pricing your upcycled pieces fairly and profitably requires accounting for several factors that first-time sellers often overlook. The cost of the original thrift store item is just the beginning. You must also factor in the cost of paint, supplies, and hardware used, as well as a realistic estimate of your labor time valued at a fair hourly rate. Research comparable handmade or vintage items on Etsy to understand what the market will bear, and never undervalue your work simply because the raw material cost was low. The value of a beautifully upcycled piece lies primarily in the skill, vision, and labor invested in its transformation.
Photography is the single most important factor in selling upcycled decor online. Even the most stunning piece will fail to attract buyers if photographed in poor lighting against a cluttered background. Invest time in learning basic product photography — natural window light is your best and most accessible tool — and style your pieces in simple, attractive vignettes that help potential buyers imagine the item in their own home. A vintage dresser photographed against a clean white wall with a simple arrangement of plants and books on top will outsell the identical dresser photographed in a garage every single time.
To get started selling your upcycled pieces, consider the following steps:
- Choose your primary sales platform based on your target customer — Etsy for handmade enthusiasts, Facebook Marketplace for local buyers, Instagram for building a brand.
- Develop a consistent visual style for your photography to build a recognizable brand aesthetic.
- Write detailed, keyword-rich descriptions that highlight the materials, dimensions, finish, and story of each piece.
- Start with smaller, easily shippable items like frames, lamps, and accessories before tackling large furniture pieces.
- Reinvest early profits into better tools and more thrift store finds to gradually scale your operation.
Building a Sustainable Upcycling Practice for the Long Term
The most rewarding aspect of upcycling as a lifestyle practice is how naturally it shifts your relationship with objects, consumption, and creativity over time. Once you have experienced the satisfaction of turning a ten-dollar thrift store chair into a stunning statement piece, the appeal of buying cheap, disposable furniture begins to fade dramatically. You start to see the world through a different lens — one that recognizes value in the overlooked, potential in the discarded, and beauty in the imperfect. This shift in perspective extends far beyond home decor and quietly reshapes the way you approach consumption in all areas of life.
Developing a sustainable upcycling practice means being intentional about what you bring into your home and studio space. It is easy to fall into the trap of hoarding thrift store finds against some future project, which quickly becomes overwhelming and counterproductive. A good rule of thumb is to have a specific vision for a piece before you purchase it, or at the very least, a firm plan to use it within the next thirty days. Keeping a project queue — a simple list of items you have and what you plan to do with them — brings clarity and prevents your creative space from becoming a storage problem.
Community is one of the most underrated resources available to upcyclers at every skill level. Online communities on platforms like Pinterest, Instagram, and dedicated Facebook groups are filled with makers who share techniques, troubleshoot problems, celebrate finished pieces, and offer genuine encouragement. Local maker markets, flea markets, and vintage fairs offer opportunities to connect with fellow upcyclers in person, swap materials, and learn new skills. Surrounding yourself with a community of like-minded creatives accelerates your growth, keeps your inspiration fresh, and transforms what might otherwise be a solitary hobby into a rich and rewarding social experience.
Finally, remember that upcycling is fundamentally a practice of patience and experimentation. Not every project will turn out exactly as envisioned, and that is not only acceptable — it is part of the process. Some of the most beloved and creative upcycled pieces in existence were the result of a happy accident or a course correction when the original plan did not work. Allow yourself the freedom to experiment, to make mistakes, to repaint something three times until it feels right, and to discover techniques and styles you never would have found if you had followed a rigid plan. The thrift store does not offer a blueprint — it offers raw possibility, and what you build with it is entirely, beautifully yours.








What do you think?
It is nice to know your opinion. Leave a comment.