










How to Cut Tin Cans: A Complete Guide to the DIY Tool That Changes Everything
Why Cutting Tin Cans Opens Up a World of Creative Possibilities
Tin cans might just be the most overlooked craft material sitting in your kitchen right now. Every household goes through dozens of them each month, and almost all of them end up in the recycling bin without a second glance. But once you learn how to work with them, you start seeing them completely differently — as a free, endlessly available material that you can turn into something genuinely beautiful. Lanterns, garden planters, home decor — the possibilities are really only limited by your imagination and your willingness to learn a few simple techniques.
The tricky part has always been the cutting. Raw edges are sharp, and getting clean decorative cuts used to mean either investing in serious equipment or spending a lot of time wrestling with basic tools and hoping for the best. It’s no wonder so many crafters have avoided the whole idea, assuming it was too technical or too dangerous to be worth attempting at home.
That’s really starting to change, though. A new wave of DIY-friendly tools and techniques has made cutting tin cans something almost anyone can pick up — whether you’ve been making things by hand for years or you’re just getting started. Learn to do it safely and confidently, and you’ll unlock a whole category of projects for your home, garden, and gift list. This guide covers everything from picking the right tools to putting the finishing touches on something you’ll actually be proud to display.
Understanding the Right Tools for Cutting Tin Cans
Before you make your first cut, it’s worth taking a moment to understand what tools are actually out there and which one makes sense for the kind of project you have in mind. The most commonly recommended option in crafting circles is a safety can opener — the type that cuts along the side of the lid rather than through the top, leaving a smooth, rounded edge with no sharp bits to worry about. It’s a great way to open cans cleanly, but it won’t help much when you want to cut decorative shapes or patterns into the sides of the can itself.
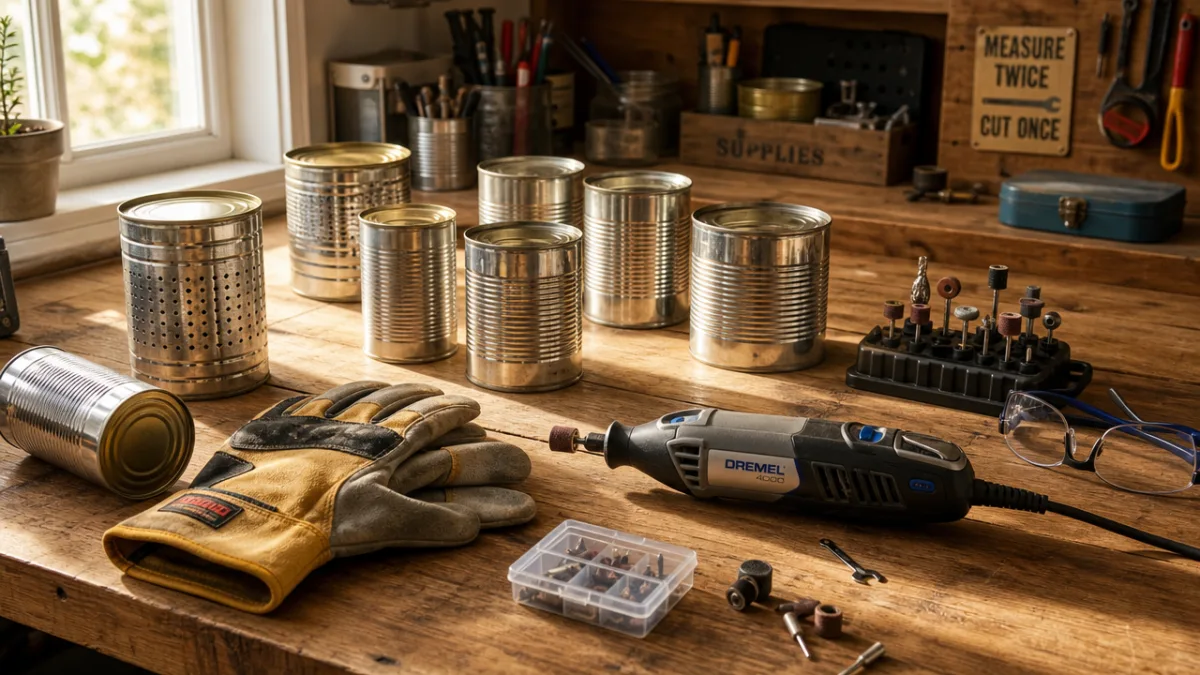
For that kind of detail work, a rotary tool like a Dremel is hard to beat. Fitted with a cutting disc or a small drill bit, it gives you real precision — lines, dots, curves, even fairly elaborate patterns are all achievable with a bit of practice. Aviation tin snips, the kind sheet metal workers use, are another solid choice if you want to make straight or curved cuts along the body of the can, or if you plan to open it flat and work with the metal as a sheet.
One of the most exciting developments for DIY crafters in recent years is the arrival of tools designed specifically for cutting cans. These are built to score or cut around the circumference of a can at an adjustable height, giving you perfectly even horizontal rings or clean separations between sections — consistently, and without needing any metalworking experience. They’re a genuine game-changer if you want professional-looking results without professional equipment. Whatever tool you go with, knowing what it’s good at and where it has limits will make a real difference to your finished results.
Safety First: Essential Precautions Before You Start
Cutting metal at home is genuinely satisfying, but it does require you to take safety seriously. Freshly cut tin edges can be razor-sharp, and even a momentary lapse in attention can lead to a nasty cut. Before you touch anything, get yourself a pair of heavy-duty work gloves or cut-resistant gloves. Leather gloves give you great protection with decent dexterity, while purpose-made cut-resistant craft gloves fit even better for this kind of work. Don’t assume a cut edge is safe just because it looks smooth — always have your gloves on.
Eye protection is just as important, especially if you’re using a rotary tool or any kind of power equipment. Metal fragments can fly off at surprising speed, and even a tiny piece in your eye is a serious problem. A basic pair of safety glasses is all you need, and they’re cheap enough that there’s really no excuse not to wear them. If you’re working in a small or poorly ventilated space with a rotary tool or angle grinder, a dust mask is also a smart idea — fine metal particles are not something you want to be breathing in.
A bit of prep work on the cans themselves will also make the whole process safer and easier. Always wash your cans thoroughly and get all the paper labels off before you start — soaking them in warm soapy water loosens both the labels and any leftover adhesive. If you’re planning to punch or drill holes and want to prevent the metal from denting, the classic trick is to fill the can with water and freeze it solid for several hours. The ice gives the metal a firm interior support that keeps it from buckling under pressure. Once you’ve made your cuts, run a metal file or some fine-grit sandpaper along any cut edges to knock off the burrs before you handle the piece further.
Step-by-Step: How to Cut a Tin Can Using a Dedicated Cutting Tool
If you’ve picked up a dedicated can-cutting tool — the kind specifically made to score and cut around the outside of a can — you’ll find the whole process is much more straightforward than it might look. These tools work by holding a cutting wheel or scoring blade at a fixed height against the side of the can while you rotate the can against it, producing a perfectly level cut line all the way around the circumference. The secret to a clean result is simple: steady pressure and a consistent rotation speed.
Start by dialing in the height on your tool. Most of them use a simple screw or slider to adjust how high up the can the blade sits, so take a moment to get it exactly where you want before you commit. Set the can in place, check that the cutting wheel is sitting snugly against the side at the right height, and then begin rotating slowly. Depending on your tool’s design, you’ll be applying gentle downward or inward pressure on the blade as you go. Watch for a clean score line forming in the metal as you turn, and keep going until you’ve made it all the way around back to where you started.
Some tools cut all the way through in one pass; others leave a score line deep enough that you can gently snap the two sections apart. Either way, do that final separation step with your gloves on — the edges will be at their sharpest right after cutting. Once the two pieces are apart, work a metal file or a folded piece of fine-grit sandpaper methodically around the cut edge, checking with a gloved finger every so often until everything feels smooth and there are no sharp points left. Then you’re ready for whatever comes next.
- Set the blade height — Adjust the cutting tool to your desired height on the can before beginning.
- Rotate evenly — Turn the can at a consistent speed to produce a clean, level score line.
- Make multiple passes if needed — Thicker cans may require two or three rotations before the metal is fully cut through.
- Separate carefully — Always wear gloves when pulling the two sections apart.
- File the edges — Use a metal file or sandpaper to remove all burrs before handling the cut piece further.

Creative Projects You Can Make with Cut Tin Cans
Once you’re comfortable cutting cans cleanly and safely, the range of things you can make with them is genuinely exciting. Decorative lanterns are one of the most popular starting points — fill a can with water, freeze it solid, and use a hammer and nail to punch a pattern of holes through the frozen metal. When you put a candle or LED tea light inside, the light comes through those holes in the most beautiful way. Cutting off the top section with your dedicated tool gives the lantern a polished, finished look and makes it much easier to get the light in and out.
Cut-down tin cans also make wonderful garden planters. Use your cutting tool to bring a batch of matching cans down to the same height, and you’ve got a set of uniform, rustic-looking pots that look great lined up on a windowsill, fence rail, or garden wall. Spray paint them in colors that work together, punch a few drainage holes in the bottom, fill with potting mix, and plant with herbs, succulents, or whatever you’re into. With a coat of clear lacquer to slow down any rusting, these can last several seasons without looking tired.
Beyond lanterns and planters, there are so many other directions you can take this. A few ideas worth exploring:
- Desk organizers — Cut matching cans to varying heights and group them together to create a stylish set of pen and pencil holders.
- Wind chimes — Cut cans into strips or rings and hang them from a piece of driftwood or a sturdy dowel to create a musical garden ornament.
- Candle holders — A single can cut down to a short ring makes an elegant and minimalist votive holder when painted or wrapped in twine.
- Picture frames — Flatten a can and cut it into a frame shape, using tin snips to create decorative edging for a unique, industrial-style photo frame.
- Holiday decorations — Cut and shape tin cans into stars, trees, or other seasonal forms for eye-catching ornaments and table centerpieces.
One of the best things about working with tin cans is that the material costs you nothing, which means experimenting costs you almost nothing either. If something doesn’t work out the way you imagined, you just recycle it and grab another can. That low-stakes quality is actually what makes this such a great medium for getting creative — there’s no pressure to be precious about it. The more you experiment, the more you’ll find yourself looking at every empty can as an opportunity rather than something to toss in the bin.
Finishing, Painting, and Protecting Your Tin Can Creations
A clean cut is just the beginning — how you finish and protect the surface is what takes a project from looking homemade to looking genuinely polished. Before you reach for any paint, prep the surface properly. Wash the can well to get rid of any grease or fingerprints, then wipe it down with rubbing alcohol or a mild degreaser. It sounds like a small step, but residual oils from your hands really can cause paint to bead up or adhere unevenly, so it’s worth doing. Handle the prepped can by its edges, or use clean gloves.
Most experienced tin can crafters reach for spray paint, and for good reason — it goes on smoothly with no brush marks and sticks well to metal when applied properly. Look for sprays labeled as suitable for metal, or lay down a metal primer first if you’re using a general-purpose spray paint. Hold the can about 30 centimeters away and apply thin, even coats, letting each one dry fully before adding the next. Two or three thin coats will always look better than one thick one, which has a habit of dripping and running right when you least want it to. If you’re going for a distressed or vintage look, paint a base coat, let it dry, lightly sand through to the base in a few spots, then add a second color on top.
If your creation is going outside or anywhere damp, a clear lacquer or varnish spray over the finished paint will make a real difference to how long it lasts. For indoor projects it’s optional, but still a good idea if the piece will be touched a lot or exposed to any moisture. That said, some people genuinely love the way unprotected tin develops a patina and gentle rust over time — especially for garden pieces where that weathered look adds a lot of charm. Whatever finish you go with, taking the time to do it properly means you’ll be enjoying your work for years rather than months.

Tips and Tricks for Getting the Best Results Every Time
Even with good tools and a solid grasp of the basics, a few practical habits can make a noticeable difference to how your projects turn out. One of the most useful things you can do is keep an ongoing collection of cans sorted by size. Different projects call for different diameters and heights, and having a sorted stash ready to go means you can match the right can to the right project without having to wait until you happen to buy the right product. Standard food cans come in a surprisingly wide range — from tiny tomato paste tins to large coffee cans — and each has its own particular strengths as a craft material.
Another tip that seasoned tin can crafters swear by is using a center punch or automatic punch before drilling or cutting. Pressing the punch against the surface creates a small indentation that stops a drill bit from sliding across the smooth metal when you start drilling — which, if you’ve ever tried to drill into a tin can without doing this, you’ll know is a genuine problem. For decorative punched patterns, where the placement of each hole matters a lot, this is especially important. A good approach is to sketch your design on paper first, tape the paper to the can, and punch through the paper to transfer the pattern accurately to the metal.
Finally, be patient with yourself, especially at the start. Your first few attempts at cutting tin cans probably won’t be perfect, and that’s completely fine — it’s how it works with any new skill. The right pressure, the right speed, the feel of the tool against the metal — these things become second nature only after you’ve done them a few times. Hold onto your early practice cans and use them to test paint colors, filing techniques, and finishing methods before you commit to a piece you care about. The more you practice, the more confidence you’ll build, and before long you’ll be taking on projects that once would have seemed way beyond your reach.








What do you think?
It is nice to know your opinion. Leave a comment.