










“`html
DIY Tin Can & Prescription Bottle Organizer: Easy Upcycled Storage Ideas
There’s something really satisfying about taking something you’d normally throw away and turning it into something you actually want on your shelf. Upcycling tin cans and prescription bottles into organizers is one of those projects that’s accessible to pretty much anyone — it’s cheap, it’s good for the environment, and the results honestly look way better than you’d expect. Whether you’ve been crafting for years or you’re just now picking up a glue gun for the first time, this kind of project meets you where you are.
Why Upcycled Organizers Are the Smart Choice for Your Home
Millions of tin cans and prescription bottles end up in landfills every year, and while one household’s choices might feel small in the grand scheme of things, they do add up. Choosing to give these containers a second life instead of tossing them is a genuinely meaningful habit — not in a preachy, guilt-trip kind of way, but in the quiet, practical sense of using what you already have. It’s a small shift in how you see everyday objects, and over time it starts to feel pretty natural.
The cost argument is hard to argue with, too. Decent desk organizers, bathroom caddies, and craft storage can run you anywhere from fifteen to sixty dollars at a store, and the quality isn’t always there to back up the price. A tin can wrapped in burlap and twine? If you’ve already got those materials lying around, it costs you essentially nothing. When you’re organizing multiple rooms or setting up a new space on a tight budget, those savings genuinely stack up.
And then there’s the part that’s harder to put a number on — the fact that you made it yourself. Something handmade carries your taste in a way that a store-bought bin just doesn’t. You picked the colors, layered the textures, and made the little decisions that ended up making it yours. People notice that stuff, and it tends to spark conversation in a way that a plastic container from a big box store never would. More than that, there’s a quiet satisfaction in reaching for a pen from something you built yourself. It’s a small thing, but it makes a space feel genuinely lived-in and cared for.
Gathering Your Materials: What You Need Before You Begin
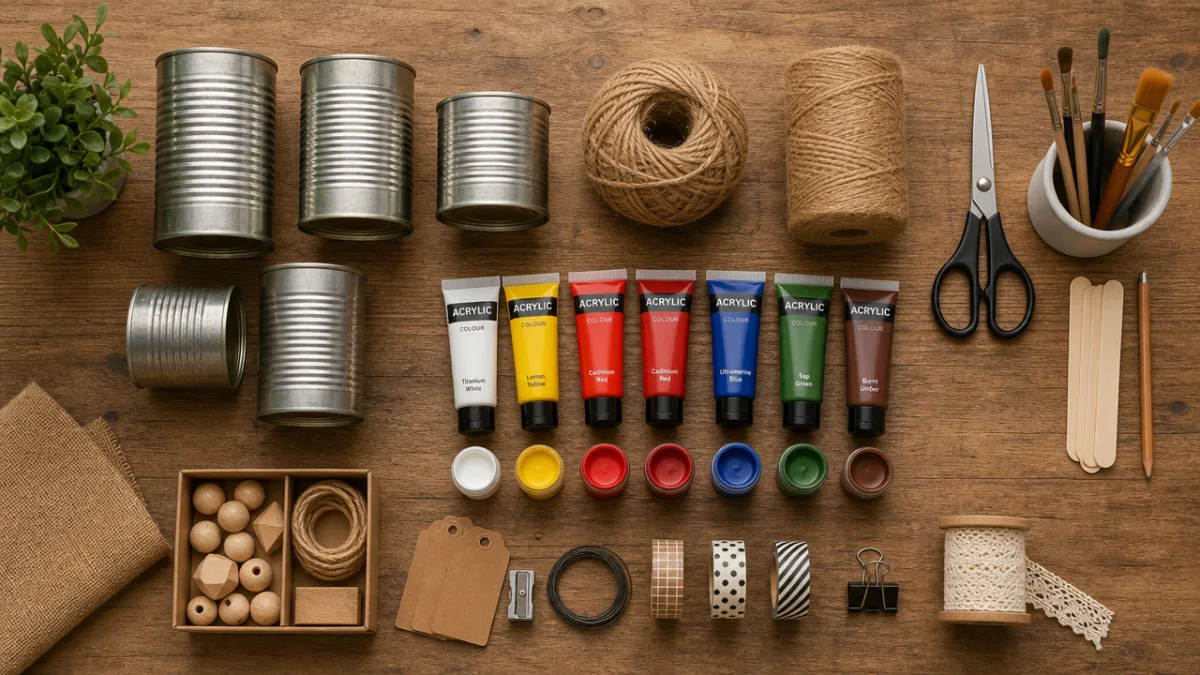
The nice thing about this project is that most of what you need is probably already in your house — you just haven’t thought of it this way yet. Spend a few weeks saving tin cans in different sizes, from small tomato paste tins to large coffee cans. Rinse them out, peel off the paper labels, and take a quick look at the interior rim for any sharp edges. If you find any, a safety-edge can opener or a gentle tap with a rubber mallet will take care of it. Prescription bottles just need a good wash and label removal — warm soapy water works fine, or a bit of rubbing alcohol if the label’s stubborn.
Once your containers are ready, start thinking about how you want to decorate them. The options are genuinely wide open here, and a lot depends on the look you’re going for. Burlap, twine, washi tape, acrylic paint, spray paint, fabric scraps, old maps, sheet music, decorative paper, ribbon, and leather cord are all fair game. If you need paint but don’t want to buy a full can, hardware stores often sell small sample pots for just a couple of dollars — perfect for a project like this where you really only need a splash of color. Thrift stores are also great for picking up fabric scraps, and it’s worth walking around your own home first to see what you’d otherwise be throwing out anyway.
For tools and adhesives, you’ll want to have a few basics on hand before you sit down to work:
- A hot glue gun with plenty of glue sticks — it’s the fastest and most reliable way to secure fabric, twine, and other decorative elements to the surface of your cans
- Mod Podge or another decoupage medium if you’re planning to apply paper or fabric, since it acts as both the adhesive and the sealant
- Medium-grit sandpaper to scuff up the outside of tin cans before painting — this simple step makes a big difference in how well the paint actually sticks
- Acrylic or spray paint in whatever colors you’ve chosen, plus a clear sealant if your finished organizer will live somewhere humid like a bathroom
- Scissors, a craft knife, a ruler, and a pencil for measuring and cutting your decorative materials cleanly
- Magnets, velcro strips, or small screws if you’re planning to mount anything on a wall or the inside of a cabinet door
Having everything laid out before you start saves you from that mid-project scramble where you can’t find the one thing you need. Lay down a cutting mat or some old newspaper, throw on an apron or clothes you don’t mind ruining, and give yourself enough time to actually enjoy the process. These projects go much better when you’re not rushing, and honestly, the making is half the fun.
Step-by-Step Techniques for Decorating Tin Cans
Painting is the most straightforward place to start, and it opens up a lot of possibilities without requiring much skill. Wash and completely dry your can first, then give the outside a light sanding to roughen up the surface. Hit it with a coat of spray primer — grey or white works well as a base for most colors — and let it dry fully before adding color on top. Spray paint gives you that smooth, clean finish, while brush-on acrylic lets you get more intentional with textures, layering, and brushstroke effects that give the piece a bit more character and depth.
Wrapping is another technique that requires zero painting skill and produces results that look surprisingly polished. Start at the base of the can, tack down the end of your twine, rope, or yarn with a dab of hot glue, and start winding tightly row by row up the can. Add a small dot of glue every few rows to keep things secure, and keep going until you reach the top edge. You can stick with one material for a clean, uniform look, or layer different ones — burlap rope at the bottom, natural twine in the middle, a metallic cord at the top — for something with a little more visual interest. This technique works just as well on prescription bottles, and the results look genuinely artisan.
Decoupage is worth exploring if you love the look of patterns, vintage imagery, or paper textures. Tear or cut your paper — wrapping paper, old book pages, magazine clippings, kraft paper, sheet music, whatever speaks to you — into manageable pieces. Brush a thin layer of Mod Podge onto a small section of the can, press your paper down, smooth out any air bubbles with your fingers, and work your way around the surface, overlapping pieces slightly as you go. Once everything is dry, seal it with two or three more coats of Mod Podge or a clear varnish to protect it from moisture and daily handling.
If you want to push things further, try combining techniques. A deep navy can stenciled with gold geometric shapes reads as design-forward and intentional. A prescription bottle wrapped in leather cord with a small bead or feather accent looks like something from a boutique shop. Since the base materials cost so little, there’s really no risk in experimenting — if something doesn’t work, you can sand it down and start over without any guilt.
Creative Organization Ideas for Every Room in Your Home
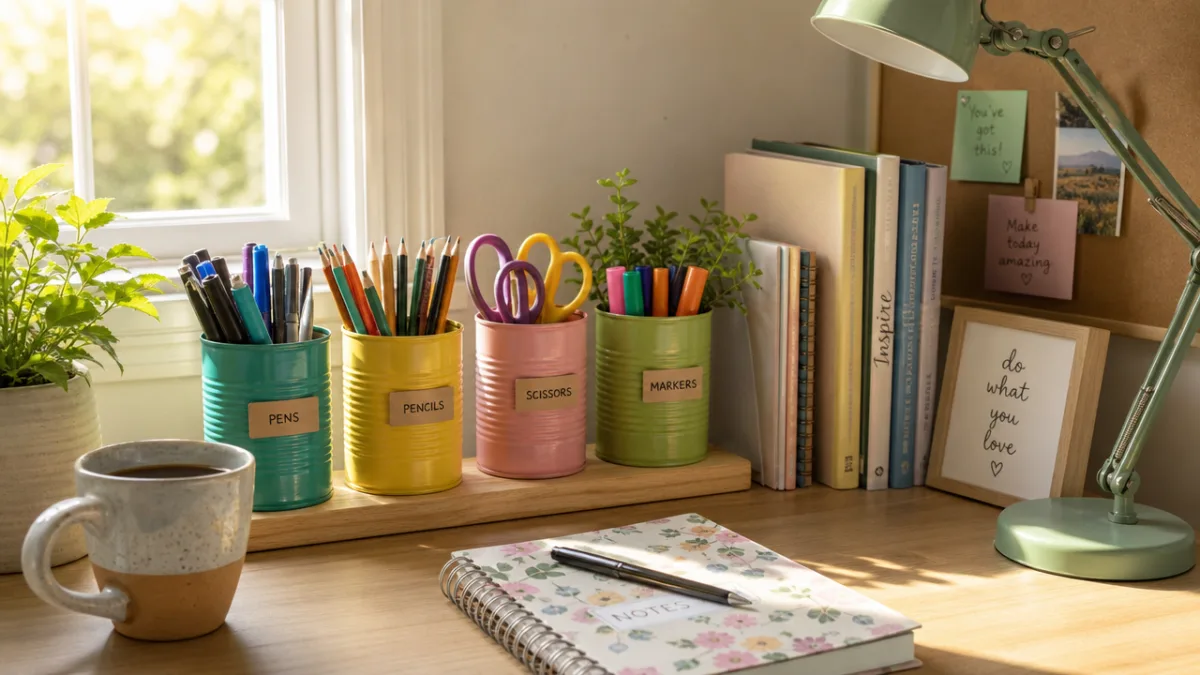
The desk or home office is an obvious starting point, and for good reason — the results are immediately useful and satisfying. Group three or four cans of different heights on a wooden plank base, secure them with strong adhesive or small screws from underneath, and you’ve got a desk caddy that holds pens, pencils, scissors, markers, and rulers without anything tipping over or disappearing into a drawer. Spray them in coordinating shades of the same color — say, three tones from light to dark — and the whole thing looks deliberately put-together rather than assembled from last week’s recycling bin.
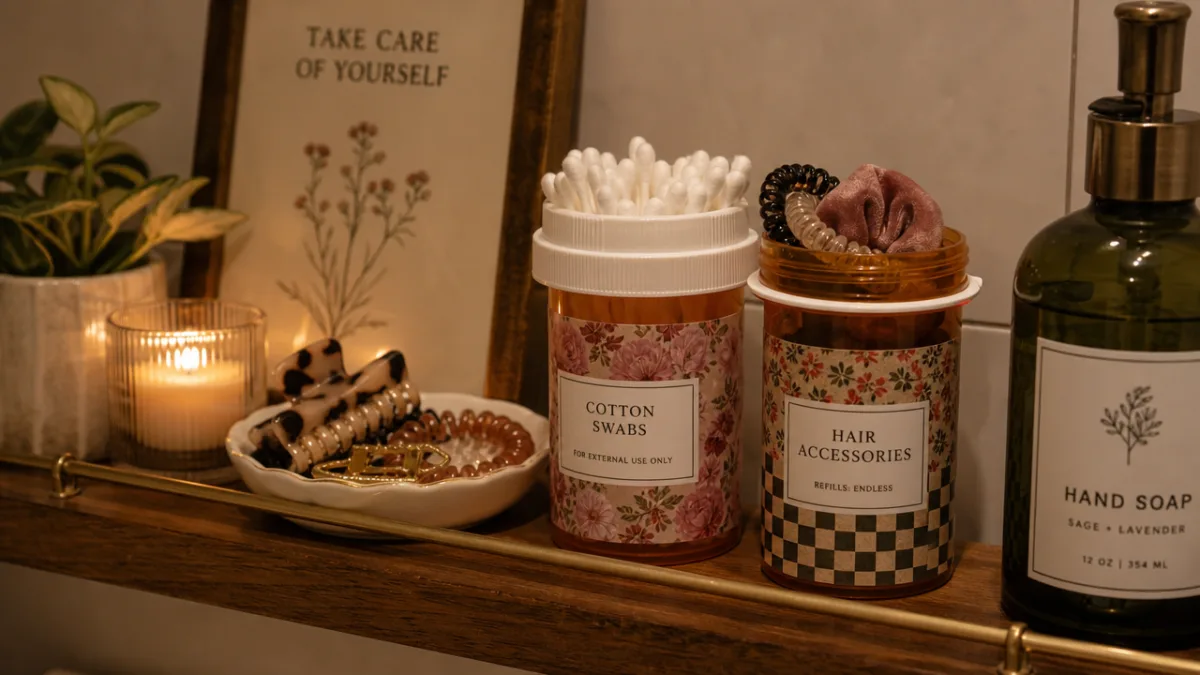
The bathroom is where prescription bottles really come into their own. Cleaned-up medicine bottles are the perfect size for cotton swabs, bobby pins, hair ties, small makeup brushes, and nail care tools. Line a collection of them up on a small wooden tray or inside a shallow repurposed box and you’ve got a tidy toiletry station that actually looks nice on a bathroom counter. And since these containers are already designed to seal tightly when capped, they’re also great for anything that needs to stay dry — bath salts, loose leaf tea, or small pieces of jewelry.
In the kitchen, tin cans can pull double duty in both practical and decorative ways. Large coffee cans work beautifully on the counter near the stove for holding wooden spoons, spatulas, and whisks. Smaller cans are great as herb planters on a sunny windowsill — punch a few drainage holes in the bottom, add some potting mix, and plant whatever herbs you actually cook with. You can also mount a row of cans on a wooden board hung on the wall to create a vertical herb garden or a spice rack that doubles as a piece of living wall art.
Kids’ rooms and craft spaces are especially well-suited to these kinds of organizers, and involving children in the decorating process makes the whole thing more fun. Let them finger-paint the cans, press handprints into wet paint, or go to town with stickers and sequins — the resulting organizers carry real sentimental value alongside their practical function. Use larger cans for crayons and markers, medium ones for scissors and glue sticks, and small prescription bottles for paper clips, erasers, and tiny game pieces. Everything gets sorted and stays visible without having to invest in a purpose-built storage system.
Mounting and Displaying Your Organizers for Maximum Impact
How you display your finished organizers can take the whole project from “fun craft” to “intentional design choice.” A wall-mounted display is one of the most popular options because it frees up surface space while turning your organizers into a functional installation. Attach small pipe clamps to a length of reclaimed wood or a painted plank, slide your decorated cans into the clamps, and you’ve got something that reads as both industrial and warm at the same time. This works really well in kitchens, home offices, and craft rooms where wall space tends to be more available than counter space.
Magnetic mounting is a clever alternative, especially in spaces where you’d rather not drill into walls — think inside cabinet doors, on the fridge, or on a metal pegboard. Hot-glue a strong neodymium magnet to the back of each can, and the organizer becomes fully movable and repositionable without leaving any marks. This is particularly handy in rental apartments where wall damage is a concern, and it also means you can rearrange things whenever the mood strikes without any commitment.
For a freestanding setup that works on shelves, windowsills, or mantels, try grouping your organizers on a tray or a small wooden pallet. The tray acts as a visual anchor that ties the collection together and makes it easy to lift the whole display as a unit when you’re cleaning or rearranging. Play with height by setting some cans on small risers — a stack of books, an upturned bowl, or a few wooden blocks — to create a more dynamic arrangement that gives the eye somewhere to travel.
Tips for Longevity and Maintaining Your Upcycled Creations
Rust is the main thing to watch out for with tin can organizers, especially if they’re living in a bathroom or out on a patio. The best way to head it off is to seal everything thoroughly while you’re still making it. Once your decoration is dry, apply two or three coats of a clear outdoor-grade varnish or waterproof Mod Podge, letting each coat dry completely before adding the next. Give extra attention to the interior of the can and the top rim — those are the spots most likely to come in contact with moisture from damp brushes, bathroom steam, or the occasional splash.
If your organizers are going somewhere particularly damp, it’s worth placing a small piece of felt or a rubber furniture pad at the bottom interior of each can. It elevates whatever you’re storing just enough to keep things away from any moisture that pools at the base. For prescription bottles in bathrooms, dry them out between uses and store them with the lids off when you can, so any trapped moisture has a chance to evaporate. These are small habits, but they make a real difference in how long your containers look good.
Every once in a while, it’s worth giving your organizers a refresh. Because the base materials cost nothing, repainting or rewrapping a can that’s looking a bit tired doesn’t feel wasteful at all — it just feels like part of the process. Think of your upcycled organizers as things that can evolve alongside your taste. A can that was once wrapped in burlap for a rustic look can be stripped back, painted terracotta, and wrapped in leather for something warmer and more bohemian when your style shifts. That kind of adaptability is one of the best things about working with such simple, forgiving materials.
One last thing: photograph your work before it goes into use. A well-lit photo of your finished organizer set gives you something to look back on, and it’s also a great way to share your ideas with friends or online communities who might be inspired to try something similar. These projects contribute to a broader culture of creativity and sustainability that genuinely benefits people, and sharing them is part of that. Your tin can organizer isn’t just a storage solution — it’s a small act of imagination made real, and that’s always worth marking.
“`








What do you think?
It is nice to know your opinion. Leave a comment.