










DIY Aesthetic Study Desk Organizer from Cardboard: Your Complete Guide to a Beautiful, Budget-Friendly Workspace
There is something deeply satisfying about sitting down at a desk that feels entirely your own — organized, beautiful, and built with your own two hands. If you have been scrolling through Pinterest dreaming of a perfectly curated study space but hesitating because of the cost, this guide is exactly what you need. Creating a stunning desk organizer from cardboard is one of the most rewarding DIY projects you can undertake, combining sustainability, creativity, and practicality into a single afternoon of crafting joy. The best part? Most of what you need is already waiting in your recycling bin.
Cardboard has quietly become one of the most beloved materials in the DIY and aesthetic crafting community, and for excellent reason. It is lightweight yet surprisingly sturdy when layered and reinforced correctly. It cuts cleanly with basic tools, accepts paint and decorative paper beautifully, and costs absolutely nothing when repurposed from delivery boxes or packaging. More and more students, remote workers, and creative individuals are discovering that some of the most photogenic, Pinterest-worthy desk setups in existence were built not from expensive store-bought organizers, but from humble corrugated cardboard transformed through vision and effort.
This comprehensive guide will walk you through every stage of building your own aesthetic cardboard desk organizer, from gathering your materials and planning your layout to decorating your finished creation and styling it on your desk. Whether your personal aesthetic leans toward soft cottagecore neutrals, clean dark academia vibes, pastel kawaii, or crisp modern minimalism, the techniques here are fully adaptable. By the end of this article, you will have everything you need to build a functional, gorgeous organizer that looks like it came straight from a boutique stationery shop — at essentially zero cost.
Understanding the Aesthetic: Finding Your Desk’s Personal Style
Before you cut a single piece of cardboard, the most important step is defining the aesthetic direction you want your organizer — and by extension, your entire desk — to embody. Aesthetic is not a superficial concern; it directly influences your focus, creativity, and enjoyment of your study or work space. Research in environmental psychology consistently shows that people perform better in environments they find visually pleasing and personally meaningful. Choosing an aesthetic for your organizer is therefore both an artistic and a practical decision that will pay dividends every time you sit down to work or study.
The most popular desk aesthetics circulating on Pinterest right now include dark academia, which favors deep browns, forest greens, aged textures, and vintage printed papers; soft study, which uses cream, blush, and sage tones with delicate floral or cloud motifs; minimalist neutral, relying on white, beige, and natural kraft textures for a clean Scandinavian feel; and maximalist colorful, which embraces bold colors, stickers, washi tape, and playful shapes. Spend some time before starting your project pinning images that genuinely excite you, then identify the colors, textures, and shapes that appear most frequently. That recurring visual language is your aesthetic foundation.
Once you have identified your aesthetic direction, translate it into a concrete list of colors and materials. For example, a dark academia organizer might call for a base coat of deep forest green paint, followed by decoupage with pages from an old paperback novel, finished with gold metallic detail. A minimalist organizer might stay unpainted in natural kraft, sealed with matte varnish, and adorned only with a single sprig of dried lavender tucked into a pen holder. Writing these choices down before you begin keeps your creative process focused and prevents the common DIY pitfall of starting enthusiastically then losing direction midway through.
Gathering Your Materials: Everything You Need to Get Started
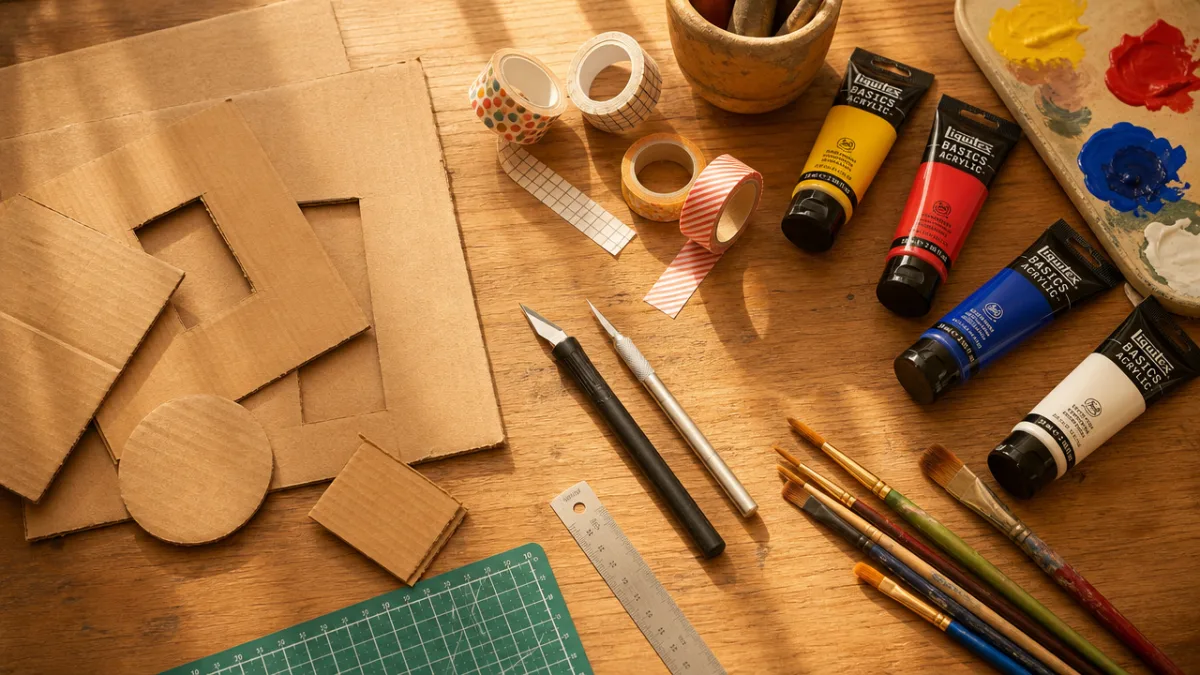
One of the greatest appeals of this project is the minimal investment required. The primary material — cardboard — should ideally come from double-walled corrugated boxes, the kind used for shipping heavy items like appliances or book orders. Double-walled cardboard is significantly stronger than single-ply packaging and will give your finished organizer the structural integrity to hold books, bottles, and heavy stationery without buckling over time. Gather several boxes of different sizes so you have plenty of material to work with, and do not discard any pieces; even small offcuts are useful for reinforcing joints and creating decorative details.
Beyond cardboard itself, you will need a selection of tools and finishing supplies. For cutting, a sharp craft knife or box cutter is essential — dull blades tear cardboard rather than cutting cleanly, leaving ragged edges that are difficult to finish neatly. A metal ruler and a self-healing cutting mat protect your work surface and ensure straight, accurate cuts. For adhesion, a hot glue gun provides fast, strong bonds ideal for structural assembly, while PVA glue (white school glue) is perfect for decoupage and surface finishing. Having both on hand gives you flexibility throughout the build process.
For decoration, your shopping list will depend on your chosen aesthetic, but some universally useful supplies include the following:
- Acrylic paint in your chosen color palette (two to three colors is usually sufficient)
- Decorative paper, such as scrapbooking sheets, newspaper, vintage book pages, or wrapping paper
- Washi tape in coordinating patterns for quick, no-mess decoration
- Mod Podge or diluted PVA glue for decoupage sealing
- A set of flat and round paintbrushes in various sizes
- Sandpaper (medium grit) for smoothing cut edges before painting
- Optional: gold or silver metallic paint, rubber stamps, stickers, or dried flowers for embellishment
Do not overlook the value of spending thirty minutes thoroughly organizing your workspace before you begin. Lay out all your materials, fill your hot glue gun and let it warm up, prepare small containers of paint, and cut a stack of cardboard into rough-sized pieces before you start precise cutting. This preparation phase prevents the frustrating mid-project scramble for supplies and keeps your creative momentum flowing uninterrupted from start to finish.
Designing and Building Your Organizer: A Step-by-Step Construction Guide
The design phase is where your project takes shape as a real, functional object, and it deserves careful attention before any cutting begins. Start by measuring your desk and the items you want to organize. Place your most frequently used items — pens, scissors, rulers, sticky notes, your phone, perhaps a small potted plant — on your desk and observe how much space they occupy and how you naturally reach for them. This real-world observation will guide you toward an organizer design that actually fits your workflow, rather than one that looks beautiful in photos but proves impractical in daily use.
A well-rounded beginner organizer typically consists of several modular components that are built separately and then assembled together. Consider including a tall central section for rulers and scissors, two or three medium cylindrical or rectangular pen cups of varying heights for visual interest, a flat tray section for loose papers or your phone, and a small divided compartment for paper clips, erasers, and tiny supplies. Sketching this layout on paper before building helps you visualize proportions and catch design problems before you have invested time cutting cardboard. Even a rough pencil sketch is enormously valuable at this stage.
To construct each component, cut multiple identical cardboard panels using your craft knife and metal ruler, then layer them together with hot glue to achieve the desired wall thickness — three to four layers is generally ideal for sturdy walls. Cut identical top and bottom panels and glue them in place to close each section. For cylindrical components, score the cardboard lightly at close intervals along its length, bend it gently into a curve, and use hot glue to secure the cylinder shape before gluing on circular top and bottom caps. Reinforce every interior joint with a thin strip of extra cardboard glued across the seam; this simple technique dramatically increases the structural strength of your organizer.
Once all individual components are built and the glue has fully cured — allow at least thirty minutes — arrange them on your desk in different configurations until you find a layout that feels both functional and visually pleasing. Then glue the components together permanently, pressing each joint firmly for at least sixty seconds while the hot glue sets. If any gaps appear between components, fill them with a thin rolled strip of cardboard pressed into the gap and sealed with PVA glue. Sand all exterior surfaces lightly with medium-grit sandpaper to smooth any rough edges or protruding glue strings before moving on to decoration.
Decorating Your Organizer: Bringing Your Aesthetic to Life
This is the stage most people look forward to most, and rightly so — decoration transforms a structurally sound but plain cardboard construction into a genuinely beautiful object. Begin with a base coat of paint applied generously over all exterior surfaces. Acrylic paint works best on cardboard because it dries quickly, adheres well, and is available in an extraordinary range of colors. Apply two full coats, allowing complete drying time between coats, to achieve an even, opaque coverage that conceals the cardboard texture and provides a clean ground for further decoration. A foam roller rather than a brush creates a smoother finish on large flat surfaces.
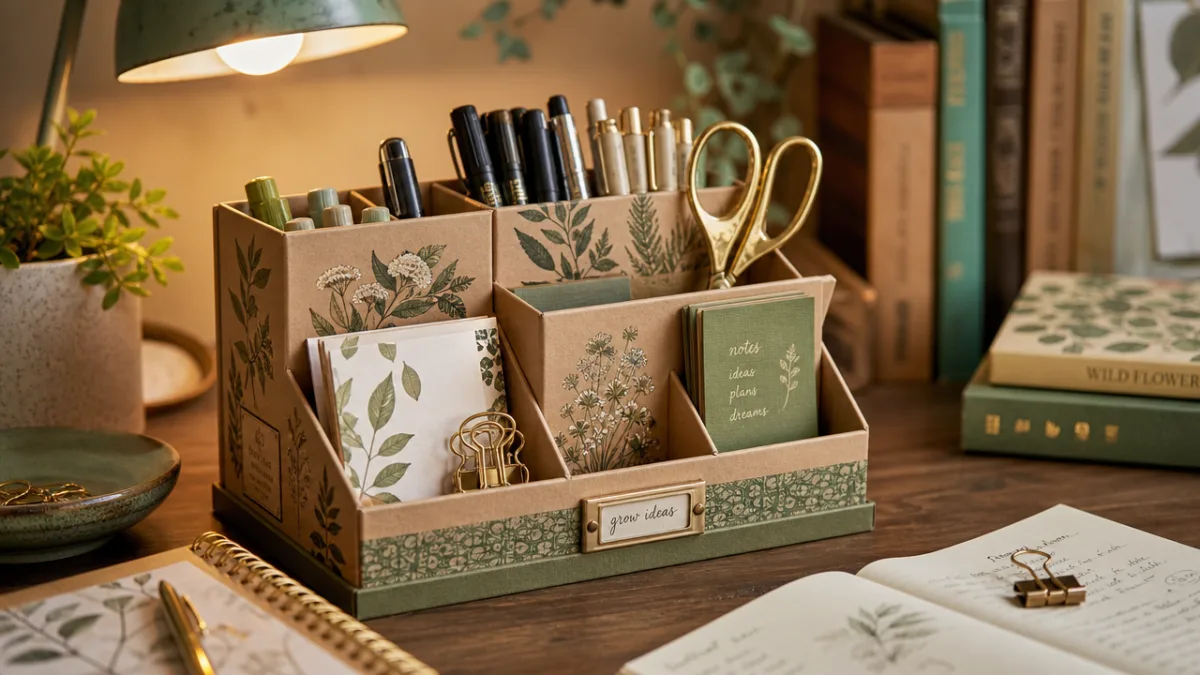
Decoupage — the technique of gluing decorative paper to a surface and sealing it with varnish — is perhaps the single most effective technique for achieving an aesthetic, editorial look on your cardboard organizer. Tear or cut your chosen decorative paper into irregular pieces roughly the size of a playing card, brush a generous layer of diluted PVA glue onto the surface, press the paper pieces down overlapping slightly, then brush another coat of glue over the top. Wrinkles and bubbles will largely disappear as the glue dries. For a dark academia look, vintage novel pages create an astonishing effect; for a soft study aesthetic, pages from a floral calendar or botanical illustration book are stunning.
Once your base decoration is dry and sealed, add detail layers that create visual depth and personality. Consider these finishing techniques depending on your aesthetic direction:
- Gold leafing or metallic paint: Apply gold metallic paint to raised edges, rims of pen holders, or as thin stripe details using a fine liner brush for an instantly luxurious result.
- Washi tape borders: Run washi tape along the top rim of each component for a clean, colorful finishing line that also protects the raw cardboard edge from wear.
- Rubber stamp patterns: Use ink stamps to print repeating patterns — stars, moons, tiny botanicals, or geometric shapes — across plain painted sections for texture and visual interest.
- Dried flower accents: Glue tiny sprigs of dried lavender, baby’s breath, or pressed leaves onto the surface using a dot of PVA glue for an organic, cottagecore feel.
- Sticker layering: For a maximalist or kawaii aesthetic, layer stickers of varying sizes across surfaces, then seal everything with a coat of Mod Podge to prevent peeling.
Sealing your finished decoration is a critical final step that many beginners skip, only to regret it later. Apply two generous coats of Mod Podge or clear acrylic varnish in your preferred finish — matte for a soft, sophisticated look; gloss for vibrant, high-impact color; or satin for a balanced, natural appearance. This protective layer prevents paint from chipping, paper from lifting, and keeps your organizer looking fresh through months of daily handling. Allow a full twenty-four hours of curing time before placing items inside or setting the organizer on your desk.
Styling Your Finished Organizer: Creating a Desk That Feels Like Yours
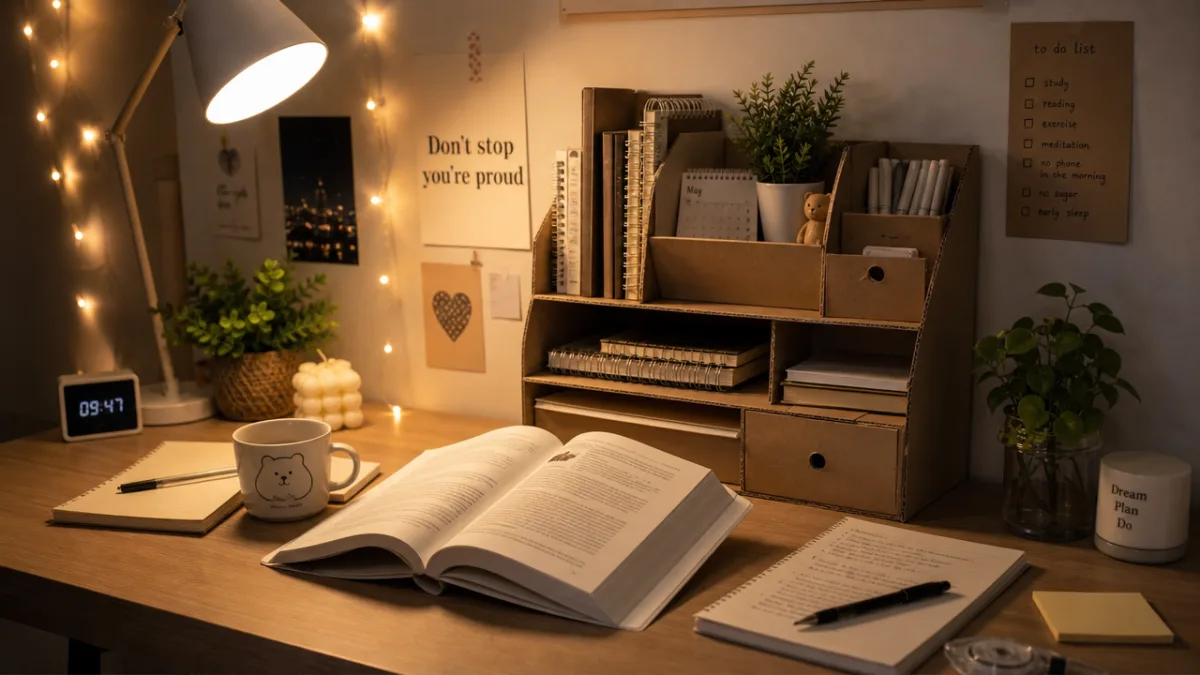
A beautifully made organizer deserves a thoughtfully styled desk to live on, and the good news is that great desk styling follows a small number of reliable principles that anyone can apply. The first is the principle of intentional grouping: objects arranged in deliberate clusters feel curated and calm, while randomly scattered items create visual noise that undermines even the most beautifully made organizer. Place your new organizer slightly off-center on your desk, then build a loose grouping around it using a small plant, a candle, a framed photo or art print, and one or two books displayed with their spines facing outward.
Height variation is the second essential principle of aesthetic desk styling. A flat, uniform surface where every object is roughly the same height looks static and uninspiring regardless of how beautiful the individual pieces are. Use a small stack of books, a wooden riser, or even a second smaller cardboard creation to elevate certain elements and create a pleasing visual rhythm of high, medium, and low points across your desk surface. Your organizer itself already contributes to this by having components of varying heights — lean into that by placing taller items like your lamp or a trailing plant at the back, and keeping the area immediately in front of your screen lower and more open.
Lighting transforms a desk from simply functional to genuinely atmospheric, and it is the element most often overlooked in desk styling. A small LED desk lamp with a warm (not cool) color temperature makes every surface look richer and more inviting. String lights woven around the back of your monitor or along a shelf above your desk add softness and a dreamy quality that photographs beautifully and genuinely makes long study sessions feel more pleasant. If you work in a space with natural light, position your desk to receive it from the side rather than directly behind your screen, which creates glare, or directly in front, which creates shadows on your work.
Maintaining the aesthetic appeal of your desk over time requires building a few small habits. Spend five minutes at the end of each study session returning items to their designated places in your organizer — pens back in the pen holder, papers filed away, stray clips back in their compartment. This small ritual keeps your desk looking intentional rather than chaotic and makes starting your next session far more psychologically appealing. Consider taking a photograph of your perfectly styled desk so you have a reference to return to when things inevitably drift out of place during busy periods.
Sustainability, Customization, and Taking Your Skills Further
One of the most meaningful dimensions of this project is its environmental impact — or rather, its refreshing lack of one. Every piece of cardboard you repurpose into a desk organizer is a piece of cardboard that does not go into the recycling stream, which, despite good intentions, is an energy-intensive process. When you create something beautiful and durable from material that would otherwise be discarded, you are participating in what sustainability advocates call the circular economy: keeping materials in productive use for as long as possible before they are eventually recycled or composted. This is not a small thing, and it is worth feeling genuinely proud of.
As your cardboard crafting skills develop, the range of desk accessories you can create expands enormously. Once you are confident with basic box construction and decoupage finishing, consider tackling a coordinating letter tray built from layered cardboard panels, a small desktop file holder with dividers, a monitor riser with built-in storage compartments underneath, or even a small decorative shelf mounted above your desk. Each of these projects uses the same fundamental techniques you have learned building your organizer, and making a full matching set of desk accessories in a cohesive aesthetic is one of the most satisfying achievements in the DIY space.
The cardboard crafting community online is vast, generous, and constantly producing new ideas and techniques worth exploring. Beyond Pinterest, platforms like YouTube and Instagram are home to incredibly skilled creators who share detailed tutorials on advanced techniques including cardboard furniture construction, sculptural wall art, storage systems, and architectural miniatures. Engaging with this community — leaving comments, sharing your own finished projects, asking questions — is both motivating and educational. Many makers report that sharing their work publicly, even to a small audience, significantly deepens their commitment to improving their skills and completing projects they might otherwise have abandoned.
Finally, remember that the value of this project extends beyond the physical object you create. The hours you spend planning, building, and decorating your organizer are hours spent in a focused, creative, meditative state that is increasingly rare in a screen-saturated world. Working with your hands produces a particular kind of satisfaction — what psychologists call the IKEA effect — where objects we have created ourselves feel more valuable and meaningful than identical objects we could simply purchase. Every time you reach for a pen from your handmade organizer, or glance across your beautifully styled desk, you will feel a small but genuine sense of accomplishment. That feeling, accumulating quietly over months and years, is one of the best reasons to make things yourself.








What do you think?
It is nice to know your opinion. Leave a comment.