










DIY Santa and Snowman Christmas Ornaments: A Complete Guide to Handcrafted Holiday Magic
The Timeless Appeal of Handmade Christmas Ornaments
There is something deeply special about hanging a handmade ornament on the Christmas tree. Unlike store-bought decorations that come and go with seasonal trends, a DIY ornament carries the weight of memory and personal effort. When you craft a Santa or snowman ornament with your own hands, you are not simply making a decoration — you are creating a tiny artifact of the holiday season that can be passed down through generations and admired for years to come.
Santa Claus and snowmen are arguably the two most iconic figures of the Christmas season, each carrying their own rich symbolism. Santa represents generosity, wonder, and the magic of giving, while the snowman embodies the playful, wintry spirit of the holidays. Combining both into a set of handmade ornaments gives your tree a cohesive, festive look that feels both classic and uniquely personal. Whether you are a seasoned crafter or picking up a hot glue gun for the first time, these projects are accessible and deeply rewarding.
Handmade ornaments also make extraordinary gifts. Imagine presenting a friend or family member with a carefully crafted Santa or snowman ornament that you spent time and love creating. The gesture speaks volumes about your appreciation for them. Many people find that once they start making ornaments by hand, they cannot stop — the creative satisfaction is addictive, and every tree tells a different story through the decorations hanging from its branches.
Why These Two Characters Work So Well Together
Santa and snowmen share a visual language that makes them natural companions on any Christmas tree. Both figures are traditionally round and jolly, often depicted with cheerful expressions and warm, festive colors — reds, whites, and blacks dominate both characters’ palettes. When placed side by side on a tree, ornaments featuring these two beloved figures create a harmonious visual rhythm that draws the eye and evokes feelings of warmth and nostalgia.
From a crafting standpoint, Santa and snowman ornaments also share many of the same construction techniques and materials. Both can be built from foam balls, clay, wood slices, salt dough, or even recycled materials. This overlap means that once you master the skills and gather the supplies for one character, you are already more than halfway prepared to craft the other. This makes the project doubly efficient and twice as fun, especially when working on a batch of ornaments to gift or display.
Creatively, the two figures offer wonderful opportunities for personalization and artistic interpretation. A snowman can become a whimsical winter wizard or a tiny baseball fan in a scarf and team cap. Santa can be rendered in traditional red and gold or reimagined in a modern, minimalist style. The characters are familiar enough to be instantly recognizable, yet flexible enough to accommodate endless creative variations that reflect your personal aesthetic and sense of humor.
Materials and Tools You Will Need
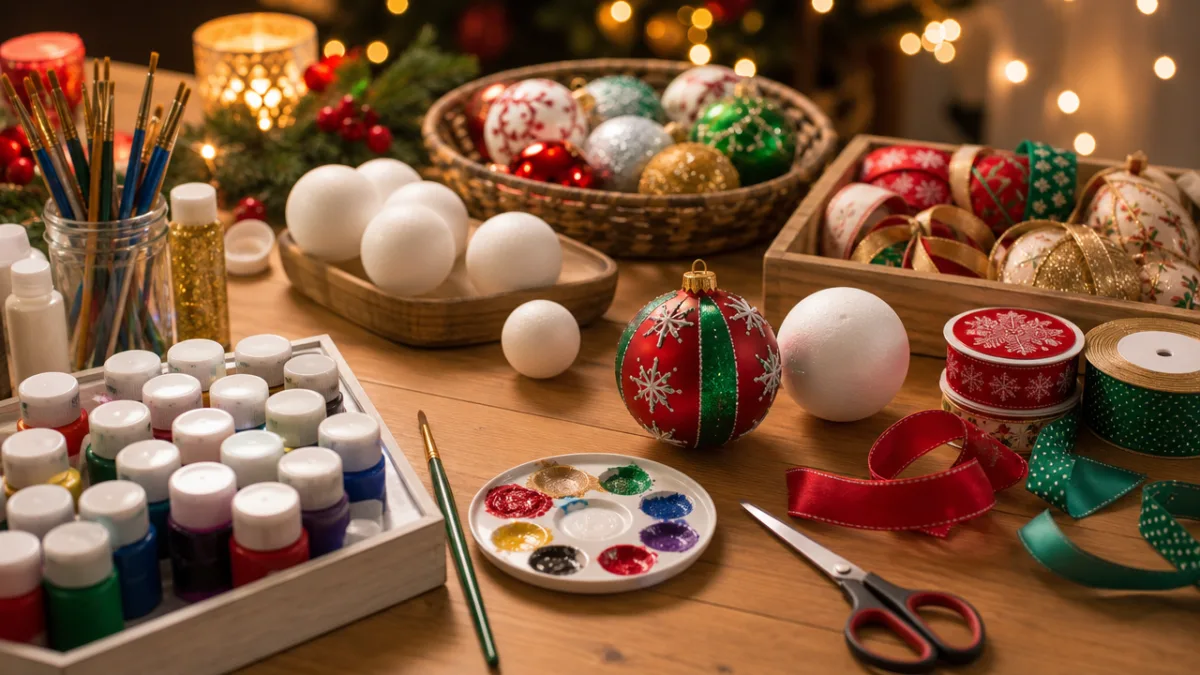
Gathering the right materials before you begin is one of the most important steps in any successful craft project. For Santa and snowman ornaments, you have a wide range of options depending on your preferred style and budget. The most commonly used base materials include styrofoam balls in various sizes, air-dry clay, wooden balls or discs, felt sheets, and salt dough. Each base material produces a slightly different look and texture, so consider which finish appeals to you most before heading to the craft store.
Paint is another crucial supply, and the quality of your paint will significantly affect the finished product. Acrylic craft paints are ideal for most ornament projects because they adhere well to a variety of surfaces, dry quickly, and come in an enormous range of colors. For Santa, you will definitely need bright red, white, peach or tan for skin tones, black, and a touch of gold or yellow for belt buckles and trim details. For snowmen, white is obviously essential, but do not overlook shades of orange for the carrot nose, black for buttons and eyes, and warm earth tones for hats and scarves.
Beyond paint and base materials, a well-stocked crafting toolkit will make the process much smoother and more enjoyable. Consider assembling the following supplies before you begin:
- Hot glue gun and plenty of glue sticks for attaching embellishments and securing components
- Fine-tipped paintbrushes in multiple sizes for detail work and broad coverage
- Foam brushes for smooth, even base coats on larger surfaces
- Ribbon, twine, or wire for creating ornament hangers
- Assorted small embellishments such as miniature buttons, googly eyes, tiny bells, and faux gemstones
- Scissors and craft knife for cutting felt, foam, and other materials with precision
- Sealant or Mod Podge to protect finished ornaments and add a professional-looking finish
Choosing the Right Base for Your Ornaments
The base material you choose will define the overall character and durability of your finished ornament. Styrofoam balls are perhaps the most beginner-friendly option because they are inexpensive, lightweight, and easy to paint and glue. They come in sizes ranging from one inch to several inches in diameter, making them perfect for both compact ornaments that fit neatly on the tree and larger statement pieces that can serve as centerpieces or mantel decorations.
Air-dry clay is a fantastic option for crafters who want a more sculptural, three-dimensional result. With clay, you can model Santa’s iconic hat directly onto the ornament head, sculpt a realistic carrot nose for your snowman, or add textured details like the furry trim on Santa’s coat. Clay ornaments take longer to complete because the material must dry fully before painting, but the result is a heirloom-quality piece that feels substantial and looks impressively detailed. Many crafters prefer clay for this reason alone.
Salt dough is a beloved traditional option that has been used in holiday crafting for generations. Made from just flour, salt, and water, salt dough is inexpensive, non-toxic, and surprisingly versatile. You can cut it into round shapes for flat ornament discs, mold it into three-dimensional figures, or press cookie cutters into it for quick, charming shapes. Salt dough ornaments must be baked in the oven to harden, but once finished and sealed, they are wonderfully durable and carry a rustic, homemade charm that many people find irresistible.
Step-by-Step Instructions for Your Santa Ornament
Creating your Santa ornament begins with preparing your base. If you are working with a styrofoam ball, start by inserting a small loop of wire or ribbon into the top of the ball to create a hanger — do this before painting so you have a handle to hold while working. Apply a base coat of white paint all over the ball and allow it to dry completely. This primer layer helps subsequent colors adhere more evenly and prevents the paint from looking patchy or uneven on the final piece.
Once your base coat is dry, paint the lower two-thirds of the ball in bright red to represent Santa’s suit. Leave the upper portion white or paint it a warm peach or tan color to represent his face and the white fur trim of his hat. Use a fine brush to add Santa’s rosy cheeks with a diluted pink or red paint applied in soft, circular strokes. Eyes can be painted as simple black dots or, for a cuter look, as tiny curved lines suggesting a jolly squint. A tiny red dot or miniature pompom makes a perfect nose.
For Santa’s hat, cut a triangle of red felt and roll it into a cone shape, securing the seam with hot glue. Glue a thin strip of white felt or faux fur around the base of the hat to represent the white trim, then add a tiny white pompom to the tip. Attach the hat to the top of your ornament ball using hot glue, positioning it at a slightly jaunty angle for extra personality. Finish the ornament by using a fine brush to paint or draw a simple black belt across the middle of the red section, add a small square of yellow or gold paint for the buckle, and seal everything with a coat of Mod Podge for protection and a lovely subtle sheen.
Adding Personality and Custom Details to Santa
One of the most enjoyable aspects of making handmade ornaments is the freedom to add personal touches that transform a generic craft project into something uniquely yours. For Santa, consider giving him a tiny pair of wire-framed spectacles made from thin craft wire bent into two small circles and connected at the nose bridge. These miniature glasses add an enormous amount of character and are surprisingly easy to make. Attach them just below the eye area with a small dab of hot glue and watch your Santa come to life.
You can also customize Santa’s color scheme to match your tree’s overall palette. While traditional red and white is always charming, consider a vintage-inspired blue and white Santa for a more unexpected look, or a woodland-themed Santa dressed in earthy greens and browns. These creative variations allow you to make ornaments that feel fresh and original rather than predictable. Adding small details like a miniature sack made from burlap fabric or a tiny list made from a strip of rolled paper adds wonderful storytelling elements to the finished piece.
For families crafting together, consider giving each Santa ornament a name tag or a year label written in metallic paint pen or small adhesive letters. This transforms each ornament into a dated keepsake, allowing you to track your family’s creative journey from year to year. Children especially love seeing their own creativity memorialized in an ornament that gets to come out every December and take its place on the family tree. This tradition of personalization is one of the most powerful arguments for handmade holiday decorations.

Step-by-Step Instructions for Your Snowman Ornament
The snowman ornament follows a similar basic construction process to the Santa, beginning with a prepared base ball and a solid white base coat. For a more dimensional snowman, you can glue two balls of different sizes together — a smaller one on top for the head and a larger one below for the body — creating that classic stacked snowman silhouette. If you prefer to work with a single ball, simply paint the entire surface white and use painted details and embellishments to suggest the snowman’s characteristic round shape.
The snowman’s face is where your personality really gets to shine. Paint two small black circles for the eyes, or use black seed beads attached with a tiny dot of glue for a more three-dimensional look. The iconic carrot nose can be sculpted from a small piece of orange clay or cut from an orange craft foam sheet and rolled into a tiny cone. A row of small black dots descending down the front of the body serves as the snowman’s buttons. For an especially charming touch, use a toothpick to paint tiny eyelashes or a subtle smile that gives your snowman a warm, friendly expression.
No snowman is complete without his accessories, and this is where you can have tremendous fun with fabric scraps and small embellishments. Cut a thin strip of colorful felt or ribbon and tie it around the snowman’s neck to create a scarf, fraying the ends slightly for a realistic textile effect. A small hat made from a bottle cap painted black and trimmed with a miniature ribbon band makes an adorable top hat. You can also glue on tiny twig arms cut from a real dried branch, which adds a delightful naturalistic detail that contrasts beautifully with the smooth, painted ball surface.
Creative Variations on the Classic Snowman Design
Once you have mastered the basic snowman ornament, the possibilities for creative variation are virtually limitless. Consider crafting a snowman family set where each ornament represents a different family member — a tall dad snowman, a slightly smaller mom snowman, and tiny child snowmen in various heights. You can customize each figure with miniature accessories that reflect the real person’s personality and interests, such as a tiny knitted scarf in their favorite team’s colors or a miniature book for the family bookworm.
Themed snowmen are another wonderful way to expand your ornament collection and create conversation pieces. An astronaut snowman wearing a tiny foil space helmet, a chef snowman in a miniature white toque, or a mermaid snowman with a shimmering fabric tail all make memorable and original ornaments that guests will notice and admire. These imaginative variations are especially popular for gifting, as they allow you to tailor each ornament specifically to the recipient’s personality, profession, or passion, turning a simple craft project into a thoughtful and personalized present.
Nature-inspired snowmen using real materials gathered from outdoors can also be incredibly appealing. Incorporating actual small pinecones, dried berries, sprigs of holly, or tiny pieces of birch bark into your snowman ornament creates a beautiful organic quality that factory-made decorations simply cannot replicate. Sealed properly with varnish or Mod Podge, these natural elements preserve beautifully and add wonderful texture and visual interest to the finished ornament. This approach is particularly lovely for a woodland or rustic-themed Christmas tree.
Displaying, Gifting, and Preserving Your Handmade Ornaments
Once your Santa and snowman ornaments are complete and fully sealed, the next step is deciding how and where to display them to maximum effect. On the Christmas tree, handmade ornaments deserve prominent placement where they can be seen and appreciated rather than tucked into the back branches. Hang them at eye level on the outer branches where their details can be admired up close. Group your Santa and snowman ornaments together in one section of the tree for a cohesive vignette, or distribute them evenly to create a recurring decorative motif throughout the tree’s full height.
Beyond the tree, handmade ornaments make beautiful accents in other areas of your home during the holiday season. Arrange a collection of them in a glass bowl or apothecary jar on a side table or bookshelf for an easy and elegant centerpiece. String several together on a length of rustic twine and hang them in a window or across a mantel. Individual ornaments can also be tied to wrapped gifts as decorative package toppers that serve double duty as both wrapping accent and additional present. These uses allow you to display more ornaments than your tree can accommodate and fill your entire home with handmade holiday charm.
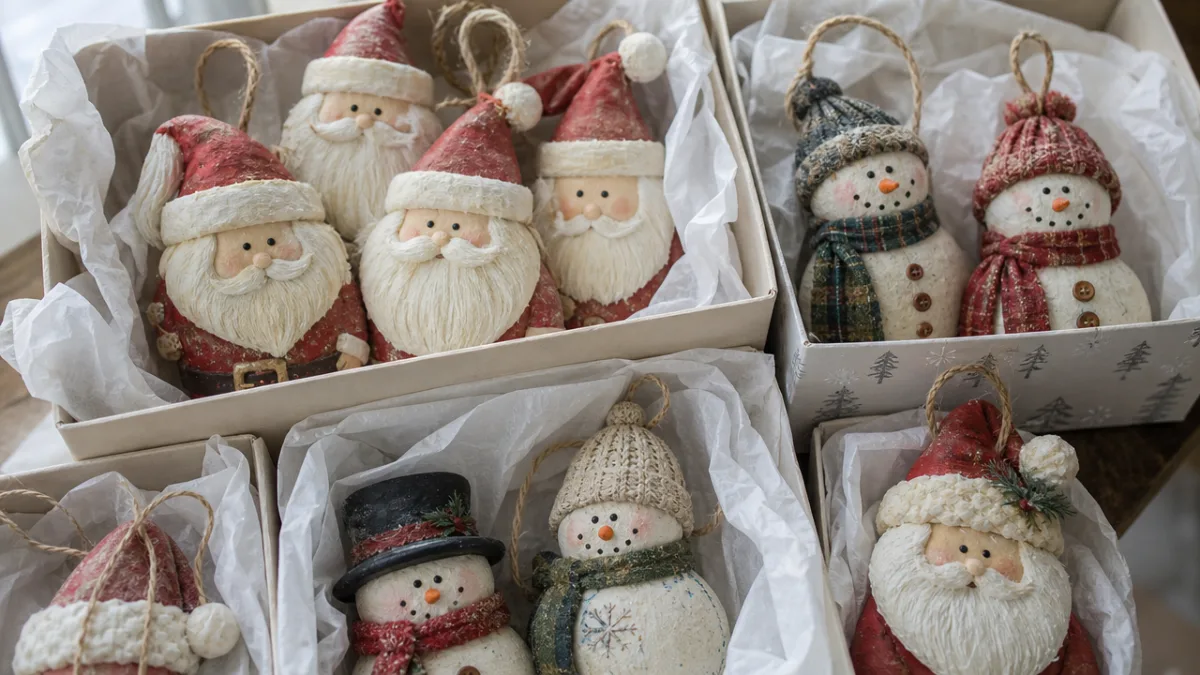
For gifting, packaging matters almost as much as the ornament itself. Place each handmade ornament in a small clear cellophane bag tied with a satin ribbon, or nestle it inside a small gift box lined with tissue paper. Include a handwritten note explaining that the ornament was made by hand, and perhaps share a few words about the materials used or the time you spent on it. Recipients who understand the effort involved in handmade gifts invariably treasure them far more deeply than they would a mass-produced alternative.
Long-Term Storage and Care for Handmade Ornaments
Proper storage is essential to ensuring that your handmade ornaments survive from season to season in good condition. Unlike commercial ornaments that come in standard-sized boxes, handmade pieces can be irregular in shape and especially fragile in certain areas — Santa’s hat or a snowman’s outstretched twig arms, for instance. The best approach is to wrap each ornament individually in acid-free tissue paper or soft bubble wrap before placing them in a storage container. Label each package on the outside if possible so you can retrieve specific ornaments without unwrapping everything.
Dedicated ornament storage boxes with individual compartments are commercially available and work wonderfully for protecting handmade pieces. Alternatively, you can repurpose egg cartons, berry containers, or divided wine boxes to create custom storage solutions at no extra cost. Store your ornaments in a cool, dry location away from extreme temperature fluctuations, which can cause materials to expand and contract over time, leading to cracking or separation of glued components. A climate-controlled closet or interior shelf is far preferable to an attic or garage where temperatures swing dramatically between seasons.
Touching up your ornaments annually before hanging them is a small but worthwhile ritual that keeps them looking their best year after year. Before decorating the tree each December, unwrap your ornaments and inspect them for any paint chips, loose embellishments, or cracked surfaces. A small tube of craft paint and a glue gun kept with your ornament storage box means you can make quick repairs as needed. With proper care, a well-made handmade ornament can last for decades, becoming one of those beloved objects that children remember from their childhood and eventually pass on to their own families — a true legacy of holiday creativity and love.








What do you think?
It is nice to know your opinion. Leave a comment.