










DIY Recycled Paper Bag Bubble Mailers: A Complete Guide to Eco-Friendly Packaging
Why Recycled Paper Bag Bubble Mailers Are Worth Making
In a world drowning in single-use plastic packaging, finding creative and sustainable alternatives has never been more important. DIY recycled paper bag bubble mailers offer a brilliant solution that combines environmental responsibility with genuine practicality. By repurposing materials you likely already have at home — grocery bags, kraft paper, and salvaged bubble wrap — you can create protective mailers that work just as well as their store-bought counterparts, at a fraction of the cost and with none of the plastic waste.
The environmental case for making your own mailers is compelling. Traditional poly bubble mailers are made from low-density polyethylene, a plastic that resists decomposition for hundreds of years. Even recycling programs rarely accept them, meaning the vast majority end up in landfills or worse, in the ocean. When you substitute repurposed paper bags as the outer shell, you instantly transform a packaging problem into a packaging solution. Paper decomposes in weeks rather than centuries, and if your recipient composts, the outer layer can go straight into the bin.
Beyond the environmental benefits, there’s a deeply satisfying craft element to this project. Creating something functional from materials destined for the recycling bin gives a sense of accomplishment that buying a box of pre-made mailers simply cannot match. Many small business owners and Etsy sellers have embraced homemade paper mailers as part of their brand story, charming customers with packaging that communicates care, intentionality, and values. Even if you’re just mailing a birthday gift to a friend, the handmade quality adds warmth and personality to every package you send.
Materials You Will Need
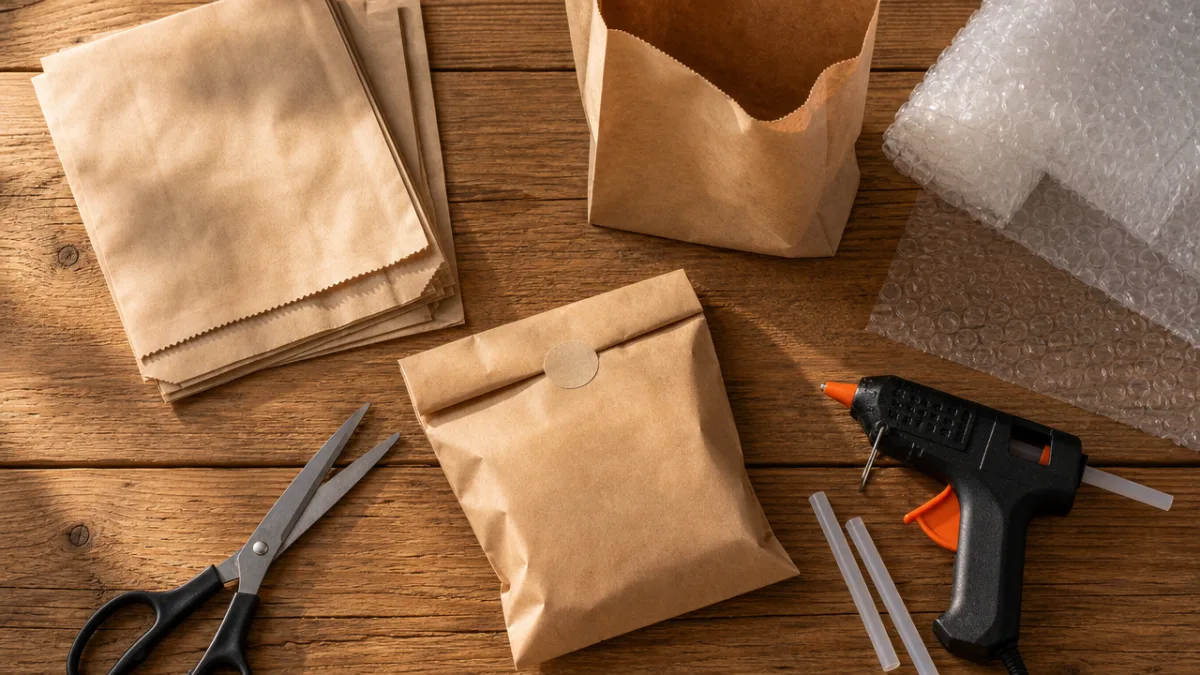
Gathering your supplies is perhaps the most enjoyable part of this project, because the goal is to use as much existing material as possible rather than purchasing anything new. Start by collecting large paper grocery bags — the kind with flat bottoms and sturdy sides. These bags are ideal because the paper is thick enough to withstand the rigors of shipping, yet flexible enough to fold and seal cleanly. Bags from hardware stores, clothing retailers, or specialty food shops tend to have especially high-quality paper and make excellent mailer stock.
You will also need bubble wrap, and here the recycling element really shines. Save every piece of bubble wrap that comes in deliveries to your home. Rolls of it come with appliances, electronics, online orders, and gifts — most of it gets thrown away immediately, but it’s perfectly reusable for this project. The bubble wrap serves as the interior cushioning layer, protecting whatever item you’re mailing from impacts and vibration during transit. Old packing peanuts, crumpled newspaper, or even shredded junk mail can supplement or replace bubble wrap if you don’t have enough on hand.
For adhesives, a hot glue gun is the most efficient option and creates a strong, lasting bond between layers. However, a strong craft glue or even double-sided tape can work for lighter mailers. You’ll also want scissors or a craft knife with a cutting mat, a ruler, and a bone folder or butter knife to create crisp, clean folds. For sealing the finished mailer once it’s packed, packing tape or a strip of kraft tape applied along the open edge works beautifully. Optionally, stamps, stickers, or a rubber stamp with your address can personalize the finished product.
- Large paper grocery or retail bags (at least 2 per mailer for smaller items)
- Saved bubble wrap from previous deliveries, any size bubbles
- Hot glue gun and plenty of glue sticks
- Scissors and a craft knife with a cutting mat
- Ruler and pencil for measuring and marking
- Bone folder or a blunt knife for crisp folding
- Packing tape or kraft tape for final sealing
- Optional: rubber stamps, twine, or kraft labels for decoration
Step-by-Step Instructions for Making Your Mailer
Begin by cutting open your paper grocery bags along the seams to create flat sheets of paper. Remove the bottom panel by cutting along the fold line, as this portion can be awkward to work with. You should now have several large, flat rectangles of kraft paper. Decide on the size of mailer you want to create based on what you plan to ship. A standard small mailer works well at roughly 6 by 9 inches, while a medium mailer might be 9 by 12 inches. Use your ruler and pencil to mark the dimensions on the paper, then cut two identical rectangles — one for the front and one for the back.
Next, cut a piece of bubble wrap that is slightly smaller than your paper rectangles — about half an inch smaller on all sides. This margin allows you to glue the paper edges together cleanly without the bubble wrap interfering with the seam. Lay one paper rectangle face-down on your work surface, then center the bubble wrap on top of it with the bubble side facing up, so the bubbles will cradle your item rather than pressing flat against the outer paper layer. Run a thin bead of hot glue around the very edges of the paper, then press the second paper rectangle face-up on top, sandwiching the bubble wrap in the middle. Press firmly along all edges and allow to cool completely.
Once the glue has set, you’ll have a flat padded sheet. Fold this sheet in half so that the two short ends meet, creating the pocket of your mailer. Seal the two long sides with hot glue or packing tape, pressing firmly to ensure a tight seal that won’t burst open during shipping. Leave one short end open — this is where you’ll insert your item. When you’re ready to send the package, slide in your item, fold the open end over at least twice to create a secure flap, and seal it with packing tape. For extra security on heavier items, run a strip of tape along the sealed sides as well.
- Cut open paper bags along seams and flatten into large sheets.
- Mark and cut two identically sized paper rectangles for your desired mailer dimensions.
- Cut a bubble wrap piece slightly smaller than the paper on all sides.
- Layer: paper face-down, bubble wrap bubble-side up, second paper face-up on top.
- Glue around all edges to sandwich the bubble wrap between the paper layers.
- Allow the glue to cool fully, then fold the sheet in half to form a pocket.
- Seal both long sides with hot glue or strong tape, leaving one short end open.
- Insert your item, fold the open end over twice, and seal with packing tape.
Tips for Stronger, More Professional-Looking Results
The difference between a mailer that looks homemade in a charming way and one that looks sloppy and unreliable often comes down to a few simple techniques. First and most importantly, always score your folds before making them. Use a ruler and your bone folder — or even a butter knife — to run firmly along the line where you intend to fold. This breaks down the paper fibers in a controlled line, resulting in a crisp, flat fold that lies perfectly flat rather than buckling or tearing. Clean folds make your mailer look neat and also ensure that the sealed edges sit flush, creating a stronger bond when glued.
When applying hot glue, work in small sections rather than trying to run a bead along the entire edge at once. Hot glue cools and sets within seconds, so if you apply too much at once, you may find that parts of the seam haven’t bonded properly by the time you press the layers together. A zig-zag pattern of glue rather than a straight line can also increase surface contact and create a more robust seal. After pressing the layers together, run your fingertip firmly along the seam to push out any gaps. For critical seams on heavier-duty mailers, apply a strip of packing tape over the glued edge as a backup measure.
If you want a more polished appearance, consider sanding or lightly dampening the outer surface of the paper bag before you begin, which can remove any existing print or branding from the bag. Alternatively, embrace the printed graphics as part of the aesthetic — many handmade sellers love the visible texture and markings of recycled bags, as it signals sustainability clearly and beautifully. You can also glue a second layer of plain kraft paper over the outside surface to give the mailer a cleaner, more uniform look while still using completely recycled materials for the inner layers.
For items that require extra protection, don’t hesitate to double up on the bubble wrap layer. Simply cut two pieces of bubble wrap instead of one and stack them with the bubbles facing the same direction before sandwiching them in the paper. This is especially important for fragile ceramics, glass, or electronics. You can also add a layer of corrugated cardboard salvaged from cereal boxes or shipping boxes between the bubble wrap layers for rigid support, which prevents the mailer from being bent or folded during transit — a common hazard for flat, lightweight packages.

Customizing and Decorating Your Mailers
One of the most delightful aspects of making your own mailers is the opportunity to personalize them in ways that factory-made packaging simply cannot offer. Even a simple rubber stamp — your name, a small botanical illustration, or a phrase like “made with love” or “packed sustainably” — can transform a plain recycled paper bag into something that feels intentional and branded. Ink pads in earthy tones like forest green, terracotta, or deep indigo look especially beautiful against the natural kraft color of recycled grocery bags, and they age gracefully without looking garish.
For those who sell products online or run a small creative business, consistent, thoughtful packaging is a powerful extension of your brand. Consider creating a simple template out of cardboard that you can trace onto your paper bags repeatedly, ensuring every mailer you make is exactly the same size. You can also design a simple stamp or have one custom-made online quite affordably that incorporates your shop name or logo. Adding a small card inside the package with care instructions, a thank-you note, or your website URL continues the branding experience right up until the customer opens the box.
Natural embellishments work wonderfully with the earthy aesthetic of kraft paper mailers. A length of jute twine tied around the mailer and secured with a small wax seal creates a beautiful, tactile experience for the recipient before they’ve even opened it. Pressed flowers, dried eucalyptus sprigs, or a sprig of lavender tucked under the twine add fragrance and visual appeal. Even a simple loop of baker’s twine in a coordinating color elevates the presentation significantly. These touches cost very little but communicate a level of care and attention to detail that recipients remember long after the package has been opened.
Practical Considerations for Mailing and Shipping
Before you start mailing your handmade bubble mailers in earnest, it’s worth understanding how postal services classify and handle this type of package. In the United States, items that can bend and measure within certain dimensions may qualify for the lower-cost “large envelope” or “flat” rate rather than the “package” rate. However, the presence of bubble wrap often makes your mailer exceed the thickness threshold for flats, so it may automatically be classified as a package. Weigh your finished, sealed mailers on a kitchen scale and use your postal carrier’s online tools to calculate postage accurately before heading to the post office.
Write or print your address label clearly and attach it securely. A standard white mailing label works perfectly on kraft paper, or you can write directly in black marker — the contrast is clear and readable. Cover your address label with a strip of clear packing tape to waterproof it. This simple step prevents rain, humidity, or rough handling from smearing the ink and rendering the address unreadable, which could result in your package being returned or lost. If you’re applying a stamp, press it firmly against the paper and hold for a few seconds to ensure a complete ink transfer on the slightly textured surface.
It’s also worth performing a quick durability test before committing to sending valuable items in a new batch of mailers. Make a test mailer, seal it empty, and give it a few firm squeezes, drops from knee height, and some gentle flexing. Check that the seams hold, the bubble wrap doesn’t shift, and the overall structure maintains its integrity. If you notice any weak points, revisit your technique before you start mailing — add extra glue, reinforce with tape, or switch to a heavier paper. The goal is a mailer that arrives at its destination looking almost as good as it did when it left.
- Always weigh your finished mailer before purchasing postage to avoid underpaying.
- Cover address labels with clear tape to waterproof them against weather and handling.
- Perform a quick stress test on new mailer batches before sending valuable items.
- For international shipping, check customs regulations regarding recycled paper packaging.
- Mark fragile items clearly with a stamp or written label on both sides of the mailer.

The Bigger Picture: Building a Zero-Waste Shipping Practice
Making your own recycled paper bubble mailers is a wonderful first step, but it fits naturally into a broader philosophy of zero-waste or low-waste shipping that more and more small businesses and individual senders are embracing. Once you start looking at your packaging with fresh eyes, you begin to notice how many opportunities exist to reduce waste. The void fill inside your packages, for example, can be shredded paper from your home office, crumpled newspaper, or those biodegradable cornstarch peanuts that dissolve in water rather than persisting in landfills. Every element of the package is an opportunity for a better choice.
Consider also the recipient’s experience of opening a zero-waste package. Unlike struggling with heavy-duty plastic tape on a poly mailer, your kraft paper mailer can be opened easily and cleanly. The bubble wrap inside, if saved by the recipient, can be reused or passed along. The paper outer shell can go into their paper recycling bin or even a compost pile. By thinking through the entire lifecycle of your packaging — from the moment it leaves your hands to the moment it’s fully disposed of by the recipient — you can make choices that minimize environmental impact at every stage and create a package that recipients genuinely appreciate rather than resent.
Sharing this practice with others amplifies its impact enormously. Post your process on social media or in crafting communities, and you may inspire dozens or hundreds of other people to make the same switch. Many online seller communities have threads dedicated to sustainable packaging, and homemade paper mailers are a frequent and well-loved topic. If you have friends who run small businesses, gifting them a stack of handmade mailers is a thoughtful and practical present that introduces them to the concept without requiring any effort on their part. The more people adopt even small packaging changes, the more meaningful the collective environmental impact becomes.
Ultimately, DIY recycled paper bag bubble mailers represent something larger than just a clever craft project. They represent a mindset shift — an understanding that waste is not inevitable, that creativity can substitute for consumption, and that small, consistent choices accumulate into meaningful change over time. The materials are free, the process is satisfying, the results are beautiful, and the environmental benefit is real. Whether you make one mailer for a single special package or dozens each week for a thriving online shop, each one is a quiet, tangible declaration that you care about the world your packages travel through.








What do you think?
It is nice to know your opinion. Leave a comment.