










DIY Christmas Paper Garland Ideas: How to Make Beautiful Handcrafted Holiday Decorations
The Magic of Handmade Christmas Garlands
There’s something about hanging decorations you actually made yourself that just hits differently. Christmas paper garlands have this warmth to them — a personal quality that no perfectly packaged store-bought ornament can come close to matching. When someone walks into your home and sees handcrafted paper chains, spirals, or folded stars draped across the mantel, they can feel that someone put real time and care into this space. That’s the kind of thing that turns a house into an actual holiday home.
Paper garlands have been a holiday staple for generations — and I mean that literally. Families used to sit together by the fire cutting and folding strips of colored paper into long looping chains, and honestly, not much has changed. What has changed is how far the craft has come. There are now hundreds of styles, techniques, and variations out there, ranging from super beginner-friendly to genuinely impressive, and they work across every kind of decorating aesthetic — rustic farmhouse, modern minimalist, you name it.
Beyond how they look, making garlands is just a genuinely good way to spend time with people you care about. Kids love it, and it’s one of those activities that actually holds their attention while sneaking in some creativity and fine motor practice along the way. But honestly, adults get just as much out of it. There’s something about the rhythmic, repetitive process of cutting and assembling that’s weirdly calming — a nice contrast to how hectic the rest of the holiday season tends to feel.
Essential Materials and Tools You Will Need
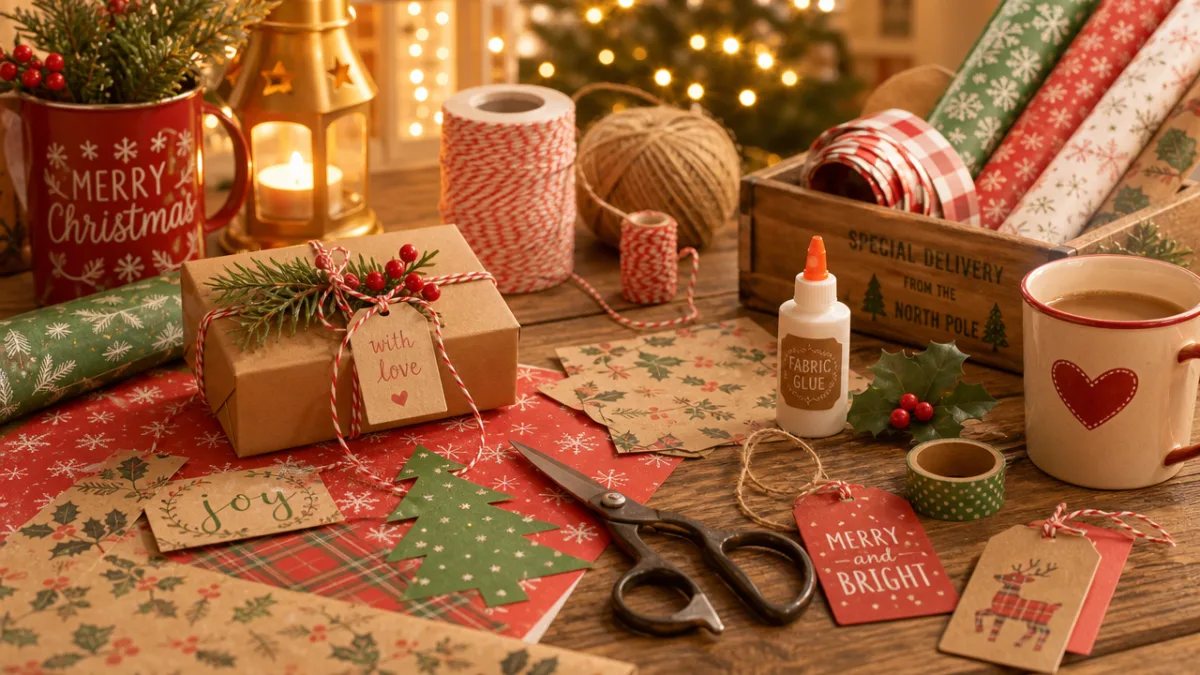
Before you dive into any of these projects, it’s worth taking a few minutes to get your supplies sorted. Starting a garland only to realize you’re missing something mid-way through is frustrating, and having everything ready makes the whole process so much smoother. The most important decision is your paper. You’ve got a lot of options here — colored cardstock, kraft paper, patterned scrapbooking paper, tissue paper, old newspaper, sheet music, even brown paper bags. Each one gives you a completely different vibe, so think about what fits your overall look before you start cutting.
As for tools, a sharp pair of scissors is the baseline — dull scissors will frustrate you instantly. If you want cleaner, faster cuts, a paper trimmer or a craft knife with a cutting mat is even better. A bone folder makes folding so much neater than just using your fingernail, and a hole punch will come in handy for more styles than you’d expect. For adhesive, a glue stick works fine for lighter paper, but double-sided tape or a hot glue gun will give you a stronger hold on thicker cardstock.
For stringing everything together, you have more choices than just plain thread. Twine has that natural, rustic quality that pairs perfectly with kraft paper. Thin ribbon in red, green, or gold dresses things up nicely. Fishing line is great when you want the paper pieces to look like they’re floating — almost invisible in use. And baker’s twine in classic holiday colors is a perennial favorite that adds a little extra charm without being too much.
- Colored cardstock and patterned scrapbooking paper in various Christmas hues
- Sharp scissors, paper trimmer, or craft knife with cutting mat
- Glue stick, double-sided tape, or hot glue gun with glue sticks
- Hole punch for creating hanging holes or decorative perforations
- Twine, ribbon, baker’s twine, or fishing line for stringing
- Ruler and pencil for measuring and marking precise cuts
- Bone folder for creating neat, professional-looking folds
Classic Paper Chain Garland: A Timeless Technique
The classic paper chain is probably the first garland most of us ever made, and there’s a reason it’s stuck around so long. It’s simple enough that little kids can do it with minimal help, yet the finished product is genuinely cheerful and festive. To get started, cut your paper into strips of consistent width and length — roughly an inch wide and six to eight inches long is the sweet spot. You can stick to one color for a clean, cohesive look, or go full holiday chaos with a rotating mix of reds, greens, golds, and whites.
Assembling the chain is satisfying in the best way. Take one strip, curl it into a loop, overlap the ends by about half an inch, and glue or tape them together. Then slip the next strip through that loop before sealing it, and keep going until you’ve got the length you want. The trick to a chain that looks intentional rather than rushed is consistency — same size loops, firmly secured joins, and a little patience while the glue dries before you tug on the next link.
Once you’ve got the basic technique down, it’s fun to start playing with variations. Alternating narrow and wide strips adds texture. Mixing patterned holiday paper with solid colors creates a nice visual rhythm. You can even write something on each strip before forming the loop — a holiday countdown, a wish for the new year, a little note — and suddenly your garland tells a story that guests can read as they move through the room.
Accordion-Fold and Honeycomb Paper Garlands
Accordion-fold garlands take a bit more effort than a basic chain, but the three-dimensional effect you get is honestly worth every extra minute. A Christmas tree version is a great place to start: cut identical triangle shapes from green cardstock, fold each one in a back-and-forth accordion pattern, then glue two folded triangles together along their flat edges. When they spring open, you get this beautiful, rounded, fully dimensional little tree with real depth to it — not flat at all.
Honeycomb garlands work on a similar principle but produce a globe-like sphere shape that looks almost impossibly impressive when strung in a row. You layer sheets of tissue paper or lightweight paper, glue them together in a specific repeating pattern, and when you pull the layers apart they fan open into that signature honeycomb structure. It takes some patience to get the gluing right, but the finished result looks so polished that people genuinely can’t believe it’s handmade. Metallic or pearlescent paper takes these to a whole other level.
If you want something a little less involved but still with great visual impact, the fan approach is your friend. Cut long rectangles, score them at even intervals with a bone folder, and fold them into fans. Glue two fans together at their ends and you’ve got a full circular medallion; leave them as half-fans and line them up along a string for a lovely bunting effect. Running a line of glitter or a stamped snowflake along the edge of each fan before you assemble everything adds a finishing touch that makes the whole garland feel special.
- Cut identical shapes from cardstock — triangles for trees, circles for baubles, or stars for a celestial theme
- Score each shape at regular intervals using a bone folder and ruler to ensure even, clean folds
- Create the accordion fold by alternating the direction of each fold consistently
- Apply glue to the flat edge of one folded shape and press the corresponding edge of a second shape firmly against it
- Hold the glued edges together until fully dry, then gently pull the outer edges apart to reveal the three-dimensional form
- Punch a small hole at the top of each finished shape and thread twine or ribbon through to string them together
Origami and Folded Paper Star Garlands
If you’re someone who enjoys a project with a bit more intricacy to it, origami-inspired garlands are incredibly rewarding. Lucky stars — those small, puffy, perfectly geometric little shapes — are a great starting point for a Christmas garland. You fold long thin strips of paper into a flat pentagon shape, then gently press in each side to puff out the points. Made from metallic or foil paper, they catch light beautifully and look genuinely magical strung together in a long strand.
Froebel stars, sometimes called Advent stars or Swedish stars, are a step up in complexity but have real holiday heritage behind them — they’ve been a beloved Christmas tradition in parts of Europe for a very long time. You weave four strips of paper together through a specific sequence of folds, and what emerges is a flat, eight-pointed star with this stunning geometric symmetry. They take some practice to get right, but once you have the rhythm down, you’ll want to make dozens of them. Gold or silver paper makes these look genuinely heirloom-quality.
Pinwheel stars are a slightly more approachable option that still delivers real visual impact. Cut squares of paper, fold diagonally, make cuts toward the center along each fold, then bring every other point to the middle and secure it with a brad or a dab of glue. Hung together in alternating sizes and colors, pinwheel stars create a garland that actually moves and spins gently in the air — catching candlelight or the glow of string lights in a way that feels a little bit enchanted.
Nature-Inspired and Themed Paper Garlands
Nature-inspired paper garlands have had a real moment lately, and it’s easy to see why. The rustic, organic, Scandinavian-influenced holiday aesthetic is everywhere, and handmade kraft paper garlands fit right into it. Simple cutout shapes — pine trees, holly leaves, snowflakes, little woodland animals — bring a warm, earthy quality to any room. These look especially lovely when combined with actual natural elements like dried orange slices, cinnamon sticks, or pine cones wired onto the same strand. The mix of handmade paper and natural texture is really rich and layered in the best way.
Botanical garlands inspired by poinsettias, holly, or mistletoe take more time and precision, but the results can be genuinely breathtaking. For a paper poinsettia garland, you cut petal shapes from red and green cardstock in two different sizes, score the center of each petal to give it a natural curve, and layer them together with a little yellow circle in the middle. A few of these blooms strung along green velvet ribbon creates a garland that’s almost too pretty to be made of paper — people will do a double take.
Themed garlands are also a wonderful way to make your space feel cohesive and intentional rather than just decorated. A vintage garland might use pages from old books or sheet music cut into simple shapes and strung on red velvet ribbon. A modern geometric garland in black, white, and gold feels sleek and contemporary. A kids’ room garland with paper gingerbread people, candy canes, and little wrapped presents in bright colors is guaranteed to delight anyone under ten — and honestly, plenty of people over ten too.
- Kraft paper pine trees with simple star or snowflake cutouts for a rustic woodland look
- Paper poinsettia flowers in red and green cardstock for a realistic botanical garland
- Vintage book page or sheet music shapes for an antique, literary holiday aesthetic
- Geometric black, white, and gold shapes for a modern minimalist Scandinavian style
- Gingerbread men, candy canes, and gift boxes for a bright, playful children’s room display
- Paper snowflakes in various sizes and intricate cut patterns for a classic winter wonderland theme
Tips for Displaying and Preserving Your Paper Garlands
Making your garlands is the fun part, but how you hang them makes a real difference in the final look. The biggest thing to keep in mind is to let them drape naturally rather than pulling them taut. A loose, gentle swag has life and movement to it — a rigidly straight garland just looks flat and a little sad by comparison. When you’re hanging them along a mantel, staircase, or window frame, small command hooks or decorative pins do the job without leaving any damage behind once the season is over.
Layering different garland styles together is one of those tricks that takes a display from nice to genuinely spectacular. A simple red and green paper chain alongside a gold and white folded star garland, loosely intertwined — that combination has a richness and abundance to it that either one would lack on its own. You can also add small paper ornaments or punched shapes tied at intervals along an existing garland for extra dimension. Mixing matte papers with metallic or glossy ones is another great move, since they catch light differently and keep the eye moving throughout the day and into the evening.
When the season ends, a little care in how you store your garlands will go a long way. Loosely coil each one and nestle it in a flat lidded box lined with tissue paper — never crammed or compressed, which is a surefire way to end up with creased, torn, or distorted garlands you can’t fix. Keep the boxes somewhere cool and dry, away from humidity, which is paper’s real enemy. Store them well and a good handmade garland can genuinely last for years, maybe decades, becoming one of those decorations your family looks for every single holiday season.








What do you think?
It is nice to know your opinion. Leave a comment.