










DIY Vintage Scarf Back Button Up Shirt: Transform Your Wardrobe with This Creative Upcycling Project
There is something undeniably magical about taking two separate pieces of clothing or fabric and combining them into one stunning, entirely original garment. The DIY vintage scarf back button up shirt trend has captured the hearts of crafters, fashion enthusiasts, and sustainability-minded individuals alike, offering a way to breathe new life into forgotten items that might otherwise collect dust in the back of a closet. Whether you have a beloved vintage silk scarf you never quite knew how to wear, or you stumbled across a gorgeous printed square at a thrift store, this project gives that fabric a second, spectacular purpose.
This particular DIY project sits at the crossroads of upcycling, fashion design, and personal expression. It requires only a modest set of sewing skills, some basic tools, and a healthy dose of creativity. The result is a garment that looks intentional, chic, and completely one-of-a-kind — the kind of piece strangers stop you to ask about. In a fashion landscape increasingly dominated by mass-produced clothing that everyone seems to own, a hand-crafted item made from vintage materials carries an authenticity and personality that simply cannot be purchased off a rack.
Beyond the aesthetic appeal, there is a genuinely satisfying dimension to this kind of project. You are participating in a longer tradition of making and mending, of valuing materials enough to transform them rather than discard them. Vintage scarves often carry history in their patterns and textures — silk printed in the 1960s, paisley designs from the 1970s, bold graphic prints from the 1980s — and incorporating them into modern clothing creates a beautiful dialogue between past and present that makes your wardrobe richer in every sense of the word.
Gathering Your Materials and Choosing the Right Scarf
Before you cut a single thread, the most important decision you will make is choosing which scarf to use as the centerpiece of your shirt. The back panel of a button-up shirt is a generous but defined canvas, and the scarf you select needs to fit that space while also complementing the shirt itself. A standard square scarf measuring between 26 and 36 inches works beautifully for most adult shirt sizes, giving you enough fabric to cover the back panel fully without excessive piecing or awkward seaming. Long rectangular scarves can also work wonderfully, particularly for creating a dramatic visual effect with a bold print running vertically down the back.
Material matters enormously in this project. Silk and satin scarves lend an elegant, almost luxurious quality to the finished garment, but they can be slippery and challenging to sew, especially for beginners. Polyester and rayon scarves are more forgiving and often feature equally beautiful prints at a fraction of the price, making them ideal if you are attempting this project for the first time. Lightweight cotton and modal scarves offer the easiest sewing experience and produce a more casual, wearable everyday shirt. Whatever fiber content you choose, make sure the scarf is clean, pressed flat, and free of any significant damage like tears, stains, or pulled threads that would show in the finished piece.
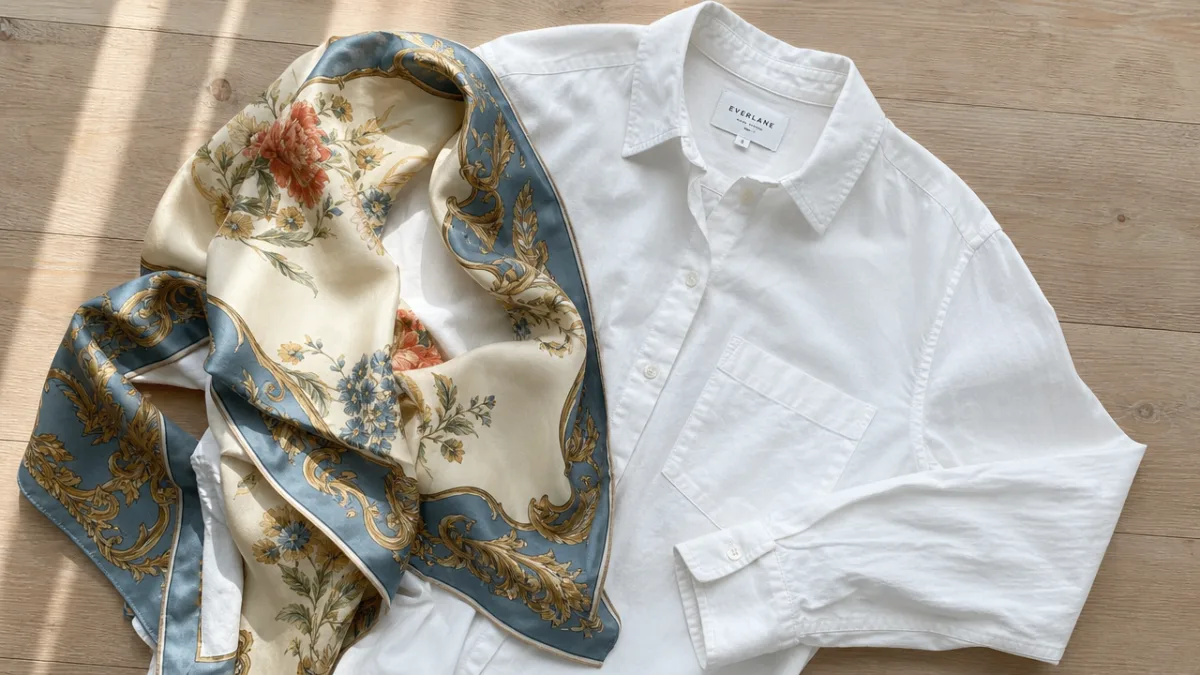
The shirt you choose is equally critical to the outcome. A classic Oxford or chambray button-up in a neutral tone like white, cream, light blue, or pale grey tends to let the scarf fabric take center stage without competing. Thrift stores are an excellent source for donor shirts, allowing you to experiment without worrying about ruining something precious. Look for shirts in your correct size with backs that are free of excessive darts, yokes, or complex construction details, as a simpler back panel makes the insertion process considerably more straightforward. Gather your tools — sharp fabric scissors, matching thread, pins, a seam ripper, an iron, and your sewing machine — and you are ready to begin.
- A vintage or decorative scarf, ideally 26 to 36 inches square or a long rectangle with a bold print
- A plain button-up shirt in a neutral color that complements your scarf’s palette
- Sharp fabric scissors and a seam ripper for careful deconstruction
- Sewing machine loaded with thread that matches your shirt fabric
- Iron and ironing board for pressing seams and preventing puckering
- Pins or fabric clips to hold pieces securely before and during sewing
Deconstructing the Shirt: Removing the Original Back Panel
The deconstruction phase is where many beginners feel the most anxiety, and understandably so — you are deliberately taking apart a garment before you can put it back together in a new form. But approached slowly and carefully, this step is genuinely manageable and even meditative. Begin by turning your shirt inside out and examining the back panel seams with good light. You will typically find seams running along both side seams and across the shoulder seams where the back connects to the front panels and sleeves. Some shirts also have a yoke — a horizontal seam across the upper back — which you will need to account for in your planning.
Using your seam ripper, carefully open the side seams first, working slowly along the stitching line without jabbing into the fabric itself. A sharp seam ripper makes this process dramatically easier, so if yours has become dull, replace the blade before you start. Work in short increments, pausing frequently to check that you are only cutting thread and not the fabric. Once the side seams are opened, move to the shoulder seams, releasing the back panel from the yoke or collar area. If your shirt has a center back box pleat or inverted pleat, take a photo of it before you remove it so you can reference the original construction when attaching your scarf panel.
Once the back panel is fully removed, you have your template. Press it flat with a hot iron and lay it over your scarf to check the fit. This is the moment to assess whether the scarf covers the panel with some extra room on all sides for seam allowances, or whether you need to piece together sections of the scarf to achieve full coverage. Most standard scarves will cover a shirt back comfortably, though you may need to trim excess fabric or strategically position the scarf to center a particular motif or design element directly in the middle of the back for maximum visual impact. Mark your cutting lines lightly with tailor’s chalk, leaving at least half an inch of seam allowance on all sides.
Cutting and Preparing the Scarf Panel
Cutting into a beautiful vintage scarf is a committed moment — there is no undoing a cut — so take your time during this phase. If you are using a scarf with a finished rolled hem around its edges, you may be able to incorporate those edges into your design, but in most cases you will be cutting the scarf to match the shape of your back panel template. Lay the scarf on a flat, stable cutting surface and place your paper template (traced from the original back panel) on top, positioning it to center whatever portion of the print you want most prominently displayed. Use pins to secure the template to the scarf fabric, then trace around it with tailor’s chalk before cutting.
Cut smoothly and deliberately, using long scissor strokes rather than short choppy cuts, which tend to leave jagged edges on fine fabric. If you are working with silk or satin, place a layer of tissue paper beneath the fabric to prevent it from sliding around on the cutting surface — this is a professional dressmaker’s trick that makes a significant difference in accuracy. Once your scarf panel is cut to shape, finish the raw edges with either a serger, a zigzag stitch on your sewing machine, or a carefully applied bias tape border to prevent fraying during both construction and future laundering. Pressing the panel again at this stage, with a pressing cloth to protect delicate fabric, will ensure it lies perfectly flat when sewn into position.
This is also the ideal moment to make any design choices about embellishment. Some makers choose to add a narrow contrast border around the scarf panel using ribbon or bias tape in a color pulled from the scarf’s print, which creates a clean, intentional-looking frame that elevates the finished garment considerably. Others prefer a completely clean, seamless look where the scarf fabric appears to flow directly out of the shirt fabric with minimal visual interruption. Neither approach is wrong — it entirely depends on the aesthetic you are going for and how much additional complexity you want to introduce into the project. Gather any additional trim or decorative elements before moving into the assembly phase.
- Trace your shirt’s original back panel onto paper to create a reusable template
- Position the template over your scarf, centering the most visually appealing portion of the print
- Pin the template securely and trace around it with tailor’s chalk
- Cut carefully using long, smooth scissor strokes to maintain clean edges
- Finish all raw edges immediately using a serger, zigzag stitch, or bias tape
- Press the cut panel flat using a pressing cloth appropriate to your fabric type
Assembling the Shirt: Sewing the Scarf Panel Into Place
Assembly is the most technically demanding phase of this project, but it is also the most rewarding — this is where you watch your vision come to life as two disparate objects begin merging into something entirely new. Begin by pinning your prepared scarf panel to the shirt’s back yoke along the upper edge, right sides together, matching the raw edges precisely. Sew this seam first, using a straight stitch set to a medium length — approximately 2.5 millimeters works well for most fabric combinations. Press the seam open or toward the yoke, depending on the weight and stiffness of your scarf fabric, and check the alignment from the right side before proceeding.
Next, you will reattach the sides of the scarf panel to the shirt’s front panels using the original side seam allowances as your guide. This is where pressing matters enormously — a well-pressed seam lies flat and creates a crisp, professional-looking junction between the shirt’s woven cotton or linen and the scarf’s distinctive print fabric. If you are working with a particularly slippery scarf material, consider hand-basting the pieces together with a long running stitch before taking them to the machine, as this prevents the layers from shifting under the presser foot and producing a wavy or puckered seam. Remove basting stitches after the machine stitching is complete and press again thoroughly.
The lower hem of the back panel requires careful attention, particularly if your shirt has a curved shirttail hem rather than a straight one. Clip the seam allowance of your scarf panel at intervals around any curves to allow the fabric to lie flat, then turn under the hem allowance and press it firmly before stitching. A topstitched hem in matching thread looks neat and durable, while a hand-sewn blind hem stitch creates a more refined finish that is nearly invisible from the outside. Once the hem is complete, sew the side seams of the shirt back together, starting from the hem and working upward toward the underarm, using the original seam line as your guide. Turn the shirt right side out and examine your work from every angle.

Finishing Touches and Styling Your Upcycled Creation
With the structural sewing complete, the finishing touches are what transform a functional construction project into a polished, wearable garment. Begin with a thorough pressing of the entire shirt, using the appropriate heat setting for your scarf fabric and a pressing cloth wherever necessary. Pay particular attention to the seam junctions where the shirt and scarf fabrics meet, as these areas can develop small wrinkles or twists during sewing that only become visible once the garment is right-side out. A good final press resolves most of these minor imperfections and gives the shirt that crisp, put-together look you want when you step out wearing it.
Check all the original buttons and buttonholes on the shirt’s front placket, replacing any missing or damaged buttons with ones that complement the color palette of your scarf. This is a surprisingly impactful detail — swapping plain white plastic buttons for vintage mother-of-pearl buttons, brass buttons, or enamel buttons in a color drawn from the scarf’s print immediately elevates the entire garment from a clever craft project to a genuinely thoughtful fashion piece. If you want to take the scarf theme even further, consider cutting small circles from any leftover scarf fabric and covering plain buttons with it using a button-covering kit available at most craft stores, creating truly coordinated details that tie the whole design together.
Styling this shirt is genuinely fun because the scarf back transforms it into a garment with two distinct personalities. Worn with the back facing forward — layered open over a tank top or tied at the waist — the scarf panel becomes the focal point and the shirt reads as a distinctive, artistic statement piece. Tucked into high-waisted trousers or a midi skirt with just the collar and cuffs visible, the shirt feels more classic from the front, with the gorgeous scarf back revealed only in glimpses or when you turn around, creating a wonderful element of surprise. Either way, this is the kind of item that rewards wearing, that gets better every time you reach for it, and that tells a story every single time someone catches a glimpse of that beautiful vintage print.
- Press the finished shirt thoroughly with appropriate heat and a pressing cloth
- Replace original buttons with decorative alternatives that complement the scarf’s color palette
- Try fabric-covered buttons made from leftover scarf material for a fully coordinated look
- Style the shirt open and layered to foreground the scarf back as the main attraction
- Tuck it in for a more subtle look that reveals the scarf print as a delightful surprise detail
Caring for Your Garment and Expanding Your Upcycling Practice
Proper care will ensure that your handcrafted shirt remains beautiful through many wearings and washings. Because you have combined two different fabric types — the shirt’s original woven cotton or linen with your scarf’s silk, polyester, or rayon — you should always launder according to the most delicate fabric’s requirements. In most cases, this means hand washing in cool water with a gentle detergent, or running the shirt through a machine’s delicate cycle inside a mesh laundry bag. Avoid wringing or twisting the fabric, particularly if your scarf is silk, as this can distort the weave and dull the print over time. Lay the shirt flat to dry or hang it smoothly, and store it on a proper hanger rather than folded to prevent creasing at the seams.
Ironing the finished garment should always be done with a pressing cloth between the iron and the scarf fabric, even after you have completed the project. Vintage silk and polyester prints can scorch, melt, or flatten under direct iron heat, losing both their sheen and the crispness of their printed pattern. A light misting of water before pressing helps relax any wrinkles without requiring excessive heat. If you used any embellishments like ribbon trim or decorative buttons, check these periodically for secure attachment and restitch them at the first sign of loosening — small maintenance tasks like these extend the life of handmade garments considerably and are far easier to address early than after a button has been lost entirely.
Once you have completed one scarf back shirt and worn it proudly, it is difficult not to start looking at every vintage scarf, bandana, or decorative fabric with an eye toward its next incarnation. The same basic technique adapts beautifully to other garment types — denim jackets with scarf-panel backs, linen blazers with scarf-lined interiors, or even simple tote bags featuring a framed scarf panel on the front. The skills you develop in this project — careful deconstruction, thoughtful material matching, precise seaming across different fabric types — translate directly into more ambitious upcycling adventures. Start a collection of interesting vintage scarves from thrift stores, estate sales, and flea markets, and you will never again be without inspiration for a project that is beautiful, sustainable, and entirely your own.








What do you think?
It is nice to know your opinion. Leave a comment.