










Wall Decor DIY: Transform Your Room with Creative and Budget-Friendly Ideas
Why DIY Wall Decor Is the Ultimate Room Makeover Solution
There’s something really special about looking at your walls and knowing you made everything on them. DIY wall decor has taken off in a big way over the past decade, and honestly, it’s easy to see why. It gives you the freedom to personalize your space in a way that anything off a store shelf just can’t match. When you make your own wall art, you’re not just filling blank space — you’re putting a little piece of yourself up there. Your personality, your taste, your story.
And the cost savings? Genuinely impressive. Interior designers can charge thousands to pull together a gallery wall or a single statement piece, but with a bit of time and some basic supplies, you can get results that look just as good for a fraction of the price. A lot of the most striking wall decor projects use stuff you probably already have kicking around — old frames, fabric scraps, leftover paint, twine, or even pages torn from old books and magazines.
Another thing that makes DIY wall decor so appealing is how easy it is to change. Unlike furniture or flooring, your walls can be completely transformed whenever the mood strikes. You’re never stuck with a look you’ve grown tired of. Whether you’re into clean Scandinavian minimalism, layered boho-chic vibes, industrial edge, or cozy cottagecore, you can make your walls say exactly that — and update them again whenever your taste shifts.
Essential Materials and Tools You Need to Get Started
Before jumping into your first project, it helps to have a few supplies on hand. The good news is that most beginner-friendly wall decor ideas don’t need much, and a lot of what you’ll use can be found at dollar stores, thrift shops, or already sitting in a drawer somewhere. Having a basic kit ready means you can start something new whenever the inspiration hits — which is honestly one of the best parts of getting into DIY.
Here’s a solid starter list of materials that’ll cover you across a wide range of wall decor projects:
- Canvas panels or stretched canvases in various sizes
- Acrylic paints in a versatile color palette including neutrals and accent colors
- Paintbrushes in multiple sizes including flat, round, and fan brushes
- Hot glue gun and glue sticks for quick adhesion
- Twine, jute rope, or macramé cord for textile projects
- Picture frames in assorted styles from thrift stores
- Scissors, craft knife, and cutting mat
- Adhesive strips or picture-hanging hardware
- Washi tape and decorative paper or cardstock
- Dried flowers, leaves, or botanical elements
Beyond the physical supplies, inspiration is just as important. Pinterest, Instagram, and design blogs are basically endless idea libraries — spend some time saving images that genuinely excite you, then step back and look at what you’ve collected. You’ll start to notice patterns: the same colors coming up, similar textures, certain arrangements you keep gravitating toward. That’s your personal style talking, and it’ll guide your projects better than any style quiz ever could. Putting together a simple mood board before you start can also save you a lot of time, money, and second-guessing down the road.
Top DIY Wall Decor Ideas for Every Style and Budget
If you’re looking for something that makes an immediate impact without being too complicated, a gallery wall is a fantastic place to start. The idea is simple: group a bunch of framed pieces together on one wall — photos, prints, illustrations, quotes, abstract art, whatever speaks to you — and arrange them into something cohesive. What’s great about gallery walls is that they’re never really finished. You can start with three frames and keep building over time, adding new pieces and swapping out old ones as your collection grows.
Abstract painting is another beginner-friendly option that tends to get surprisingly impressive results. You don’t need any formal training — just a canvas, some acrylic paint, and the willingness to play around. Try using a palette knife, a sponge, or even crumpled plastic wrap to layer color onto the canvas. Right now, shades like terracotta, sage green, ivory, and dusty rose are having a real moment, and they work beautifully in both modern and bohemian spaces. Abstract art also makes it easy to match your walls to your existing decor palette exactly.
Macramé wall hangings have made a huge comeback and are still one of the most popular DIY room decor projects you’ll find online. With just a few basic knots — the square knot and spiral knot will get you most of the way there — you can create textile art that adds real warmth and texture to a room. Beginners can usually finish a small piece in an afternoon, and a larger statement hanging might take a weekend, but the end result genuinely looks like something from a boutique.
A few more ideas worth trying:
- Pressed flower frames: Collect wildflowers, press them between heavy books for two weeks, then arrange them in a glass frame for delicate botanical art.
- Washi tape wall murals: Use colorful or patterned washi tape directly on the wall to create geometric shapes, faux window frames, or abstract designs that peel off without damage.
- Floating shelf displays: Combine shallow wall-mounted shelves with small plants, candles, and framed prints for a layered three-dimensional display.
- Upcycled wood signs: Sand down scrap wood or pallet boards and use chalk paint and stencils to create rustic typographic art.
- Fabric wall art: Stretch a bold fabric print over a canvas frame or staple it into an embroidery hoop for an instant textile art piece.
How to Plan and Execute a Cohesive Room Decor Vision
Making beautiful individual pieces is one thing — getting them to work together as part of a room is where a little planning goes a long way. The most striking rooms aren’t necessarily the ones with the most expensive things in them; they’re the ones where everything feels like it belongs together. When you’re thinking about your wall decor as a whole, start with the colors already in the room. Look at your furniture, rugs, curtains, and bedding, and pick out two or three of those shades to echo in your wall art. That repetition is what creates a sense of flow and intention.
Scale is something a lot of first-time decorators don’t think about until it’s too late. One small frame floating on a large wall looks lonely and a bit sad, while a huge canvas crammed into a narrow hallway can feel suffocating. A good rule of thumb is that your wall art should span roughly two-thirds to three-quarters of the width of the furniture it sits above. For a gallery arrangement, think of the whole grouping as one single piece and scale it the same way. And before you put a single nail in the wall, lay everything out on the floor first — it’s one of those old decorator tricks that genuinely saves a lot of frustration.
Texture is the secret ingredient that makes a room feel layered and alive rather than flat. Mix it up wherever you can — a smooth painted canvas next to a rough macramé piece, a shiny metallic frame beside a weathered wood sign. This kind of variety keeps the eye moving and gives the space a richness that’s hard to put your finger on but easy to feel. Don’t be afraid to mix styles either. Vintage, modern, and handmade pieces can coexist beautifully as long as they share a consistent color story tying them together.
A few key principles to keep in mind when planning your wall layout:
- Hang art at eye level, with the center of the piece approximately 57 to 60 inches from the floor
- Leave consistent spacing between pieces in a gallery arrangement, typically 2 to 3 inches
- Anchor large pieces before filling in with smaller ones
- Use paper templates taped to the wall to preview placement before hammering
- Balance visual weight — pair a heavy dark piece with a lighter airy one nearby
Room-by-Room DIY Wall Decor Ideas and Inspiration
Each room in your home has its own mood and purpose, and your walls should reflect that. In the bedroom, you want decor that feels calm and personal — a real sanctuary. Soft botanical prints, watercolor landscapes, meaningful quotes in gentle lettering, and textile art in muted tones all fit beautifully here. A large statement piece above the headboard can anchor the whole room and do so much of the heavy lifting that you might not need much else on the other walls at all, which keeps things feeling peaceful rather than cluttered.
The living room is where you can be a little bolder. It’s a space for gathering and making an impression, so go for it. A large abstract painting, a layered gallery wall, or an oversized mirror surrounded by smaller pieces can all make a real statement. This is also the room where layering works best — combining wall-mounted shelves with art, plants, and objects creates that editorial, curated look that feels like it belongs in a design magazine, without actually needing a designer’s budget to pull it off.
Kitchens and dining areas don’t get nearly enough love when it comes to wall decor, which is a shame because there’s so much potential there. Framed recipe cards written in beautiful calligraphy, botanical herb prints, vintage market signs, or a chalkboard wall where you jot down weekly menus or favorite quotes can all add so much personality to a space that’s usually pretty utilitarian. Even something as simple as a row of hooks with woven baskets and a few trailing plants can turn a blank kitchen wall into something genuinely lovely.
Home offices are worth thinking about carefully, because the stuff you look at all day really does affect how you feel and work. A large corkboard or foam board mounted on the wall gives you a flexible, constantly evolving inspiration space where you can pin images, notes, and ideas and rearrange them freely. Fill the rest of the wall with things that genuinely energize you — bold type, vibrant colors, maps of places you love, prints that connect to what you’re working toward. Your office walls should feel like fuel, not wallpaper.
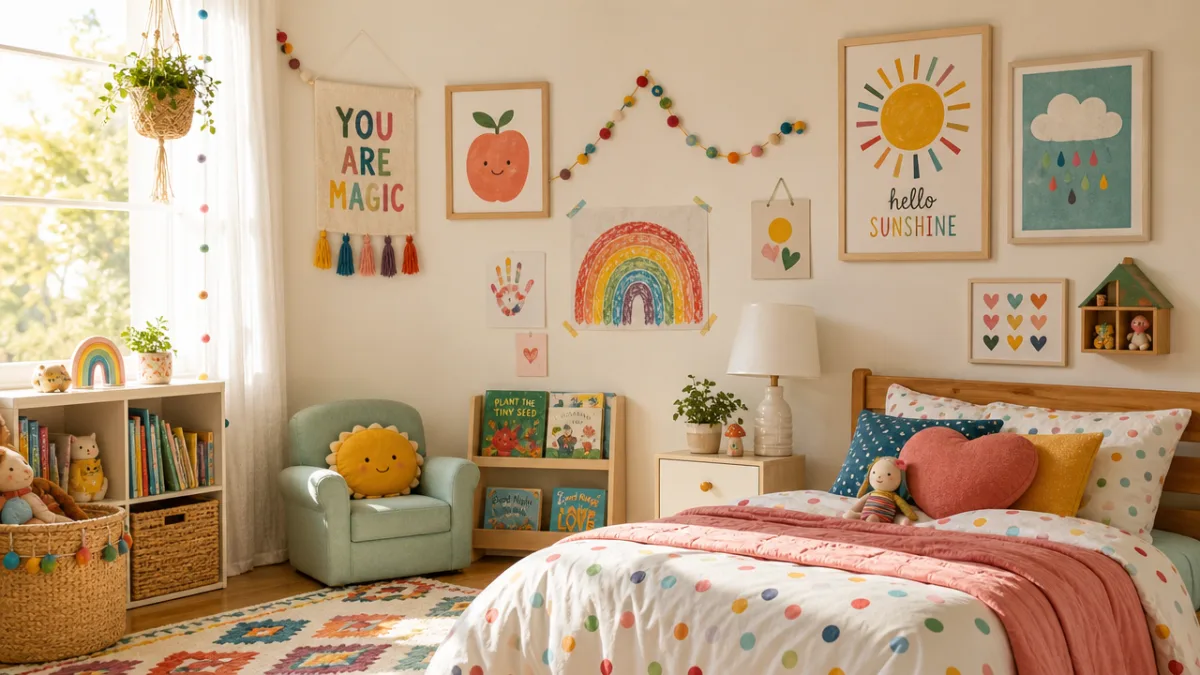
Kids’ rooms might be the most fun to work with of all. Since children’s tastes change fast, it makes sense to lean into decor that’s easy to update. Removable wall stickers, framed illustrations from favorite books, painted wood letters, and chalkboard panels all create joyful spaces that can grow and shift with the child. Even better — get the kids involved. Finger-painted canvases, handprint art, and framed drawings they made themselves give them ownership of their space and create the kind of sentimental pieces that are genuinely priceless.
Tips for Displaying, Maintaining, and Refreshing Your DIY Wall Decor
Once everything is up on the wall, a few small things can make a big difference in how it all looks. Lighting is probably the most underrated part of displaying wall decor. Natural light is always flattering, but in darker rooms, a small picture light above a focal piece or a nearby floor lamp washing the wall with warm ambient glow can completely transform how a piece reads. It sounds like a small detail, but it genuinely changes everything — even a simple DIY canvas looks like real art with the right light on it.
Maintenance is something most DIY tutorials skip over, but it’s worth thinking about. Macramé and other fabric pieces collect dust over time, so give them a gentle shake outside occasionally or use a hairdryer on the cool setting to blow debris away. Painted canvases can be lightly wiped down with a soft dry cloth. Botanical and pressed flower pieces are especially sensitive to strong direct sunlight, which will fade them faster than anything else, so hang them somewhere a little more protected if you can. A little preventative care means your handmade pieces stay looking fresh for years rather than fading out in months.
Refreshing your walls seasonally is one of the easiest ways to keep your home feeling current and alive without committing to a full renovation. You don’t have to change everything — swapping out just one or two key pieces per season is often enough to shift the whole feel of a room. Bring in warm terracottas and natural textures in autumn; layer in cozy textile pieces and metallic accents in winter; go for botanical prints and soft pastels in spring; lean into bright colors and breezy lightweight fabrics in summer. It’s a simple rhythm, but it keeps your home feeling thoughtful and intentional all year long.
And finally — give yourself some grace with this stuff. Your first macramé hanging probably won’t look exactly like the Pinterest photo that inspired it, and your first abstract painting might surprise you in ways that are both exciting and a little frustrating. That’s completely normal. Every project teaches you something — about technique, about color, about what you actually like and what you don’t. Over time your skills sharpen, your eye gets better, and your confidence grows. Your walls stop being just a backdrop and start becoming something more: a living record of your creativity and curiosity. No store-bought anything is ever going to give you that.








What do you think?
It is nice to know your opinion. Leave a comment.