










Vintage Vibes: Crafting Decoupage Plaques with Pressed Flowers
The Timeless Art of Decoupage and Pressed Flowers
There’s something really special about taking something delicate and fleeting — a rose from your garden, a sprig of lavender at its most fragrant — and turning it into a piece of art that lasts forever. Decoupage, that centuries-old craft of layering paper and sealant onto surfaces, pairs so beautifully with pressed botanicals that the two feel made for each other. The plaques you end up with have this quiet, vintage elegance that you just can’t get from anything store-bought. Hang them in a hallway, prop them on a windowsill, give them to someone you love — they always feel like they mean something.
The word “decoupage” comes from the French découper — “to cut out” — and it has a surprisingly long history. Venetian craftspeople in 17th-century Europe were lacquering furniture with layers of decorative paper, and from those aristocratic beginnings the technique slowly became the beloved folk art it is today. Modern crafters have better sealants and far more materials to play with, but the heart of decoupage hasn’t really changed: it’s all about patience, layering, and a genuine love for making things by hand.
What pressed flowers bring to the equation is warmth — something no printed paper can replicate. Every petal holds a little memory of the season it came from: a summer afternoon, a grandmother’s garden, wildflowers spotted on a country drive. Sealed beneath layers of glossy or matte medium on a wooden plaque, those petals become a permanent, touchable record of something beautiful. Together, the structure of decoupage and the naturalness of pressed botanicals produce pieces with a distinctly vintage feel that fits right in with today’s cottagecore and botanical art movements.
Gathering and Pressing Your Flowers
Before any of the fun plaque-making can happen, you need pressed flowers — and the pressing process itself is worth doing carefully. The flowers that work best are ones with relatively flat profiles and low moisture content. Pansies, violas, daisies, cosmos, Queen Anne’s lace, and ferns are favourites among botanical crafters for good reason: they press predictably and hold their colour well. Roses and dahlias are gorgeous but bulky, so you’ll get better results pressing them petal by petal and reassembling them on your plaque afterward.
When you pick your flowers really matters. Mid-morning on a dry day is ideal — after the dew has dried off but before the afternoon heat starts stressing the plants. Flowers that are just slightly past their absolute peak actually press better than fresh tight buds, which tend to be thick with moisture. Skip harvesting after rain if you can, since waterlogged flowers take ages to dry and are much more likely to go mouldy in the press. Don’t forget foliage either — fern fronds, eucalyptus, little ivy sprigs — they press beautifully and add great texture and contrast to your finished design.
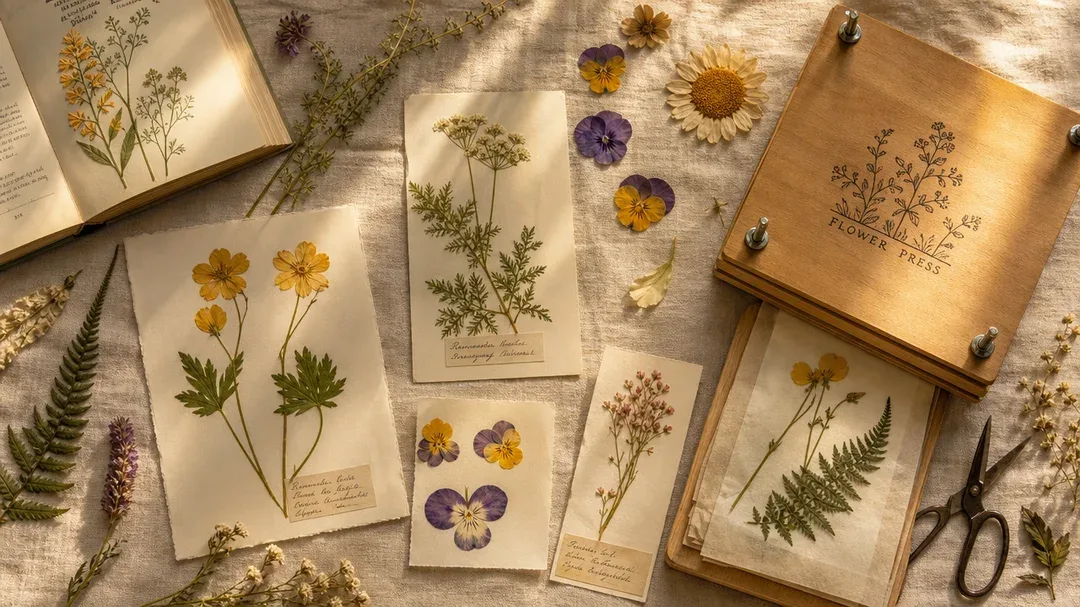
A wooden flower press with bolts and wing nuts is the classic tool, but an old heavy book works just fine when you’re starting out. Lay your flowers face-down on blotting paper, making sure nothing overlaps, then close things up. Change the blotting paper every couple of days for the first week to pull moisture away efficiently. Most flowers are ready to use within two to four weeks. Once they’re done, store them in labelled envelopes somewhere cool and dry until you’re ready to get started on your plaque.
Choosing Your Plaque and Background Materials
The base you choose sets the whole tone for your plaque, so it’s worth giving it a little thought. Unfinished wooden plaques from craft stores are the go-to choice for most people — wood takes decoupage medium really well, gives you a sturdy surface to build up layers on, and can be sanded smooth or left with a bit of texture depending on the look you’re after. Oval and rectangular shapes tend to suit botanical arrangements particularly nicely, echoing the proportions of those beautiful Victorian herbarium specimens.
Before you start layering, think about what background will make your pressed flowers shine. A coat of chalk paint in soft white, dusty sage, or faded cream gives you a dreamy, vintage backdrop where even the palest petals stand out. If you want more texture and period character, try layering torn pieces of tissue paper, old book pages, or sheet music directly onto the raw wood before you add your flowers. You can also try watercolour washes with a dry brush — a blush pink fading to ivory, for example — to create soft, painterly gradients that complement your botanicals.
If you want your plaque to feel really considered, spend a few minutes thinking about how your background colour and your pressed flowers will interact. Deep burgundy cosmos look incredible against aged cream. Bright yellow buttercups practically glow against dusty French grey. Pale lavender becomes almost ethereal on soft white. It takes about five minutes to hold your pressed specimens up against different swatches of colour or paper before you commit, and it’s genuinely worth it — you’ll end up with something that looks intentional rather than accidental.
Composing and Applying Your Design
This is honestly the most fun part. Start by arranging your pressed flowers on the plaque without any glue, just moving things around until something clicks. Think about giving your arrangement a focal point — maybe a single large pressed rose or an intricate fern frond — with smaller elements like scattered petals, tiny buds, and leaf sprigs filling in around it. Asymmetrical layouts tend to feel more natural and lively, though if you’re drawn to something more formal and symmetrical, that can look really lovely too.
Once you’re happy with how it looks, take a photo on your phone. You will bump things out of place as you work, and having that reference means you can put everything back exactly where you wanted it. Then, working one element at a time, brush a thin even layer of decoupage medium — Mod Podge in matte or gloss is the standard, though a homemade mix of PVA and water works well too — onto the back of each flower using a small soft brush. Press it gently into place and smooth from the centre outward with your fingertip or a soft cloth to get rid of any air bubbles.
Patience really pays off here. Rushing is how you end up with torn petals and smeared designs. Take your time, let each section set for a few minutes before you place something next to it, and use tweezers for anything especially delicate — the oils from your fingers can tear or discolour thin petals. Once everything is in place and the adhesive has dried, you’re ready to start sealing, which is what will protect all your work for years to come.
Here are some useful tips for a smooth application process:
- Always work on a protected, flat surface — a silicone mat or parchment paper stops your plaque from sticking to the table.
- Keep a small cup of water and a clean brush nearby so you can fix smudges before the medium dries.
- Apply decoupage medium in thin layers rather than one thick coat — thick coats are how you get wrinkling and bubbling.
- If a petal tears during placement, a tiny dab of medium reattaches it seamlessly before you seal over it.
- Work in natural light where you can, so it’s easier to spot air bubbles or uneven patches that need attention.
Sealing, Finishing, and Adding Vintage Touches
Sealing is what takes your arrangement from a pretty but fragile collage to something genuinely durable and polished. Use a wide soft brush to apply your first topcoat of decoupage medium in smooth, even strokes across the whole surface. It’ll look a bit cloudy when it’s wet — don’t worry, that’s completely normal — and watching it dry clear is one of those little moments that never gets old, even after you’ve made dozens of these. Once it’s fully dry (usually twenty to thirty minutes at room temperature), check whether any petals have lifted and gently fix them before moving on.
Most finished plaques benefit from three to five topcoats, with a light sand between each one using very fine-grit sandpaper (400 grit or finer) to build up a silky smooth surface. Sanding feels a bit counterintuitive at first — you’ve worked hard on this thing and now you’re abrading it — but it really does make a difference, knocking back brush strokes and producing a polished, almost glass-like finish. Wipe away the dust with a barely damp cloth before each new coat. For the final layer, a dedicated varnish or resin instead of regular decoupage medium creates a hard, crystal-clear shell that’s seriously impressive.
To really lean into the vintage character of your plaque, a few finishing details can make it look like something out of a Victorian botanical collection. Brushing diluted raw umber or burnt sienna acrylic paint around the edges and quickly wiping it back creates a convincing aged effect. Antiquing wax rubbed in with a cloth and buffed to a soft sheen adds beautiful depth to any texture in the wood. And if you want to add genuine scholarly charm, tiny hand-lettered labels identifying your specimens — “Rosa gallica,” “Viola tricolor” — written in fine ink and sealed under a topcoat transform the whole thing into something that could genuinely pass for Victorian botanical art.
Embellishments can further personalise your finished plaque. Consider these options for adding extra character:
- Lace trim: Glue a narrow strip of antique lace around the edge of the plaque before sealing for a soft, romantic border.
- Wax seal: Press a decorative wax seal into a small amount of modelling paste in a corner of the plaque for an authentic antiquarian feel.
- Ribbon hanger: Thread a length of velvet or satin ribbon through a drilled hole at the top for a soft, vintage way to hang it.
- Gilding: Dry-brush a tiny amount of gold or bronze craft paint along the edges for a subtle, elegant finish.
- Stamped text: Use alphabet stamps and ink to add words — “garden,” “bloom,” “botanica” — to the background before applying your flowers.
Displaying, Gifting, and Growing Your Craft
A finished decoupage floral plaque is surprisingly versatile. Hang three or five together in a gallery wall arrangement — varying shapes but a consistent colour palette — and you’ve got a cohesive botanical display that looks genuinely curated. A single plaque propped on a mantelpiece or bookshelf works beautifully as an accent piece on its own. On a bedside table, a small pressed flower plaque brings a note of nature and handmade warmth that feels completely different from anything mass-produced. And here’s something to look forward to: these pieces actually age beautifully, the colours softening over the years in a way that only adds to their vintage charm.
As gifts, these plaques are hard to beat — especially when the flowers carry some personal meaning. One made from blooms cut from a bride’s bouquet, flowers from a loved one’s garden, or wildflowers gathered on a memorable trip becomes something genuinely irreplaceable. A small handwritten card explaining where the flowers came from elevates it from a pretty object into a story, and that’s really what makes handmade gifts so special. For a particularly memorable occasion, a set of small matching plaques tied together with ribbon and nestled in a simple wooden box is a beautiful way to present them.
Once you’ve got the basics down, there’s so much room to experiment and make the craft your own. Try mixing pressed flowers with other decoupage elements — vintage stamps, torn pages from old atlases, scraps of antique lace or wallpaper — for richer, more layered compositions. Branch out from wooden plaques: old chopping boards, salvaged picture frames, smooth river stones, and terracotta pots all take decoupage really well. Some experienced crafters go all out and embed pressed flowers under a full resin pour, creating a deep, jewel-like finish that makes even the most delicate specimens look absolutely stunning.
The online community around botanical crafting and decoupage is genuinely one of the warmest corners of the internet. Instagram and Pinterest are full of finished pieces ranging from charmingly rustic to incredibly refined, and watching what more experienced crafters are making is one of the fastest ways to develop your own eye. Lots of them document their whole process in short videos, so you can pick up tips on composition, adhesion, and finishing that might otherwise take months of trial and error to figure out yourself. Finding your own aesthetic within all of this — your signature colours, your favourite flower combinations, your particular finishing style — is one of the quieter pleasures of any craft you stick with long-term.
Maybe the best thing about decoupage pressed flower plaques, though, is that the whole process rewards you for slowing down. In a world that’s constantly moving fast and producing things instantly, there’s something genuinely restorative about spending an afternoon pressing flowers, sketching out a composition, and building up layers with a soft brush. The craft asks you to be present, careful, and patient — and those aren’t just good qualities for making art, they’re good for you. Every plaque you finish is a small act of preservation: saving something beautiful from time and giving it somewhere new to live.








What do you think?
It is nice to know your opinion. Leave a comment.