










Smart DIY Sealing Solutions for Home Fixes
Understanding Why Sealing Matters in Your Home
When it comes to home maintenance, sealing is one of the most underappreciated yet critically important tasks a homeowner can undertake. Gaps, cracks, and unsealed joints are not just cosmetic problems — they are entry points for moisture, cold air, pests, and energy loss. A single unsealed gap around a window frame or pipe penetration can result in hundreds of dollars in wasted heating and cooling costs every year, not to mention the structural damage that moisture infiltration can cause over time.
The good news is that most sealing projects around the home are well within the capabilities of an average DIY enthusiast. You do not need professional training or expensive tools to tackle the majority of these fixes. With the right products, a bit of preparation, and some patience, you can dramatically improve your home’s energy efficiency, comfort, and durability in a single weekend. Understanding which sealant to use for which application is the foundation of doing this work correctly and making your repairs last.
Beyond energy savings, proper sealing protects your home’s structural integrity. Water that works its way into walls through gaps around pipes, windows, or siding can cause wood rot, mold growth, and long-term damage that costs far more to repair than the original sealing job would have. Think of sealing not as a repair task but as a prevention strategy — one of the smartest investments of time and money you can make in your home’s long-term health and value.
Common Problem Areas That Need Attention
Before reaching for a caulk gun, it helps to walk through your home systematically and identify the places most likely to need sealing. Windows and doors are obvious starting points, especially where the frame meets the wall or the sill meets the glass. But many homeowners overlook less visible areas such as where pipes and wires penetrate walls and floors, where the foundation meets the sill plate, or around recessed lighting fixtures in ceilings that back up to unconditioned attic space.
Bathrooms and kitchens deserve special attention because they combine moisture, temperature fluctuation, and heavy use in ways that break down sealants faster than in other rooms. The joint between a bathtub and the wall, the perimeter of a kitchen sink, and the base of a toilet are all spots where failing or missing seals can allow water to damage subfloors and walls invisibly over months or years. Regular inspection of these areas — at least once a year — can catch problems early before they escalate into expensive repairs.
Exterior sealing is equally important and often more neglected. The transition points where different building materials meet — wood siding and brick, stucco and trim, siding and window casing — all expand and contract with temperature changes, creating gaps over time. A thorough exterior inspection in the spring and fall, followed by targeted caulking where needed, can dramatically extend the life of your paint job and protect the structural components behind the cladding from water intrusion.
Choosing the Right Sealant for Every Job
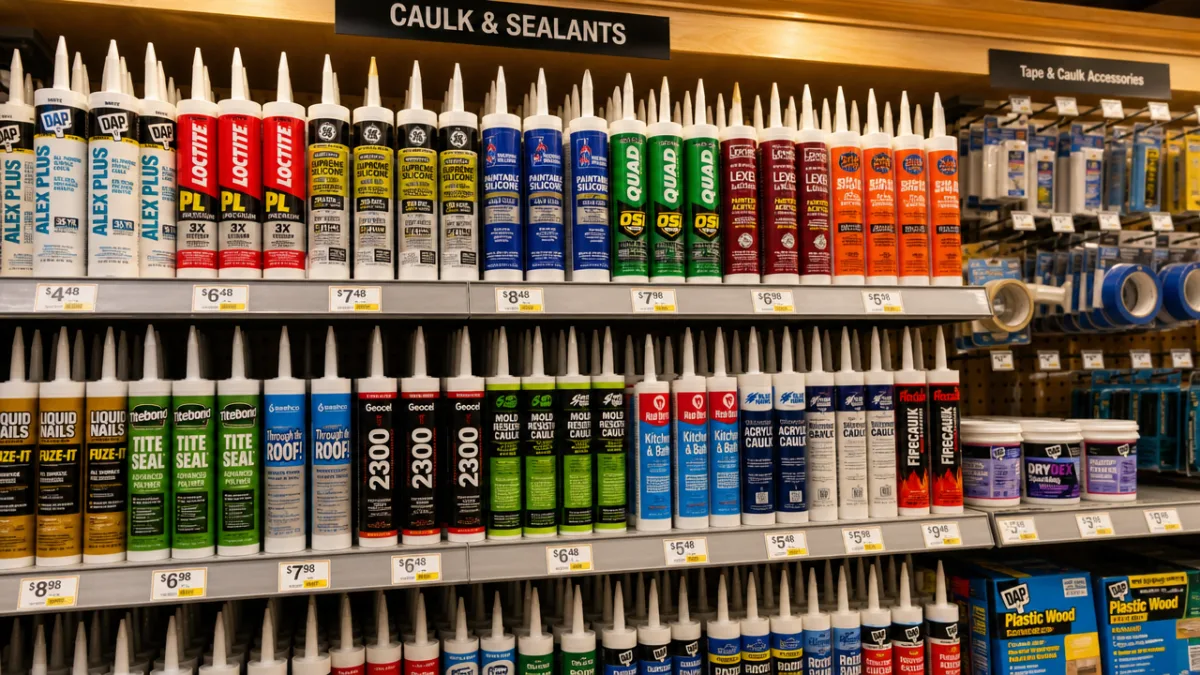
Not all sealants are created equal, and choosing the wrong product for a particular application is one of the most common mistakes DIYers make. Sealants differ in their flexibility, adhesion, paintability, moisture resistance, and durability, and each of these characteristics matters depending on where and how the sealant will be used. Using an interior latex caulk on an exterior joint exposed to sun and rain, for example, will result in a failed seal within a single season, no matter how carefully it was applied.
Silicone caulk is the gold standard for wet areas like bathrooms and kitchens because it resists moisture extremely well and remains flexible as surfaces expand and contract. However, pure silicone is notoriously difficult to paint over and requires careful surface preparation because it does not adhere well to dirty, oily, or damp surfaces. Latex-silicone blends offer a middle ground, providing better paintability and adhesion while retaining reasonable moisture resistance — a useful option for areas that see occasional splashing but not constant submersion.
For exterior applications, polyurethane sealants are often the best choice because they bond tenaciously to wood, masonry, and metal, and they cure to a firm but flexible consistency that holds up well through freeze-thaw cycles and UV exposure. Butyl rubber caulks are a traditional choice for roofing and flashing applications because of their exceptional waterproofing and long-term durability in outdoor conditions. Expanding foam sealants, meanwhile, are ideal for filling larger gaps and cavities — around pipes, in wall penetrations, or in the gap between a door frame and the rough opening — where a standard caulk bead would not be sufficient.
Reading Labels and Understanding Specifications
Manufacturers pack a lot of useful information onto the labels of sealant products, and taking the time to read them before purchasing can save you from buying the wrong thing. Key specifications to look for include the expected service life (measured in years), the temperature range in which the product can be applied and in which it will perform, whether it is paintable and if so how long to wait before painting, and its rated flexibility or movement capability expressed as a percentage of the joint width.
Pay attention to application temperature ranges in particular. Many caulks and sealants require surface and ambient temperatures above 40°F (4°C) to cure properly, and applying them in cold weather can result in adhesion failure or incomplete curing. Some products are formulated specifically for cold-weather application and will indicate this on the label — these are worth keeping on hand if you live in a climate where fall and winter maintenance is a reality. Applying a sealant at the wrong temperature is one of the most frustrating ways to waste both product and effort.
Color and finish options also matter more than they might seem. Many sealants are available in white, almond, clear, and a range of neutral tones, and choosing the right match for your surfaces will make finished repairs look clean and intentional rather than patched. Some high-end products are available in custom colors or can be tinted to match paint colors — a worthwhile investment for visible exterior joints or trim work where appearance is as important as performance.
Essential Tools and Preparation Techniques
The quality of any sealing job depends at least as much on preparation and technique as on the product itself. Investing in a few quality tools and taking the time to properly prepare surfaces will make the difference between a repair that lasts years and one that peels away within months. At minimum, you will need a quality caulk gun, a utility knife or caulk removal tool, a putty knife, painter’s tape, and a spray bottle filled with water for smoothing water-based caulks. A heat gun or hair dryer can also be useful for softening old caulk to make removal easier.
Surface preparation is non-negotiable for a lasting seal. The substrate must be clean, dry, and free of old caulk, paint flakes, grease, and dust. Old caulk that is not fully removed before new caulk is applied is one of the leading causes of premature seal failure — the new caulk adheres to the old rather than to the substrate, and when the old caulk fails, it takes the new layer with it. Take the extra time to scrape, scrub, and clean the joint thoroughly before applying anything new. For bathroom tiles and tubs, a mildicide cleaner applied before caulking can help prevent mold growth under the new seal.
Choosing the right size caulk gun for the job matters more than most beginners realize. A standard half-barrel ratchet gun works fine for small jobs, but for larger projects or when using thicker products like polyurethane, a smooth-rod or dripless gun with an antidrip mechanism will give you better control and reduce mess significantly. Some professionals prefer battery-powered caulk guns for high-volume work, but for the occasional DIY project, a quality manual gun in the $15–30 range will serve you well for years if you clean it after each use.
Applying Caulk Like a Professional
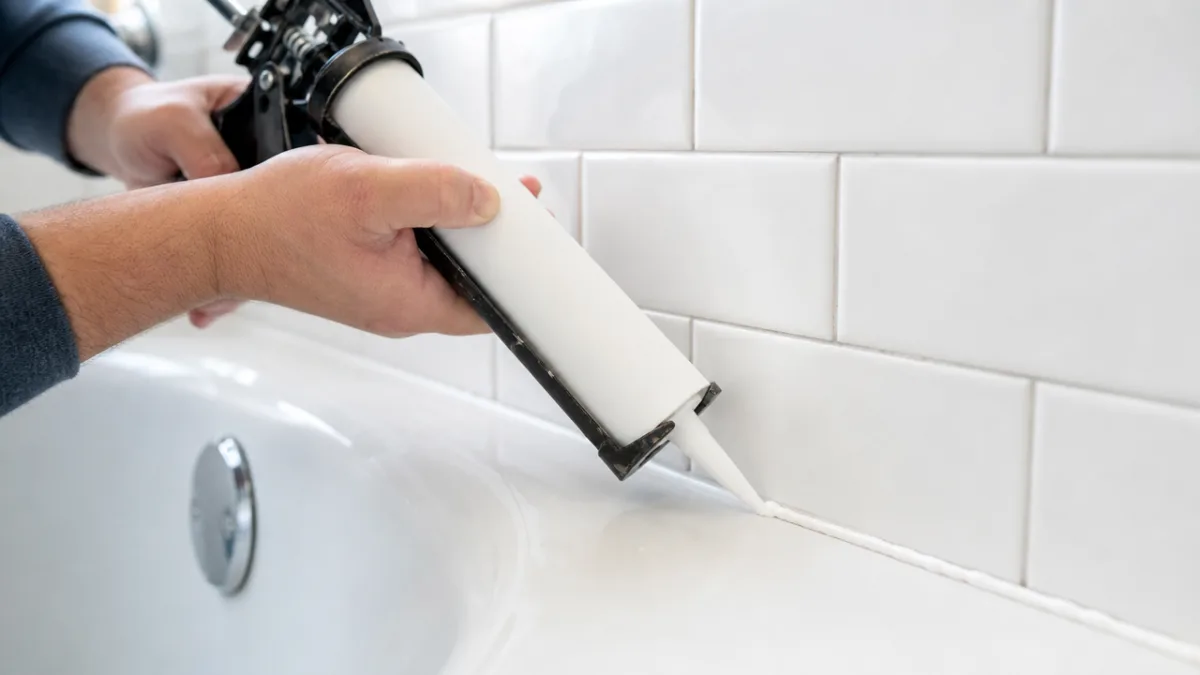
Professional caulk application follows a consistent set of steps that produce clean, durable results. Begin by masking both sides of the joint with painter’s tape, leaving the gap exposed. This keeps the surrounding surface clean and gives you a crisp, straight edge when you remove the tape. Cut the caulk tube at a 45-degree angle, starting with a smaller opening than you think you need — you can always cut more, but you cannot undo a tip that is too large. Pierce the inner foil seal with the rod on your caulk gun or a long nail.
Hold the gun at a consistent angle and apply steady, even pressure as you draw the bead along the joint in a single smooth motion. Maintain a consistent speed — too fast and you will have gaps and voids in the bead, too slow and you will have excess product that is difficult to smooth. Immediately after laying the bead, wet your fingertip or a caulk smoothing tool with water (for latex) or mineral spirits (for silicone) and run it along the bead with steady pressure to tool it into the joint and remove any excess. Remove the painter’s tape while the caulk is still wet for the cleanest possible edge.
Knowing when not to apply caulk in a single pass is an important advanced skill. Deep joints — anything wider than about half an inch — should be partially filled with a backer rod (a foam rope available at hardware stores) before caulking. This gives the caulk something to bond to on the back side of the joint, ensures the correct depth-to-width ratio for flexibility, and reduces the amount of caulk needed. Joints that are too deep relative to their width will not flex properly and are prone to cracking under movement stress.
Tackling Specific Sealing Projects Around the Home
With the right knowledge and tools in hand, you can confidently take on the most common sealing projects homeowners encounter. Bathroom recaulking is one of the most frequently needed and most satisfying jobs to complete. Begin by removing all old caulk from around the tub, shower, and sink using a caulk removal tool or utility knife, then clean the surfaces thoroughly with a bathroom cleaner and allow them to dry completely — ideally for 24 hours. Fill the tub with water before applying the new bead of caulk so that the joint is slightly open and the finished seal will not crack when the tub is in use and carrying its full weight.
Window and door caulking on the exterior is another high-impact project. Work your way around each window and door, looking for gaps between the frame and the siding or brick mold. Probe suspicious areas with a putty knife to find places where old caulk has pulled away from the substrate or cracked. For wood-to-wood and wood-to-masonry joints, a siliconized latex or polyurethane caulk will give excellent adhesion and flexibility. Take extra care at the bottom corners of window frames, as these are the first places water will find if the seal is compromised.
Basement and crawl space sealing is a project that many homeowners overlook because these areas are out of sight, but they have an outsized impact on comfort and energy efficiency. Air sealing the sill plate — the wood member that sits on top of the foundation wall — with expanding foam or a flexible sealant can dramatically reduce drafts in the living space above. Similarly, sealing around pipes and wire penetrations through the foundation wall prevents cold air, moisture, and pests from entering. A well-sealed basement or crawl space can reduce heating and cooling loads significantly and make upper floors noticeably more comfortable in extreme weather.
Weatherstripping Doors and Windows
Caulk handles stationary joints well, but moving parts like doors and windows require a different type of sealing solution: weatherstripping. The right type of weatherstripping depends on the location and the type of movement involved. Foam tape is the easiest to install and works well for compression seals on the tops and sides of doors, but it compresses permanently over time and typically needs replacement every few years. V-strip or tension seal weatherstripping made from plastic or metal is more durable and works well for the sides of door and window frames where the surface slides past the seal.
Door sweeps address the gap at the bottom of a door, which is often the largest single source of air infiltration in a home. Automatic door sweeps that retract when the door opens and drop when it closes are especially effective for frequently used exterior doors, preventing the sweep from dragging on flooring. For a simpler solution, an adjustable door sweep screwed to the bottom of the door can be set to just lightly contact the threshold and seal effectively without excessive drag. Replacement is straightforward and the materials are inexpensive — making this one of the highest-return projects in terms of energy savings per dollar spent.
Window weatherstripping tends to fail in predictable ways: foam compresses, adhesive backing releases, and the channel that holds the seal in a double-hung window can become worn or damaged. When re-weatherstripping windows, take the time to measure carefully and cut strips to precise lengths, as gaps at joints will negate the benefit of the new material. Some older windows have removable stop molding that makes replacing the channel seal much easier, while others require the new strip to be adhesively bonded into place. Either way, a re-weatherstripped window that previously rattled or drafted will feel remarkably different after the repair is complete.

Long-Term Maintenance and When to Call a Professional
Even the best-quality sealants have a finite service life, and building in a routine inspection schedule is the most effective way to ensure your sealing work continues to protect your home year after year. A twice-yearly walkthrough — ideally in the spring after winter weather stress and in the fall before cold and wet weather returns — gives you an opportunity to catch failing seals before they allow damage to occur. Look for cracks, gaps, peeling edges, discoloration from mold or mildew, and any areas where the sealant has pulled away from the substrate.
Keeping a small stock of sealant on hand means you can address problems immediately when you find them rather than letting a small gap become a larger problem while you make a hardware store run. A tube or two of latex caulk, one of silicone, and a can of expanding foam will cover the majority of household repairs. Check the expiration dates on stored sealants — most have a shelf life of about a year once opened, and caulk that has begun to skin over inside the tube or that comes out in strings rather than a smooth bead should be replaced. Label your tubes with the purchase date to avoid guessing.
Documentation is an often-overlooked maintenance habit that pays real dividends over time. Taking photos of completed sealing projects and noting the product used, the application date, and any relevant details creates a maintenance log that helps you track how different products perform in your specific climate and application scenarios. This information is also valuable when you are preparing to sell your home, as it demonstrates a pattern of proactive maintenance that buyers and inspectors will view favorably. A simple folder of dated photos and receipts costs nothing but a few minutes of effort.
Knowing the Limits of DIY Sealing
For all that DIY sealing can accomplish, there are situations where professional assessment or intervention is the right choice. If you discover that water has already penetrated a wall or floor system and caused structural damage or widespread mold, a sealant is not the solution — remediation and structural repair come first. Applying caulk over a mold problem does not eliminate the mold; it only hides it temporarily while the growth continues behind the seal. When you find evidence of ongoing water infiltration — staining, soft drywall, warped flooring, or visible mold — investigate the cause thoroughly before sealing anything.
Roof flashing and complex roofline penetrations such as skylights and chimney bases are generally best left to a roofing professional unless you are experienced working at heights and understand the specific products and techniques involved. A failed roof seal can lead to significant interior damage very quickly, and the cost of professional repair is almost always less than the cost of repairing the water damage that results from a DIY job gone wrong. Many roofing warranties are also voided by unauthorized work, so check your documentation before attempting repairs.
Energy auditors and building performance contractors can also be valuable partners in a comprehensive sealing project. A professional energy audit using blower door testing and infrared imaging can reveal air leakage paths that are completely invisible to the naked eye — inside wall cavities, at partition wall top plates, and through recessed lighting penetrations. For homeowners who have addressed all the obvious sealing opportunities and still experience drafts, high energy bills, or comfort issues, a professional audit can pinpoint exactly where additional effort will have the greatest impact and help you prioritize the remaining work for maximum return on your time and investment.








What do you think?
It is nice to know your opinion. Leave a comment.