










How to Install Solar Powered Drip Irrigation, Controller and Valves
Understanding Solar Powered Drip Irrigation Systems
Solar powered drip irrigation represents one of the most efficient and environmentally friendly ways to water your garden, landscape, or small farm. By combining the precision of drip irrigation with the renewable energy of the sun, these systems deliver water directly to plant roots while eliminating reliance on grid electricity or manual watering schedules. Whether you are tending a backyard vegetable garden or managing a larger property, this technology offers a compelling blend of convenience, conservation, and cost savings that makes it increasingly popular among homeowners and hobby farmers alike.
The core principle behind drip irrigation is simple: water is delivered slowly and directly to the base of each plant through a network of tubing, emitters, and valves. This targeted approach reduces evaporation dramatically compared to sprinkler systems or flood irrigation, meaning your plants receive more of the water you provide. When you add solar power into the equation, you eliminate the need to run electrical lines to your garden, which can be expensive and logistically challenging in remote or rural settings. A small solar panel paired with a rechargeable battery can power a controller and solenoid valves for years with minimal maintenance.
Before diving into installation, it helps to understand the key components that make up a solar powered drip irrigation system. These include the solar panel itself, a battery for energy storage, an irrigation controller or timer, one or more solenoid valves, a main water supply line, distribution tubing, drip emitters or micro-sprinklers, and various fittings and connectors. Each component plays a specific role, and choosing quality parts from the outset will save you troubleshooting headaches later. Take time to sketch out your garden layout and calculate your watering needs before purchasing anything, as this planning step is critical to a successful installation.
Planning Your System Layout and Calculating Water Requirements
Effective planning is the foundation of any successful irrigation installation. Begin by drawing a simple map of the area you want to irrigate, noting the location of your water source, the positions of your plants or planting rows, and any obstacles such as pathways, fences, or structures. Measure the total length of tubing you will need and count the number of plants or zones you intend to water. This information will determine how many valves you need, what size pump or water pressure is required, and how large a solar panel and battery bank you should purchase to meet your energy demands reliably.
Calculating water requirements is not as complicated as it might sound. Most vegetables and flowering plants require roughly one inch of water per week, though this varies based on climate, soil type, and the specific crops you are growing. Drip emitters are rated in gallons per hour, typically ranging from 0.5 to 2 gallons per hour per emitter. By multiplying the number of emitters by their flow rate and estimating how many minutes per day your system will run, you can calculate your total daily water usage. This figure also helps you size your water source, whether that is a municipal supply, a rain barrel, or a storage tank.
When planning your zones, group plants with similar water needs together whenever possible. Tomatoes and squash, for example, require more frequent watering than herbs like rosemary or lavender. Organizing your garden into irrigation zones allows your controller to apply different schedules to different areas, maximizing water efficiency and promoting healthier plants. Consider the slope of your land as well, since water pressure decreases over longer distances and uphill runs, which may require pressure compensating emitters to ensure even distribution throughout the system.
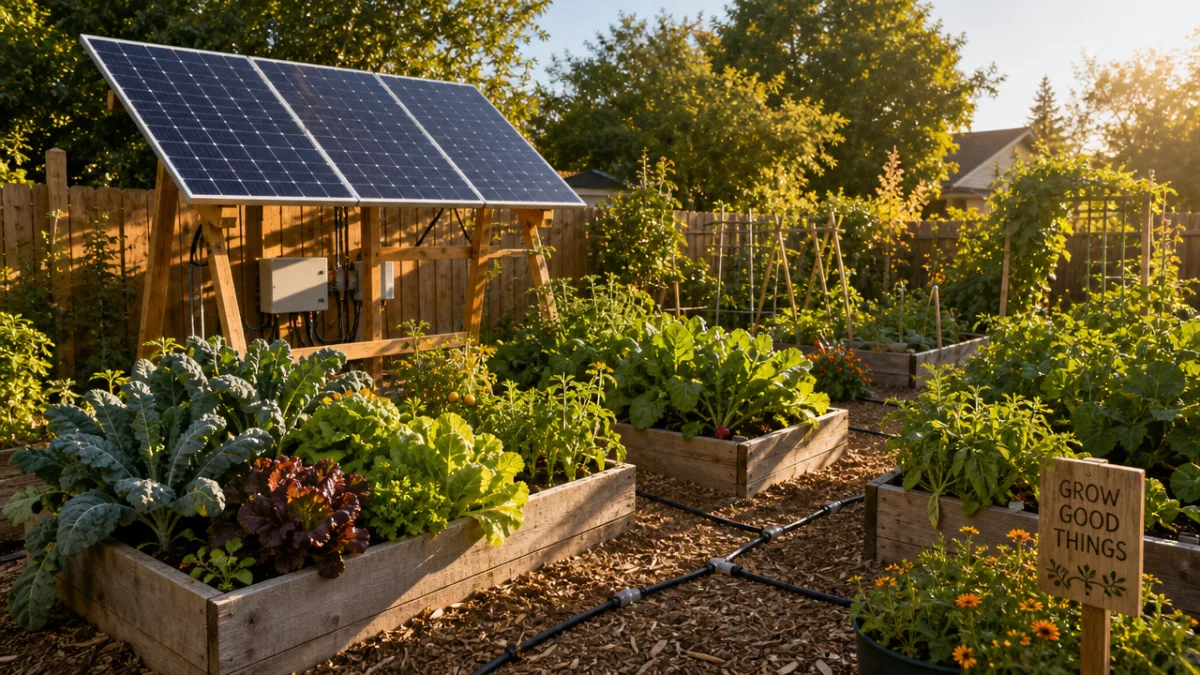
Do not overlook sun exposure when placing your solar panel. The panel needs to receive direct sunlight for at least six to eight hours per day to keep the battery adequately charged. Avoid locations where shade from trees, buildings, or fences will reduce solar gain, especially during the afternoon hours when sunlight is most intense. Many gardeners mount their panels on a simple wooden or metal frame at an angle matching their geographic latitude, which optimizes year-round energy collection. A south-facing orientation in the Northern Hemisphere is generally ideal for maximizing solar input.
Gathering Tools and Materials for Installation
Having all your tools and materials assembled before you begin will make the installation process much smoother and more enjoyable. The basic tools you will need include a shovel or trenching tool if you plan to bury any supply lines, a hole punch tool for creating emitter insertion points in the tubing, a pair of sharp scissors or tubing cutters, a tape measure, and adjustable pliers or a small wrench for tightening fittings. A drill with appropriate bits will be useful if you need to mount the controller or solar panel bracket to a wall, post, or other structure.
In terms of materials, your shopping list will typically include the following essential items:
- A solar panel rated between 5 and 20 watts depending on your controller and valve requirements
- A sealed lead-acid or lithium battery with sufficient capacity to run the system through cloudy days
- A solar-compatible irrigation controller or timer with battery input
- One or more 9-volt or 12-volt solenoid valves matched to your controller
- A backflow preventer to protect your water supply from contamination
- A filter screen to remove debris that could clog emitters
- Half-inch or three-quarter-inch poly mainline tubing as your primary supply line
- Quarter-inch distribution tubing and drip emitters for individual plants
- Barbed fittings, end caps, stakes, and figure-eight closures
- Waterproof wire connectors and UV-resistant electrical cable for connecting the solar panel to the controller
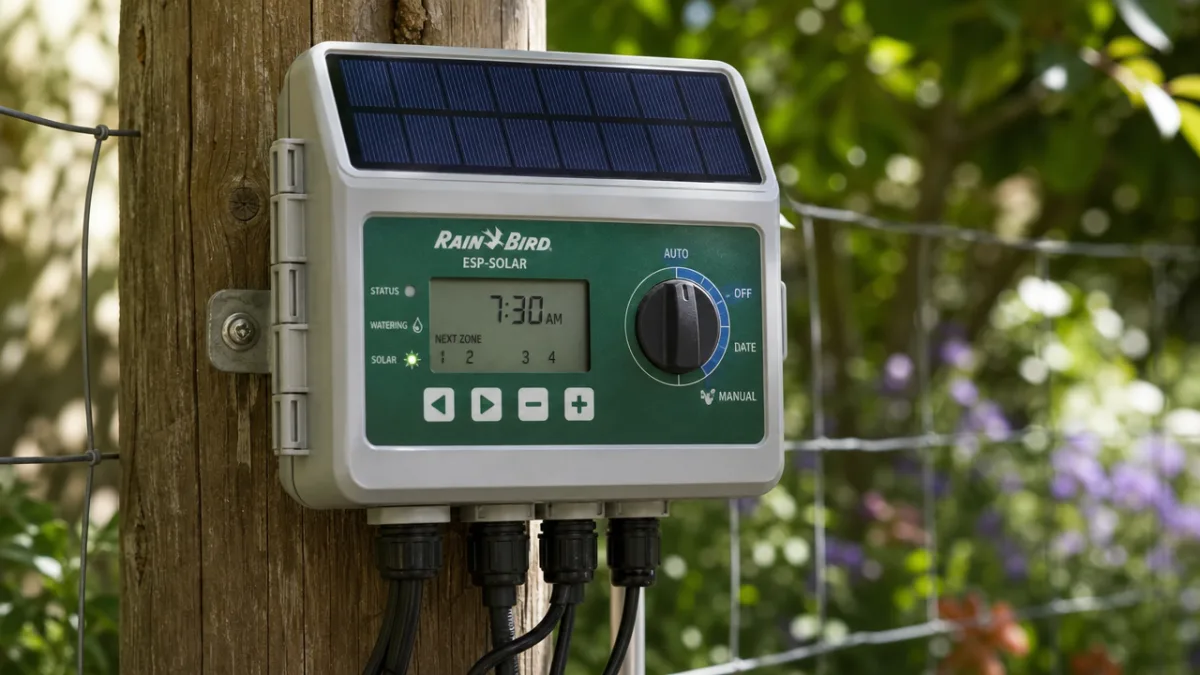
Quality matters significantly when selecting your components. Cheap solenoid valves may fail prematurely or fail to open and close reliably, leading to drowned plants or a completely dry garden. Look for valves with a low-pressure activation rating if you are working with gravity-fed systems or rain barrels, as standard valves often require municipal water pressure to operate correctly. Similarly, invest in a controller that is specifically designed for solar or battery operation, as these units are optimized for low power consumption and will extend your battery life considerably compared to adapted AC controllers.
Installing the Solar Panel, Battery, and Controller
Begin the electrical portion of your installation by selecting a secure, weatherproof location for your battery and controller. A small plastic enclosure or a weatherproof junction box works well for housing these components outdoors. Mount the box on a post, fence, or garden shed wall within reasonable cable distance of your solar panel. Make sure the enclosure has ventilation to prevent heat buildup, which can shorten battery life. Some gardeners choose to keep the battery indoors or in a shed and run longer cables to the panel and valves, which is perfectly acceptable as long as you account for any voltage drop over extended wire runs.
To mount the solar panel, assemble your chosen bracket or frame and position it where you have confirmed good sun exposure throughout the day. Angle the panel toward the sun at your latitude angle for optimal year-round performance, or use a simple adjustable mount that allows you to modify the angle seasonally. Secure the panel firmly, as wind can dislodge poorly anchored panels and cause damage. Run your solar cable from the panel to the battery enclosure, keeping connections tight and using waterproof connectors at every junction. Most small solar panels designed for irrigation use include a built-in charge controller to prevent overcharging, but verify this before connecting the panel directly to your battery.
With the panel and battery connected, it is time to wire the irrigation controller. Most solar-compatible controllers accept 9-volt or 12-volt input and include terminals for connecting directly to your battery. Follow the manufacturer’s wiring diagram carefully, as incorrect polarity can damage the controller or valves instantly. Once powered, most controllers will display a startup screen allowing you to configure your irrigation schedule. Program your desired watering times and durations at this stage, keeping in mind that watering in the early morning typically reduces evaporation losses and the risk of fungal disease compared to evening irrigation. Test the controller’s manual activation feature before proceeding to valve installation.
Installing the Solenoid Valves and Main Supply Line
Solenoid valves are the gatekeepers of your irrigation system, opening and closing on command from the controller to release water to each zone. Start by locating a convenient tap-off point from your water supply, whether that is a garden hose bib, a water storage tank, or a rainwater collection system. Connect your backflow preventer first, then your filter screen, and finally the solenoid valve or valves in sequence. The backflow preventer is a non-negotiable component that protects your drinking water supply from potential contamination through back-siphoning, and many municipalities require it by code.
Run your main supply line from the valve assembly to the perimeter of your irrigation area. Poly tubing can be laid on the surface of the soil and held in place with garden staples, or buried a few inches underground for a cleaner appearance and better protection from UV degradation and accidental damage. Keep your main line as straight as possible to minimize pressure loss, and use appropriate barbed fittings and clamps wherever you need to make turns or branch off to secondary lines. Flush the main line thoroughly before connecting your distribution tubing and emitters to remove any debris introduced during installation.
Connect the solenoid valve wiring to the appropriate terminals on your irrigation controller according to the manufacturer’s instructions. Most residential systems use two-wire connections per valve, with a common wire shared among all valves if you have multiple zones. Keep wire connections protected inside the weatherproof enclosure, and seal any outdoor wire junctions with self-sealing waterproof connectors. Once the valves are wired, test each zone manually using the controller’s test function to confirm that valves open and close correctly and that water flows freely through the main lines before you proceed with the final distribution tubing layout.
Laying Distribution Tubing and Installing Drip Emitters
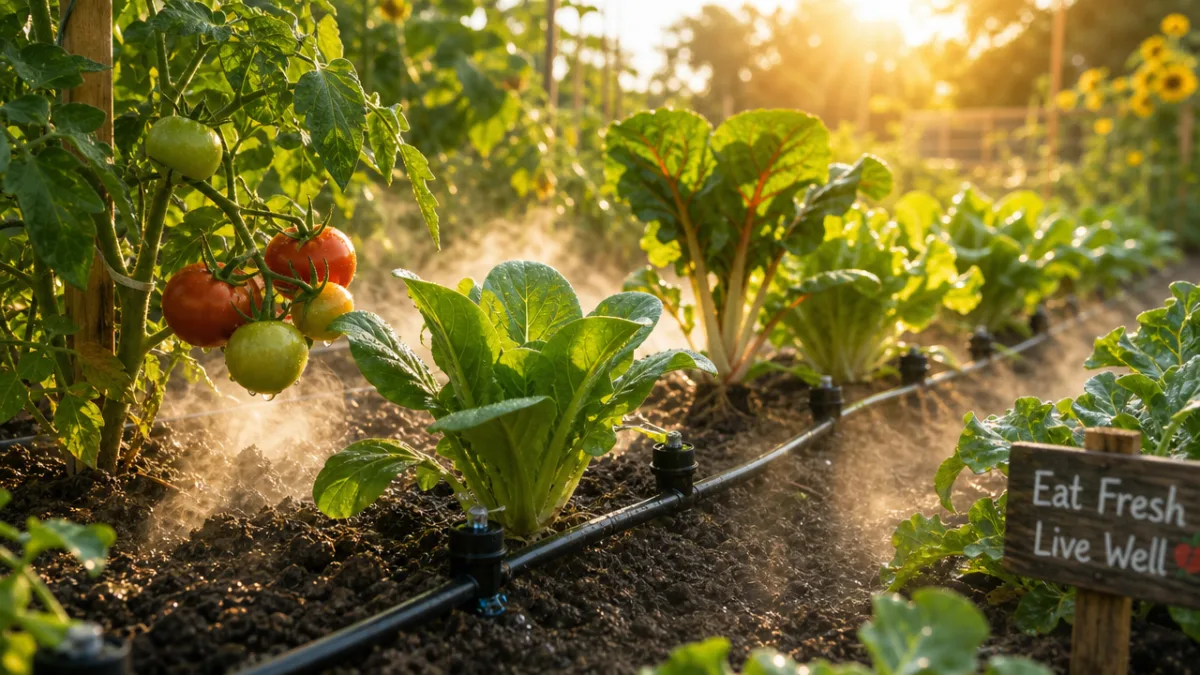
With your main supply line in place and valves tested, you are ready to install the quarter-inch distribution tubing that carries water to individual plants. Using your hole punch tool, create insertion points in the main line at appropriate intervals corresponding to your plant spacing. Insert barbed fittings into these holes and attach lengths of quarter-inch tubing, running each line to the base of the plant or group of plants it will serve. Keep distribution lines as short as practical to maintain consistent pressure, and secure tubing to the soil surface with garden staples to prevent it from shifting during use or being displaced by animals or foot traffic.
At the end of each distribution line, install an appropriate drip emitter suited to your plant’s water needs. Standard options include:
- Button drippers — Fixed-rate emitters ideal for individual plants, available in 0.5, 1, and 2 gallon-per-hour ratings
- Adjustable emitters — Allow you to dial in flow rate from nearly zero to approximately 10 gallons per hour, offering great flexibility
- Micro-sprinklers — Spray water in a small radius, useful for ground covers or densely planted beds
- Soaker rings — Loop around the base of trees or shrubs for even root zone saturation
- Inline emitters — Built directly into distribution tubing at set intervals, convenient for row crops
After installing all emitters, cap the ends of your distribution lines using end caps or figure-eight closures to prevent water from escaping freely at line terminations. Conduct a full system test by activating each zone manually and walking the entire distribution network to check for leaks at every fitting, emitter, and connection point. Tighten or replace any leaking fittings before your system goes into regular operation. Observe each emitter to confirm it is dripping steadily and delivering water to the correct location, making adjustments as needed to ensure thorough and even coverage across your entire garden.
Once you are satisfied with the performance of every zone, set your final irrigation schedule on the controller. Consider starting with a conservative schedule and observing your plants over the first week or two, then adjusting run times based on how the soil moisture and plant health respond. Most vegetable gardens thrive with one to two short watering sessions per day during summer, while established perennials and drought-tolerant plants may only need watering every two or three days. Your solar powered system will reliably execute whatever schedule you program, giving you the freedom to travel or simply enjoy your garden without worrying about manual watering.
Maintenance, Troubleshooting, and Seasonal Considerations
A well-installed solar powered drip irrigation system requires relatively little maintenance, but a few routine tasks will keep it performing at its best for years to come. Inspect your filter screen monthly during the growing season, cleaning it whenever you notice a reduction in flow or pressure at your emitters. Flush your main lines at the beginning and end of each season to clear any sediment or mineral deposits that may have accumulated. Walk your distribution lines periodically to look for emitters that have become clogged, dislodged, or chewed through by curious rodents or insects, replacing or repositioning them as needed.
Common troubleshooting scenarios you may encounter include valves that fail to open, emitters that drip continuously even when the zone is off, or controllers that display low battery warnings despite a functioning solar panel. A valve that does not open is often caused by a clogged solenoid or insufficient power from the battery, so check your battery voltage and clean the solenoid inlet screen if present. An emitter that drips when the valve is closed typically indicates a faulty valve diaphragm that needs replacement. A persistently low battery reading in a system with adequate sun exposure may signal a failing battery that has reached the end of its service life and needs replacement, which is a normal occurrence every three to five years depending on battery type and usage patterns.
Seasonal preparation is especially important in climates that experience freezing winters. Before the first hard frost, shut off your water supply and drain all tubing and valves thoroughly to prevent ice damage. Many gardeners blow out their lines with a compressor or simply disconnect and store their distribution tubing indoors during the off-season. Remove the battery from its outdoor enclosure and store it in a cool, dry place with a partial charge to maximize its lifespan. Your solar panel can generally remain outdoors year-round if it is mounted securely, but a quick inspection each spring to check for cracked glass or corroded connections is always worthwhile before you reconnect and restart the system for a new growing season.








What do you think?
It is nice to know your opinion. Leave a comment.