










Quick and Stylish Kitchen Makeover Ideas That Won’t Break Your Budget
Why Your Kitchen Deserves a Refresh Without the Renovation Price Tag
The kitchen is widely considered the heart of the home, yet it’s also one of the most expensive rooms to renovate from scratch. Full-scale remodels can easily run into tens of thousands of dollars, leaving many homeowners feeling stuck with outdated cabinets, worn countertops, and fixtures that belong firmly in a different decade. The good news is that a dramatic transformation doesn’t require a contractor, a massive budget, or weeks of living with dust and chaos. With the right approach, you can breathe new life into your kitchen in a single weekend.
Budget-friendly kitchen makeovers have exploded in popularity across social media platforms, and for excellent reason. Homeowners and renters alike are discovering that strategic, well-chosen updates can completely change the feel and functionality of a space without touching the bones of the room. Whether you’re preparing to sell your home and want to boost its appeal or simply craving a more inspiring space to cook your meals, there’s a range of affordable techniques available that deliver genuinely impressive results.
The key principle behind any successful budget makeover is focusing your energy and money on the elements that command the most visual attention. Surfaces, hardware, lighting, and color are the four pillars of kitchen aesthetics, and updating even two or three of these elements simultaneously creates a compounding effect that makes the entire room look intentional, cohesive, and noticeably refreshed. This article walks you through the smartest, most cost-effective strategies, section by section, so you can build a makeover plan that works for your space and your wallet.
Cabinet Transformations That Make the Biggest Visual Impact
Cabinets occupy more visual real estate in a kitchen than almost any other element, which means updating them — even partially — delivers an outsized return on your investment of time and money. The most impactful and affordable approach is painting. A quality bonding primer followed by two coats of cabinet-specific paint can completely transform tired wooden or laminate doors, turning dull oak into a sleek modern surface in a color that matches your vision. Popular choices include deep navy, warm sage green, crisp white, and earthy terracotta, all of which are having a major moment in contemporary kitchen design.
If painting feels like too significant a commitment, or if your cabinets are structurally sound but visually outdated, consider replacing only the cabinet doors rather than the entire unit. Many suppliers offer replacement doors at a fraction of the cost of full cabinets, and because they simply attach to existing hinges and boxes, installation can often be completed in a day. Shaker-style doors are a particularly timeless choice that bridges traditional and modern aesthetics seamlessly, making them a safe bet regardless of your home’s overall design language.
For renters or those with very tight budgets, peel-and-stick contact paper in wood grain, marble, or solid color finishes can be applied directly to cabinet faces for a temporary but surprisingly convincing transformation. Combined with new hardware, even this low-cost approach can dramatically elevate the look of older cabinetry. The critical factor is careful surface preparation — cleaning, degreasing, and smoothing the surface before application ensures the material adheres properly and lasts without peeling or bubbling at the edges.
Choosing the Right Cabinet Hardware
Cabinet hardware is one of the most underrated budget makeover tools available. Swapping out dated brass pulls or worn plastic knobs for sleek matte black handles, brushed brass fixtures, or minimalist bar pulls costs very little per piece but creates a wholesale change in the kitchen’s personality. When selecting new hardware, consider the finish you want to carry through the rest of the room — consistency across faucets, light fixtures, and cabinet hardware creates a sense of intentional design that reads as high-end even when the budget is modest.
Beyond aesthetics, the size and style of hardware you choose also affects how comfortable and intuitive your kitchen feels to use daily. Longer bar pulls on larger drawers are more ergonomic and visually balanced, while small round knobs suit narrow cabinet doors more naturally. Taking the time to measure your existing hardware and map out placement before purchasing prevents the frustration of discovering mismatched hole spacing after you’ve committed to a style. Most home improvement stores allow returns, but having accurate measurements from the start keeps the project moving smoothly.
Countertop and Backsplash Updates on a Shoestring Budget
Countertops are another area where perception and reality can be helpfully decoupled when you’re working with a limited budget. Peel-and-stick countertop film, now available in highly convincing marble, granite, butcher block, and concrete finishes, has improved dramatically in quality over recent years. Applied with care to a clean, smooth surface, these films can fool the eye convincingly in photographs and casual observation, giving the appearance of stone or wood without the material cost. They’re particularly useful in rental kitchens where permanent modifications aren’t permitted.
For those who own their homes and are willing to invest slightly more effort, concrete overlay systems offer a more durable and genuinely tactile surface transformation. These DIY-friendly kits involve applying a thin layer of concrete-based compound directly over existing laminate or tile countertops, which can then be sealed and finished in various ways. The results have a handmade, artisan quality that suits modern farmhouse and industrial kitchen aesthetics particularly well, and the total cost is typically a fraction of replacing countertops entirely with stone or quartz.
Backsplashes represent perhaps the single most dramatic transformation available for the smallest investment of material. A tile backsplash behind the stove and preparation area instantly adds texture, color, and pattern to an otherwise flat kitchen. Peel-and-stick tile panels have made this update genuinely accessible even to those with no tiling experience — they require no grout, no adhesive mixing, and no special tools, yet produce results that are strikingly close to the real thing. For a more permanent and authentic installation, traditional subway tiles remain one of the most affordable ceramic tile options on the market and never go out of style.
Grout Refresh and Cleaning
Before investing in new tile at all, consider whether your existing backsplash or floor tile might simply need professional-grade cleaning and grout refreshing. Decades of cooking grease, steam, and cleaning product residue can make perfectly good tile look dingy and outdated. A grout pen in a fresh white or contrasting dark color can be applied directly over existing grout lines to immediately brighten the appearance and restore visual crispness to the tile pattern. This quick fix costs only a few dollars and takes an afternoon, yet the improvement in the room’s cleanliness and brightness is often remarkable.
Steam cleaning, available through rental machines at most hardware stores, can remove built-up grime from grout lines and tile surfaces that no amount of household scrubbing will touch. Combining a thorough steam clean with a grout pen treatment and a tile sealant application gives existing tile a genuinely renewed appearance. Many homeowners who have completed this process report being surprised to discover that they didn’t need new tile at all — the original tile was simply obscured beneath years of accumulated residue that had gradually become invisible through familiarity.
Lighting Upgrades That Instantly Elevate the Entire Space
Lighting is one of the most powerful and frequently overlooked tools in any interior makeover, and the kitchen is no exception. Replacing a single dated overhead fixture with a modern pendant light or a stylish semi-flush mount can shift the room’s entire atmosphere, from functional utility space to warm, inviting hub of the home. Pendant lights over a kitchen island or breakfast bar are particularly effective because they serve as both task lighting and decorative focal points, adding personality and visual interest at eye level where it’s most immediately noticed.
Under-cabinet lighting is another relatively affordable upgrade that delivers both practical and aesthetic benefits simultaneously. LED strip lights installed beneath upper cabinets illuminate the countertop workspace below, eliminating shadows during food preparation while also creating a warm ambient glow that makes the kitchen feel layered and sophisticated after dark. Battery-operated or plug-in LED strips require no electrical work whatsoever, making them accessible to renters and those with no electrical knowledge, while hardwired versions provide a cleaner look and more consistent performance for those comfortable with a slightly more involved installation.
Don’t underestimate the impact of switching to warm-toned LED bulbs throughout the kitchen if you haven’t already done so. Cool or neutral light — common in older fluorescent fixtures — tends to flatten colors, make surfaces look clinical, and drain the warmth from wooden tones and organic textures. Replacing these with bulbs in the 2700K to 3000K range transforms the atmosphere immediately and makes food look more appetizing, surfaces more inviting, and the entire room more livable. This is among the cheapest upgrades available, costing just a few dollars per bulb, yet its effect on daily enjoyment of the space is immediate and noticeable.
Natural Light Maximization Strategies
Maximizing natural light is a zero-cost strategy that can dramatically transform a kitchen’s feel during daylight hours. Removing heavy or opaque window treatments and replacing them with simple linen sheers, woven roller blinds, or bare windows where privacy allows immediately floods the room with daylight, making it feel larger, cleaner, and more energetic. Placing reflective surfaces — a mirror, metallic backsplash tiles, or even a strategically hung piece of mirrored wall art — near windows amplifies the light’s reach and distributes it further into the room.
Keeping window sills clear of clutter is another simple but effective strategy. A small potted herb garden on the window sill can add life and greenery without blocking light, as herbs are generally low-growing and their thin foliage allows light to pass through and around them. This functional decoration also keeps fresh ingredients at arm’s reach during cooking, which is a pleasant daily reminder of the care and intention you’ve brought to your kitchen’s transformation.
Affordable Styling and Decorative Touches That Pull It All Together
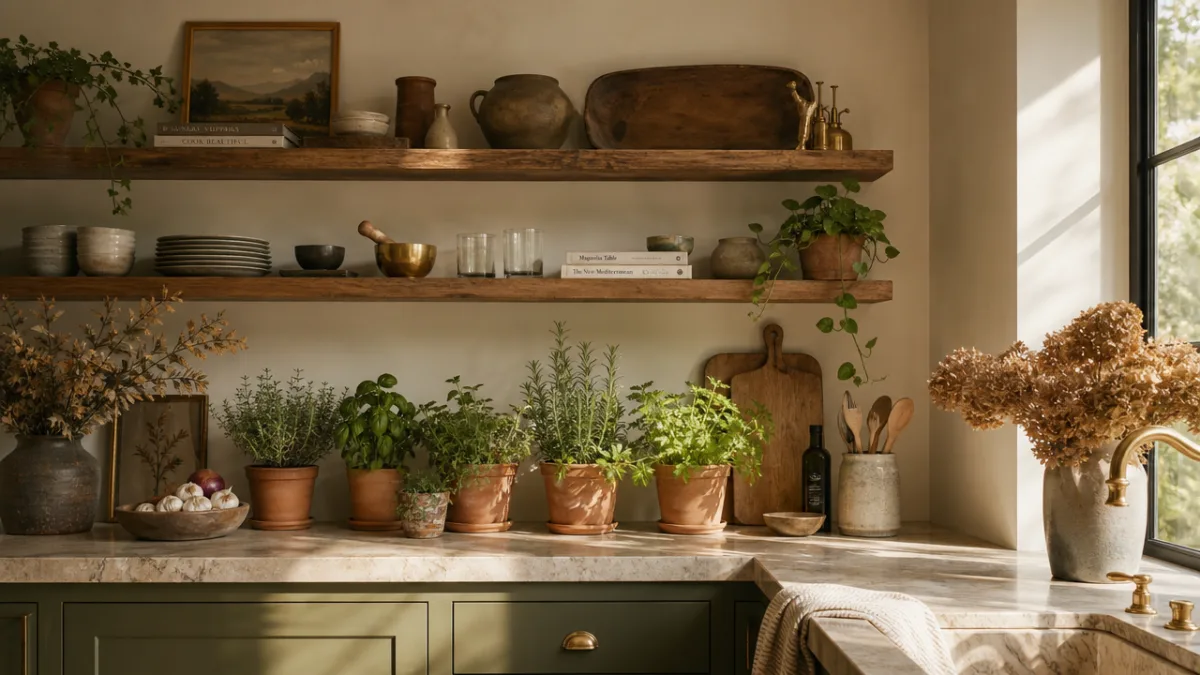
Once structural and surface updates are in place, the decorative layer is what transforms a renovated kitchen into a genuinely personal and inviting space. Open shelving, either by removing upper cabinet doors or by installing floating shelves in a strategic location, offers a cost-effective way to display curated collections of dishes, glassware, plants, and accessories that communicate personality and warmth. The key to making open shelving look intentional rather than cluttered is restraint — selecting a limited color palette for displayed items and leaving some negative space between objects allows each piece to breathe and be appreciated.
A single statement piece can anchor the room’s new aesthetic and tie disparate updates together into a cohesive whole. This might be a large-format piece of artwork propped against the backsplash on the counter, an oversized ceramic vase filled with dried Grasses or seasonal branches, or a vintage clock mounted on the wall above the stove. Statement pieces don’t need to be expensive — thrift stores, estate sales, and online marketplaces are full of characterful objects that can be incorporated into a modern kitchen aesthetic with minimal effort and cost.
Textiles are an often-forgotten dimension of kitchen styling that contribute enormously to warmth and livability. A well-chosen runner rug in front of the sink, a set of coordinated linen dish towels hung from the oven handle, or window treatments in a considered pattern or texture can soften the hard surfaces that dominate most kitchens and make the space feel more comfortable to spend time in. These small investments cost very little individually but collectively create a layered, finished look that elevates the overall quality of the makeover significantly.
Plant Life and Organic Elements
Bringing living plants into the kitchen adds a dimension of organic vitality that no purchased decoration can fully replicate. Beyond the classic window sill herb garden, trailing pothos or ivy displayed on top of upper cabinets creates an effortlessly lush look that softens the room’s geometry and adds color without requiring any additional wall space. Low-maintenance succulents grouped on a small wooden board make an attractive and self-sustaining countertop display that requires watering only occasionally and survives the variable humidity of a busy kitchen.
Dried botanical elements are another excellent option for those who find maintaining living plants challenging. Dried lavender bundles tied with twine, a terracotta pot of dried herbs, or a vase of preserved eucalyptus branches all bring natural texture and earthy tones into the kitchen without any ongoing maintenance requirement. These elements align well with the warm, artisan aesthetic that currently dominates kitchen design trends and can be sourced inexpensively from farmers markets, craft stores, or even foraged from outdoor spaces depending on your location and the season.
Creating a Cohesive Plan and Executing Your Makeover Efficiently
The difference between a kitchen that looks thoughtfully updated and one that looks merely patched together often comes down to planning rather than budget. Before purchasing a single item or beginning any project, take time to photograph your current kitchen from multiple angles and in different lighting conditions. These photos serve as a reference point that helps you evaluate changes objectively, since our eyes quickly adapt to familiar environments and make it difficult to see them clearly. Reviewing photographs rather than the room itself makes it much easier to identify what’s working, what isn’t, and where attention will deliver the greatest return.
Establishing a color story before you begin purchasing is equally important. Select a primary color — the dominant tone that will appear in the largest quantities, typically on cabinets or walls — a secondary color that appears in accents and smaller surfaces, and one or two neutral anchor tones that tie everything together. Carrying this palette through every decision, from paint color to textile choice to decorative objects, is what creates the sense of cohesion that distinguishes a professionally designed space from a collection of individually nice things that somehow don’t quite work together.
Budgeting realistically and tracking spending as you go prevents the all-too-common experience of overspending on early stages of a project and running out of funds before the finishing touches that make everything click into place. A simple spreadsheet with projected and actual costs for each element of the makeover keeps priorities visible and allows for informed trade-off decisions when needed. Prioritizing the updates that affect the most surface area or receive the most daily attention — cabinets, countertops, and lighting — while being more resourceful about decorative elements ensures that the most important work gets done even if the budget needs adjusting along the way.
Timeline and Project Sequencing
Sequencing your makeover projects in the right order prevents the frustration of redoing work or damaging finished surfaces. The general principle is to work from top to bottom and from structural to decorative — address ceiling fixtures and upper cabinets before countertops, and complete all painting before installing new hardware or styling shelves. This order ensures that drips, dust, and incidental marks from earlier work don’t damage surfaces you’ve already finished, and that the final decorative layer goes in once everything permanent is complete and properly cured.
Many of the updates described in this article can genuinely be completed over a single weekend when approached with good preparation and the right materials on hand before starting. Ordering hardware, paint, and tile samples in advance rather than buying speculatively saves multiple trips to the store and prevents project momentum from stalling. Reading full product instructions before beginning — not just during — means that drying times, ventilation requirements, and tool needs are already accounted for in your schedule rather than discovered as obstacles mid-project.
- Start with a thorough deep clean of the entire kitchen before assessing what truly needs updating versus what simply needs refreshing.
- Order sample pots of any paint colors you’re considering and test them on the actual surfaces in both daylight and artificial light before committing to full quantities.
- Complete all painting and surface treatments before installing new hardware, fixtures, or decorative elements to protect finished work.
- Photograph the space throughout the process to track progress and identify areas that may benefit from additional attention before declaring the project complete.
- Allow all painted and sealed surfaces their full recommended curing time before placing objects on them or subjecting them to regular kitchen use.
The most satisfying kitchen makeovers are those completed with patience, intention, and a genuine understanding of the space’s potential. A budget kitchen transformation is not about cutting corners or settling for less — it’s about making smart, well-considered decisions that maximize the impact of every dollar spent and every hour invested. With the strategies outlined in this guide, your kitchen can become a space that feels stylish, functional, and entirely your own, without the financial strain or structural disruption of a full-scale renovation. The kitchen you’ve been dreaming about is far more achievable than you might have believed.








What do you think?
It is nice to know your opinion. Leave a comment.