










Craft Storage Ideas That Transform Small Spaces Into Powerful Creative Studios
Why Smart Craft Storage Changes Everything About Your Creative Life
If you’ve ever sat down to work on a project only to spend the first twenty minutes hunting for scissors, the right shade of thread, or that one stamp you know you bought last spring, you already understand the cost of disorganized craft storage. A cluttered workspace doesn’t just slow you down physically — it drains your creative energy before you’ve made a single cut or brushstroke. The mental overhead of navigating chaos is surprisingly exhausting, and over time it quietly erodes the joy that drew you to crafting in the first place.
The good news is that you don’t need a dedicated room, a massive budget, or a Pinterest-perfect farmhouse aesthetic to build a storage system that genuinely works. What you need is a thoughtful approach to the space you already have. Whether you’re working with a corner of a bedroom, a fold-out table in the living room, or a narrow closet you’ve decided to repurpose, intentional storage design can turn even the most modest footprint into a highly functional creative studio. The difference between a frustrating craft corner and an inspiring one often comes down to a handful of smart organizational decisions.
This guide is built around real, actionable ideas that prioritize both accessibility and aesthetics. Great craft storage should make your supplies easy to find, easy to return, and genuinely pleasant to look at. When your workspace feels inviting, you’re far more likely to sit down and create — even for just fifteen minutes on a busy day. The following sections walk through every major category of craft storage, from vertical wall systems to portable solutions, so you can pick and choose what suits your specific space, your budget, and the kinds of projects you love most.
Vertical Storage: Making Your Walls Work as Hard as You Do
In small spaces, the floor plan is almost always the limiting factor — but walls are an underused resource in most craft rooms. Going vertical is one of the single most impactful changes you can make, because it allows you to dramatically increase your storage capacity without expanding your footprint by even a single square foot. Floating shelves, pegboards, wall-mounted bins, and stacked modular systems all take advantage of vertical real estate that would otherwise just be empty painted drywall. When every inch between your countertop and the ceiling becomes productive storage, small rooms start to feel surprisingly spacious.
Pegboards deserve special mention because they are among the most flexible and affordable vertical storage tools available. A 2-by-4-foot pegboard mounted at eye level can hold an astonishing variety of supplies — hooks for scissors and rulers, small baskets for ribbon spools and washi tape, magnetic containers for markers, and small shelves for frequently used paint bottles. The real advantage of pegboards over fixed shelving is adaptability: as your supplies and projects evolve, you can completely reconfigure the layout in minutes without a single nail hole. They’re also visually engaging, turning your tool collection into something of a display wall that inspires rather than overwhelms.
For heavier supplies like fabric bolts, large paper pads, or bins full of yarn, consider floor-to-ceiling shelving units with adjustable shelves. IKEA’s Kallax and Billy systems are perennial favorites in the crafting community because their dimensions are practical and their price points make it easy to build out an entire wall of storage without breaking the bank. Ladder shelves are another elegant option for smaller walls — they lean without requiring installation, work beautifully in rental spaces, and have enough visual lightness that they don’t make a small room feel crowded. Whatever vertical system you choose, the key principle is the same: store frequently used items at eye level and within easy reach, and push rarely used supplies up high or down low.

Drawer and Cabinet Systems: The Case for Hidden Storage
Not every supply belongs on display. Items that are bulky, visually busy, or simply not inspiring to look at are often better tucked away in drawers, cabinets, or closed bins. Hidden storage is an essential counterbalance to open shelving in a well-designed craft studio. When too much is visible at once, the room can start to feel more like a Stockroom than a creative sanctuary. Strategic use of closed storage keeps the visual noise low, which in turn helps your brain stay focused and calm while you work.
Flat file drawers — the wide, shallow kind traditionally used in architectural and design offices — are a dream solution for paper crafters, scrapbookers, and artists who work with large sheets of material. They keep paper flat, protected, and sorted by size or color without any folding or rolling. If dedicated flat file cabinets feel like too large an investment, you can replicate the concept with shallow plastic bins stacked in a sturdy shelving unit, using simple label holders on the front to identify what’s inside each one. The principle of wide, shallow storage applies equally well to fabric, wrapping paper, foam sheets, and vinyl rolls.
Small drawer systems, like the kind used for hardware organization, are remarkably useful in craft rooms for storing the tiniest supplies: brads, eyelets, sequins, seed beads, mini buttons, and all the other small embellishments that easily become a tangled mess in a generic bin. Labeling each drawer not only saves time but also helps you notice when a supply is running low before you find yourself mid-project with nothing left. Cabinet doors are another often-overlooked opportunity — the inside of a cabinet door can hold a mounted pegboard strip, a magnetic strip for metal tools, or adhesive pockets for flat items like templates and stencils.
Portable and Mobile Storage: Flexibility for Multi-Use Spaces
Many crafters don’t have the luxury of a dedicated room. If your craft area doubles as a guest bedroom, a dining room, or a home office, your storage system needs to be as mobile and flexible as your lifestyle. The goal is to build a setup that can be quickly tidied away or relocated without disrupting your organizational system. Fortunately, there’s a growing category of beautifully designed portable craft storage built specifically for this use case, and the best solutions are both functional and attractive enough to live out in the open without looking like clutter.
Rolling carts are among the most beloved tools in the portable storage category, and for good reason. A well-chosen rolling cart can hold a surprising variety of supplies in a compact footprint, roll easily from room to room or into a closet when not in use, and even serve as a mobile work surface with a cutting mat on top. The Alex drawer unit on wheels from IKEA has developed an almost cult following among crafters, but craft-specific rolling carts from brands like Recollections and Michaels offer comparable flexibility with features tailored specifically to craft supplies, like adjustable dividers and removable bins.
Tote bags, project bags, and divided carrying cases allow you to organize by project rather than by supply type. Keeping all the materials for a current knitting project in one tote, for example, means you can pick up exactly where you left off without hunting for anything — and you can carry the whole project to the couch, the backyard, or a friend’s house with no repacking required. For crafters who travel to classes or community workshops, investing in a few high-quality carrying cases for core supply categories (inks, stamps, cutting tools) can dramatically reduce setup and breakdown time. The key is to make sure your mobile storage is specific enough to be useful but flexible enough to accommodate projects as they evolve.

Labeling and Categorization: The System That Makes Every Other System Work
Even the most beautifully designed storage system will gradually collapse into disorganization if it isn’t backed by a clear, consistent labeling and categorization strategy. Labels are the connective tissue of a functional craft room — they tell you where things live, they help other people in your household return items correctly, and they make it possible to find what you need at a glance rather than opening every drawer until you stumble across the right one. A few hours spent building a labeling system at the start pays dividends every single time you sit down to craft.
There are several approaches to categorization, and the right one depends on how your creative brain works. Some crafters organize by supply type — all adhesives together, all cutting tools together, all paper products together. Others prefer to organize by project or technique — a dedicated drawer for watercolor supplies, a shelf for sewing notions, a bin for holiday card-making materials. A hybrid approach often works best: broad categories at the macro level (type of supply), with project-based sub-organization within each category. Whatever system you choose, the most important rule is that it must feel logical to you specifically, not to an abstract ideal of organization.
For the labels themselves, a label maker produces clean, consistent results that age better than handwritten paper labels. Color-coded labels add an extra layer of visual navigation — for example, using green labels for sewing, blue for paper crafting, and orange for mixed media. Clear bins and boxes are worth the slight premium over opaque alternatives because they let you see what’s inside without reading anything at all, making your storage system faster to use in practice. Consider these key principles when building your labeling system:
- Label every container, even ones that seem obvious — your future self will thank you during a rushed crafting session.
- Use consistent label placement (always on the front, always at the same height) so scanning shelves is fast and intuitive.
- Include quantity thresholds on consumable supply labels (e.g., “Reorder when less than half full”) to automate your restocking awareness.
- Revisit and revise your categories every six months as your crafting interests and supply collection naturally evolve.
- Photograph your organized shelves and drawers after a major reorganization to use as a reset guide when things drift toward clutter.
Digital organization complements physical labeling in ways that many crafters overlook. Keeping a simple inventory spreadsheet or using an app like Sortly to photograph and log your supplies can save you from buying duplicates of things you already own but can’t locate. It also makes it much easier to shop efficiently, since you can quickly check your inventory before heading to the craft store. While this level of system-building isn’t for everyone, crafters who invest heavily in supplies — particularly fabric collectors, paper hoarders, and yarn enthusiasts — often find that a simple digital inventory pays for itself very quickly in avoided duplicate purchases.
Aesthetic Choices That Make Storage Feel Like Décor
There’s a common misconception that functional craft storage must look utilitarian — that organization and beauty are somehow in opposition. In practice, the most inspiring craft studios are ones where storage is designed to delight as much as to organize. When your supplies are displayed in a way that pleases your eye, your creative space becomes genuinely motivating rather than merely adequate. The colors of your thread collection, the varied textures of yarn skeins, the rainbow gradient of your marker set — these are beautiful objects, and thoughtful display can turn your storage into part of your studio’s aesthetic identity.
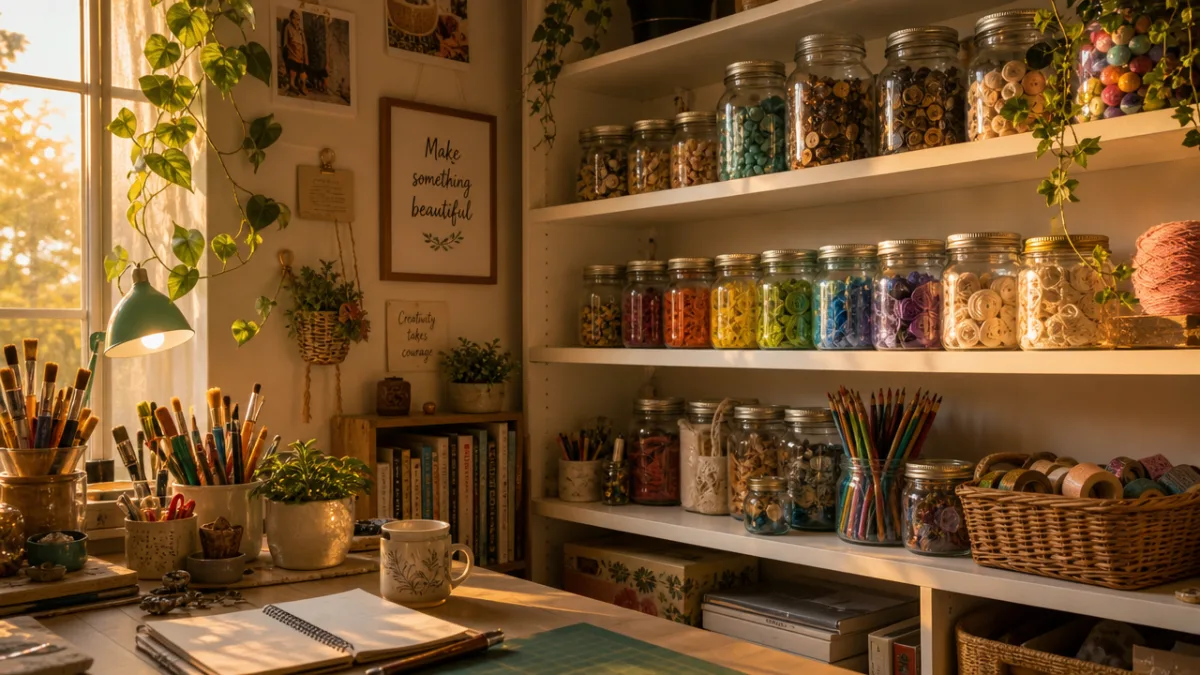
Glass jars are one of the simplest and most effective ways to make storage beautiful. Whether you’re using mason jars, apothecary jars, or repurposed food jars, clear glass displays your supplies in a way that feels curated and intentional. A row of glass jars filled with buttons sorted by color, or brushes arranged by size, looks like something from an artisan’s workshop rather than a cluttered supply shelf. Wicker baskets, wooden crates, and linen bins add warmth and texture to storage walls, softening the hard edges of shelving and making the room feel more like a creative retreat than an office supply closet.
Color coordination within your storage system creates visual cohesion that makes even densely packed shelves look intentional. Arranging yarn by color family, storing paper in rainbow order, or grouping supplies in containers of a consistent palette all contribute to a sense of calm order that can make a small room feel both organized and beautiful. This isn’t just about aesthetics for their own sake — visual order genuinely reduces cognitive load, making it easier to find what you need and easier to feel settled and creative when you sit down to work. The arrangement of your supplies sends a signal to your brain about the kind of space you’re in and the kind of work you’re about to do.
Maximizing Small Spaces: Room-Specific Solutions and Final Strategies
Small-space craft storage ultimately comes down to a commitment to intentionality — making every inch count, questioning every item’s right to take up space, and regularly editing your collection so your storage system doesn’t become overwhelmed. Before adding any new supply or piece of equipment to your studio, it’s worth asking whether you have a specific plan for it, whether you already own something that serves the same purpose, and where exactly it will live when it’s not in use. These questions might feel overly rigorous, but they’re what separates a functional small-space studio from one that gradually accumulates clutter until it stops feeling like a studio at all.
Over-door organizers are among the most underused tools in small-space craft storage. The back of a closet door, pantry door, or even the interior side of a cabinet door can hold a substantial amount of material using clear pocket organizers, hook-and-loop systems, or mounted pegboard strips. For a craft closet, fitting the door with a full-length clear pocket organizer lets you store and see hundreds of small items — inks, pens, small bottles of paint, adhesive rolls — without using any shelf or floor space. Similarly, the space under a worktable is prime real estate for wheeled bins or rolling drawers that slide out when needed and disappear when the work session ends.
Murphy-style fold-down desks and wall-mounted folding work surfaces have become increasingly refined and affordable, making them a genuinely viable option for crafters who need a dedicated surface but can’t spare the floor space for a permanent table. Paired with well-designed wall storage, a fold-down desk can create a complete crafting station that essentially disappears into the wall when the workday is done. For crafters in particularly tight spaces — a studio apartment, a corner of a shared room, or a modest home office — this kind of transformable furniture can be genuinely life-changing, turning a few square feet of wall into a fully equipped creative studio that exists only when you need it.
The most important thing to remember as you build and refine your craft storage system is that it should serve your creative life, not constrain it. The best organizational systems are ones you’ll actually maintain because they make creating easier and more enjoyable. Start with one section of your space, implement a system that feels right, live with it for a few weeks, and adjust based on what you learn. Over time, your storage will evolve alongside your interests and habits into something that feels genuinely tailored to how you create — and that’s when a small space truly becomes a powerful creative studio.








What do you think?
It is nice to know your opinion. Leave a comment.