










How to Build a Shed: A Complete Guide from Start to Finish
Planning Your Shed: The Foundation of a Successful Build
Before you grab a single tool or buy a single board, take the time to actually plan this thing out — because this is where shed projects succeed or fall apart. A good plan accounts for what you’re building it for, how much space you have, what your local codes require, and what you can realistically spend. Skipping this step is probably the most common mistake DIYers make, and it almost always means expensive fixes later. A few hours of planning upfront can easily save you days of do-overs.
First, think about what you actually need the shed to do. A shed for storing lawn equipment is a pretty different animal than one you want to use as a workshop or a backyard studio. A basic storage shed can get away with minimal insulation and simple framing, but a workshop needs wiring, ventilation, and maybe even heat. Before you lock in any dimensions, write down everything you plan to store or do in there — the contents really do shape the design almost as much as your yard space does.
Then, before you go any further, check in with your local municipality or HOA about permits and zoning. Most areas have rules about setbacks from property lines, square footage limits that trigger a full permit, and foundation requirements. It takes maybe fifteen minutes to call your local building department, and it can save you from fines, forced removal, or a nasty surprise when you sell your house someday. Don’t assume you’re in the clear — always check first.
Choosing the Right Size and Style
When it comes to shed size, bigger is almost always better — as long as your yard and budget can handle it. A 10×12 shed looks huge when it’s empty, but once you fit in a lawnmower, some bicycles, holiday decorations, and a bunch of garden tools, it fills up shockingly fast. If you’re stuck between two sizes, go bigger. The extra lumber and roofing costs a fraction of what it would cost to tear down and rebuild when you realize you’ve outgrown it after one season.
The most common shed styles are the gable (that classic triangular roofline most people picture), the gambrel (barn-style, with more headroom and overhead storage), and the lean-to (a simple single-slope design that tucks nicely against a fence or the side of a house). Each one comes with trade-offs in terms of how complex it is to build, how much headroom you get, and how it looks. Gable sheds are the go-to for most DIYers because the framing is familiar and not all that tricky. Gambrel sheds squeeze more usable volume out of the same footprint, while lean-tos are the quickest to throw up but give you the least vertical space.
Preparing the Site and Building the Foundation
Site prep isn’t the glamorous part, but it matters just as much as the framing and roofing that comes later. You want a spot that’s reasonably flat, drains well, and is easy to get in and out of. Avoid low areas where water pools after a rainstorm, and try to find a location with decent airflow to keep moisture from building up inside. A soggy, poorly drained site will rot your floor framing in just a few years no matter how well the rest of the shed is put together.
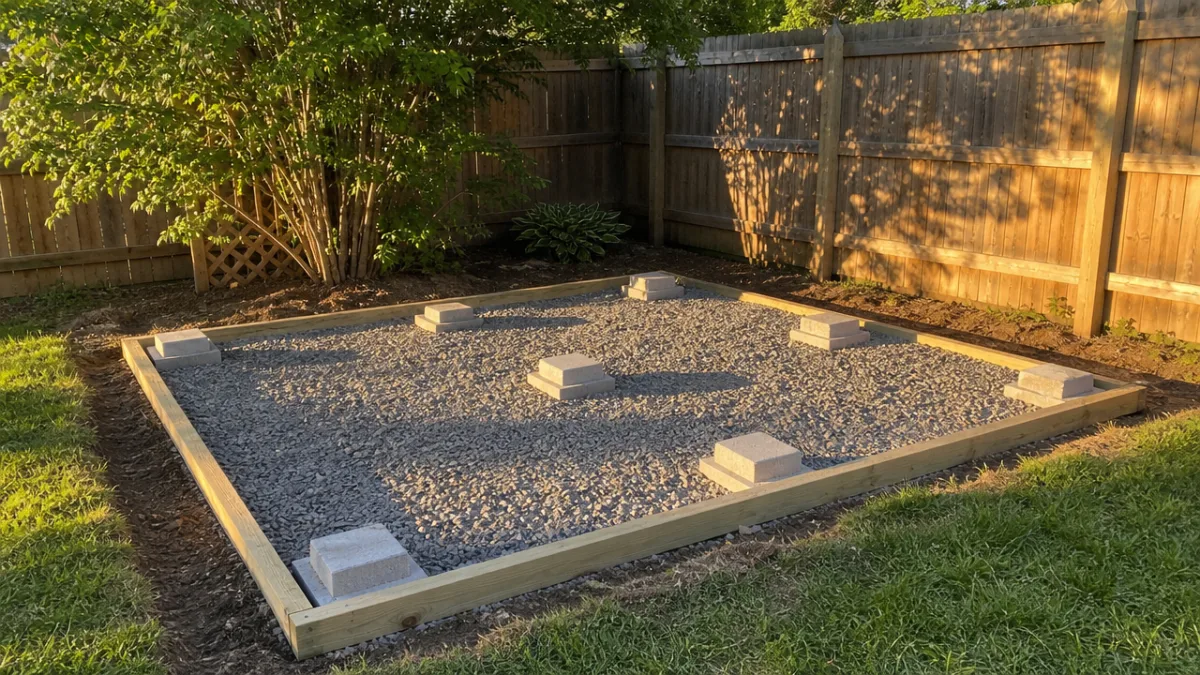
Clear out the grass, rocks, and debris, then check how level things are. More than a couple of inches of variation across the footprint needs to be dealt with before you start building. For a gentle slope, you can add gravel to the low spots or take down the high ones. For anything more significant, you’ll want a concrete or gravel foundation. Mark the corners with stakes and string, and double-check that everything is square by measuring diagonally corner to corner — when both diagonal measurements match, you’re square.
For the foundation itself, you’ve got a few options. Concrete deck blocks set on compacted gravel are the most popular choice for small to mid-sized sheds — they’re affordable, quick to install, and you don’t need to mix or form any concrete. Poured concrete piers are more permanent and hold up better in areas with significant frost heave. A full concrete slab is the most bulletproof option and really the right call if you’re planning a workshop with heavy equipment. Whatever you go with, getting it level is non-negotiable — everything you build on top of it depends on it.
Framing the Floor, Walls, and Roof
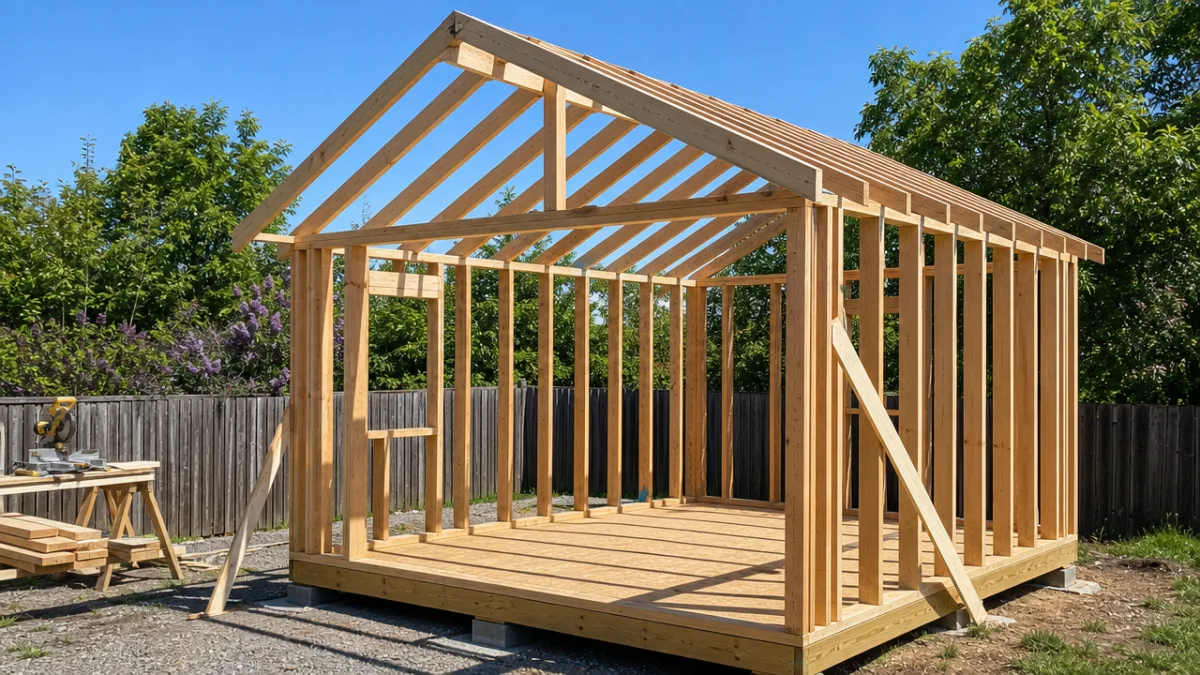
Framing is the phase where your shed actually starts looking like something, and most DIYers find it the most satisfying stretch of the whole project. Start with the floor frame — a perimeter of pressure-treated lumber (usually 2×6 or 2×8 depending on your span) with interior joists running across it at 16 inches on center. Pressure-treated wood is a must here since the floor frame sits close to the ground and is constantly exposed to moisture and insects. Once the frame is assembled and sitting on your foundation, cover it with ¾-inch tongue-and-groove plywood for a solid, squeak-free deck.
Wall framing is pretty repetitive once you get the hang of the basic anatomy: a bottom plate, a top plate (usually doubled for strength), vertical studs at 16 or 24 inches on center, and headers over any door or window openings. Build each wall flat on the deck, then tip it up, brace it temporarily, and move on to the next one. The front wall with the door opening usually goes up last so you have a clear, open deck to work on while framing the other three. Keep a level handy and use diagonal bracing to hold things plumb as you go.
Roof framing is the part that makes a lot of first-timers nervous, but a basic gable roof is way more approachable than it looks. You’ll cut a set of identical rafters at a consistent pitch — 4-in-12 or 6-in-12 are both common and shed water well. Cut and test one rafter as a template before you cut the whole batch. The rafters meet at a ridge board at the peak and tie into the top plate at the base. Once all the rafters are up, you’ll sheathe the roof deck with OSB or plywood, which gives you the surface your roofing material will sit on.
Door and Window Rough Openings
Getting your rough openings right really matters, because the doors and windows you buy are made to standard dimensions, and even a quarter-inch off can turn installation into a headache. The standard approach is to frame the rough opening about half an inch wider and taller than the door or window unit’s stated size — that little bit of wiggle room lets you shim and level everything before you fasten it down. Double up the studs on both sides of every opening, and put a structural header above it to carry the load where the stud is missing.
For a basic storage shed, a set of double doors on the front wall plus one or two small windows on the sides is a practical, good-looking setup. Wide double doors — typically 5 or 6 feet across — let you roll in a mower or wheelbarrow without any awkward contorting. Side or rear windows bring in natural light and ventilation, which goes a long way toward preventing the musty smell and condensation that haunts poorly ventilated sheds. Put windows on opposite walls when you can — it makes a real difference for cross-ventilation on warm days.
Installing Roofing, Siding, and Exterior Finishes
Once the framing is done, the goal is to get the structure weathertight as fast as possible. Start with the roof, since bare framing is really vulnerable to rain damage and wood swelling. Roofing felt — tar paper, underlayment, whatever you want to call it — gets stapled over the entire roof deck before the shingles go on, giving you a secondary water barrier. Work from the bottom edge upward, overlapping each course by at least 6 inches. It goes quickly, and once the felt is down you can weather a rain shower without any worries while you keep working on the rest of the exterior.
Asphalt shingles are the most practical and affordable roofing option for a garden shed, and installing them is well within DIY territory. Start with a starter strip along the eaves, then work your way up in overlapping courses, staggering the seams so no two adjacent courses line up vertically. Four roofing nails per shingle, placed just below the adhesive strip. At the peak, ridge cap shingles seal things up where the two roof planes meet. With one or two helpers, you can shingle a basic gable shed roof in a single afternoon.
For siding, T1-11 panel siding is easily the most popular choice among DIY shed builders. It goes up fast, it handles sheathing and siding in one panel, and it looks clean when it’s done. Install it with the grooves running vertically, fasten it with ring-shank nails or screws, and leave a small gap at the bottom so the edge doesn’t sit against grade and wick moisture. Other options include lap siding, board and batten, and cedar shingles if you want something with more character. Whichever you choose, finish by trimming out the corners, doors, and windows with 1×4 or 1×6 boards — it’s a small step that makes a big difference in how polished the shed looks.
Painting and Weatherproofing the Exterior
Paint or stain isn’t just there to make the shed look nice — it’s a real layer of protection against moisture, UV, and the constant expansion and contraction that comes with seasonal temperature swings. Prime bare wood before your topcoat, especially on end grain and cut edges where moisture sneaks in most easily. Exterior latex in a satin or semi-gloss finish is a solid choice — it resists mildew, wipes down easily, and holds up season after season. Two coats, with proper dry time in between.
Before you paint, take the time to caulk every exterior joint and gap. Anywhere trim pieces meet, anywhere siding meets a trim board, anywhere a window or door frame meets the surrounding siding — run a bead of paintable exterior caulk. Those small gaps are exactly where wind-driven rain works its way into the wall and starts the slow process of rot. A tube of caulk costs almost nothing and adds years to the life of your shed’s exterior.
Interior Setup, Electrical, and Organization
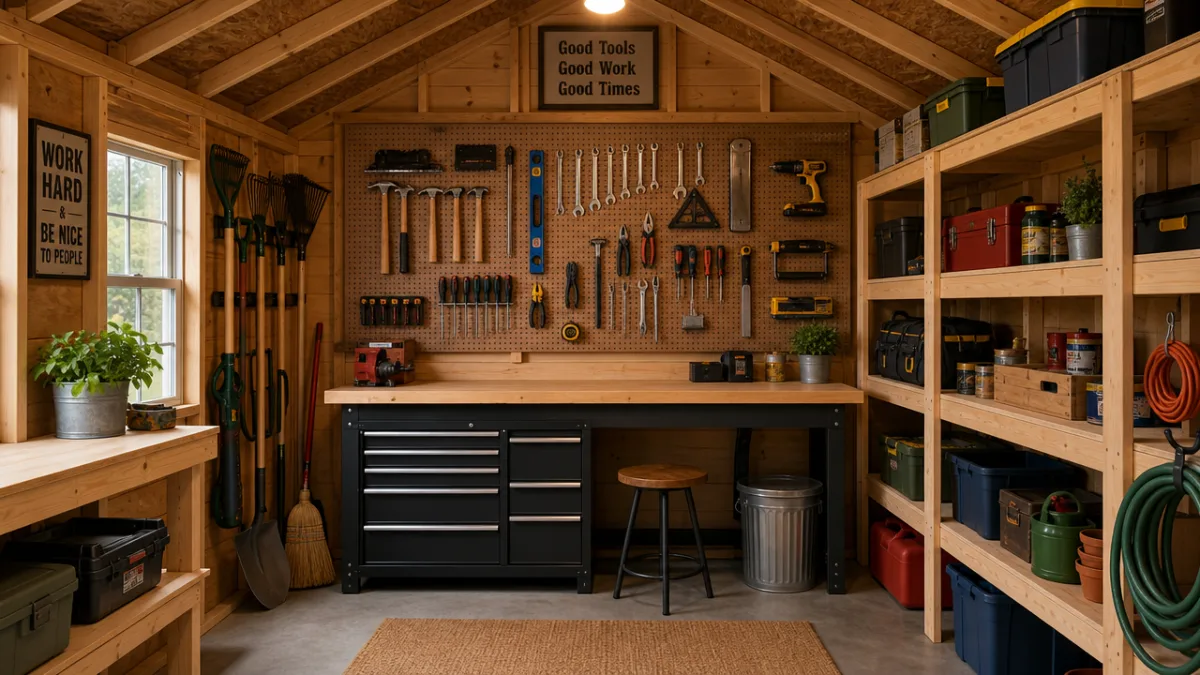
Once the exterior is buttoned up and painted, you can start making the inside actually useful. Even a simple storage shed gets a lot more functional with a few thoughtful additions. Put up shelving along at least one wall to get things up off the floor. Pegboard is cheap, easy to install, and great for hanging hand tools, garden gear, and small equipment where you can actually see and grab what you need. If you have leftover lumber, an overhead loft is easy to build and perfect for seasonal stuff like holiday decorations and camping gear that you only pull out a few times a year.
If you’re planning to use the shed as a workshop or spend any real amount of time in there, running electrical service is worth every bit of the cost and the permit process it usually involves. A basic shed electrical setup means a subpanel fed from your home’s main panel, a few duplex outlets around the walls, a couple of overhead lights, and possibly a dedicated circuit for something power-hungry like a table saw or air compressor. Underground cable needs to be buried at the right depth — 12 inches for conduit, 24 inches for direct-burial cable — and routed safely into the structure.
Ventilation is another thing worth thinking about deliberately, especially if you live somewhere with hot summers or high humidity. A ridge vent at the peak combined with soffit vents at the eaves sets up a natural convective flow that constantly draws hot, moist air out of the interior. For a workshop, a wall-mounted exhaust fan gives you active ventilation when you’re making dust or working with finishes. Good airflow keeps your stored stuff from degrading, prevents rust from forming on metal tools, and stops the mold and rot that thrive in a warm, humid, still environment.
Security and Final Touches
A shed full of tools and equipment is an easy target, and it’s worth building in some basic security from the start. Put a quality hasp and padlock on every door, and go heavy enough that it can’t be easily cut or pried off. A padlock with a shrouded shackle is a good call — less exposed metal for someone to work with. Motion-activated lights near the entrance are a cheap and effective deterrent that makes your shed a much less appealing target after dark.
The little finishing details are what separate a shed that looks thoughtfully built from one that just looks thrown together. Install proper door hardware — a handle, hinges that are actually rated for the weight of your doors, and a door stop so the door doesn’t bang into the siding every time the wind picks up. If your design doesn’t already include a roof overhang above the door, adding even a small awning is worth it; it keeps rain off you while you’re fumbling with the padlock and protects the threshold from constant water exposure. A simple gravel or paver path from your yard to the shed entrance is a small touch that makes the whole thing feel finished.
Building a shed from scratch is one of those projects that’s genuinely rewarding from start to finish. When you’re done, you haven’t just added a storage structure to your property — you’ve built something real with your own hands, something that’ll serve your household for decades if you do it right. The skills you pick up along the way, from reading plans and cutting lumber to framing, roofing, and finishing, carry over to just about every other home improvement project you’ll ever take on. Work through each phase carefully, don’t cut corners on the fundamentals, and enjoy it. The finished shed is absolutely worth the hours you put in.








What do you think?
It is nice to know your opinion. Leave a comment.